The XL350 K3 Project Bike 2014
Tip - you can get here by clicking the 'Carry on' sign towards the top of the homepage I put it there to save myself time..
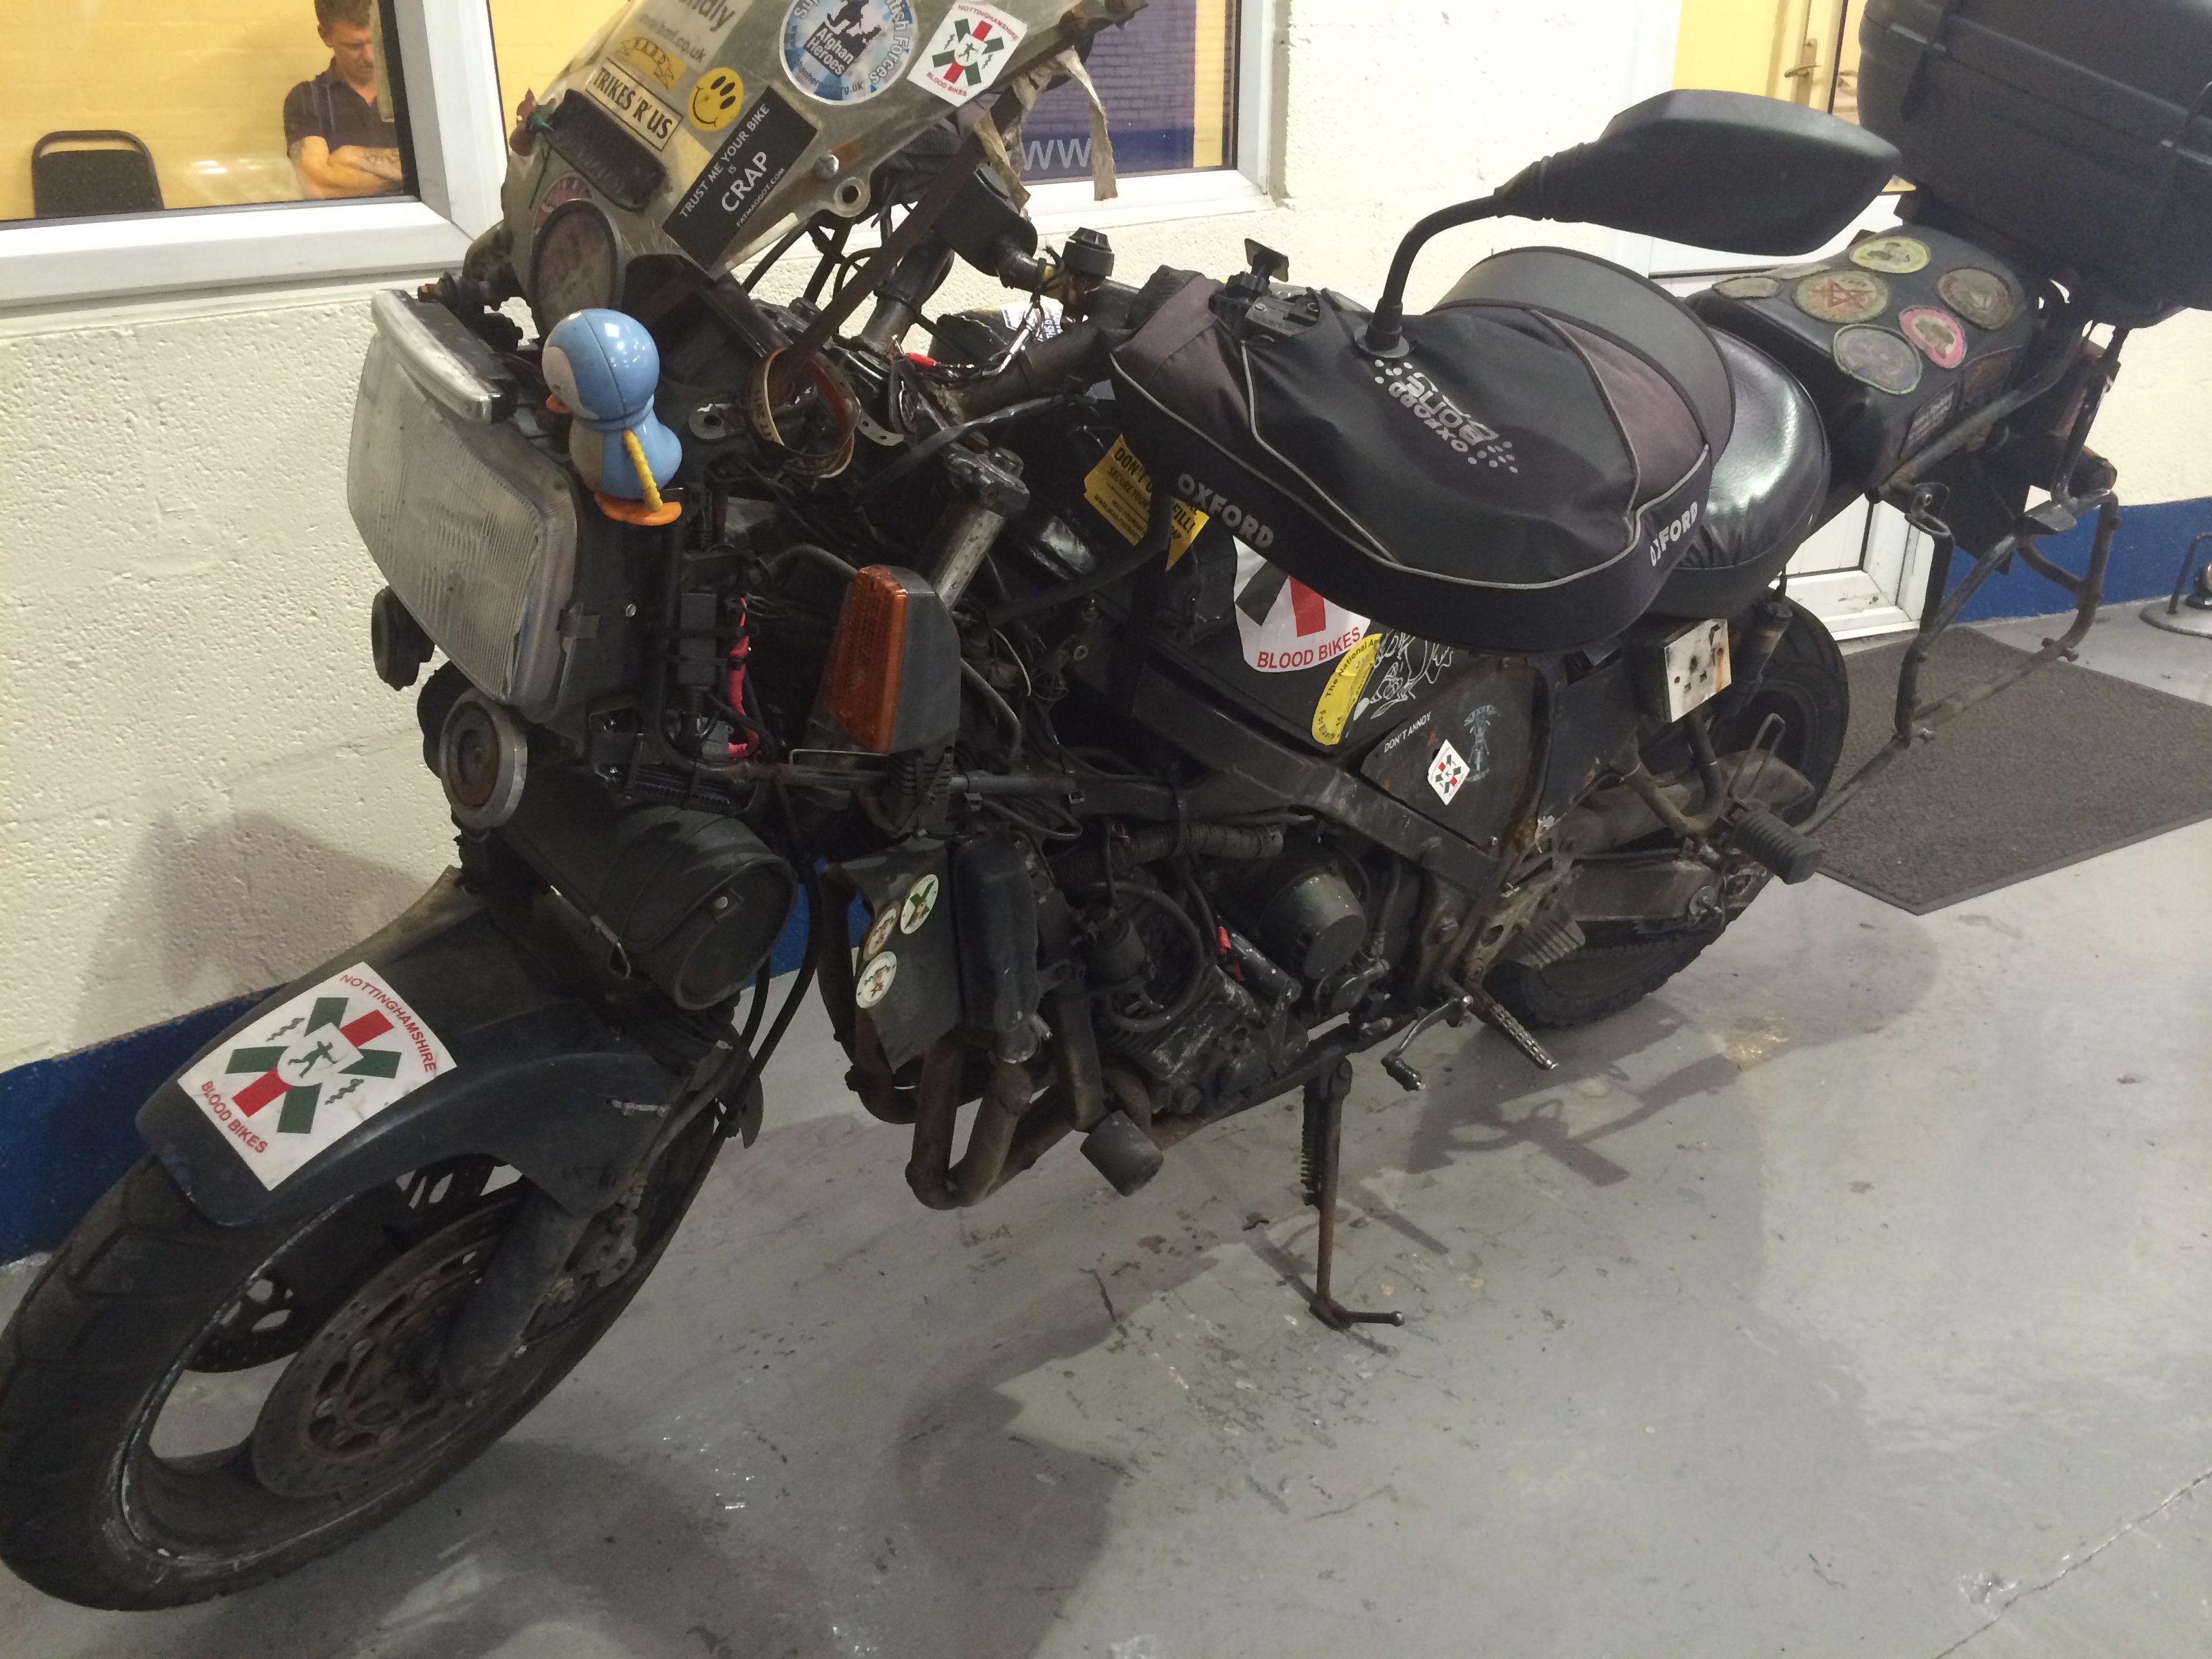
As usual, click on the photos for a better one.
I have done this one as an honest blow by blow sort of diary as it will take a while to complete. Like most projects it starts off looking pretty straightforward then you begin to uncover previous owners' bodges, lack of maintenance, find parts missing and it can turn into a long haul, so here goes, warts and all. It may not all be plane sailing...... I may end up hating myself for writing it all down....
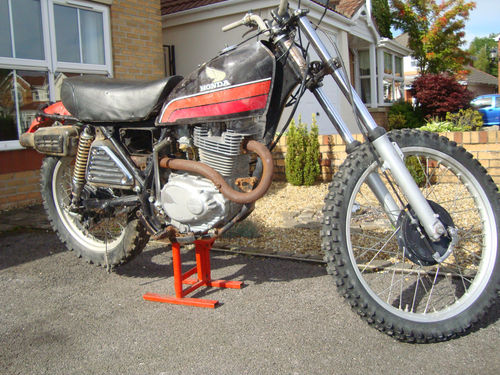
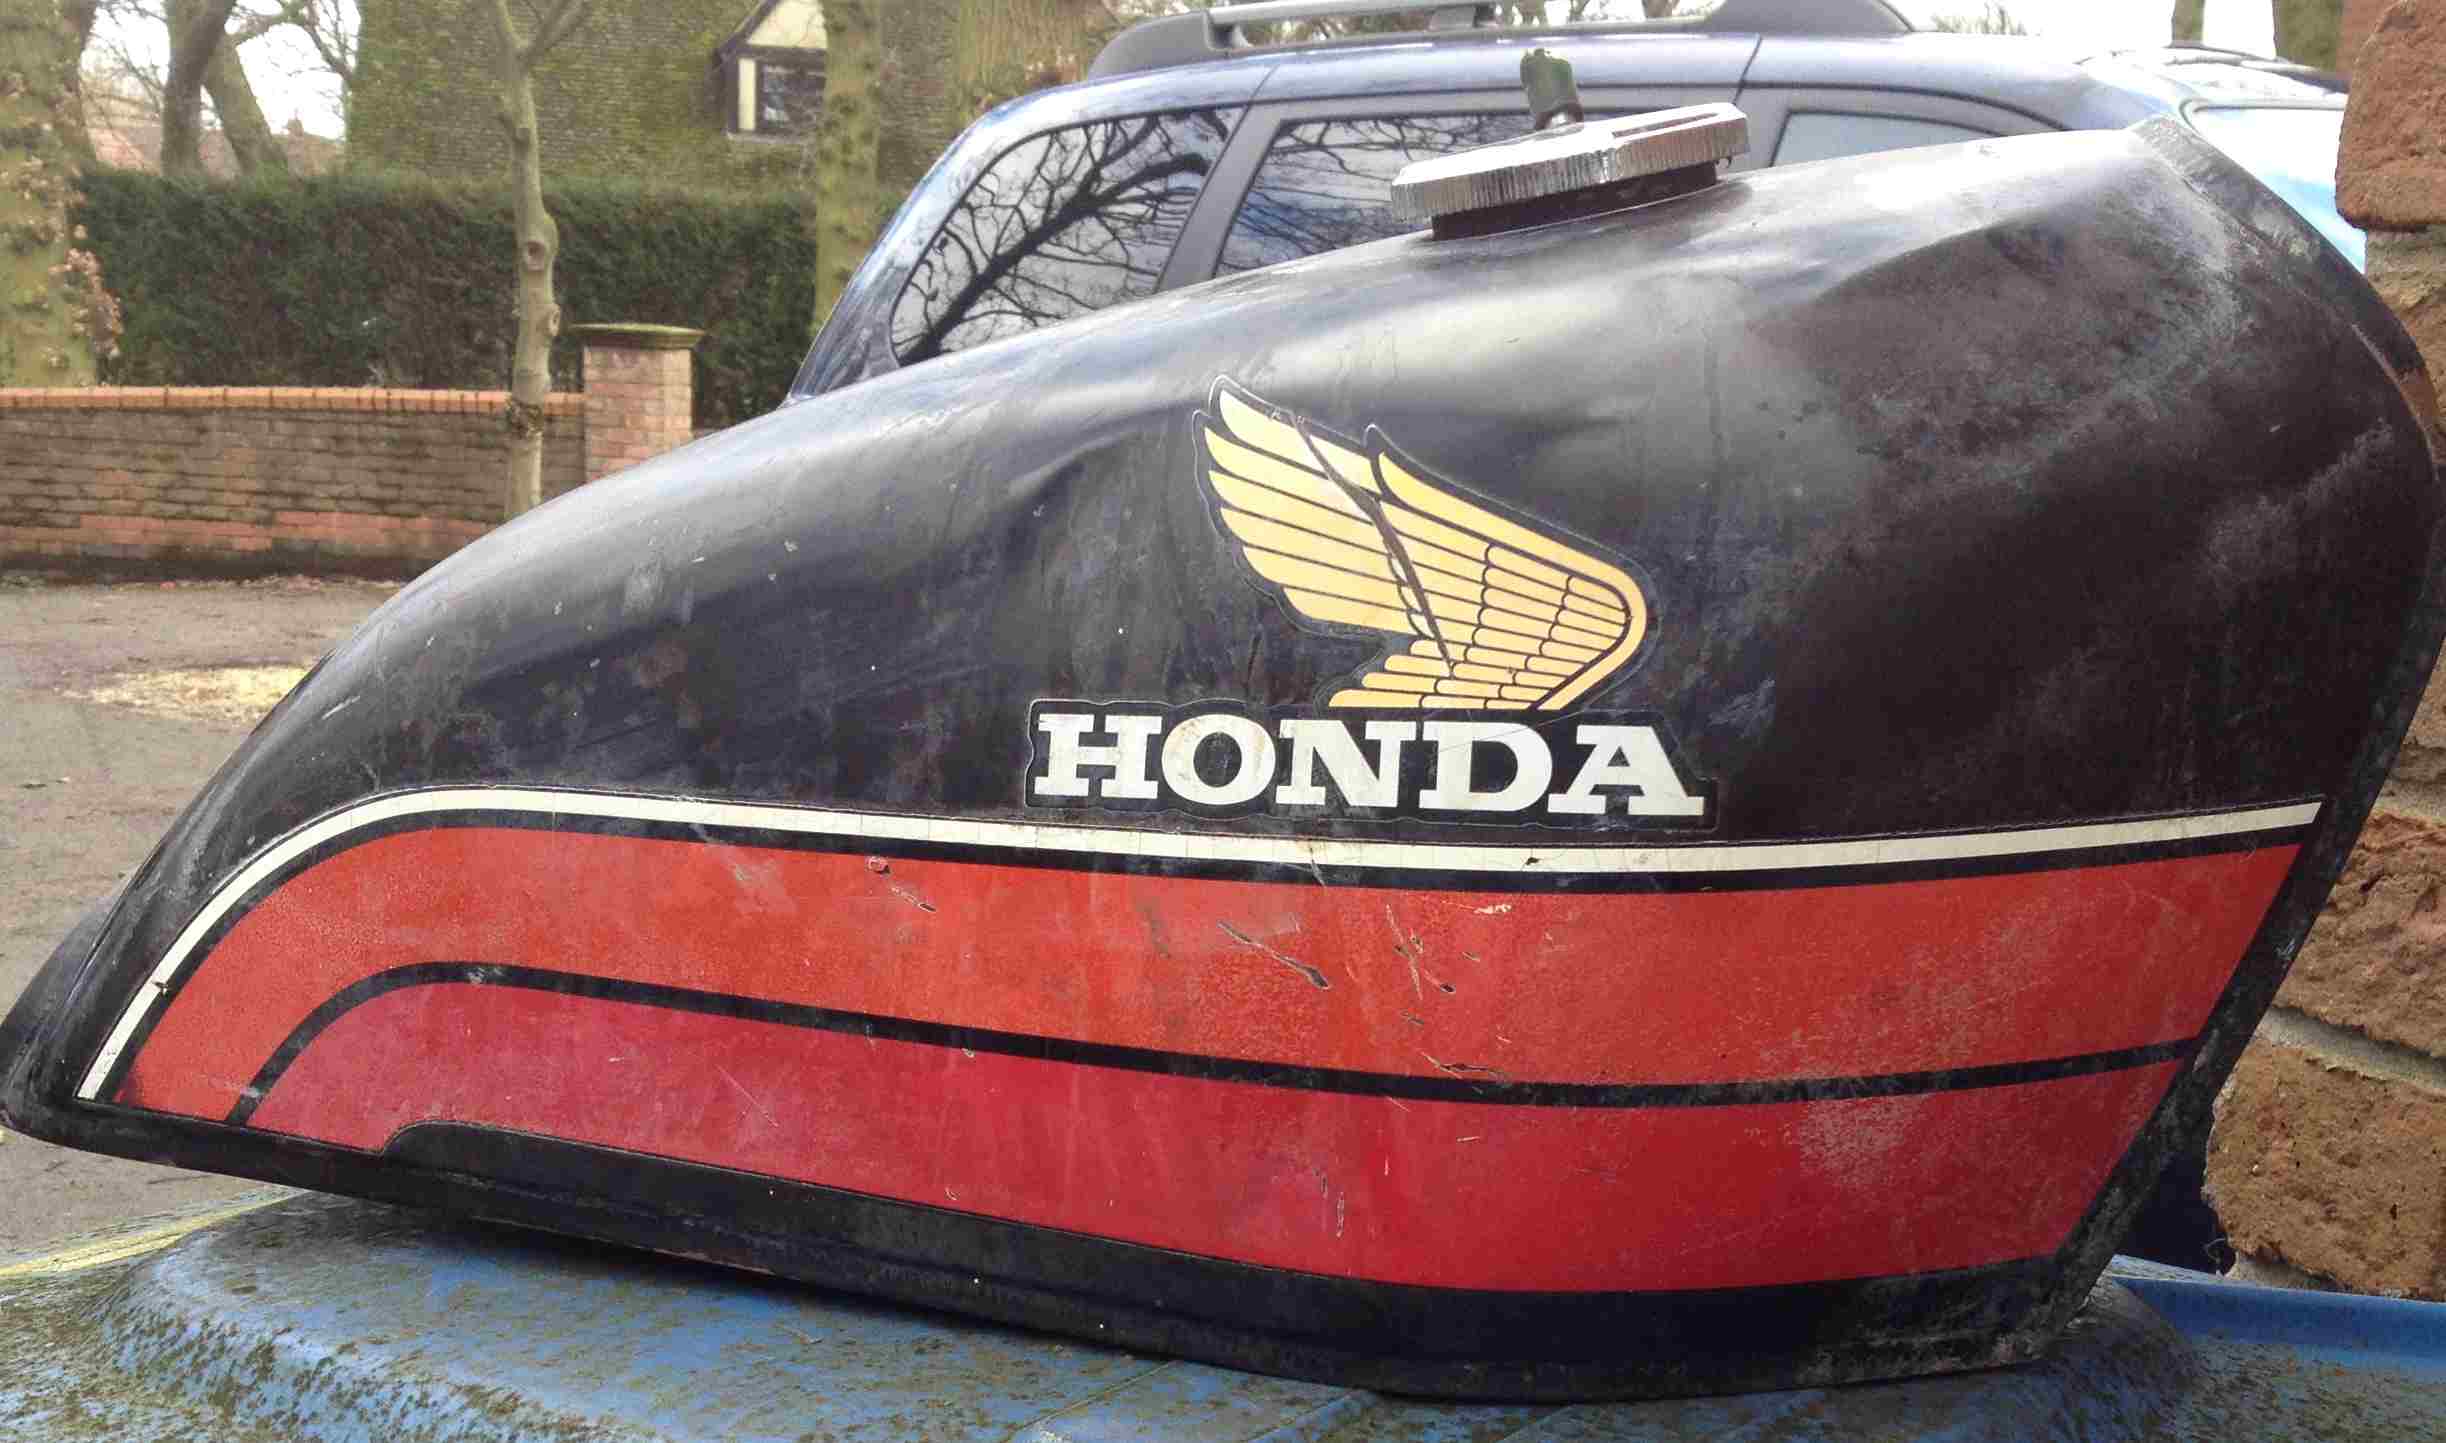
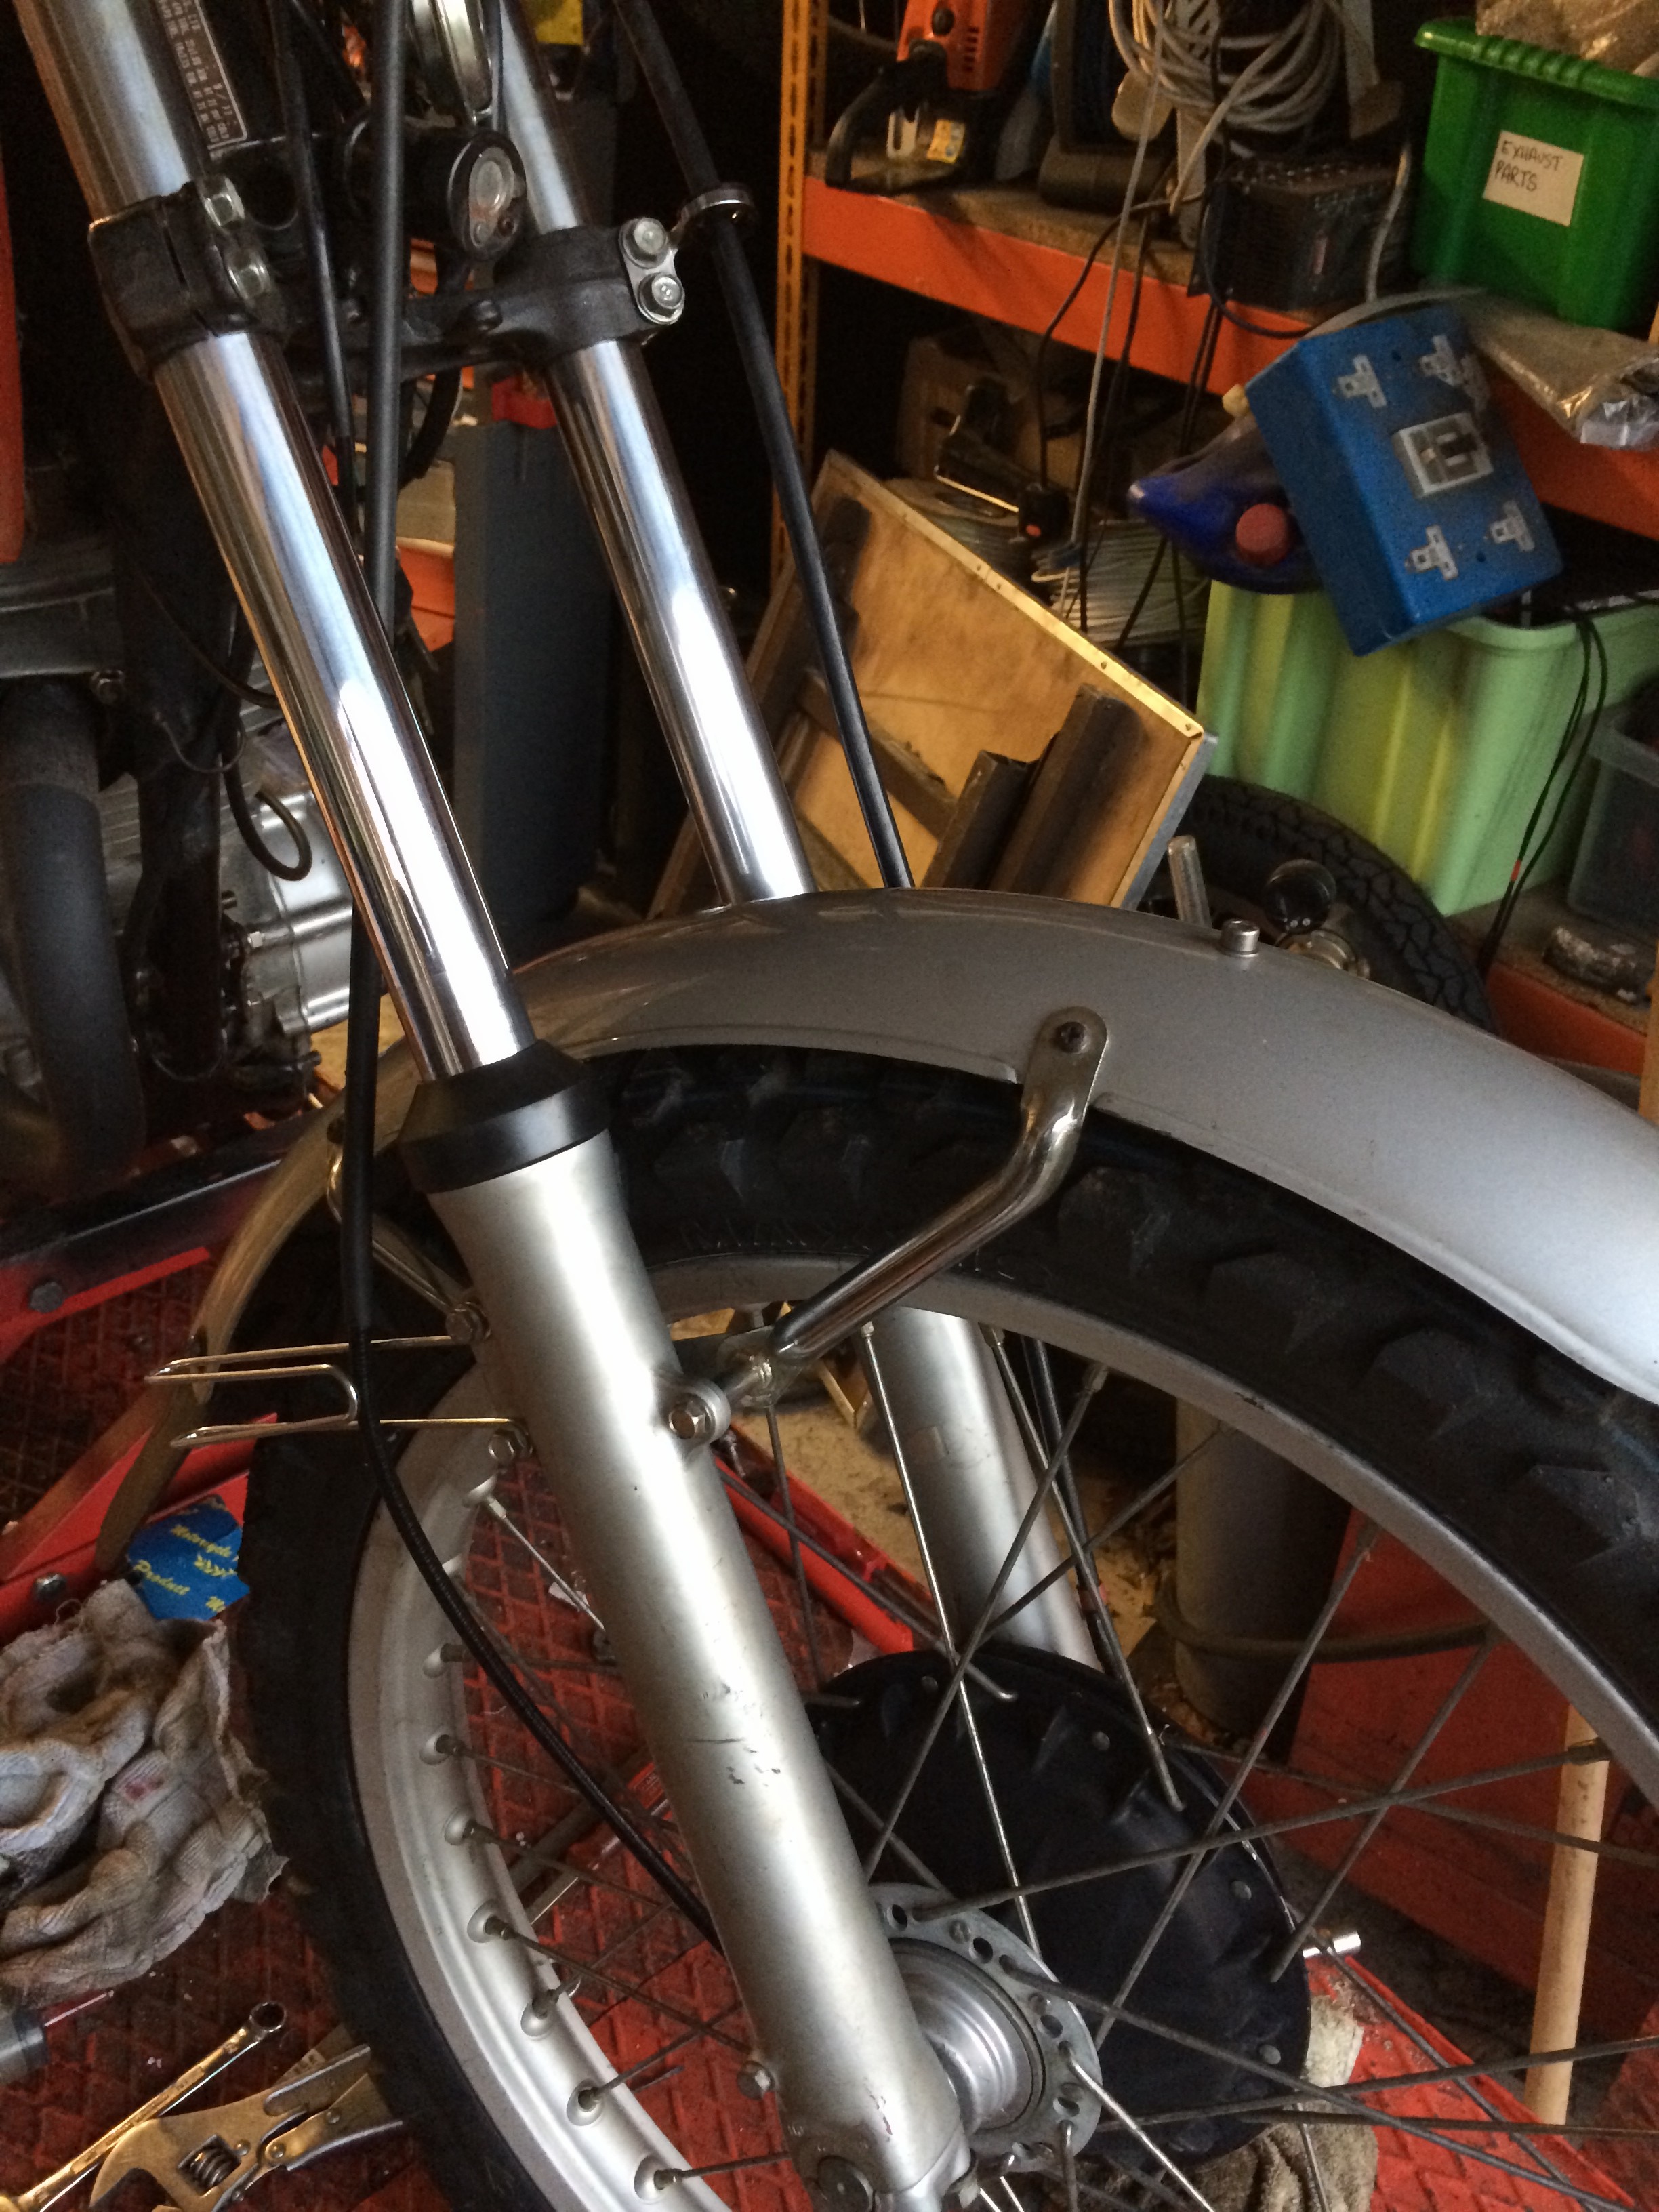
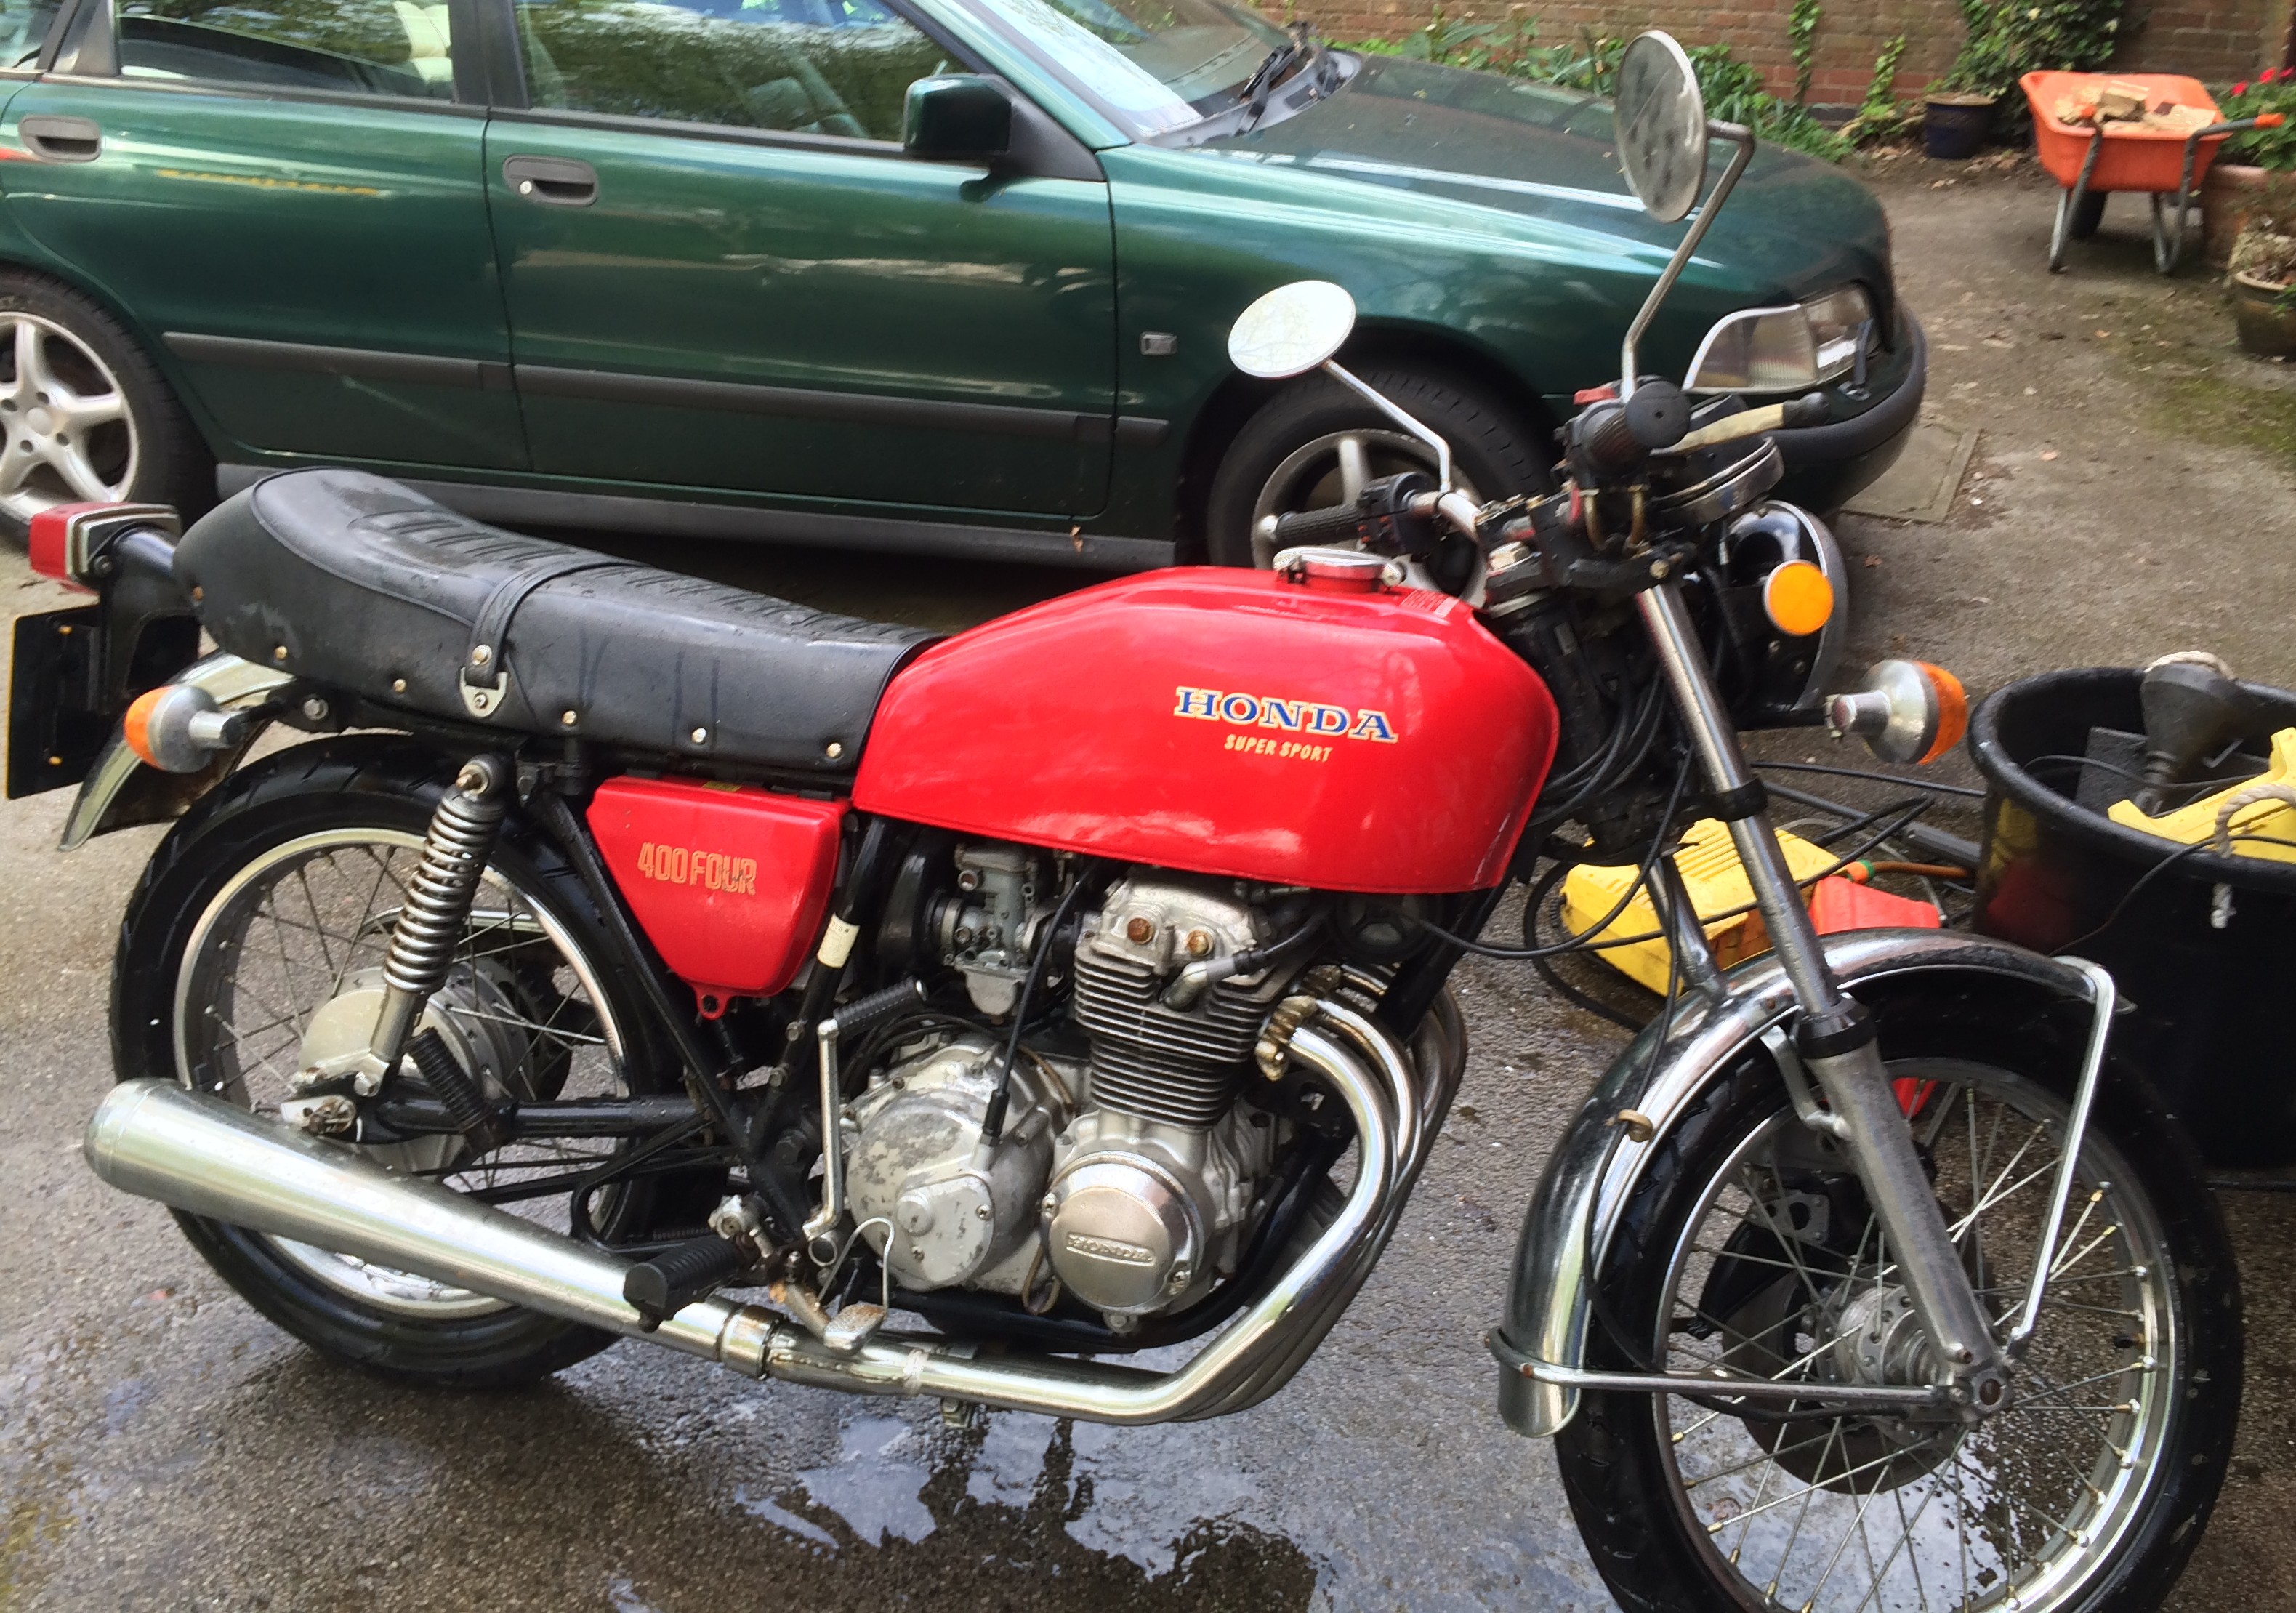
For reasons that I can't really explain, I seem to have bought a rather manky (US translation = shitty) 1978 XL350 K3 involving a 340 mile round trip to somewhere called Wales, but it is meant to have a good engine and a complete non-rusted-away exhaust with spark arrester (it is missing only the pipe heat shield). It is an unregistered US import. I may make a bobber or something out of it. It looks like this: (hands up if you noticed the front forks and front wheel are in the wrong way round?).
Update 5th Jan 2014, I decided to look at the XL350 for the first time since getting it. Conrad, the MOT tester at Alans in Mansfield has a prize winning rat bike that I quite like the idea of a bike that is mechanically perfect but idiosyncratic as a contrast to a shiny original bike; one that doesn't need a clean if you ride on a wet road.
So the adventure begins......
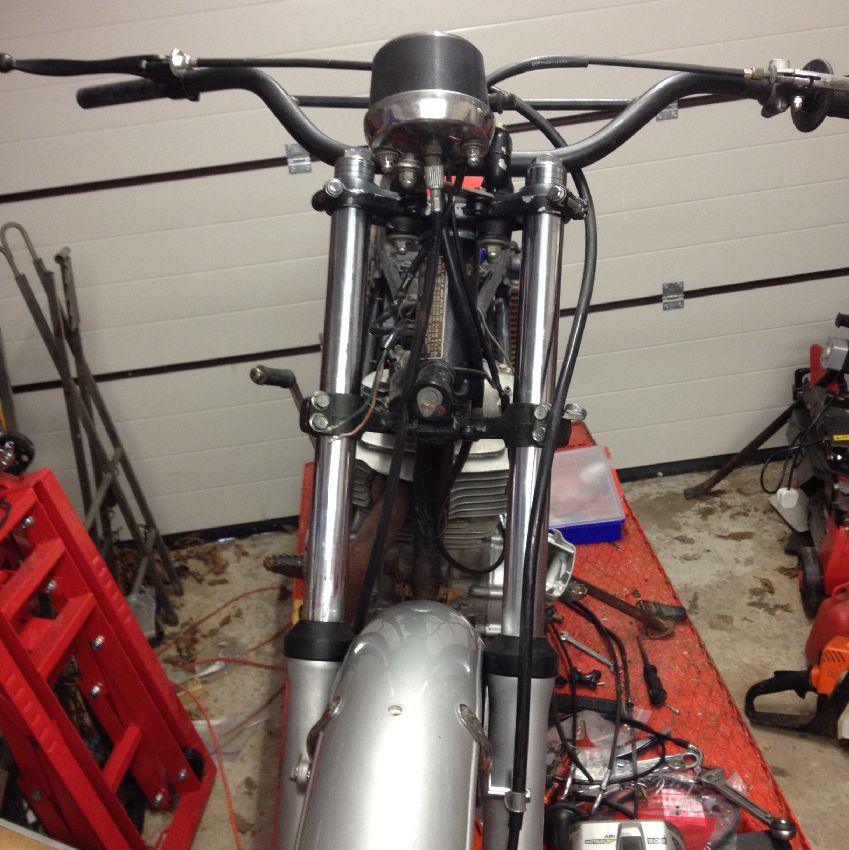
First job was to turn the front wheel and forks round the right way and replace the front brake cable ( with a used but serviceable one), and the clutch cable with a new pattern one. I also removed the handlebars and replaced them with the correct ones and fitted the front brake and clutch levers and some grips.
There is no chain on it so I have ordered one (530 x 100 links) and a new front sprocket, I have a rear sprocket new in a packet already. When I got the bike the sprocket cover was missing from the left side of the engine so I bought one on eBay last month.
There is no wiring, as such, except that the ignition is currently wired to the alternator direct no switch etc, but there is a dodgy looking XR200 type kill switch, which had cut wires. I think we can do better than that.
There's plenty of compression but I couldn't fit my temporary workshop fuel line onto the carb as the fuel pipe size was wrong so I have ordered a piece of rubber fuel line, and new push and pull throttle cables. The choke cable was snapped at the top end as they often are, so I have rigged a temporary one, and ordered a replacement.
I haven't even looked to see if there is a spark yet. I notice the points cover seems to be from a 250 Motorsport. I am quietly confident but will put a new plug and points in anyway.
My plan is to get a dating certificate from Honda if I can, it costs £30 incl. tax and can take a month or more, then MOT (annual government roadworthiness test in the UK) it with a daytime MOT (because it has no lights fitted it can only be used in daylight) and see if I can get it UK road registered. That is the plan.
There is a difference between the MOT test and complying with the Construction and Use Regulations, they are not the same thing nor are they mutually exclusive. A bike can pass the MOT and yet be illegal so far as the rest of our law is concerned. Hmm.
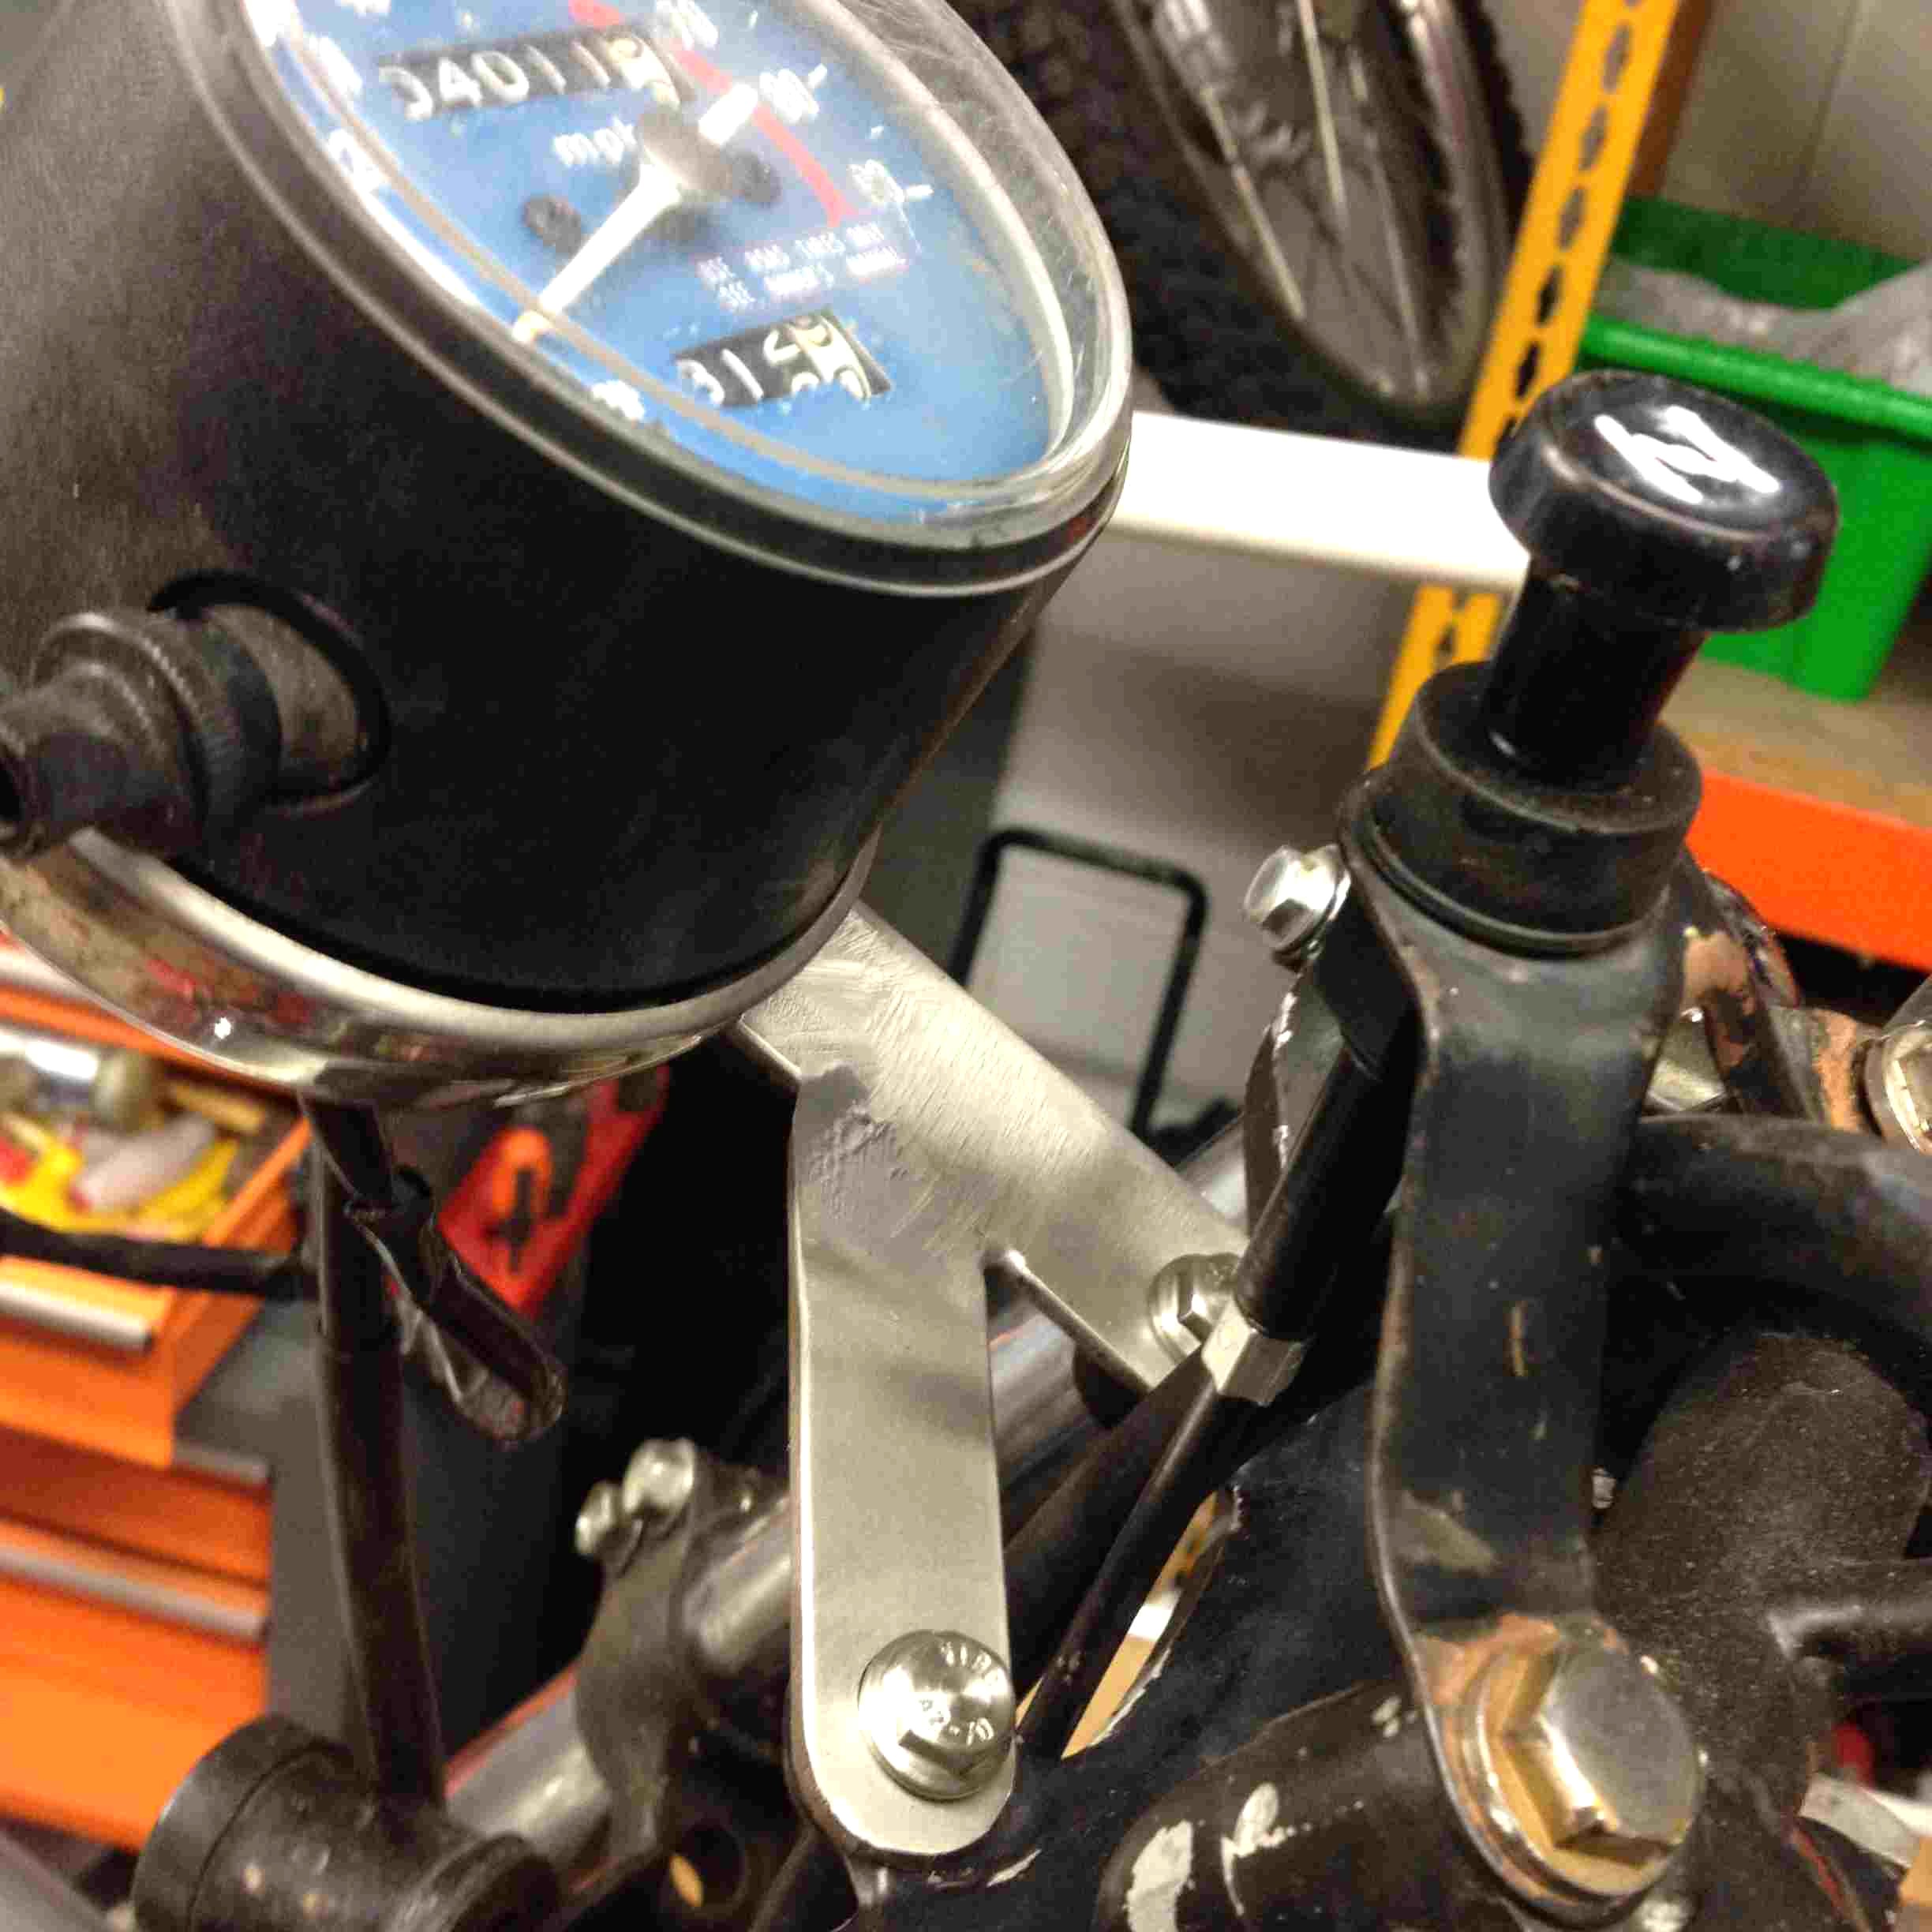
There is no speedo, so I will need to make a bracket to hold one (I have a spare speedo) and fit the missing speedo cable. Once more I shall fight the speedo drive cable retaining screw, (see below). I have a spare wire speedo cable guide as there was none on the bike.
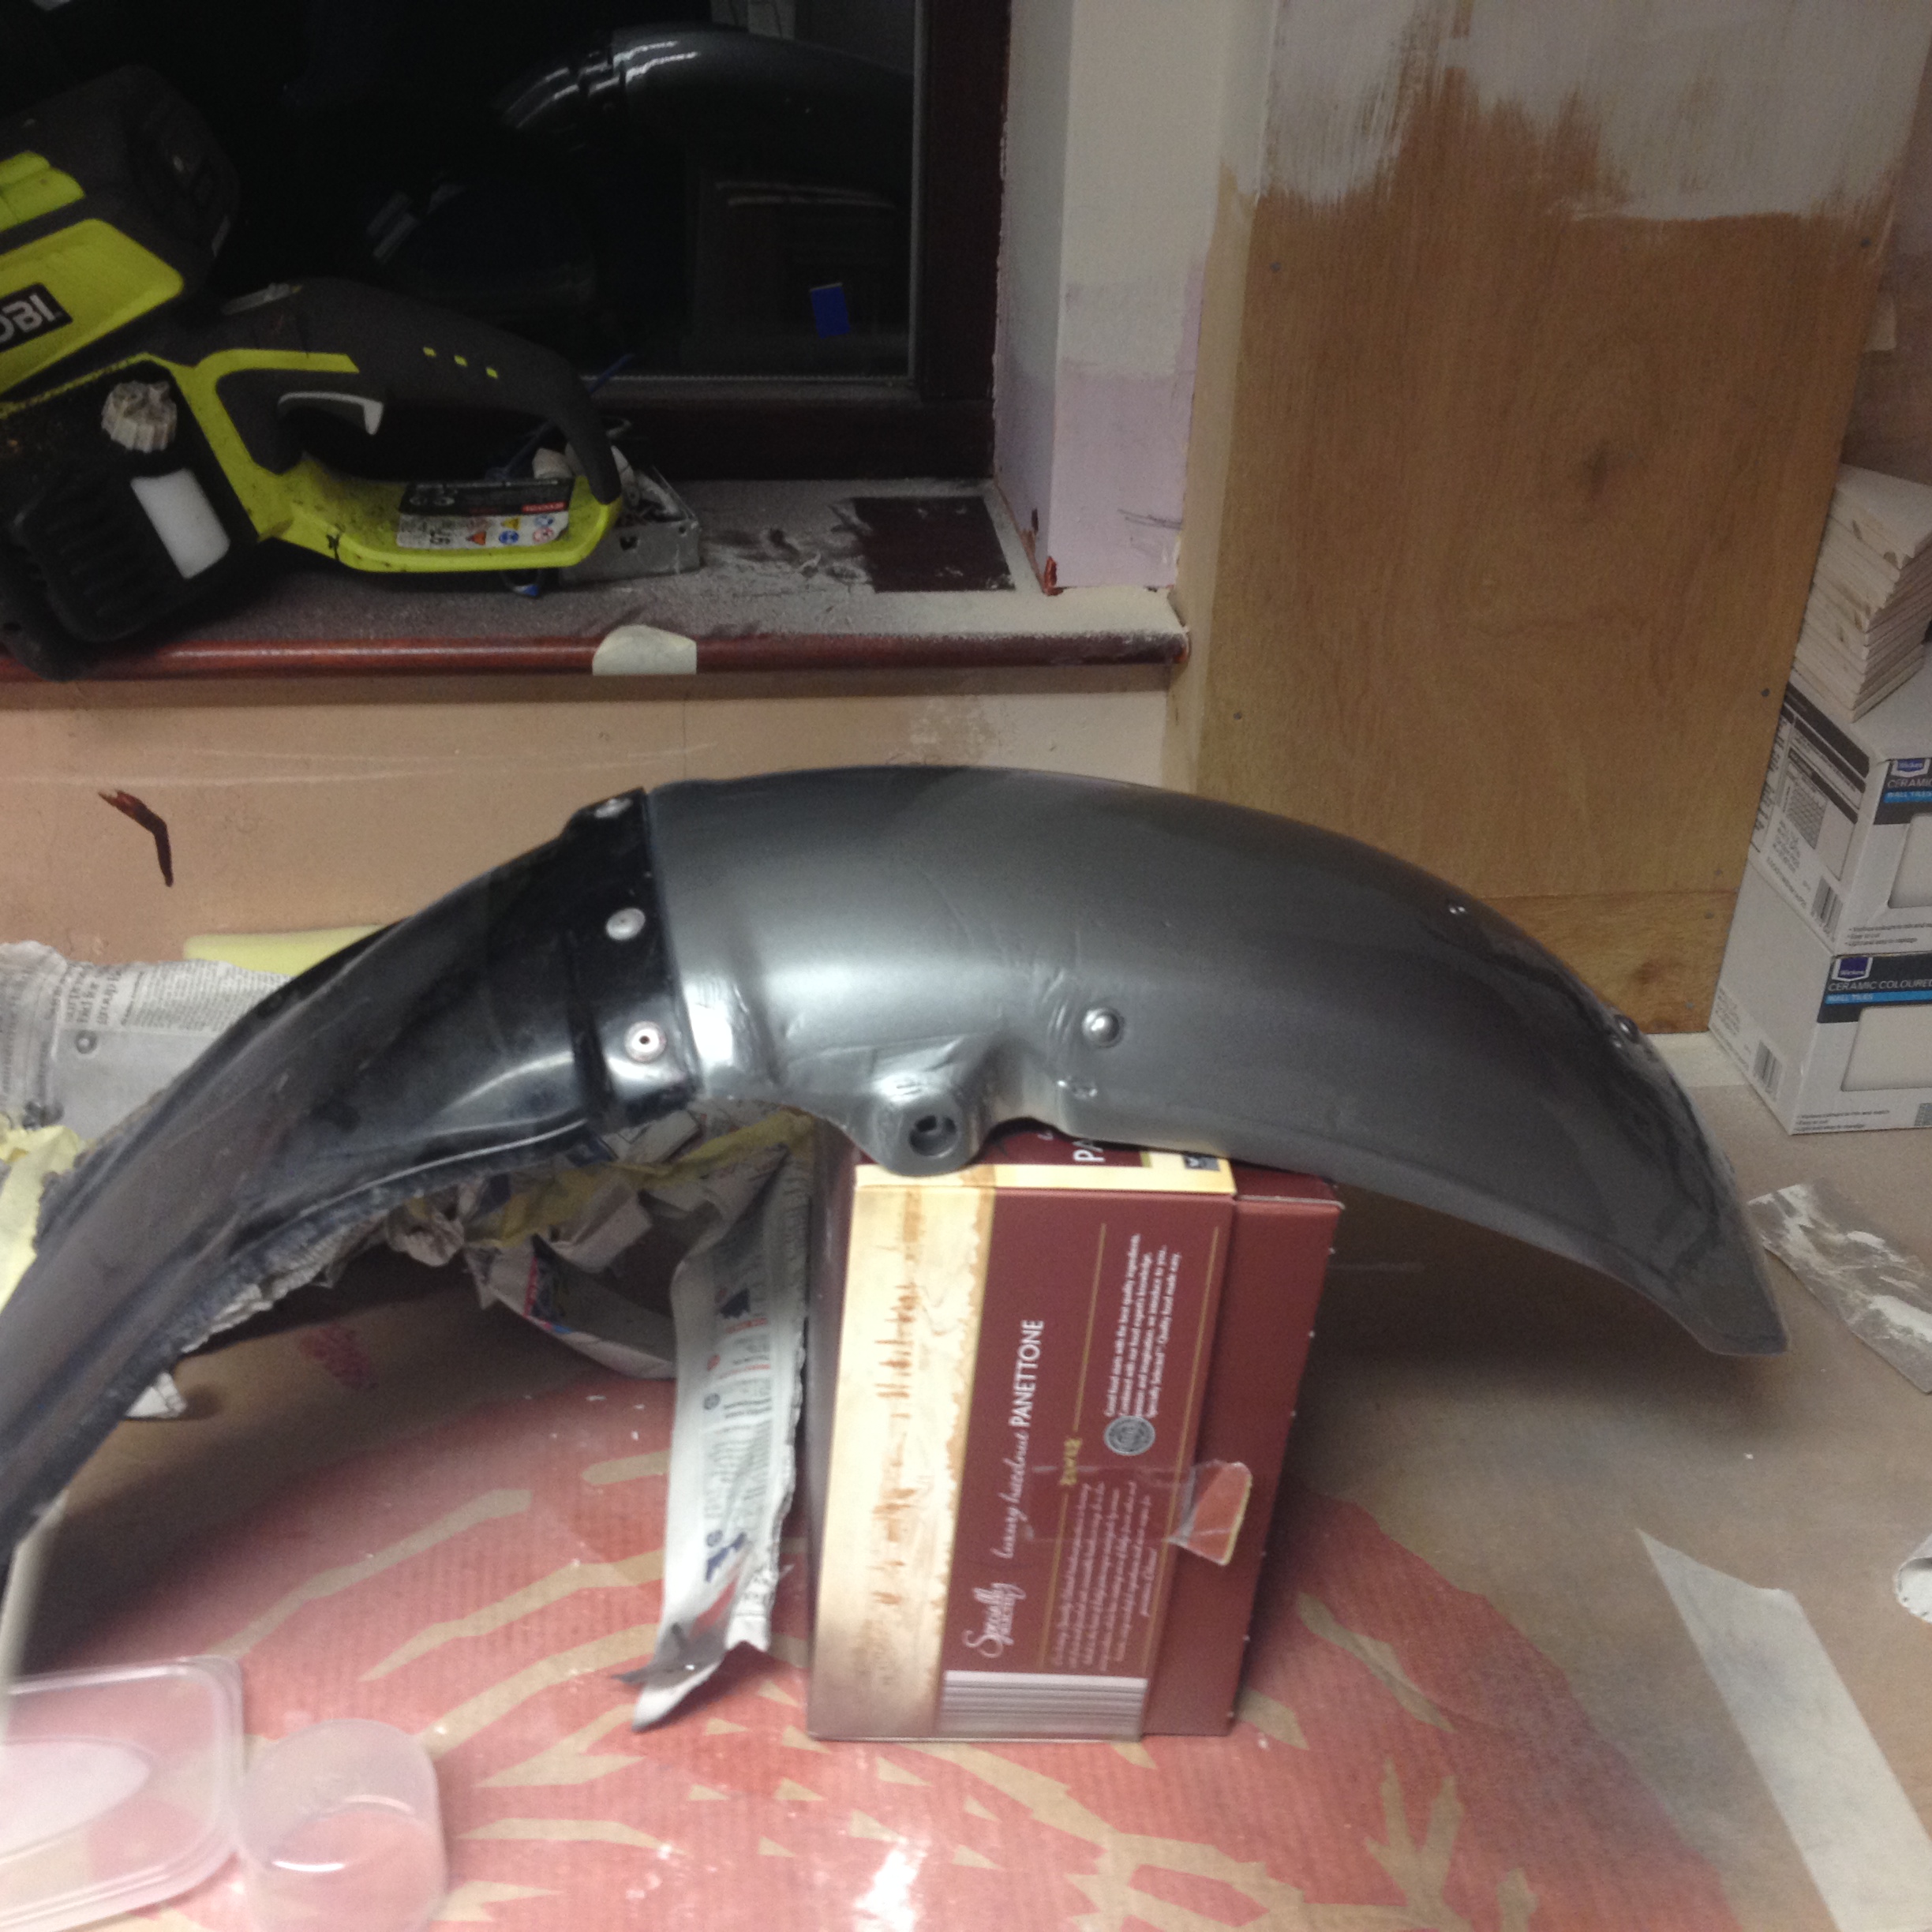
I have removed the nasty, nasty faded to pale pink and white by the sun, (formerly red) motocross front mudguard, as I have one on a shelf I can't quite reach at the moment from a TL250 that should look better.
When I call it nasty, it was this nasty thing.
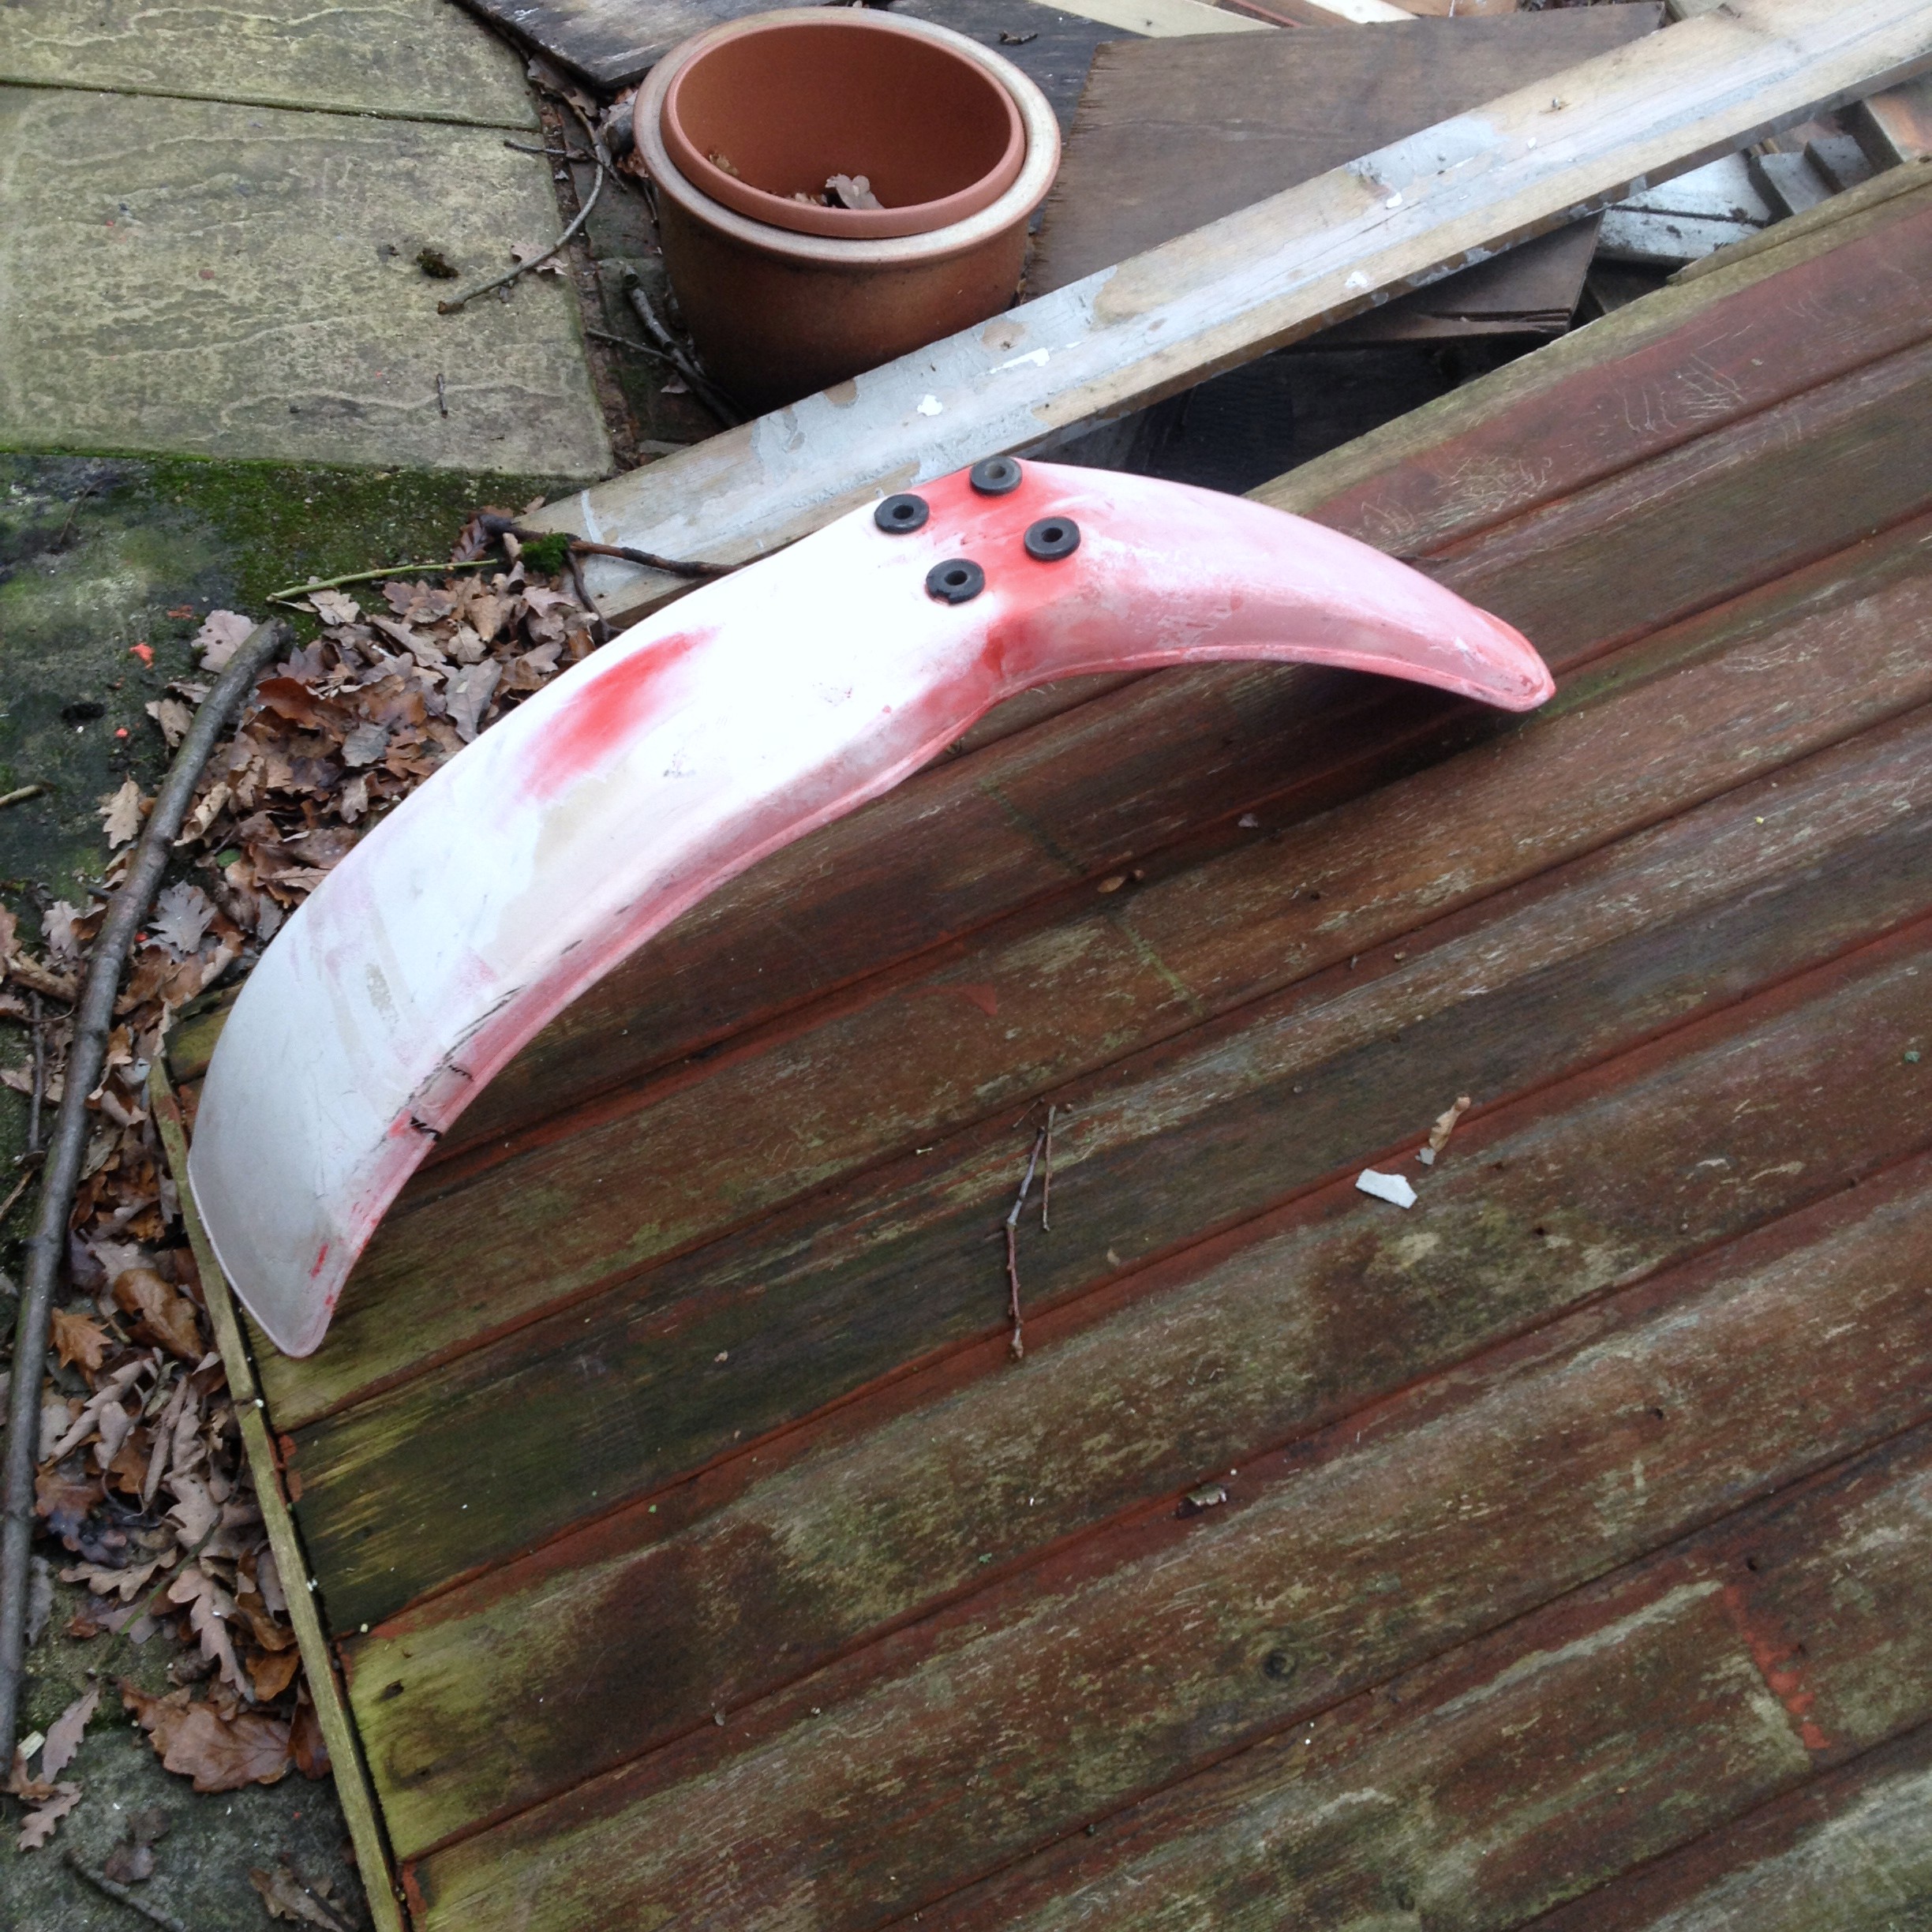
It's not on the bike in the top photo but was on when I collected the bike. I am aware I have used the 'N' word four times. I would rather drink a glass of bleach than leave this on a bike.
In the UK if you have a dual seat, you have to have rear passenger footrests for the MOT and this bike has none yet.
Only puzzle so far for me is what the hole in the top fin shown in the photo below is for, any ideas? Email me if you do rich.prentice (at) ntlworld (dot) com please! I can then feel suitably silly.

Best answer so far is shown by this picture of a motocross bike head sent in from one of my special correspondents Nigel M. spotted at the twin shock show last weekend..

It may eventually turn into a bobber or something like this.. or not
.
(This belongs to another Aussie, Ben Burton, g'day mate and thanks for the piccy!)
or this
which is a German attempt at a cafe racer made from an XL250! It made me smile...
Moving on, today I did the following:
I removed the broken end of the old speedo cable from the drive and fitted a new cable. I can't believe it, the screw just came out without any fuss! That's a first.
I fitted the new speedo cable wire guide, and I made a way to get the spare silver mudguard down from the high shelf and fitted it.
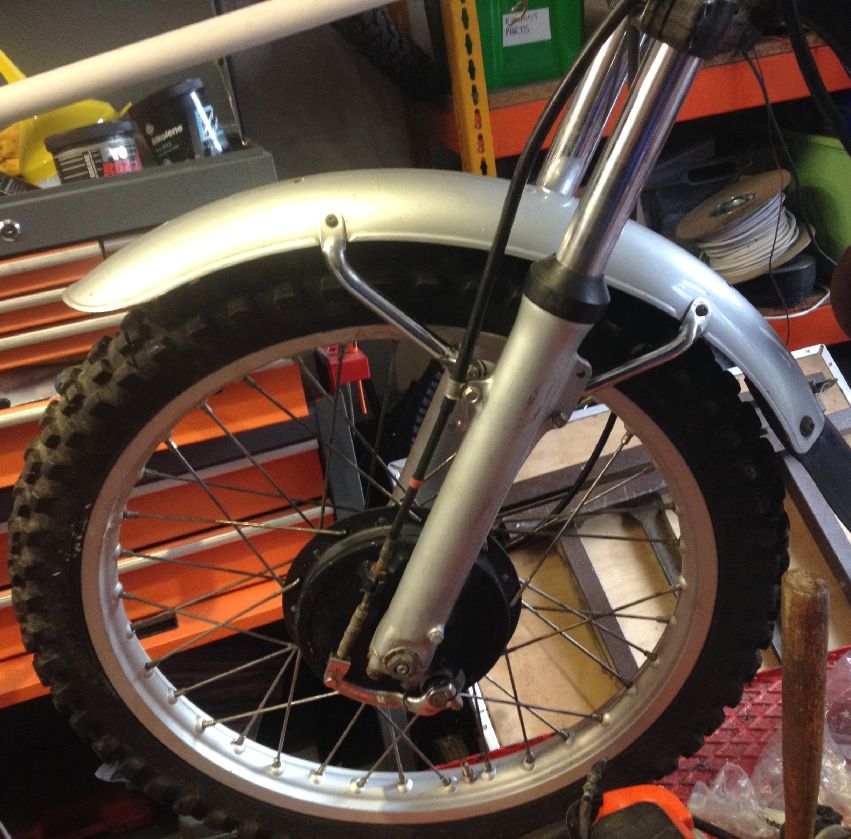
It was made to fit these exact fork legs so it just bolted on. What I really mean is there was a broken bolt in one of the 4 threaded parts so that had to be drilled out and re-tapped M6, then I fastened it on with four flanged head stainless set screws.
I fabricated a mount for the speedo out of some stainless steel flat bar, and fitted the speedo. I am not going to bother with the rev counter/tacho just at the moment as it isn't an MOT requirement. Technically the speedo isn't but it is a civil offence to have no means of knowing your speed. See The Road Vehicles (Construction and Use) Regulations 1986.
I have sent the letter and a cheque with some pictures and the VIN and engine numbers to Honda.
You used to be able to buy finned replacement stator covers in the 70's but a previous owner of this bike has a go at making his own, perhaps with a round file or an angle grinder; My daughter is a primary school teacher and I think she would say 'must try harder' on the attempt; so I replaced the cover with an new/used one... the screws came out easily and were good enough to re-use. Mmmmm nice.
 A DIY attempt at this?
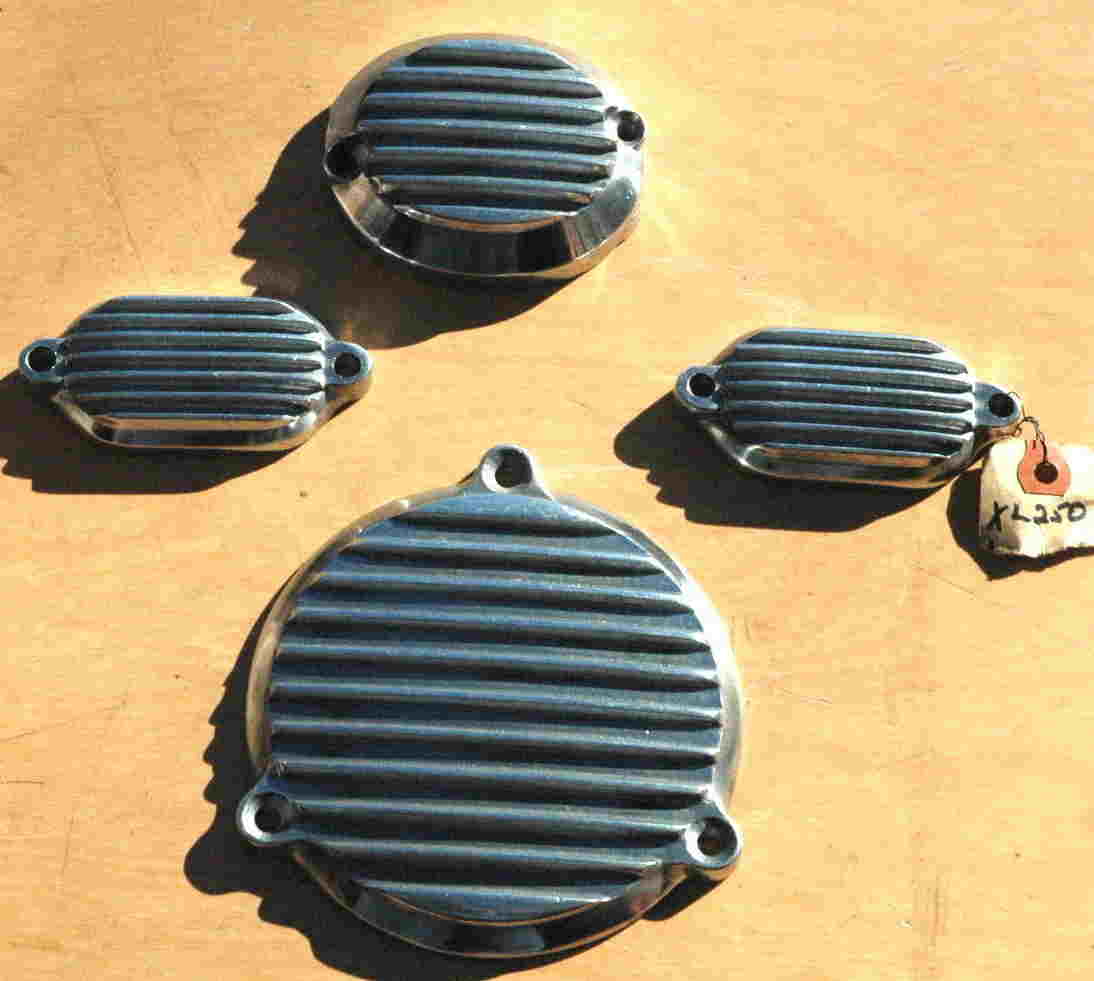
These accessory items are rare, this NOS set sold for $175 a week ago on eBay!
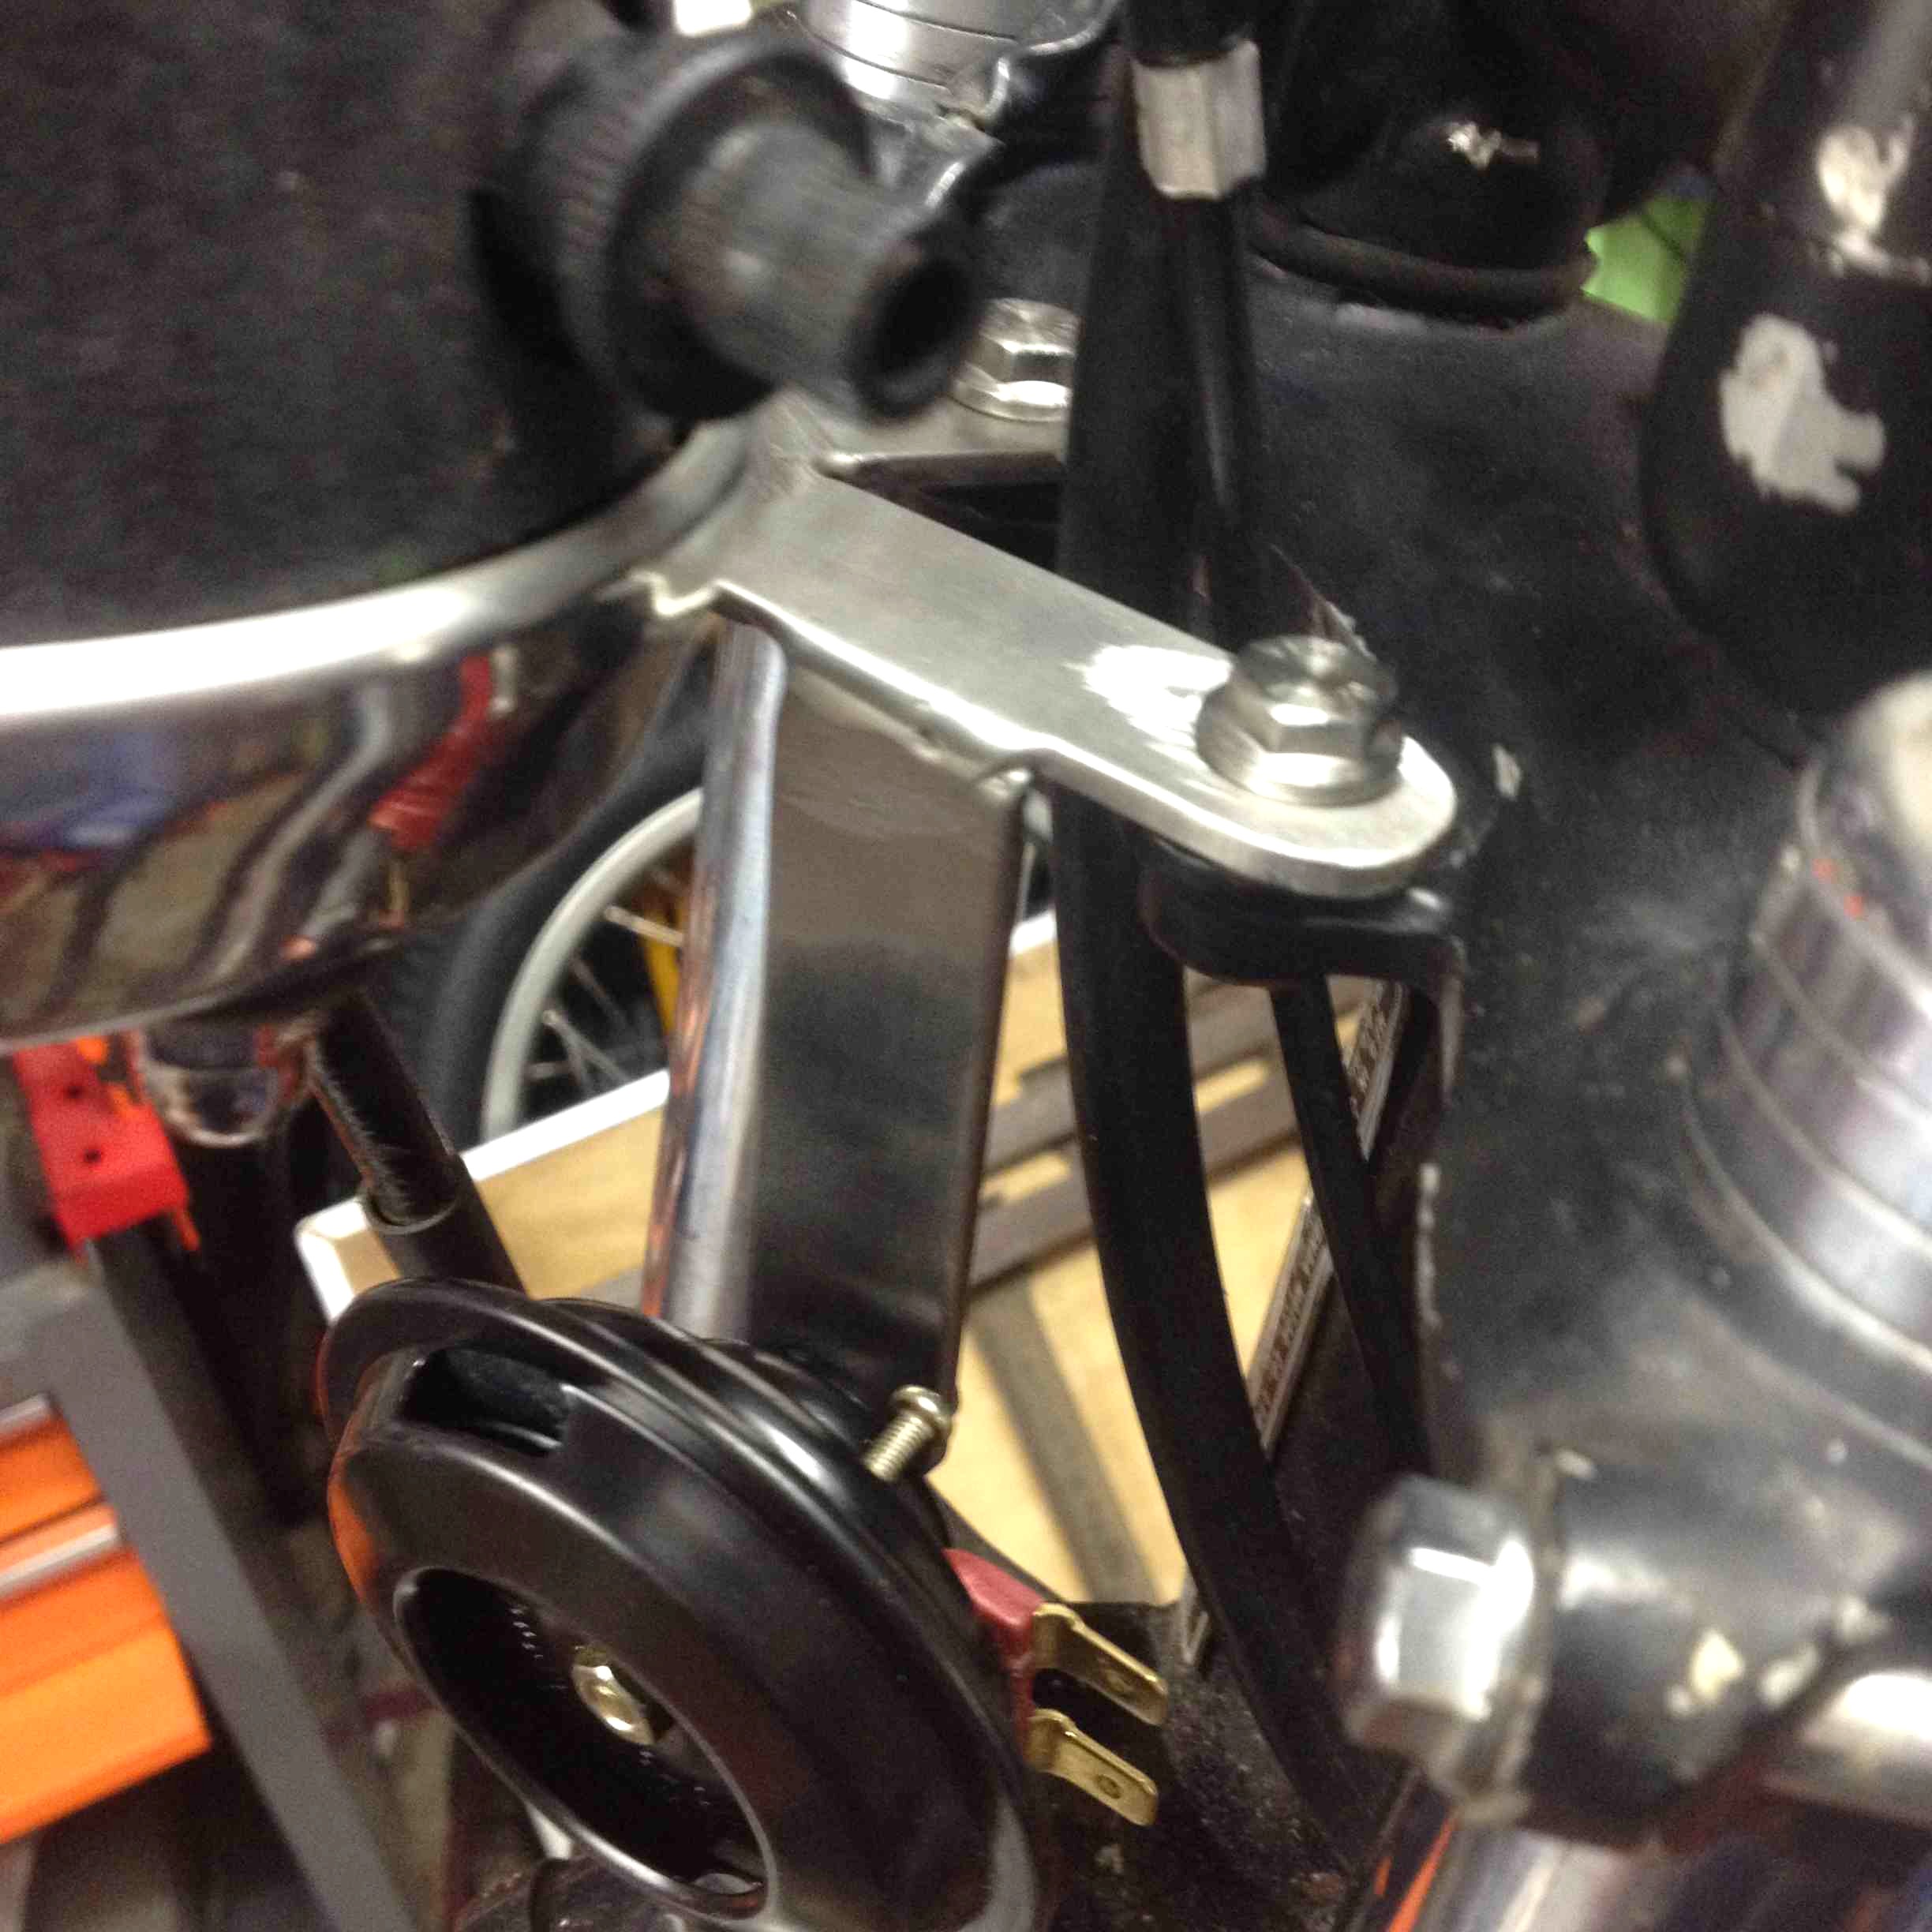
The repair that a previous owner has done on the side stand mount is interesting. It is welding Jim, but not as we know it... this will need radical surgery in the near future. The angle isn't right and the bike tends to roll off the side stand really easily which is a Bad Thing.
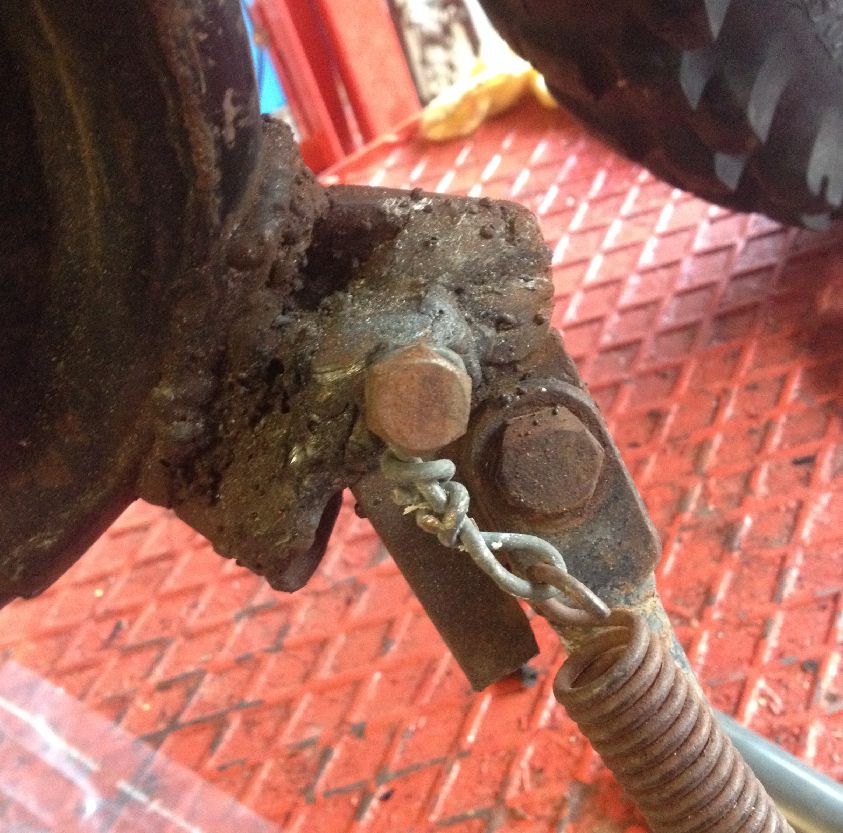
This is hillbilly engineering! I see a man with an angle grinder sorting this out, but not quite yet. This is the rear view, not good.

I haven't attempted to cut it off yet as I am using a 18v cordless one since the gearbox on my mains one went. I guess I will need to buy another one for this job.
Note to self: I also need to check whether the knobbly tyres currently fitted are road legal here in the UK...
Later the same day; turns out they are not; they are both marked 'Not for Highway Use' and anyway the front a Bridgestone Motocross M57 is perished, it's got a long thin crack most of the way round near the bead. The rear is a Dunlop Sports D756. It's Charlies in Shirebrook who will fit some new legal ones tomorrow. Whilst I am at it I'll get new rim tapes and tubes.
The bike will definitely need a horn to be legal, and I think, a red rear reflector*.
Later..
* No it won't, I have now read the motorcycle MOT manual online and it says (regarding rear reflectors):
" This inspection applies to:
all machines except those which either have no front or rear position lamps or have such lamps permanently disconnected, painted over or masked that are
. only used during daylight hours, and
. not used at times of seriously reduced visibility"
So a daylight MOT bike doesn't need a reflector. Cool.
I've ordered a push switch and already have a new 6v horn. Now I see a problem here as most horns like the one I have will be 6V DC, and the bike ignition run off the generator is 6V AC. To get DC I need a battery, and a rectifier that will produce DC from the generators AC output to charge a battery to power the horn. Possibly a horn run directly from a rectifier? The horn may not like that and I may need to regulate the voltage. I will have a look at how others do it....
Well I have looked and there is so much crap on those forums, talk about stoopids. Turns out the easiest way to do what I want is to fit a 6v AC horn. They are on eBay for £8. Old Italian scooters use them.
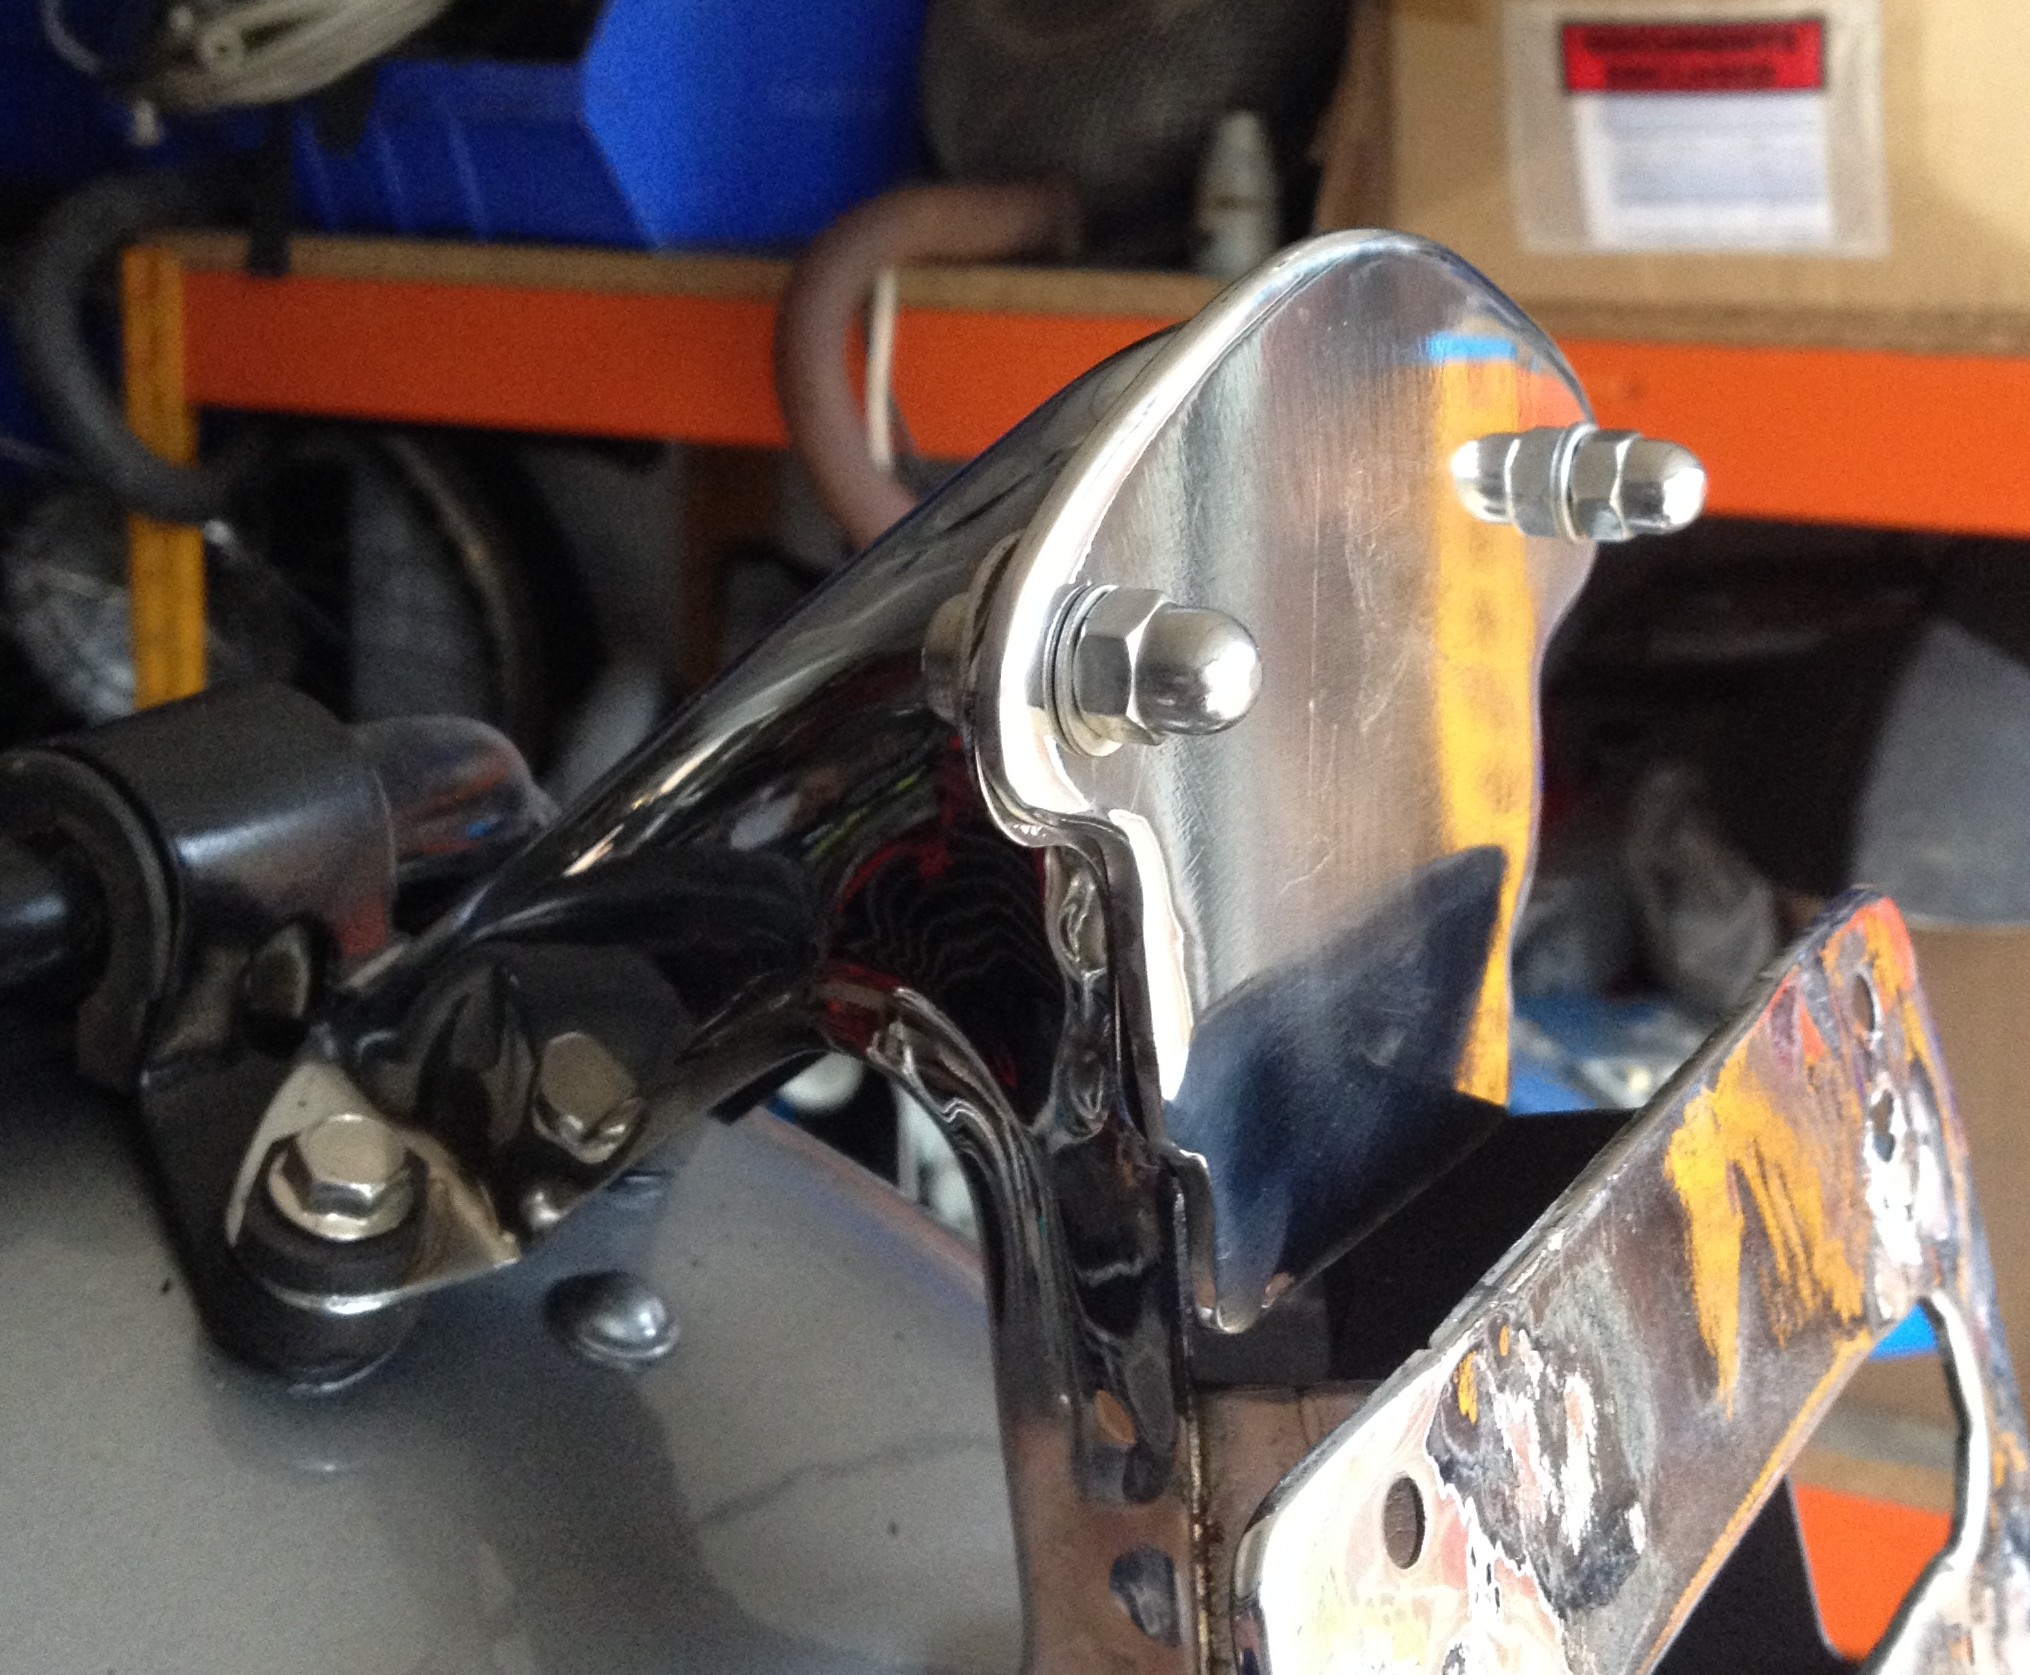
Where to mount the horn....??? I see a man making another stainless steel bracket in his workshop..
a bit later, the next day: Here is a photo of the horn mount I have just done. I simply welded another arm to the stainless speedo bracket made yesterday. Keep it simple stupid.
Finally for tonight, the wheels are off for the tyres to be fitted tomorrow. The front spindle nut was crazy hard to undo, and then the gummed up front axle/spindle itself had to be drifted out. I'll clean them up (soaking in thinners right now) and grease them when I re-fit the wheels. I also checked the brake shoes. The fronts are serviceable but one of the rears is thin, so that can have some better used ones from the spares box.
 now (Feb 3rd 2014) looks like
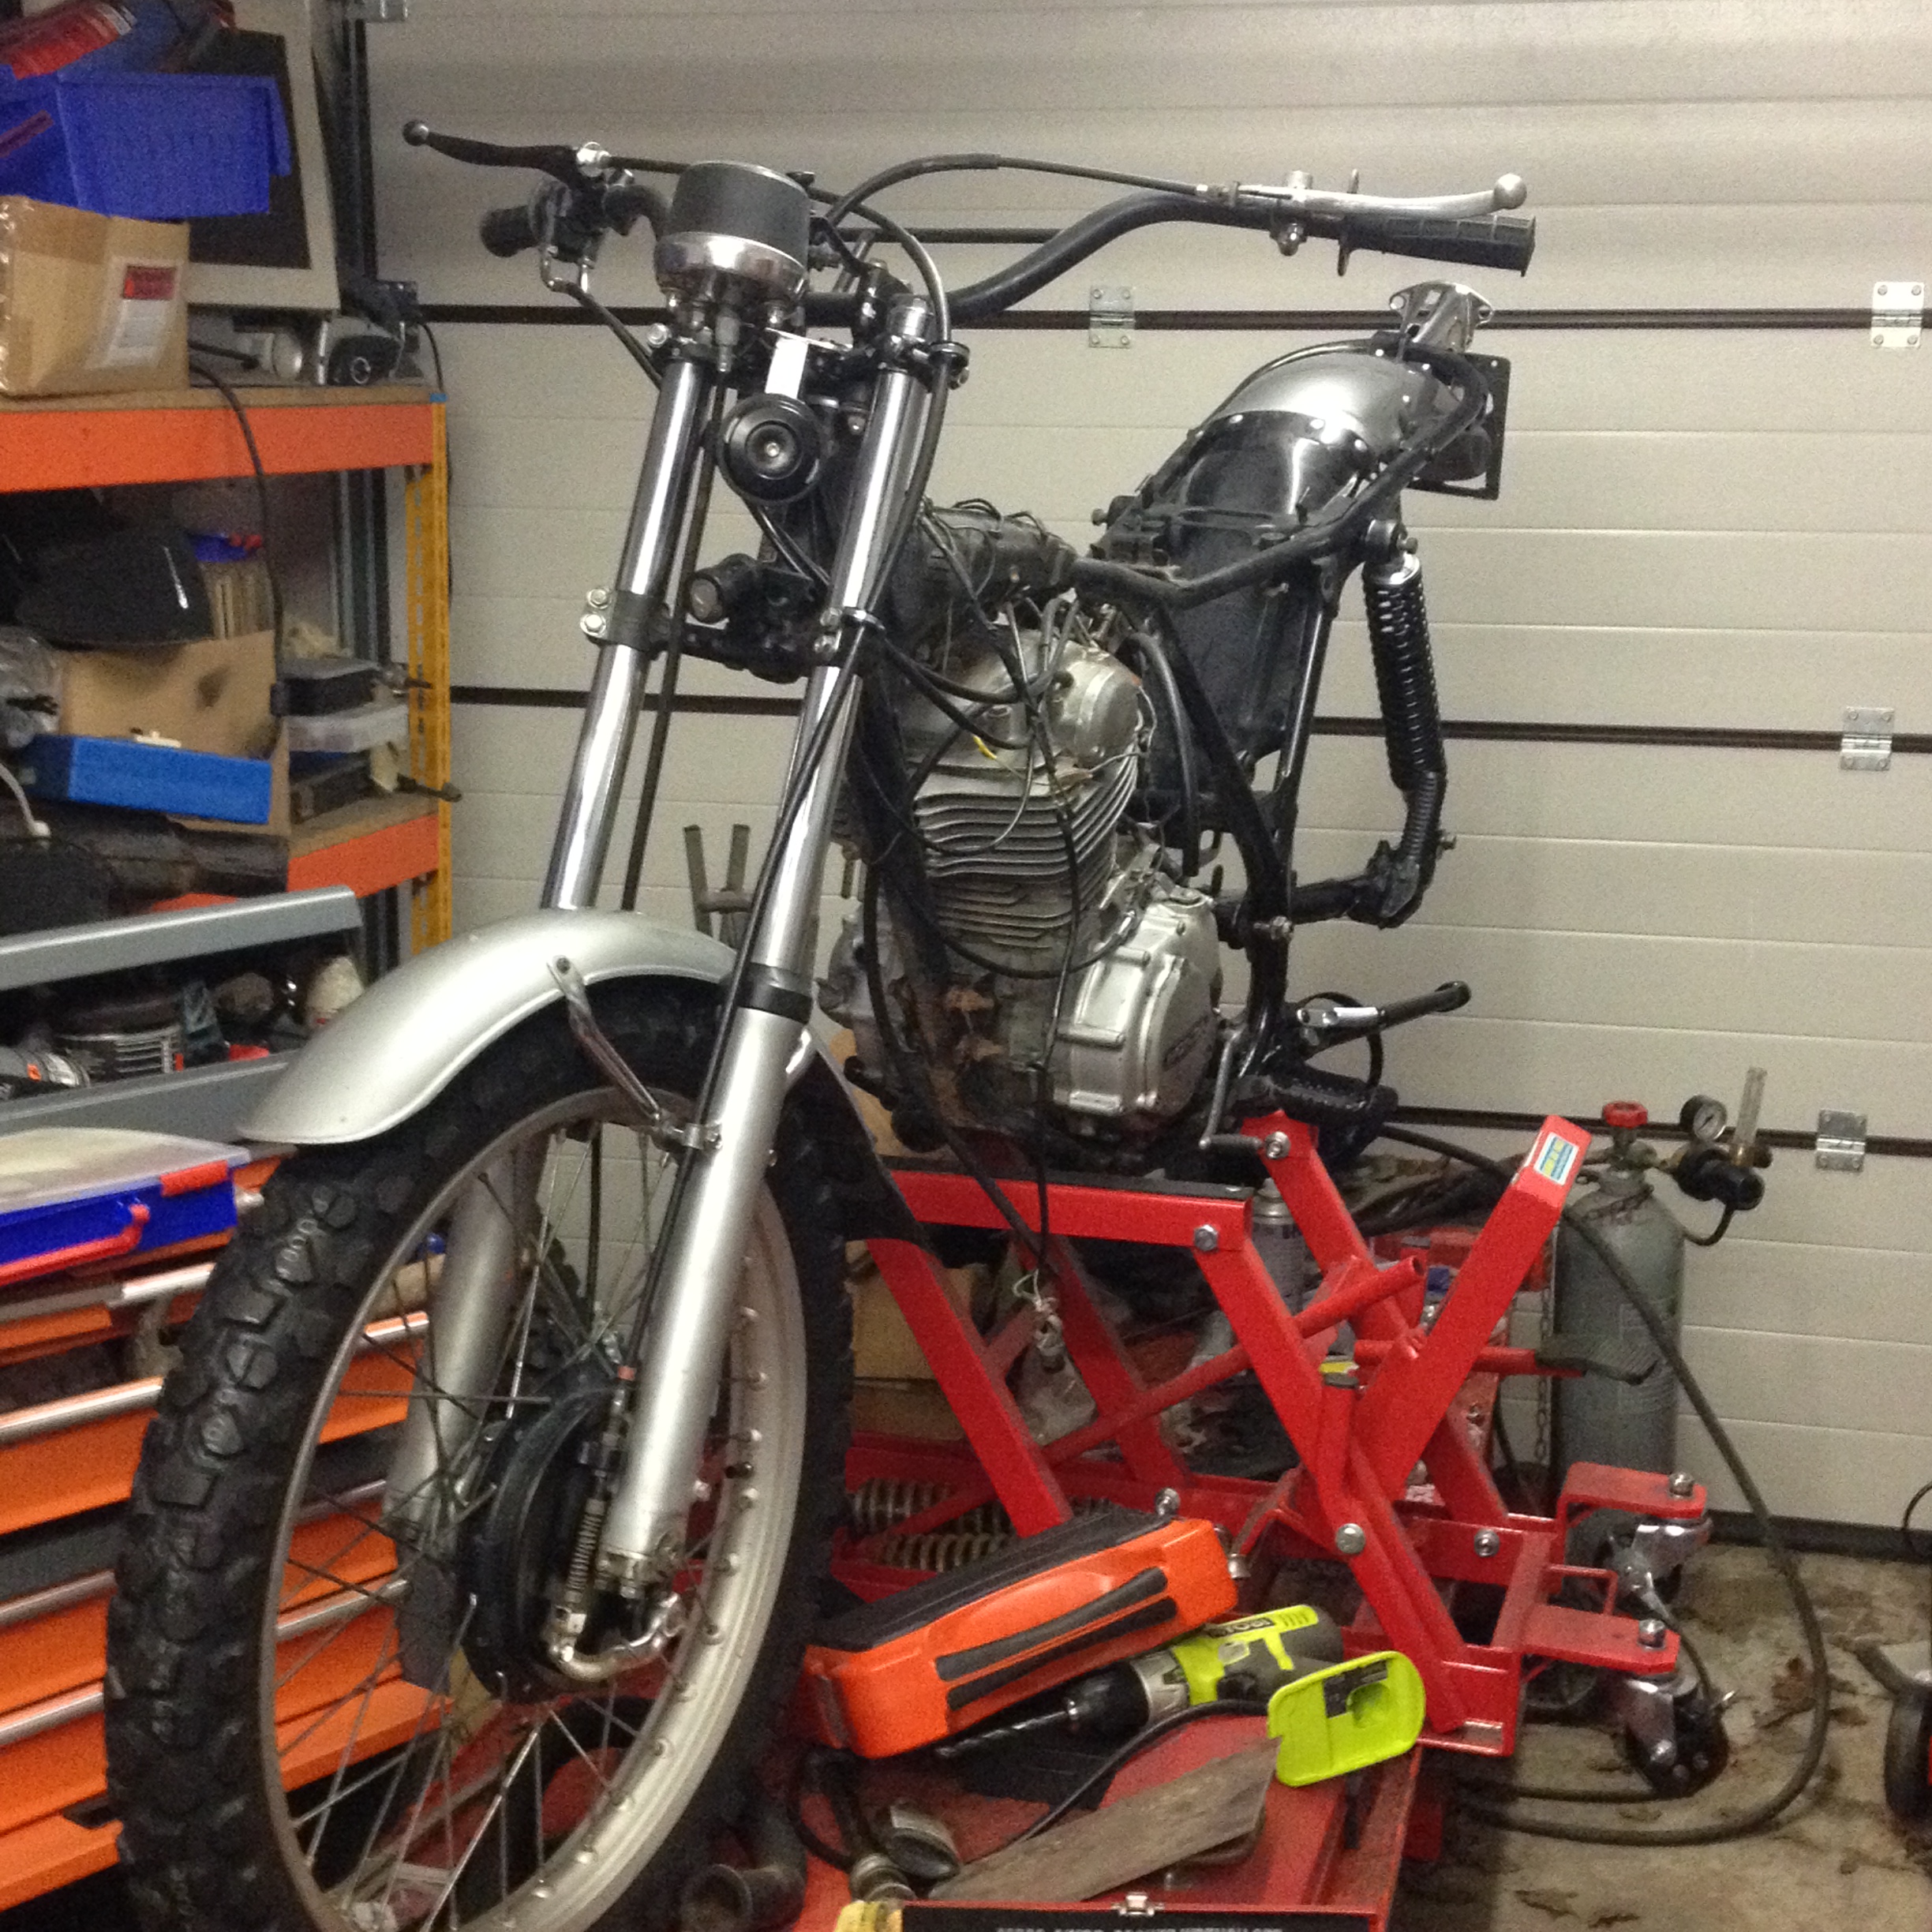
Look at the odd angle of the sidestand in the picture on the left , and compare with the one on the right.
Yes, I know the brake lever is black and the clutch lever is silver.
Time for a cold beer.
Next day:
Took wheels to Charlies and later on collected them, and now have new tyres. Choice is a bit limited with a 21" front wheel so I have a pair of Maxxus enduro tyres, road legal. 2 tyres, 2 tapes, 2 inner tubes incl. fitting £152.
Front wheel is back in; I cleaned the spindle up and polished it with some 3000 grade paper in the lathe. Rear wheel isn't.
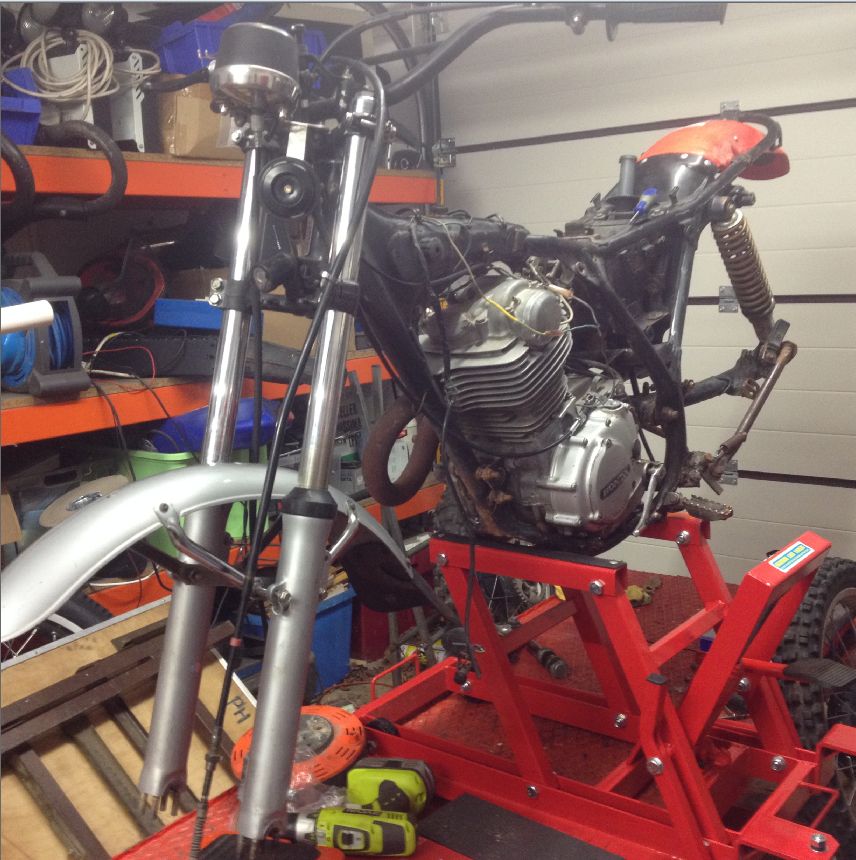
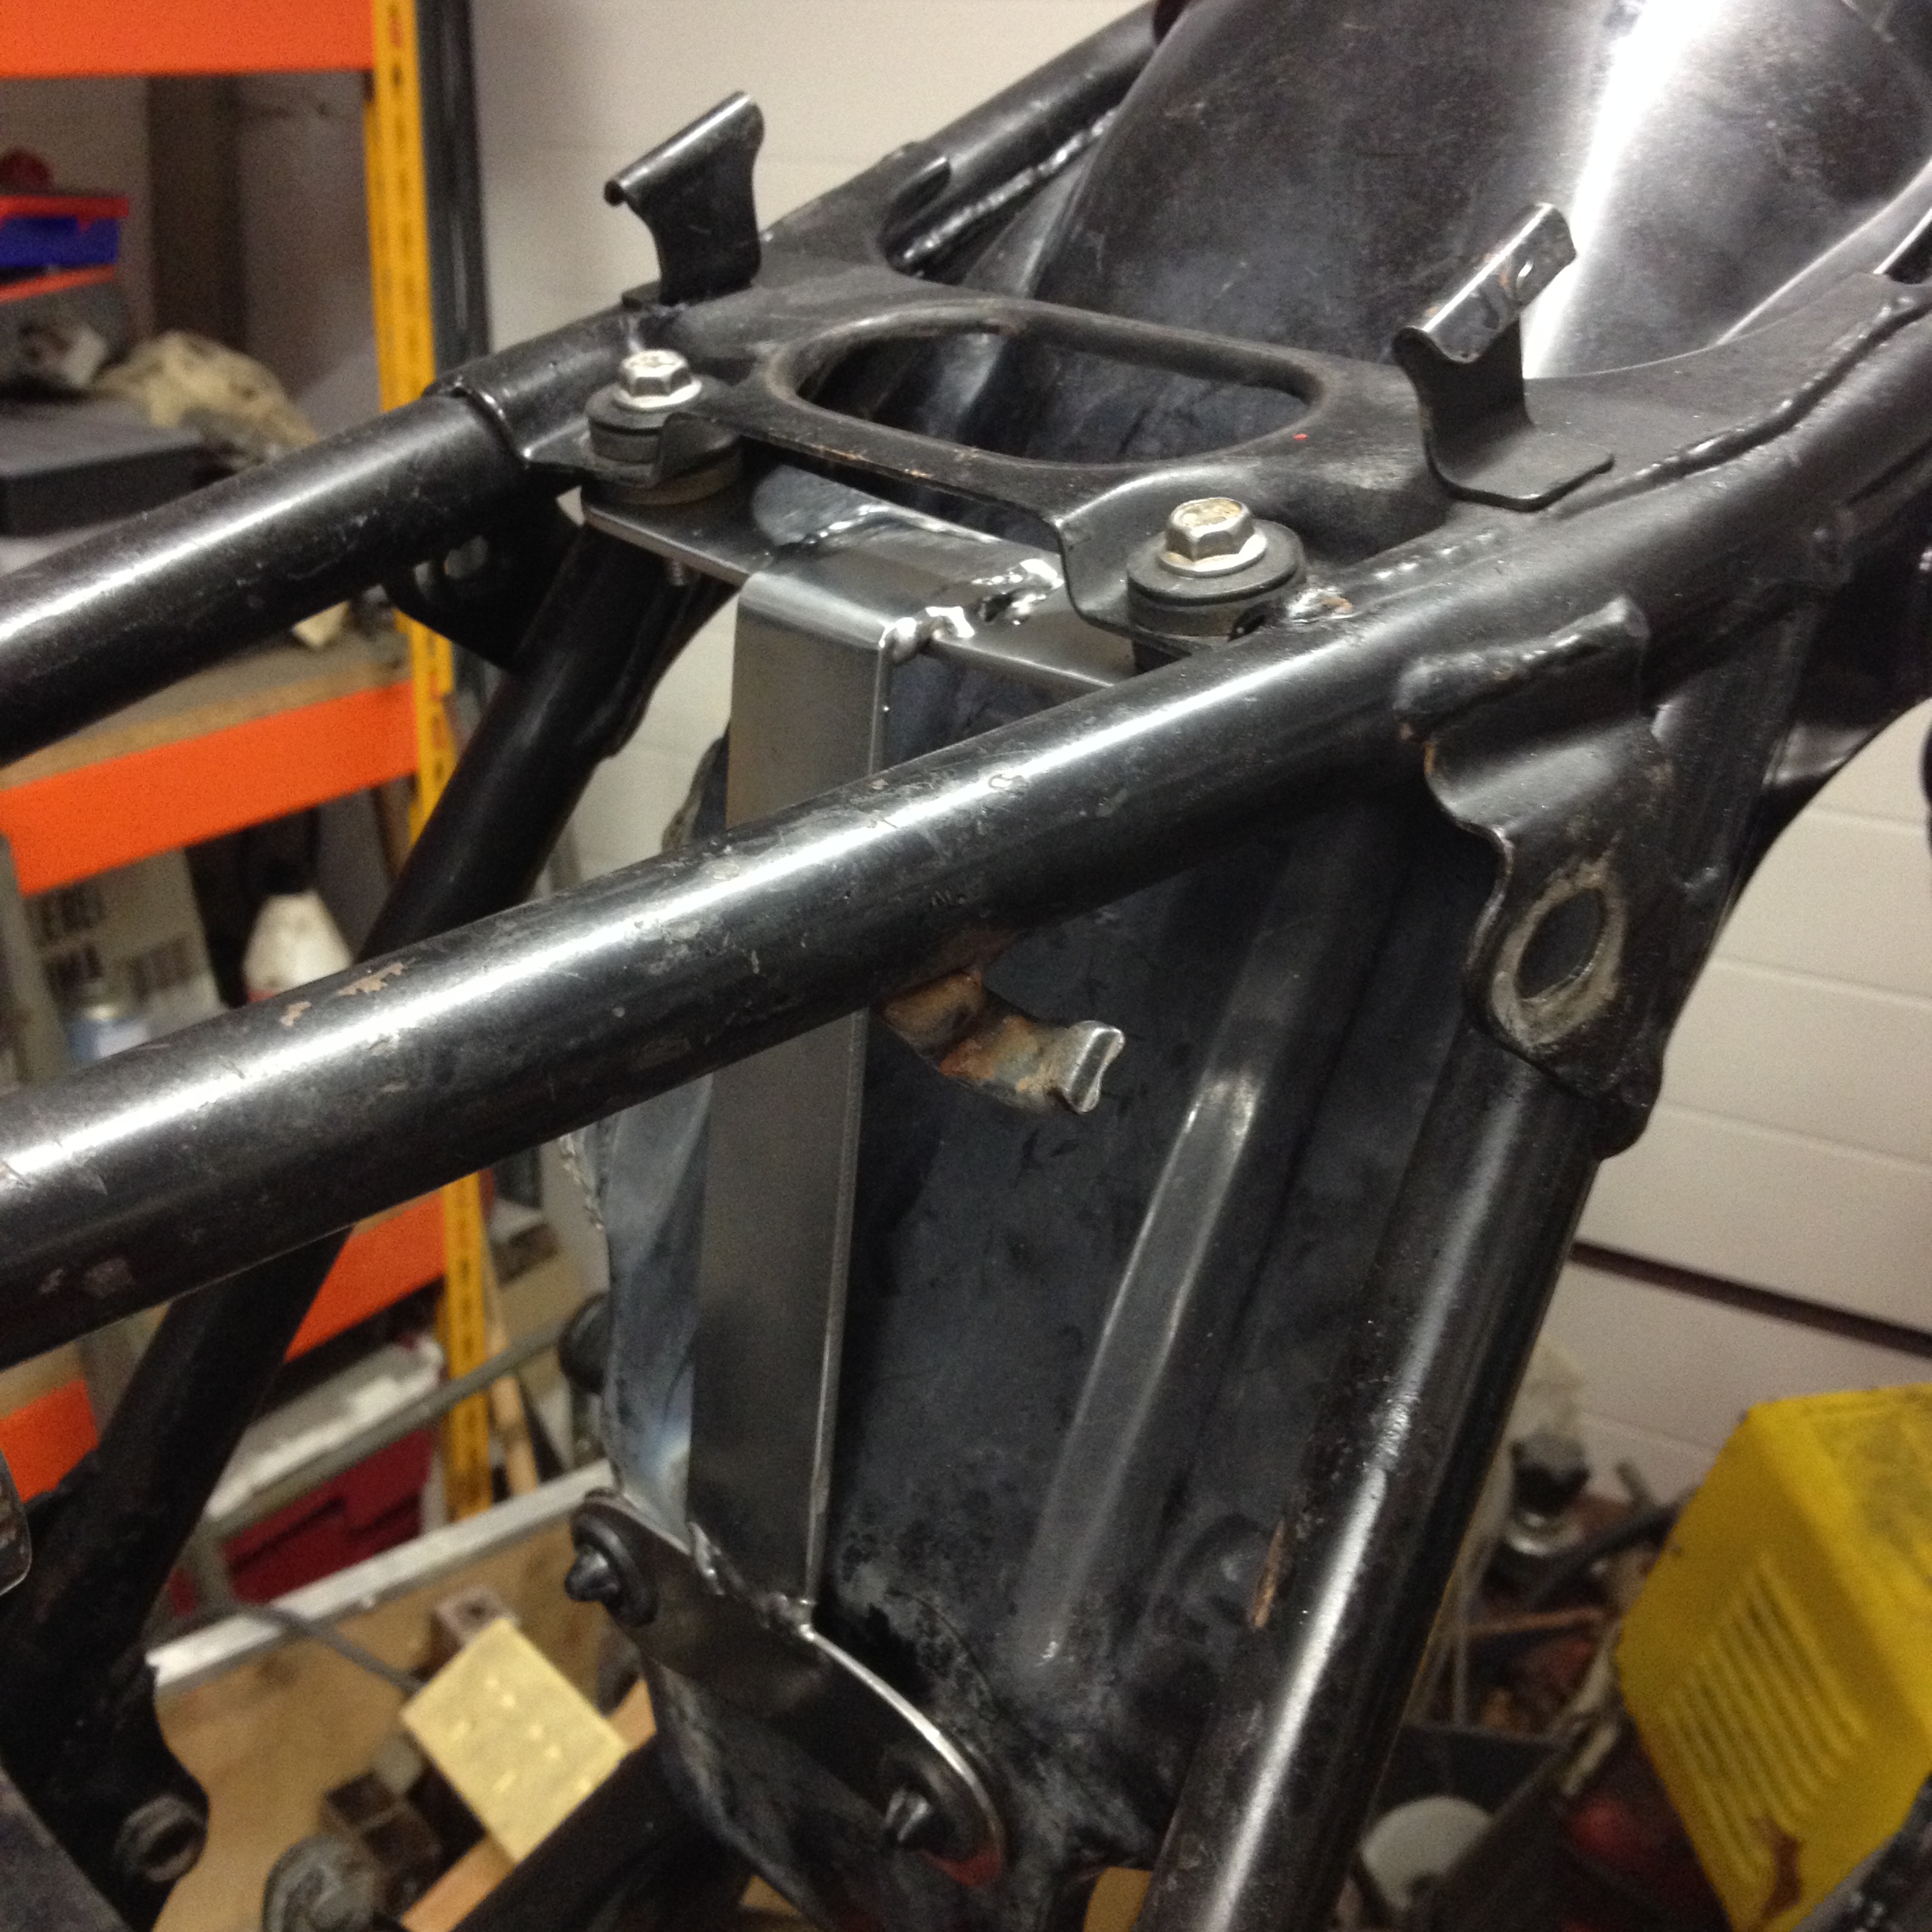
As I am planning no battery and just a carb mounted air filter like a K&N one (which I have ordered today). I wanted to lose the tin airbox (already without a lid filter element, outlet to carb pipe and the connection to the also missing big plastic under seat airbox), and combined battery holder, part of the overly complicated Honda air intake system.
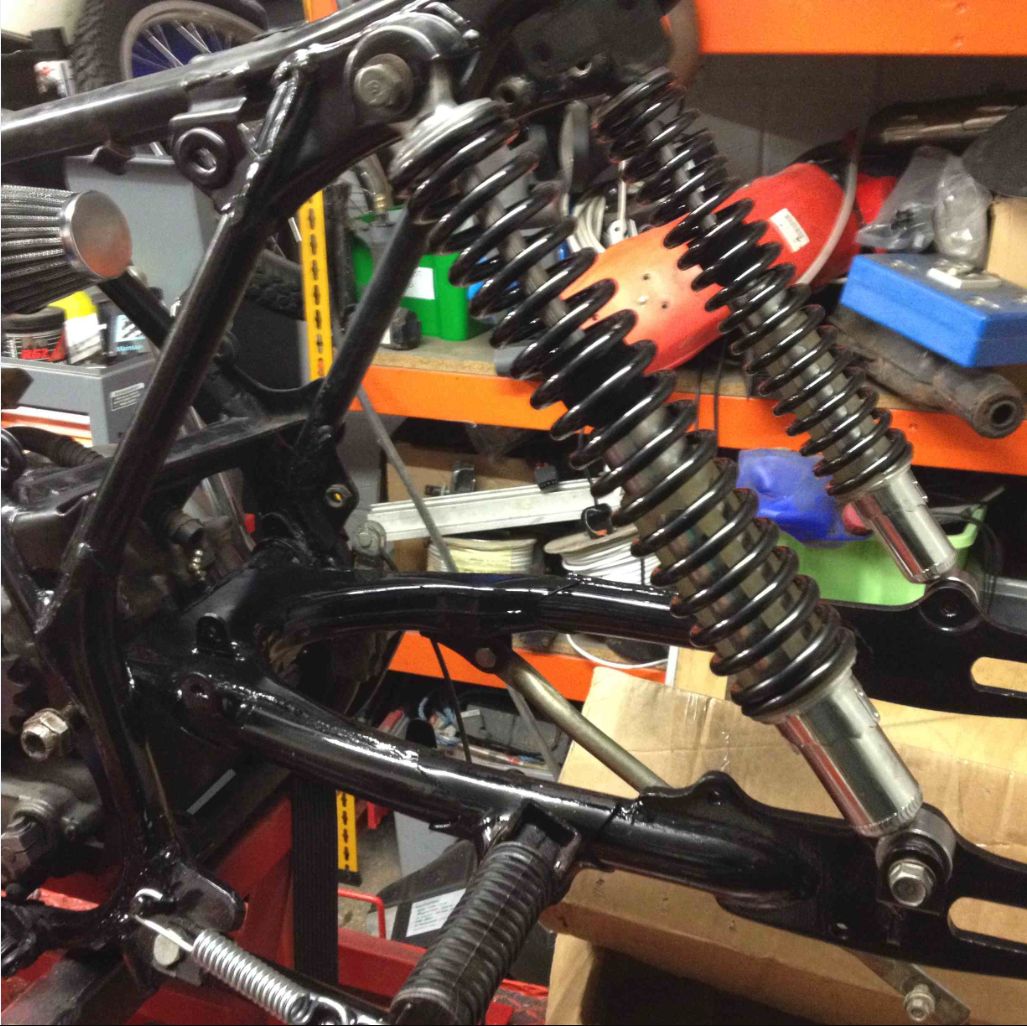
To do that you take off the rear mudguard because that's the way it comes out of the frame web... two of the M6 mudguard rear mounting bolts are so rusty they snapped. Then the exhaust needs to move over, but you can't do that unless you undo the rusty aftermarket shocks one of which is leaking (another MOT fail). I have a new Honda pair to put on; they were supposed to go on the 250 but I have some others for that so they can go on here.
The shocks have come off, and I decided to remove the exhaust which was anyway fouling on the big motocross tyre that has now gone, but the rubber side of which has polished part of the inner wall of the silencer to a mirror like finish.
There was no gasket fitted at the pipe to head joint, I have one but I have also ordered one. The exhaust semi-circular clamps were wedged half in half out of their retaining plate. Let's have a new pair.
I have a spare exhaust or three to put on and I will get the old one sand blasted and paint it. I have a spare heatshield for the pipe so it may as well go on, as it might impress the MOT tester, but with the shocks off I notice there is a little play in the swinging arm, not a lot but it may just want a repacking with grease. Or not.
David Silvers have sent the one throttle cable they had in stock, and the better pattern choke cable. I will fit these when the other cable arrives from another seller.
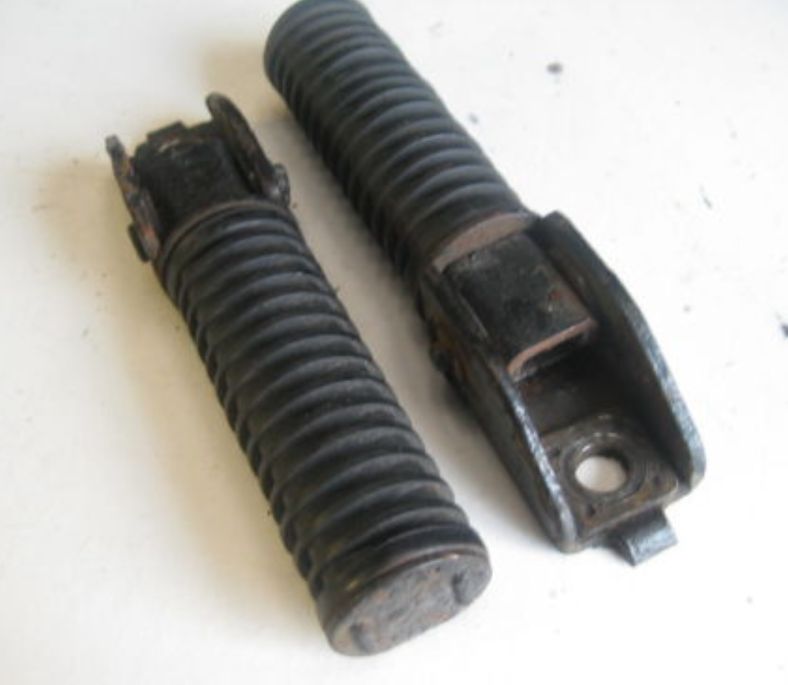
Looking at the lack of rear footrests, there was a used pair on eBay today for a tenner, genuine Honda bolt on, so I have ordered them. I will grind off the welded lugs that someone has put on and bolt these to the swinging arm.
 this is the bit I mean
 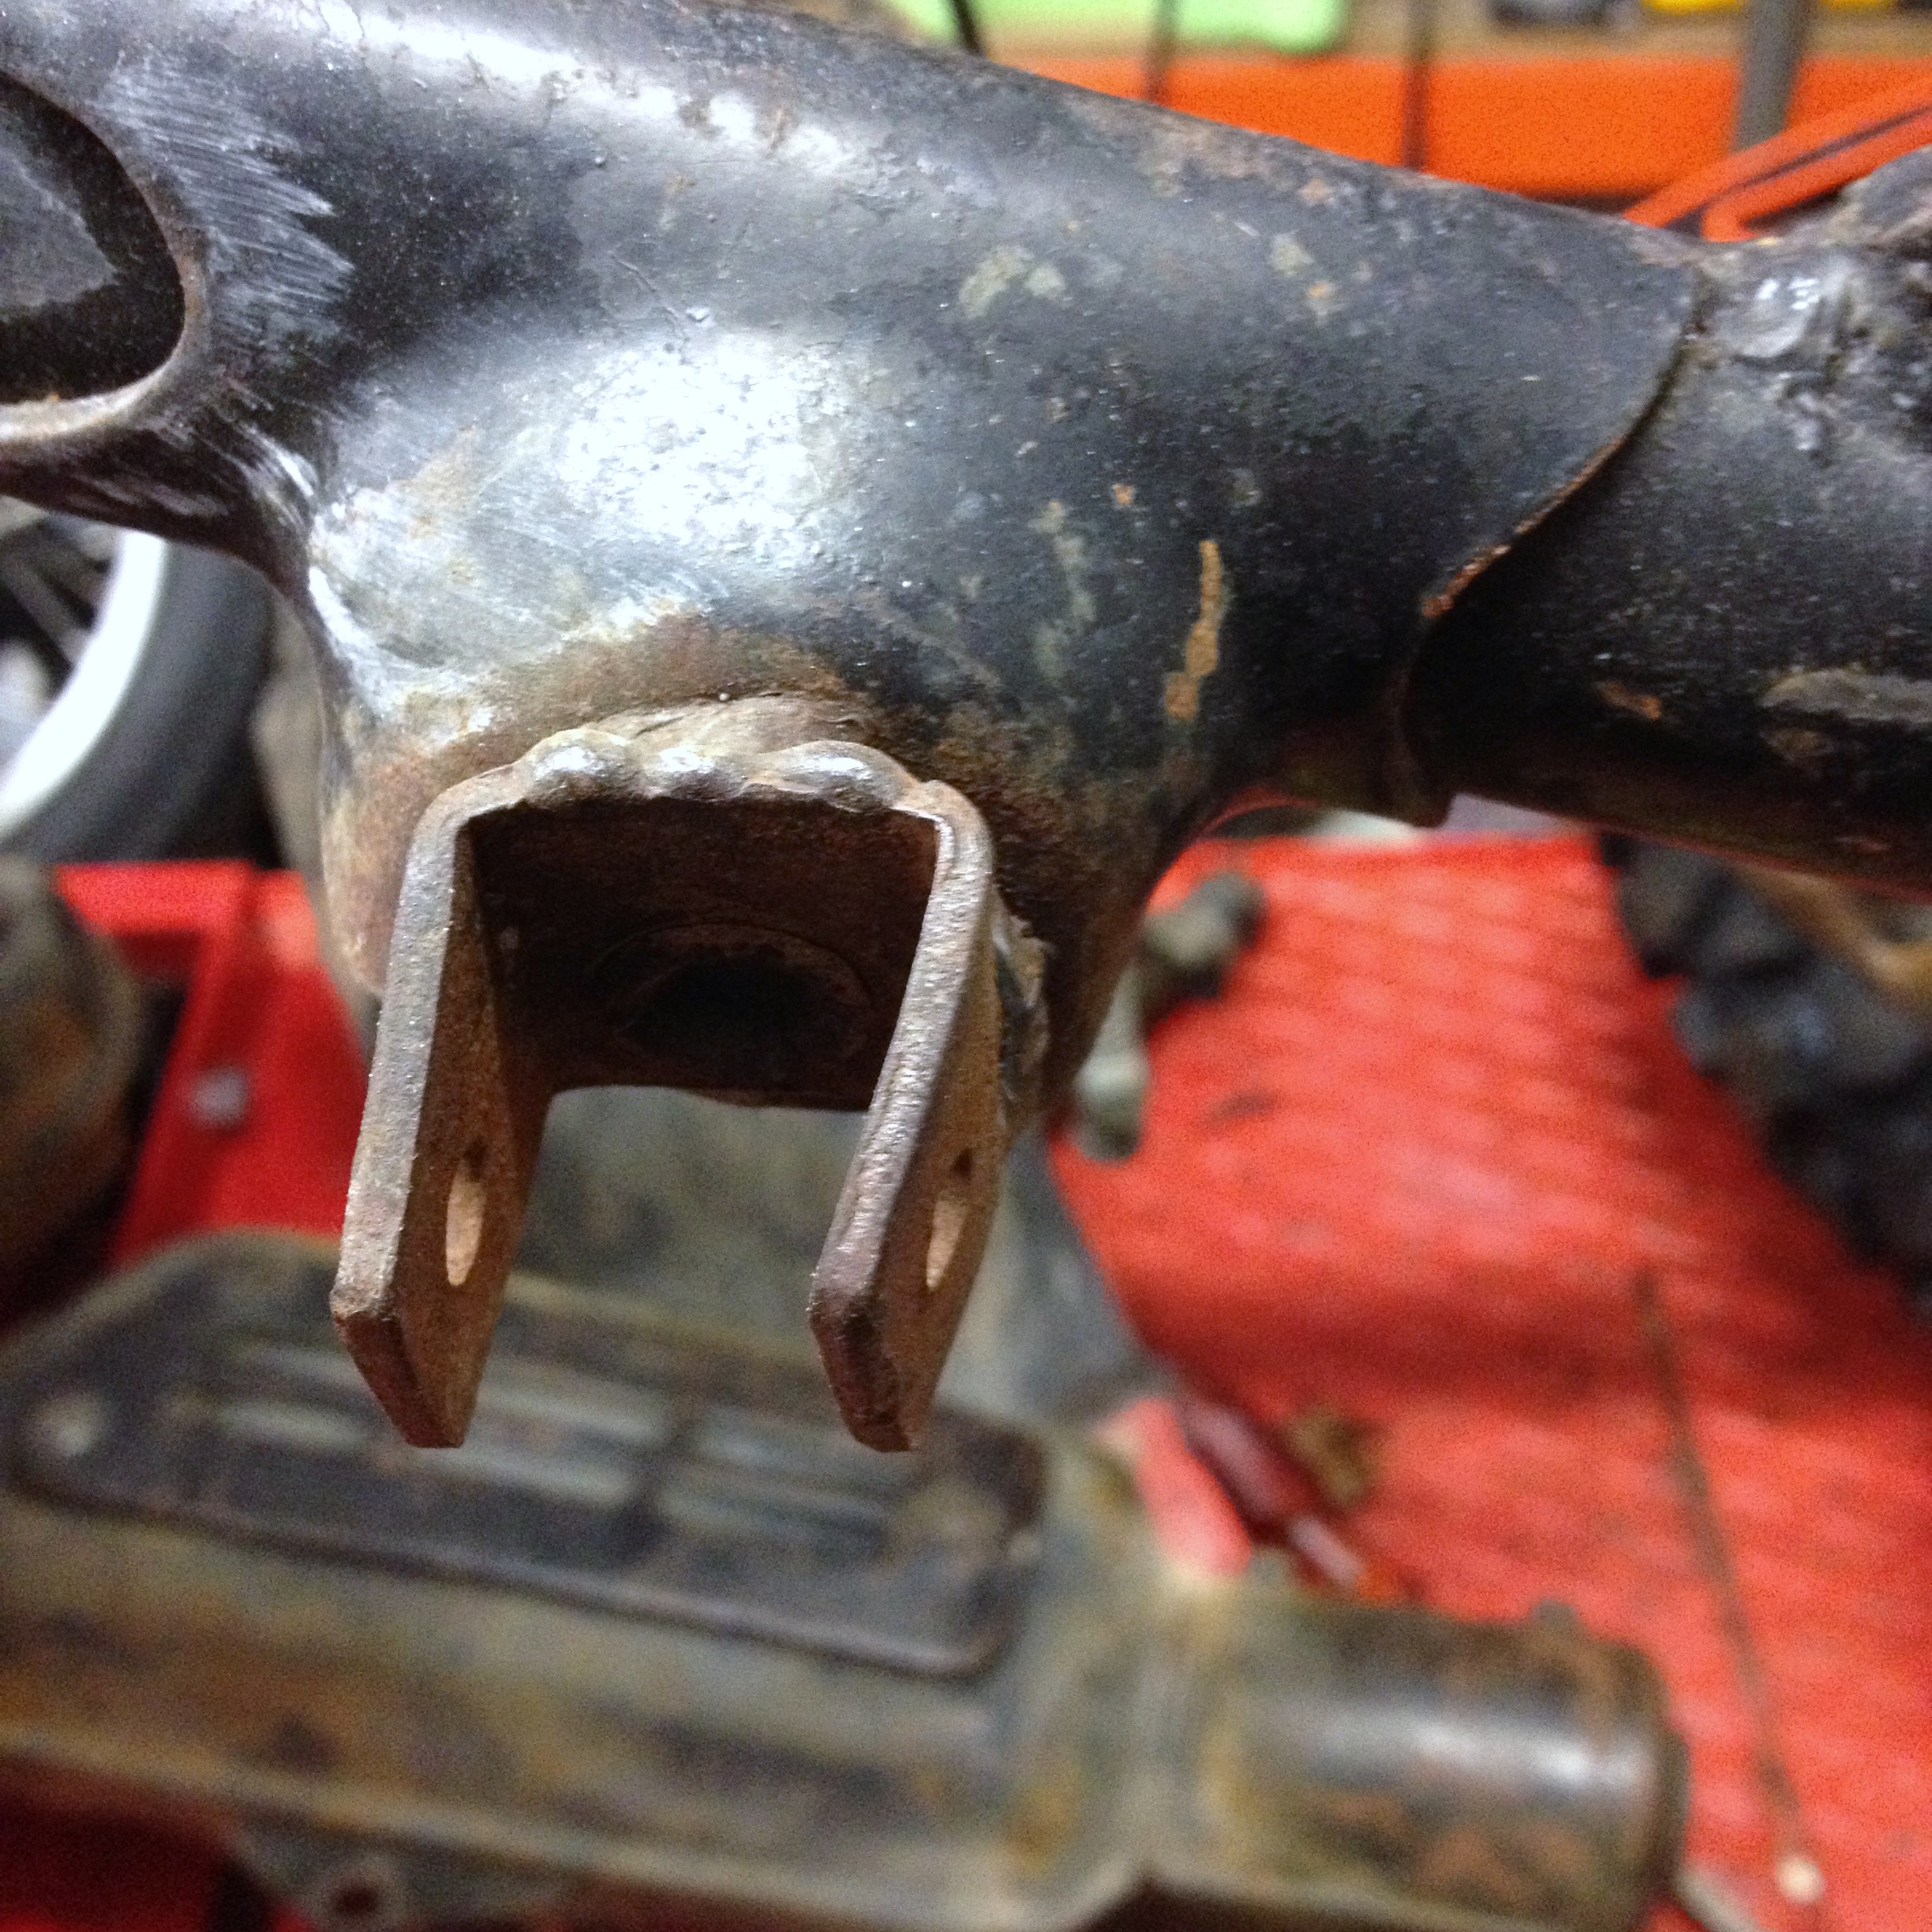 it was the same both sides.
I have replaced the rear wheel sprocket with the new one, and now play the waiting game with the postman.
Today the horn switch came. I see a slight snag here in that the handlebars for the bike are painted black as standard and the switch uses the fixing clamp to get it's ground contact to complete the circuit, which the paint may prevent, so I may have to run 2 wires.
The rubber fuel pipe came too. I think I need to finish more frame and exhaust stuff before I go down that road and try and see if it does in fact run. I learned this from Scrapheap Challenge.
The rear chain guide was with the bike as was the US style short chainguard. I have stripped the old paint off the former and etch primed it then painted it black silk acrylic. The latter begs the question whether it is a requirement in the UK for the MOT to cover the sprocket? So far all I have found is this:
"the guard must be secure and not fouling" so I need to check on that. If need be I happen to have a spare UK chainguard in primer just needs some black. This is a VOSA manual for the UK which is in pdf format, might not be up to date but is very useful:
Have you noticed how I happen to have so many parts? Hmmm, no wonder my garage is full.
The next day: I had a look online for another better swinging arm but the only ones are in the US so I will pull mine off today and get it on the bench as that is easier than trying to do the surgery in situ. I'm beginning to wish I'd kept the one I replaced on the 250 but you can't keep everything, can you? In other news, the new chain came today, it is made in Japan and certainly looks great.
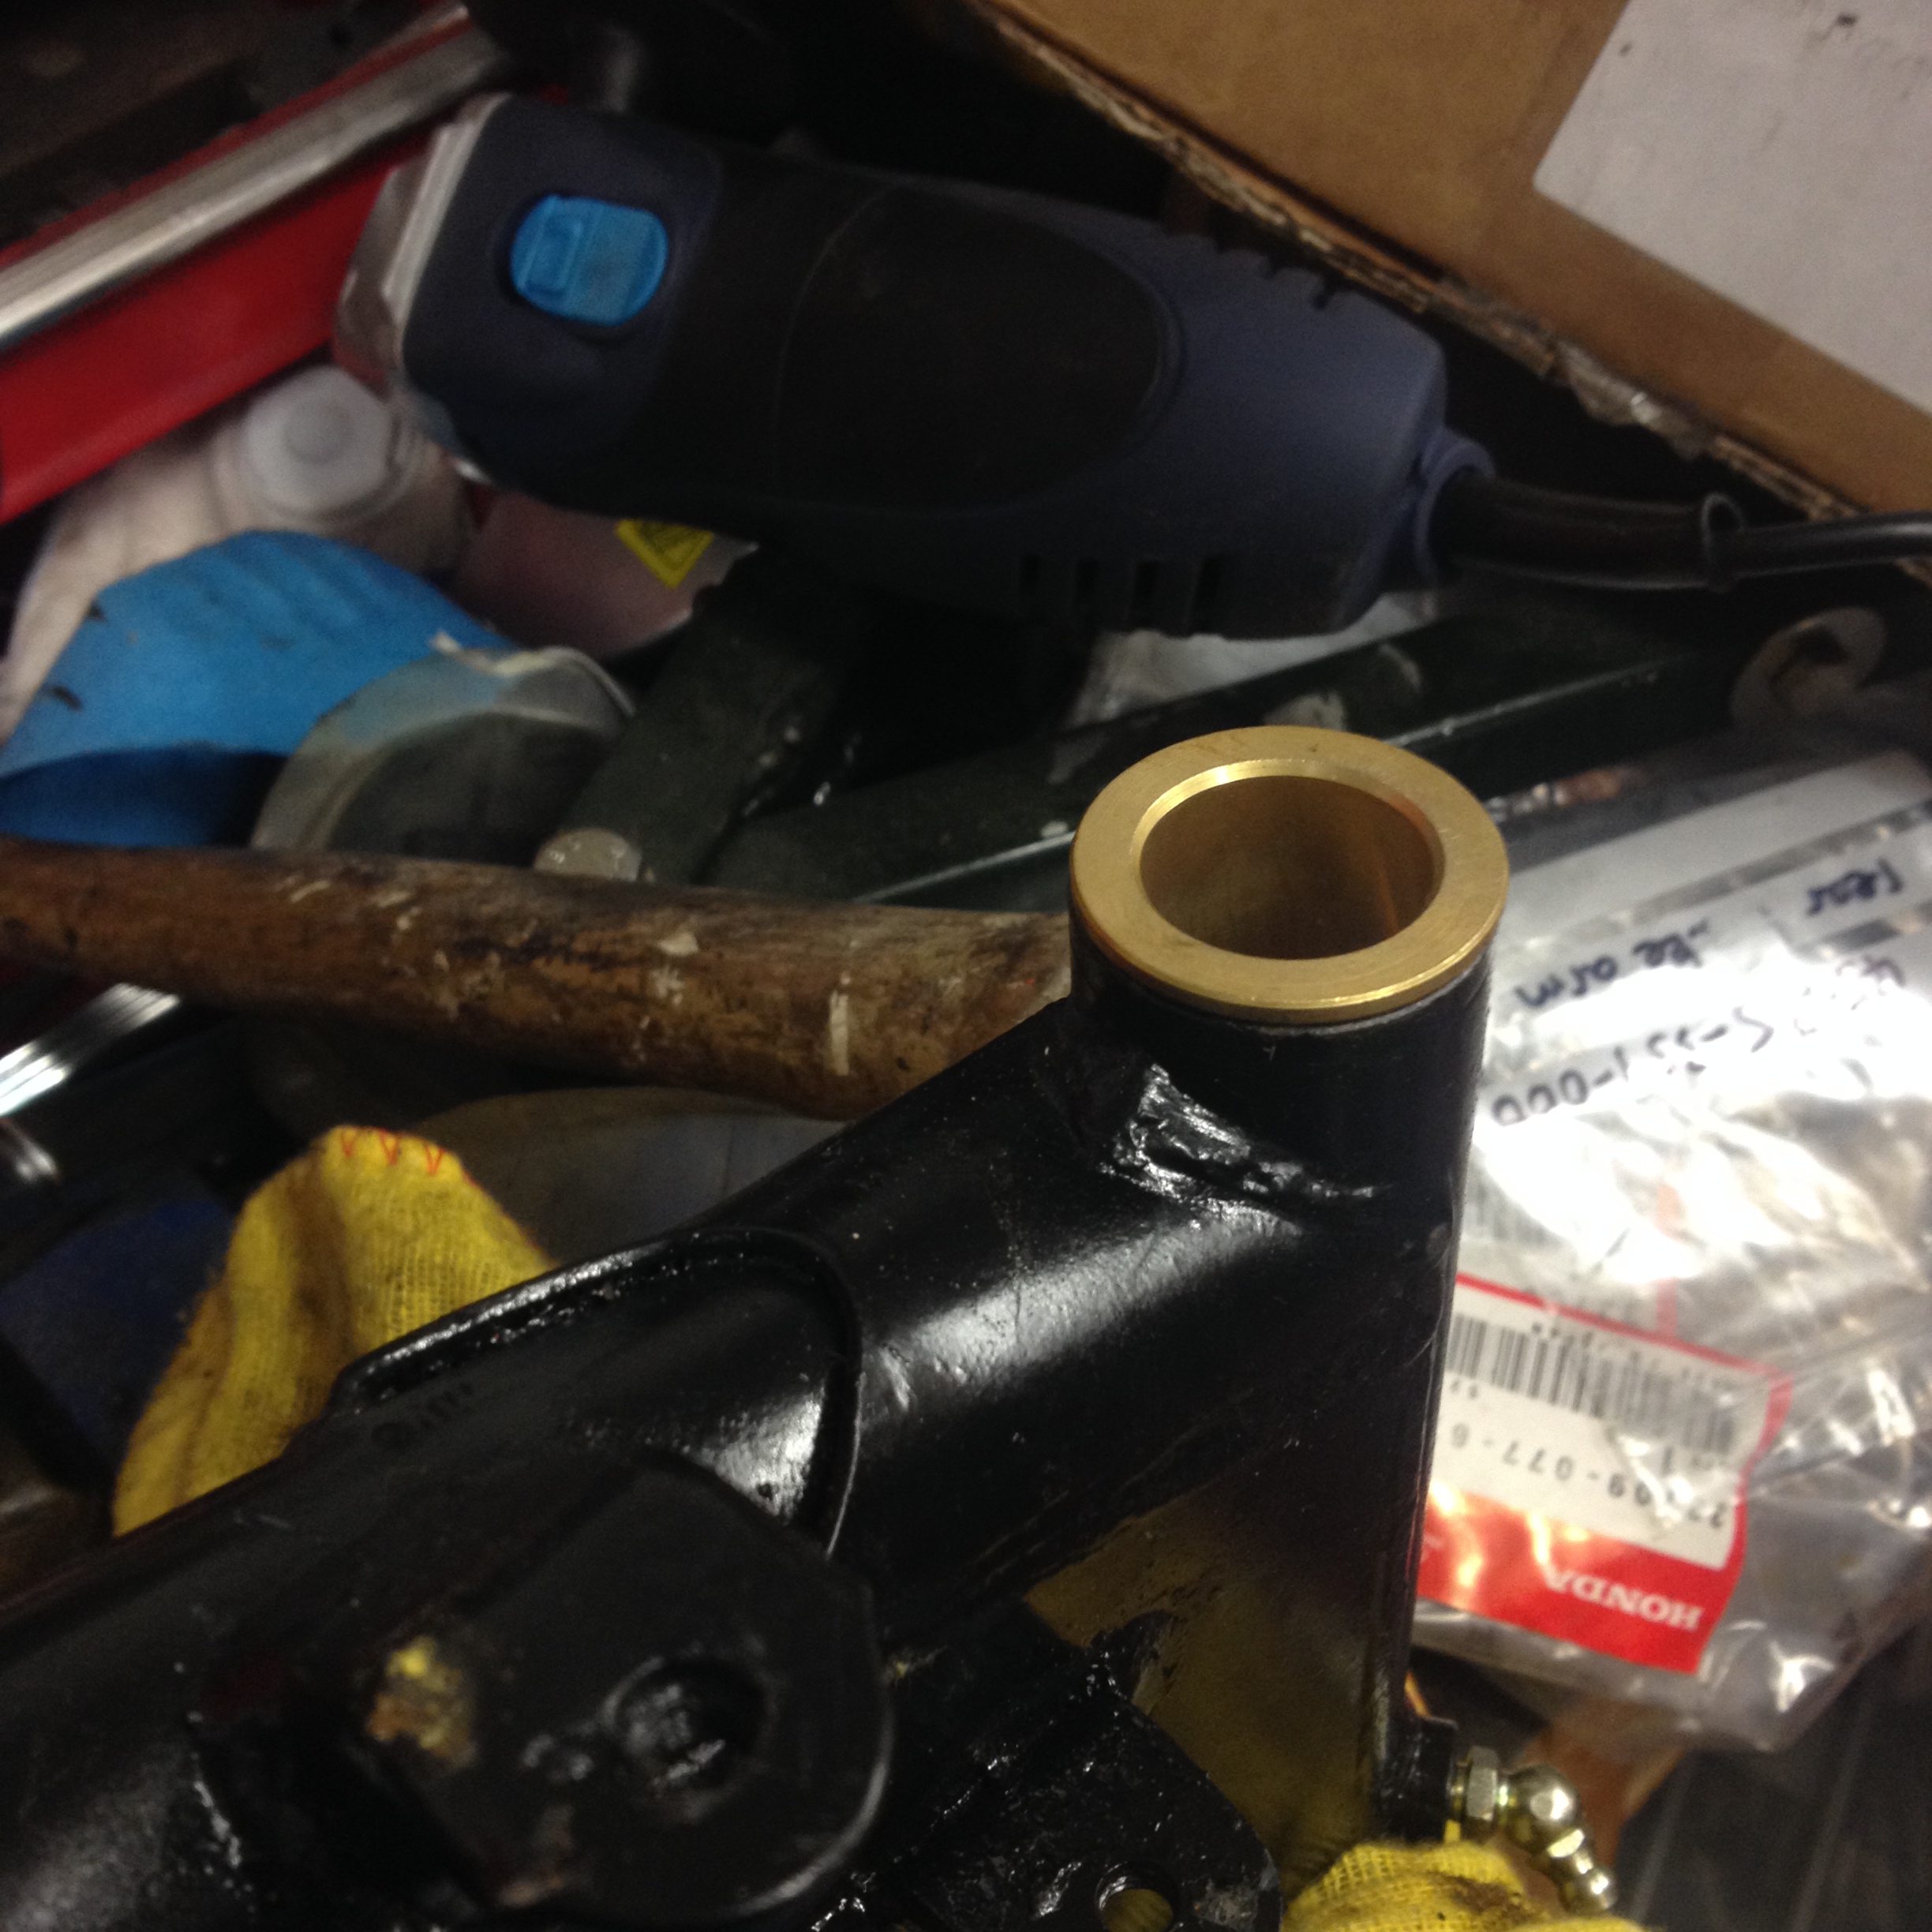
The new gearbox sprocket rocker cover breather pipe and choke cable also came and are all now fitted. I note that the case protector (11353-356-000) is missing so I will borrow one from another engine I have and ask Lovely Wife to pick up the one I have ordered from the US when she goes in June.
The swinging arm is off and a welding repair done on one side where the rear footrest was cut off. Ha! that sounds easy but I had to hammer the swinging arm spindle out and it did not come quietly. This took fifteen minutes to drift out as I didn't want to damage the threads.
And now, a complete waste of time (see later)....
The side stand arm is off and the arm straightened in my new hydraulic press (before I got that I'd have done it in the vice) as it was bent in two planes, and the mounting gap was also bent wide, so that is now closed back up.
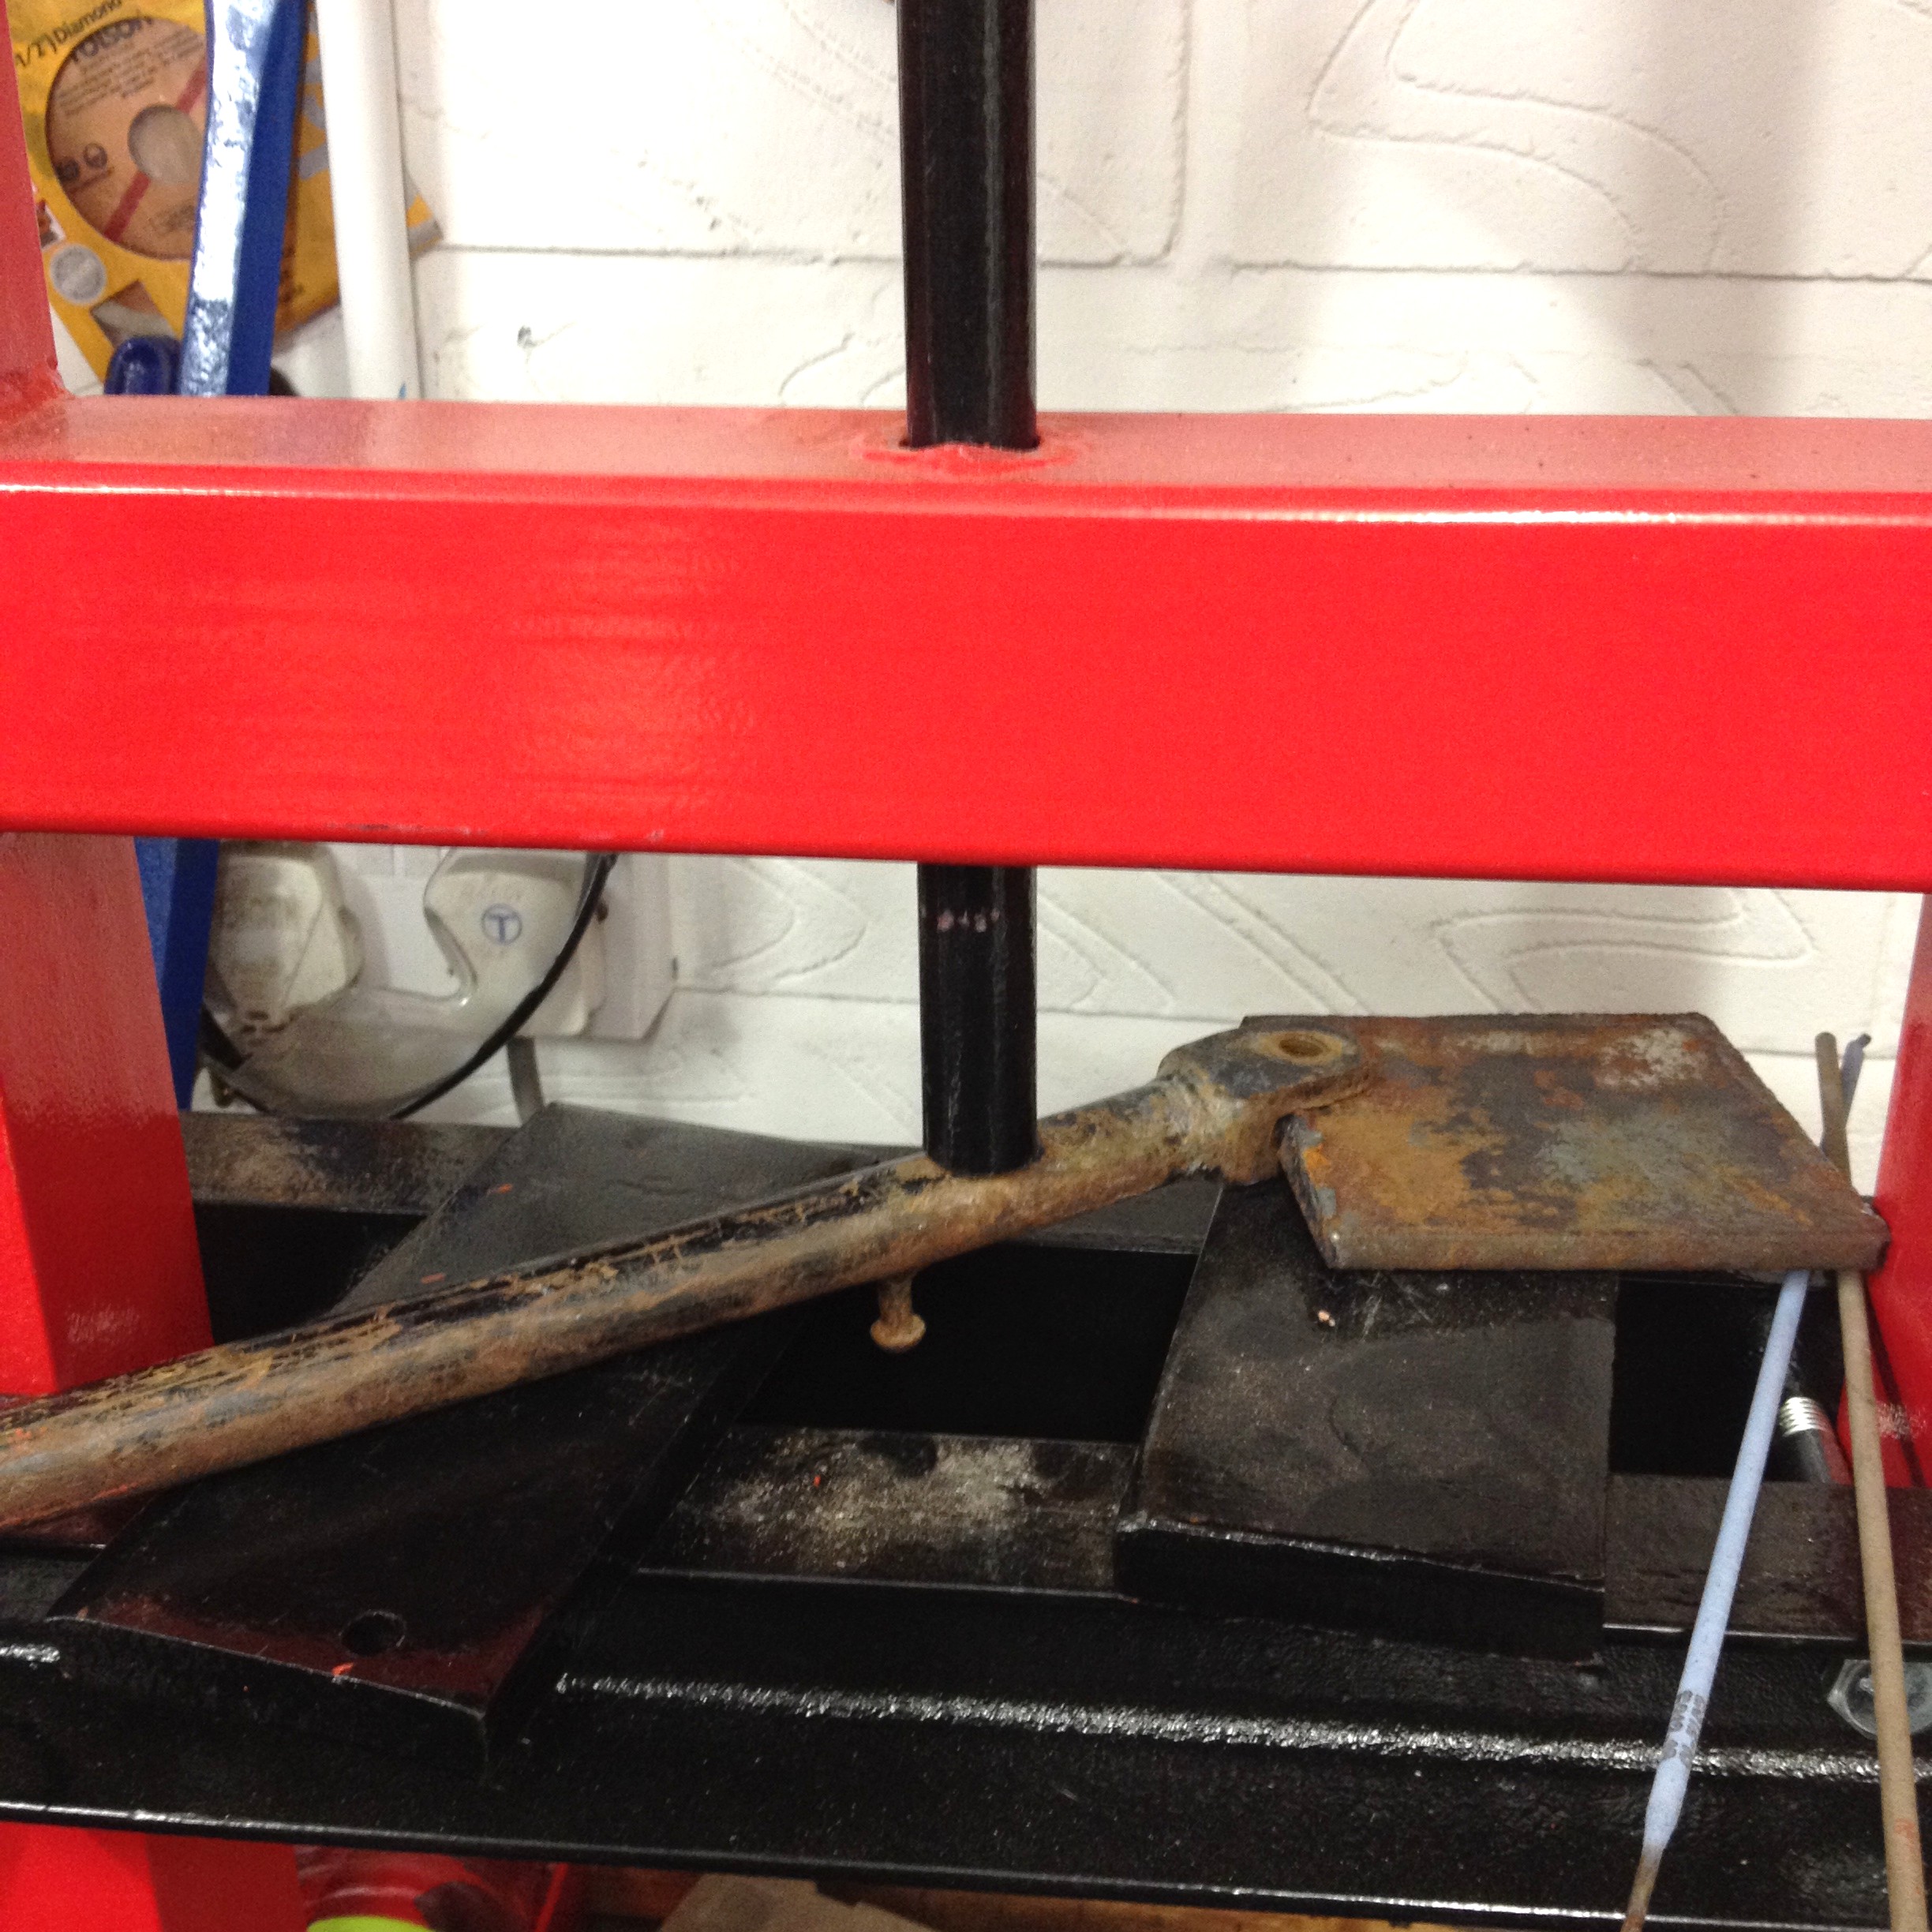
The side stand arm and the rear brake stopper arm were both nearly paint-less rusty so I have put them in paint stripper to clean them off ready for a repaint just to tidy them up. Lovely Wife now has a new utility room, and I am not allowed to strip paint in the stainless steel sink there anymore as it is all brand new, so I am doing it in a plastic tub in the garage or garden.
I am trying an enviromentally friendly stripper as I ran out of the old stuff. The new stuff is crap at stripping paint because all the Honda paint is still there after 4 hours when you wash it off, but I am saving the planet, which is a Good Thing. I may buy more Nitromors or equivalent.
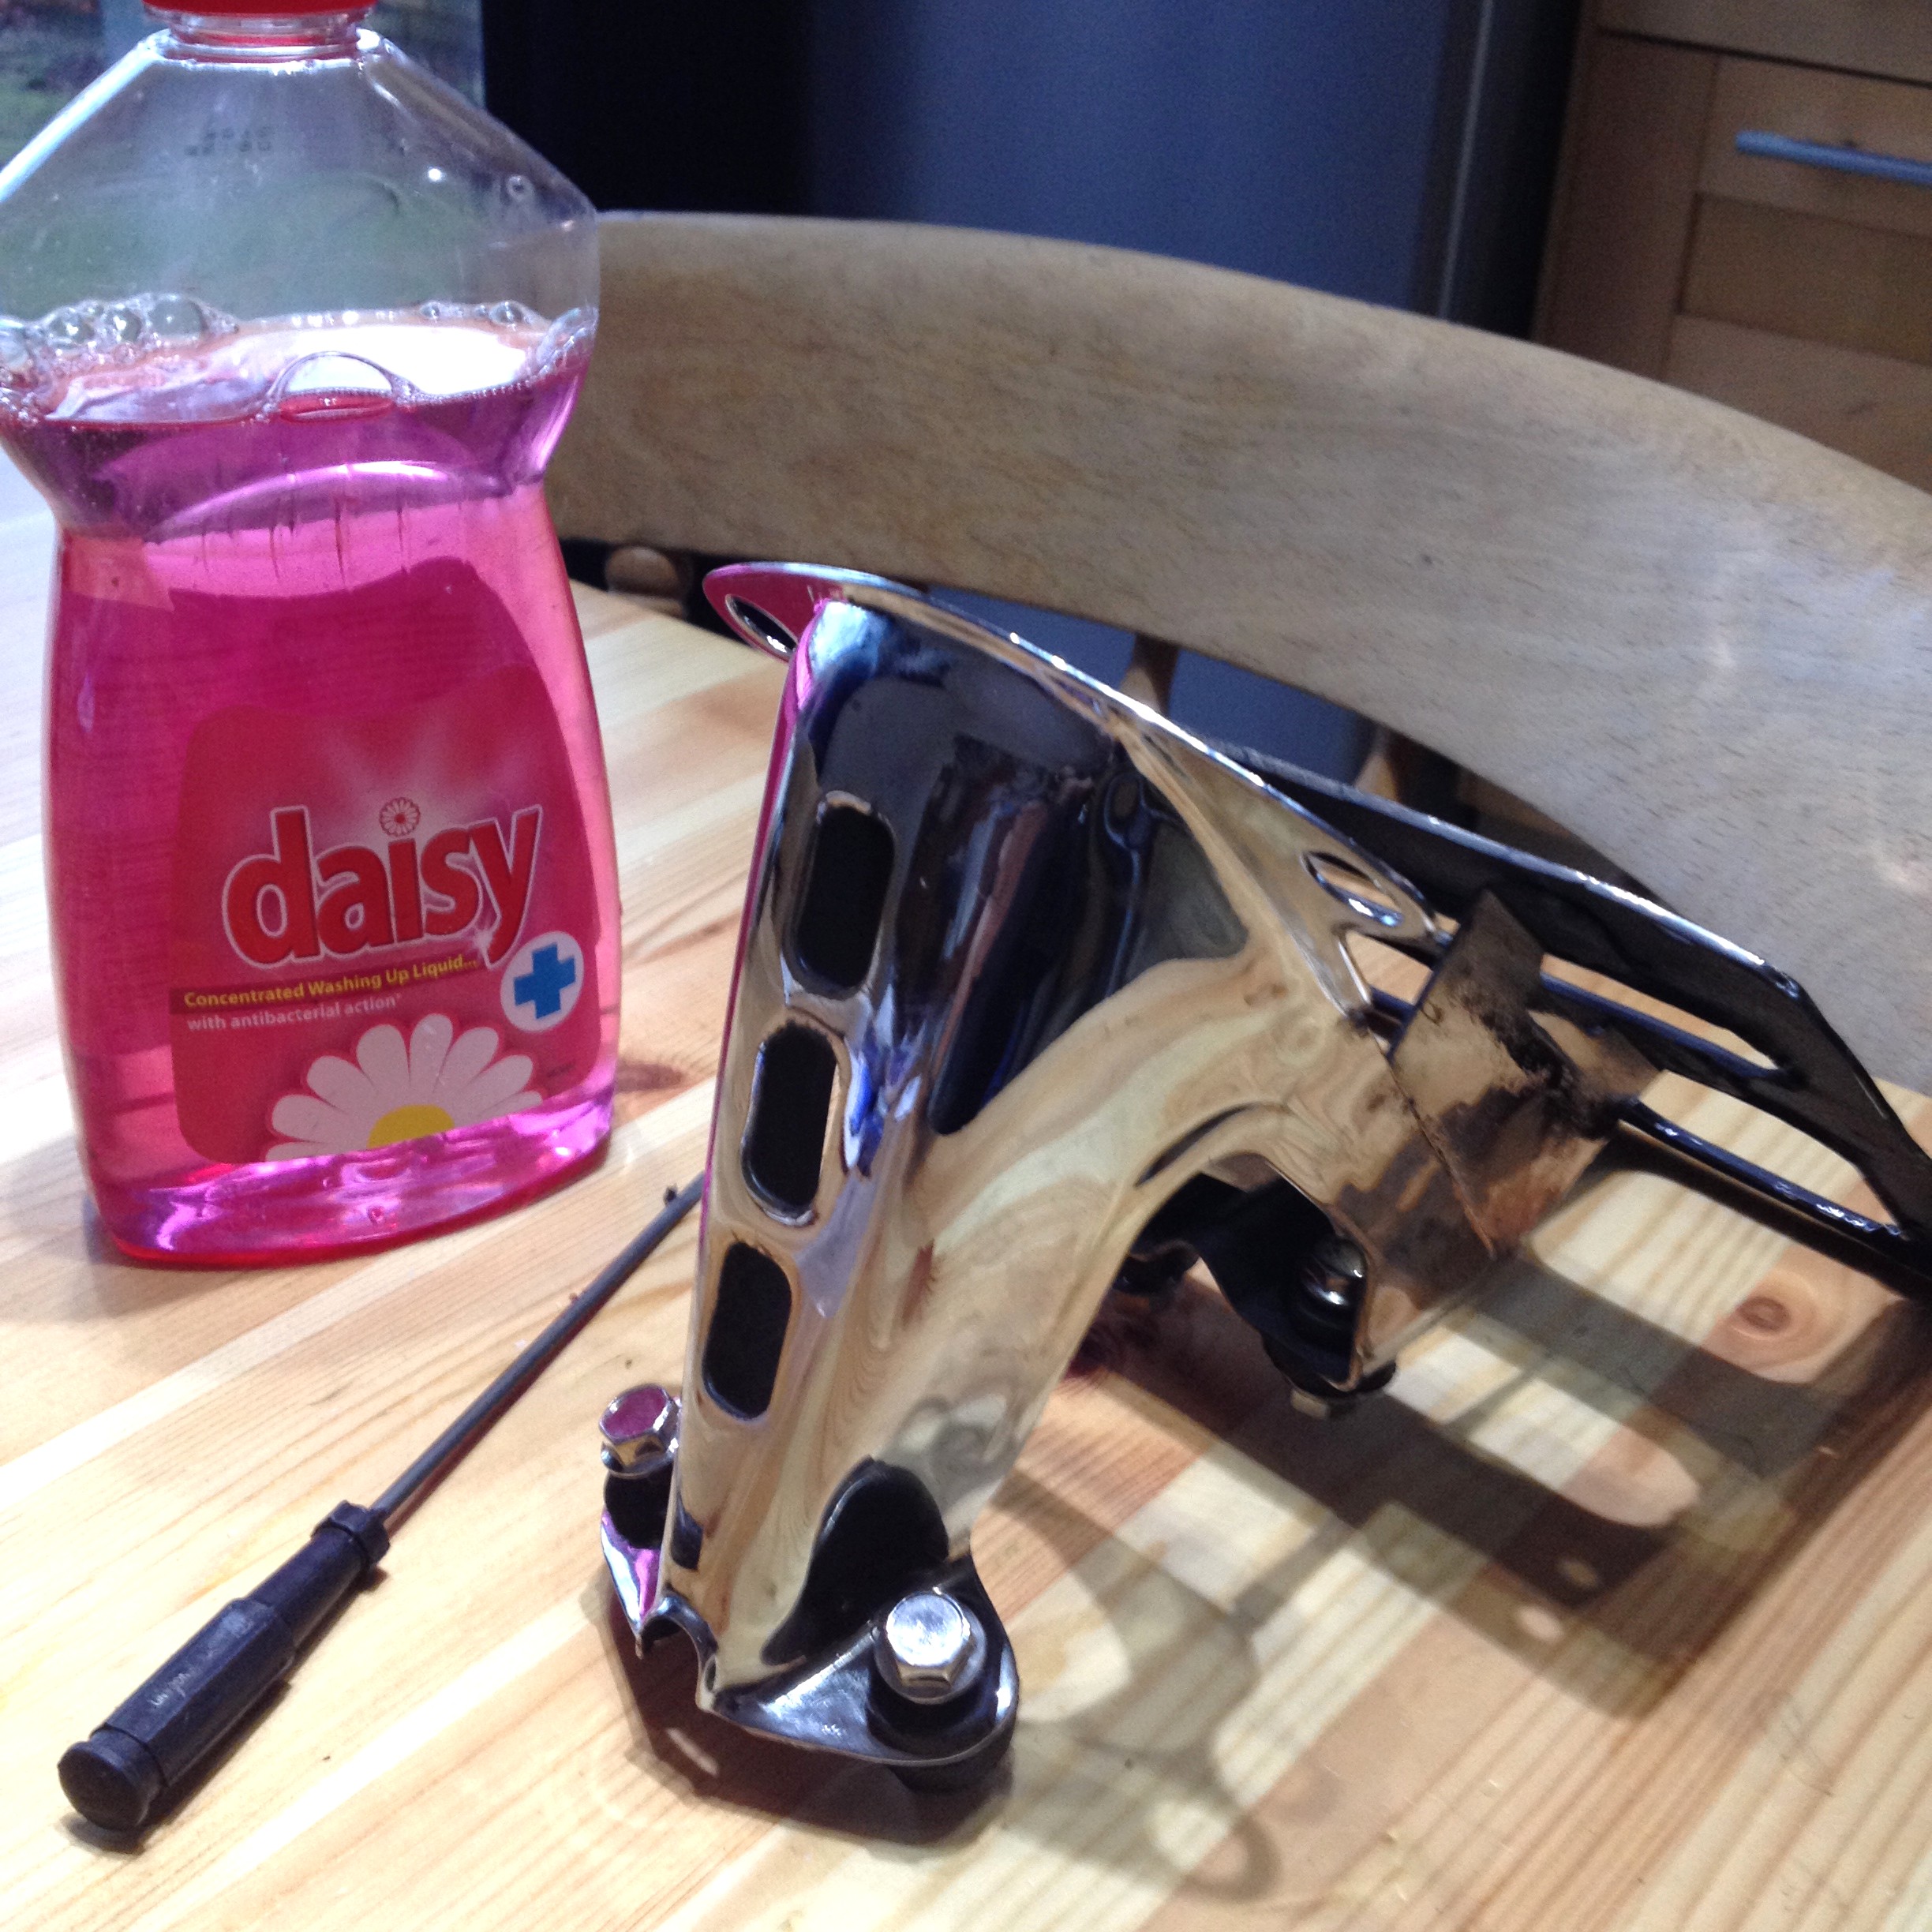
I have also realised that I will need a rear number plate/licence plate holder if I get an MOT and registration. I have one that I made up from two halves of other ones, including the original one on my restoration 250 that cut my arm as it had been hacksawed and left razor sharp by a previous owner.
I welded a new plate holder on from I think a CB500, that was then rechromed. I think I will make a stainless blanking plate for where the rear/tail light should be so it looks tidy. I can't put a light on it, although I have a spare one because the law is if it is fitted it has to work. So best not fit it then, eh?
This bracket is my spare one, and is a straight fit as the original holes on the rear number plate line up of course. I fitted some old/used rubber grommets that came off the part originally which I had saved, (tip: it's easier to fit these with a little washing up liquid on the groove of the grommet, apparently we use 'daisy').
I have realised another problem in that the two front mounts for the rear mudguard push into two rubber grommets that are part of the back of the battery/air filter holder I have now taken off. Hmm I will have to think about that.
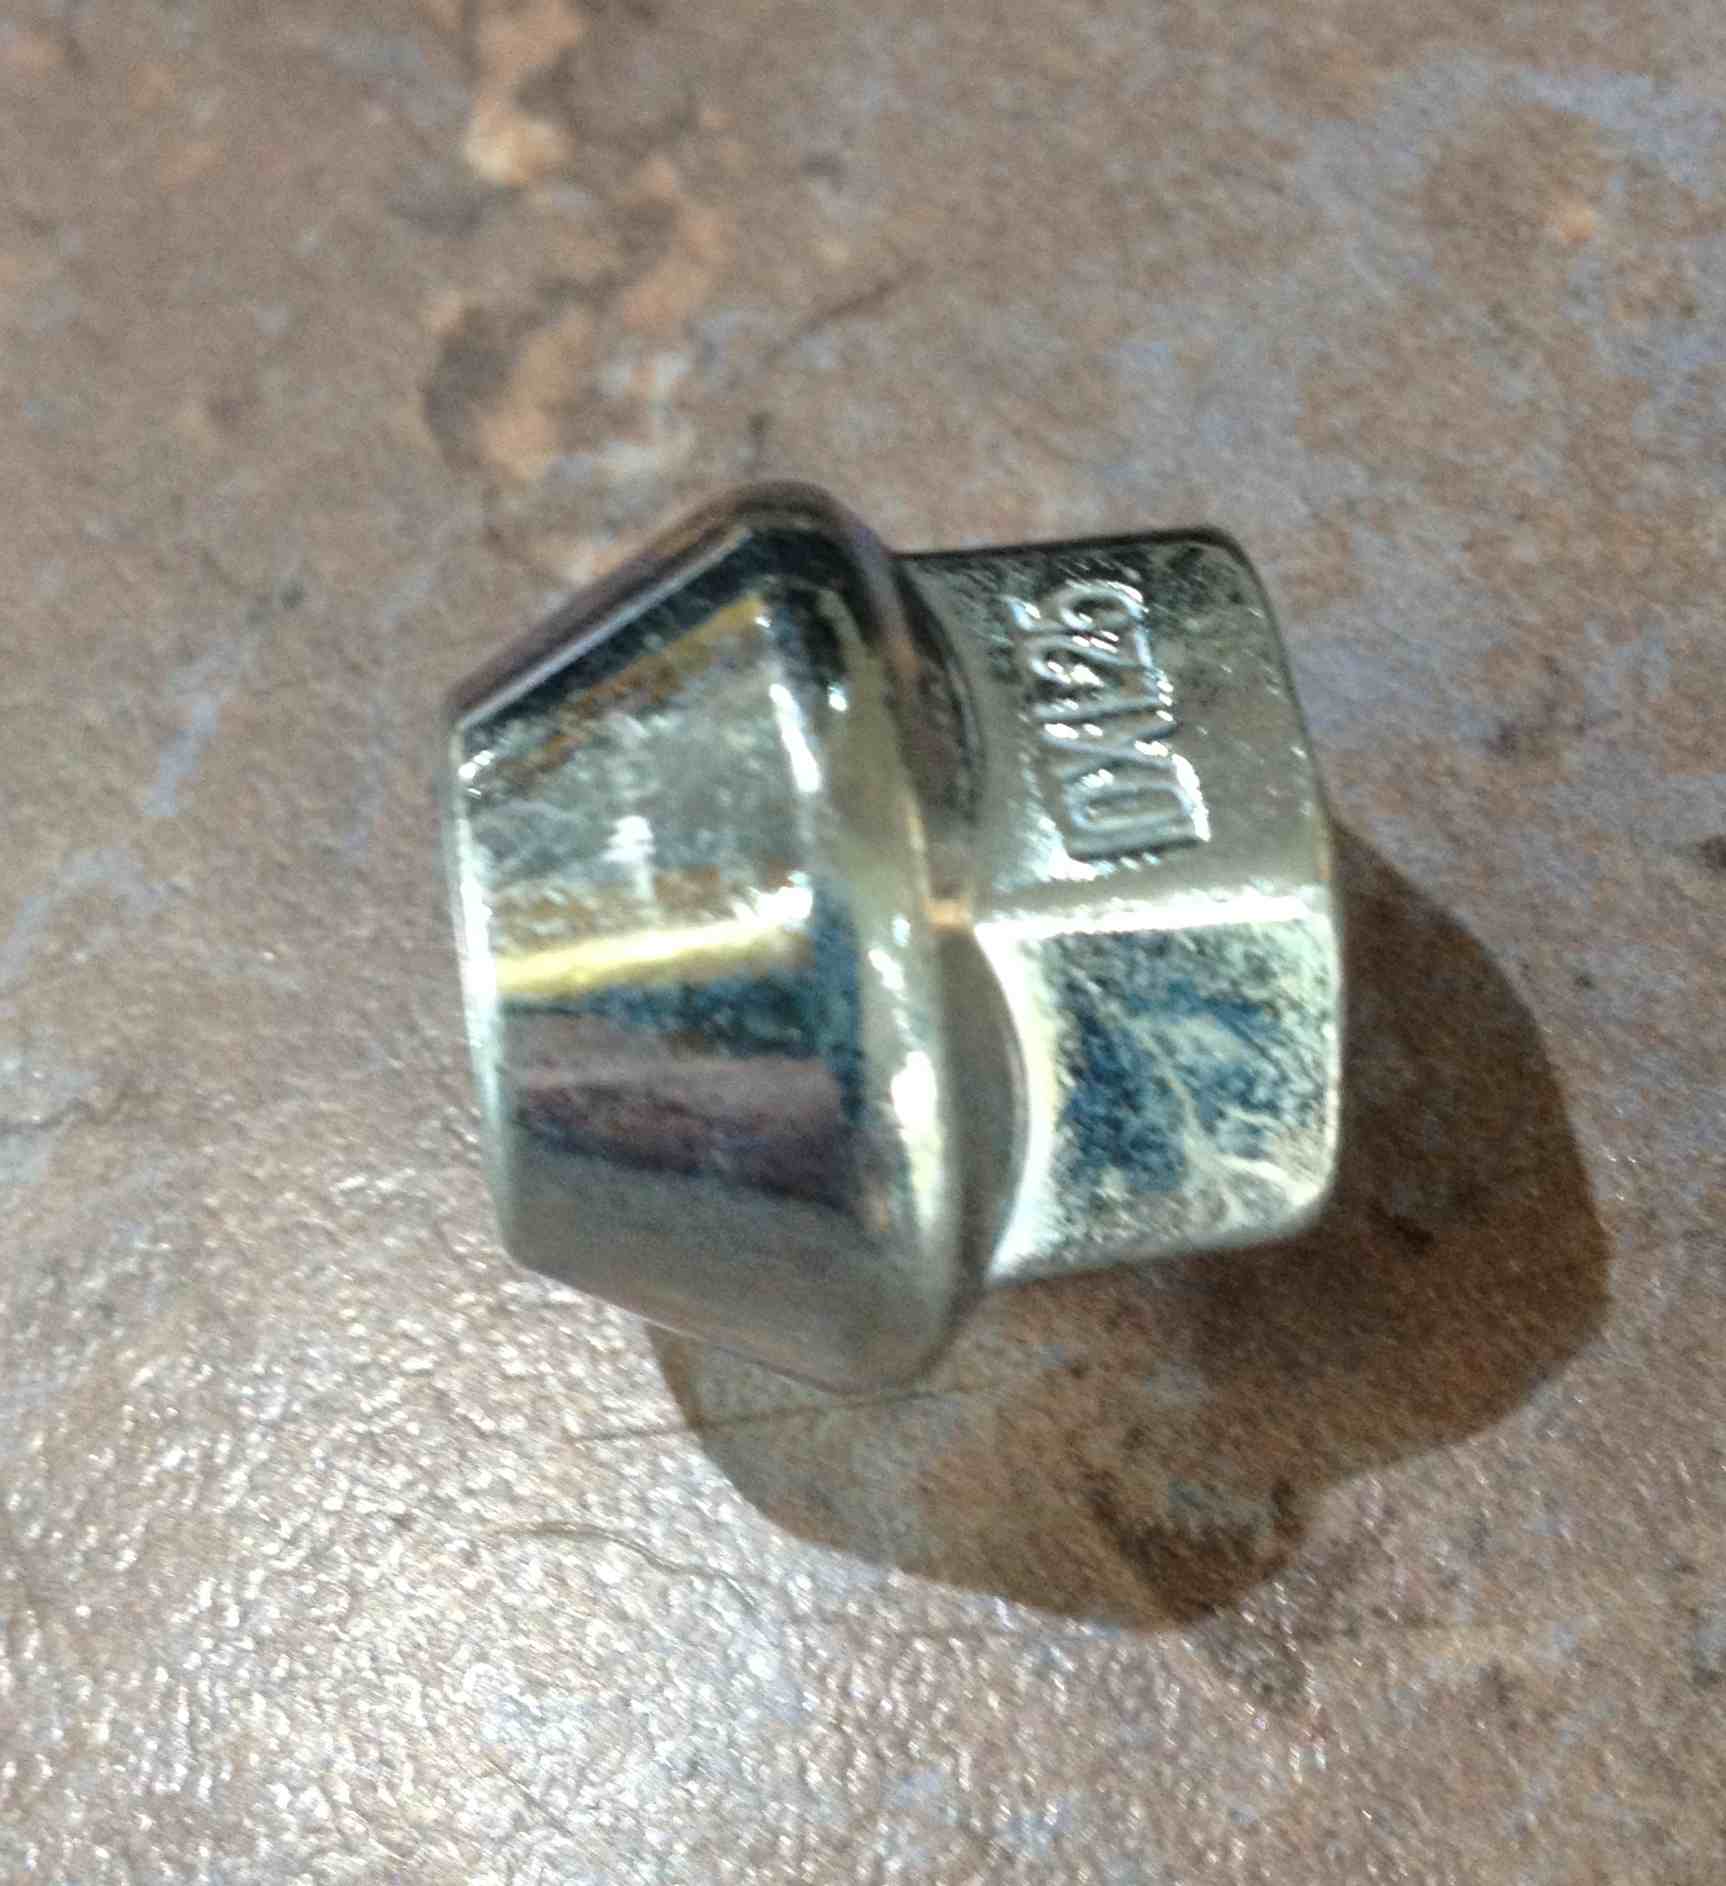
Now I don't want to sound too intense, but there is a little issue; the bolts are M10 x 20 1.25 pitch metric fine, (part no. 95701-1002000 £1.22 incl. tax each from David Silvers). However they are JIS head which is a smaller head than normal. If I use normal M10 sized flanged bolts even my 1/4 inch socket set won't fit inside the footrest bracket; the correct bolts are special order from Silvers. I will order a few things before I go to Japan next Thursday and they will be here when I get home. In the meantime the best I can do in the restricted space is use some allen head bolts M10 x 20 fine, because I can obviously get an allen key in, whilst I await the right bolts.
Today (Fri) more parts came including two M10 x 1.25 (metric fine) wheelnuts. They were not the same as in the sellers picture but were ok. This seemed the easiest way to repair the captive nuts that hold the rear footrests on.
I didn't use ordinary nuts as I wanted a shoulder.
So I turned the conical side down in my very old short bed lathe, leaving the shoulder, and then welded them into place from the rear. After welding I ran an M10 fine tap down them to be on the safe side.
 in a lathe
  becomes
 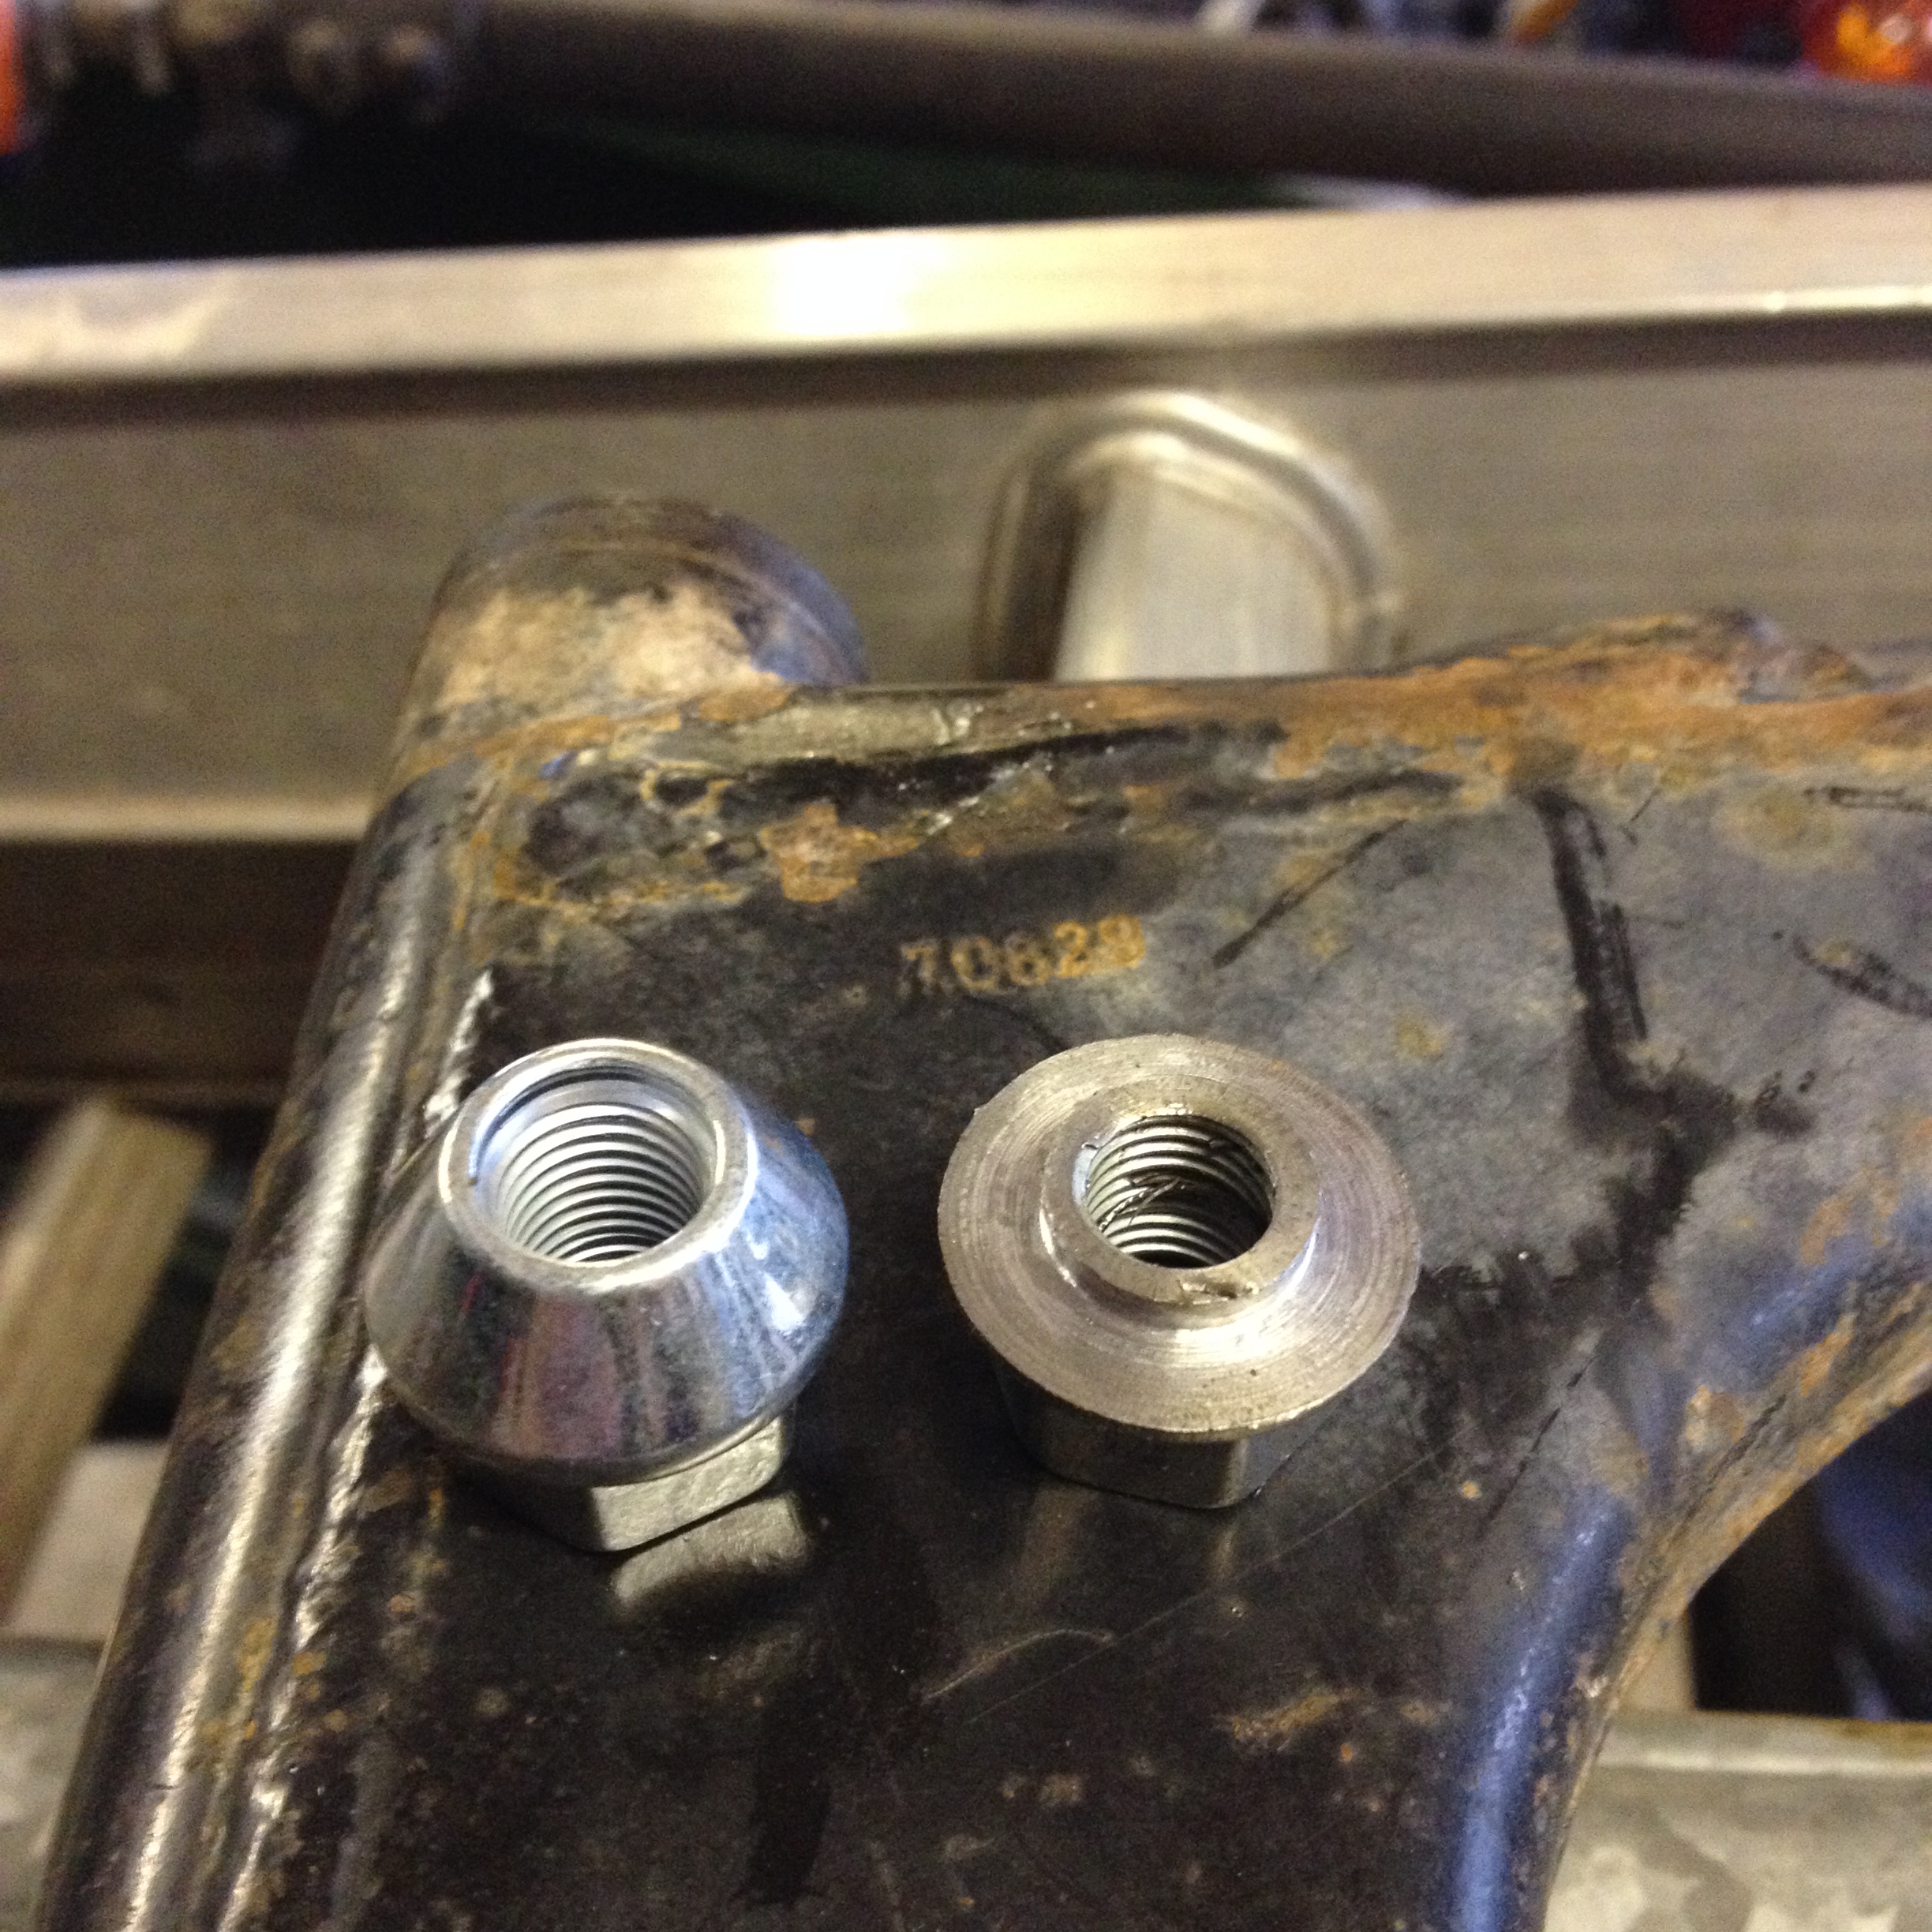 goes here
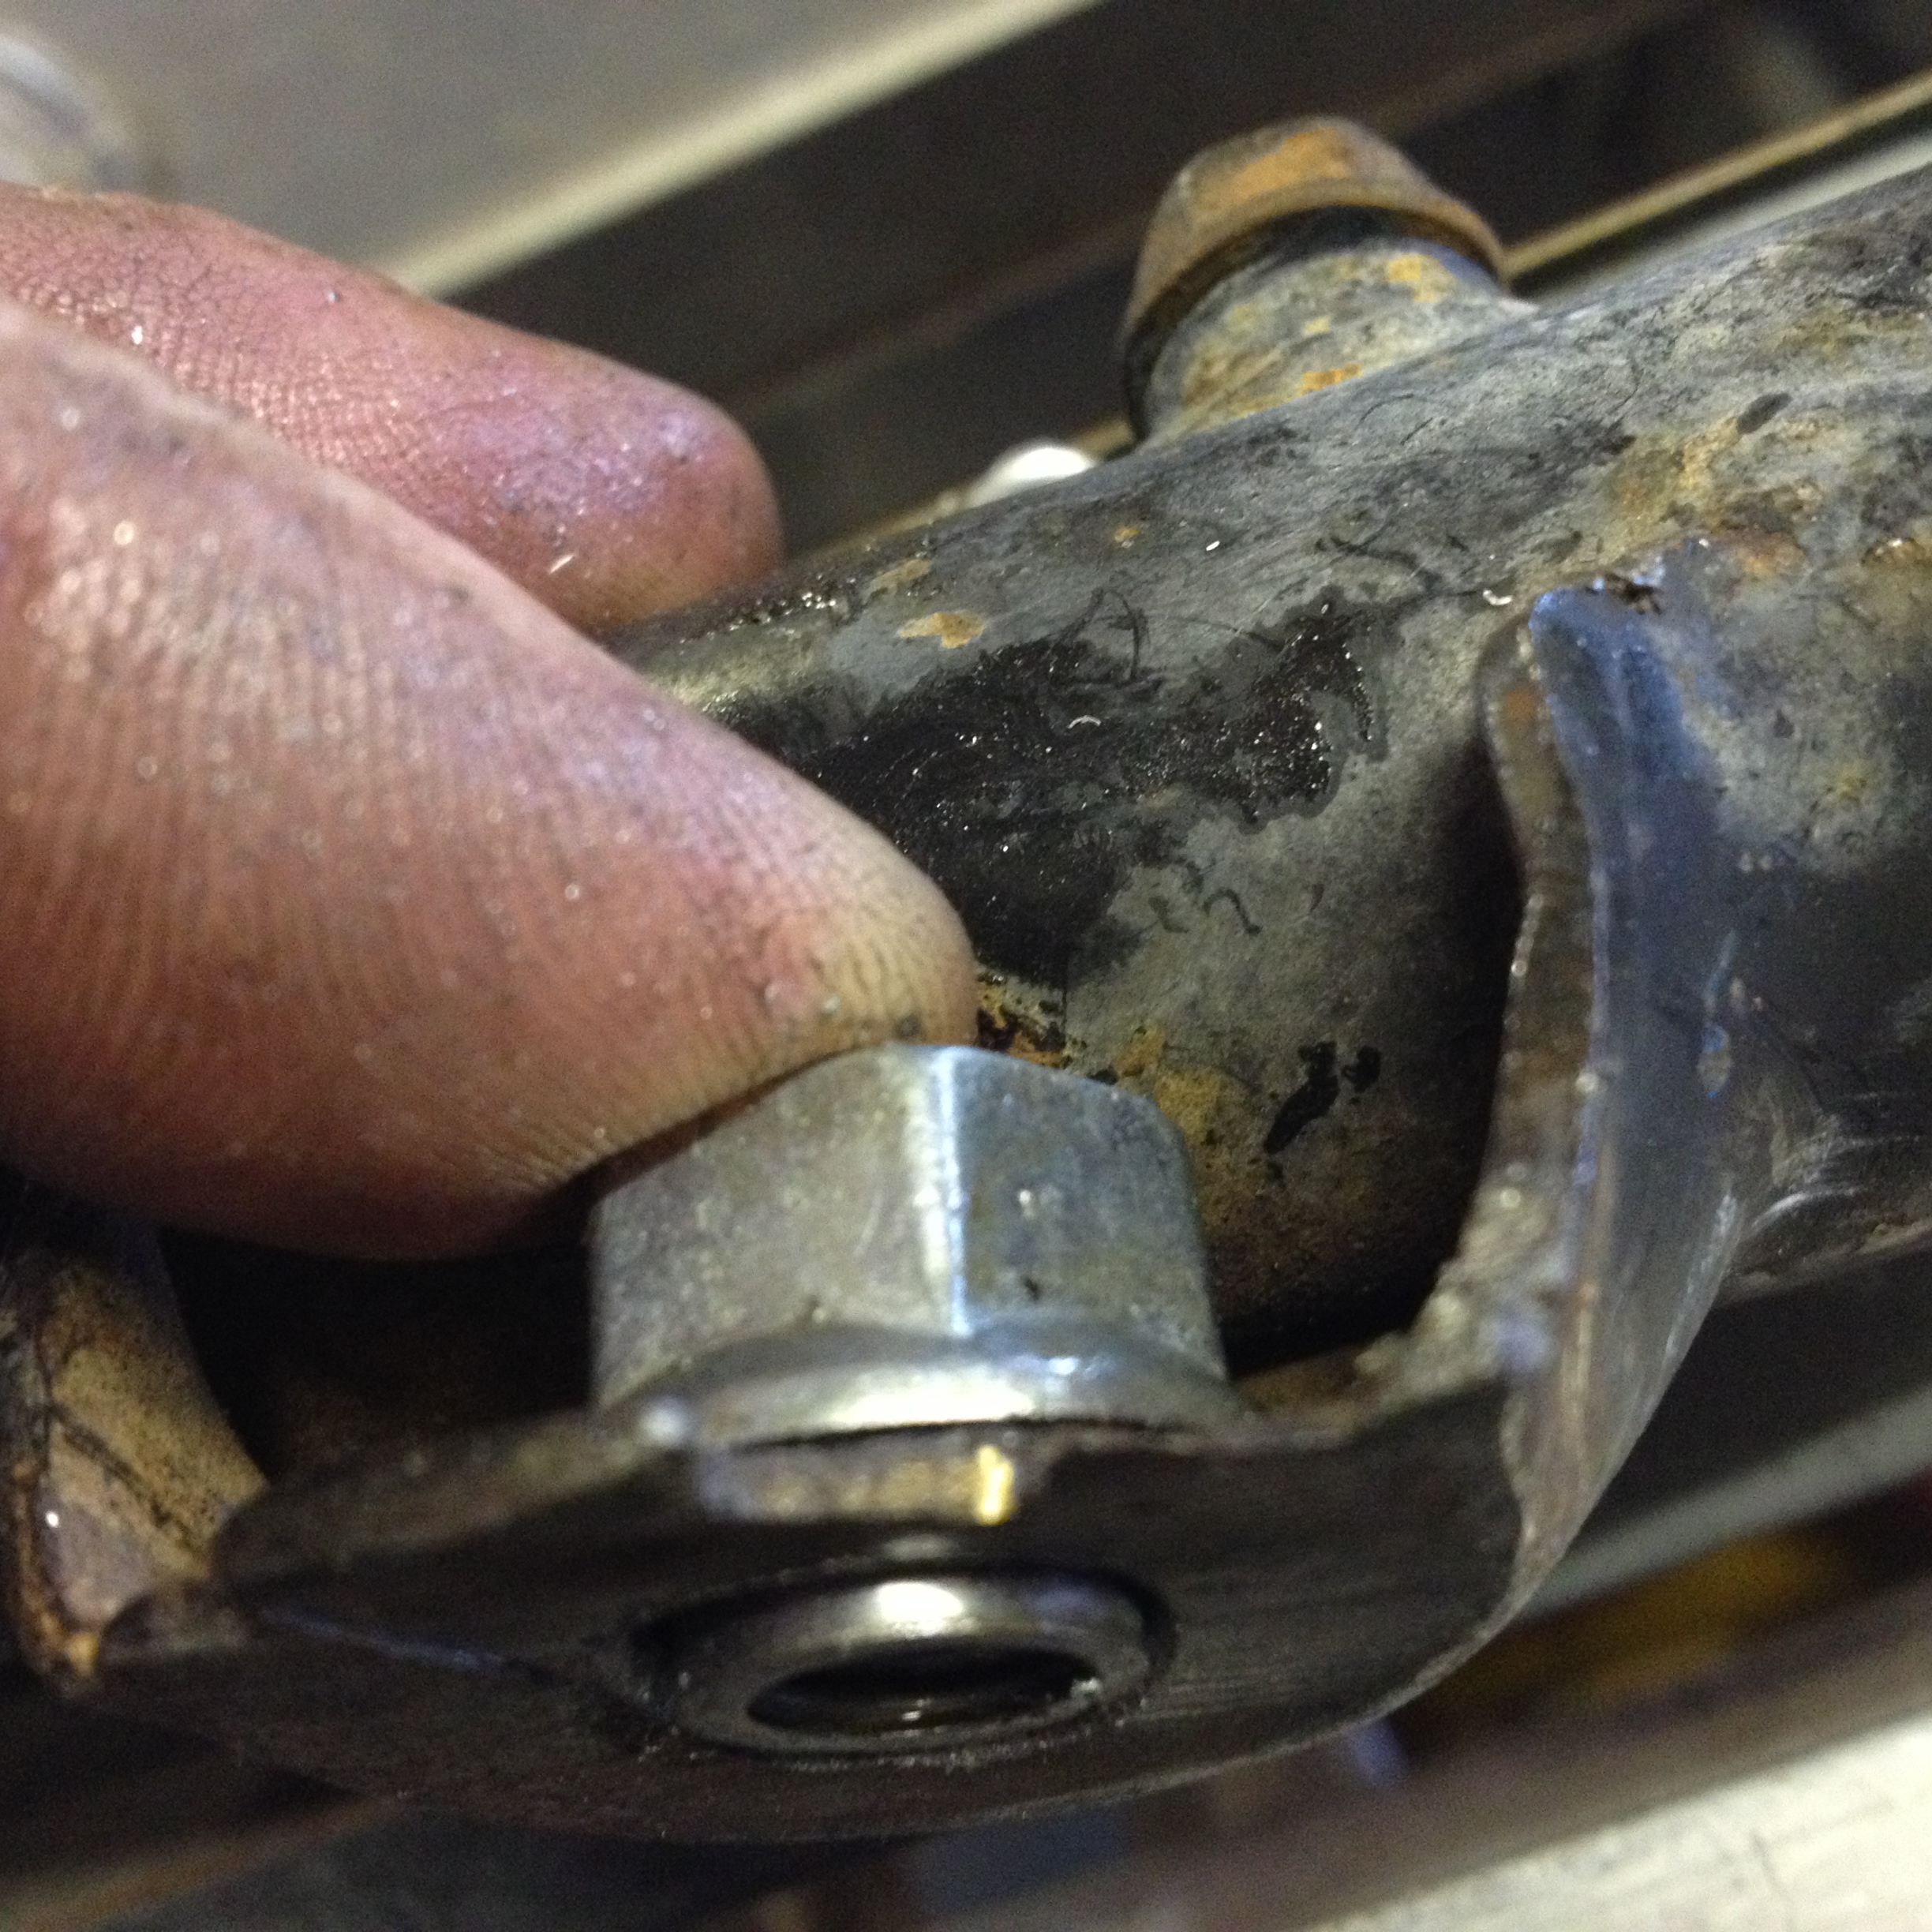
Next was a paint strip of the arm, using new stripper that actually works! Remember I am not allowed to use The New Sink.

This was followed by a rinse/dry and a couple of coats of etch primer. I used to only use etch primer for aluminium, but a guy I met who paints bikes for a living said he used it for everything, so I started to do that too.
Before I finish tonight I will paint it a coat of black. I have ordered a new grease nipple, and when the footrests come I will re-assemble the whole assembly.
Note, the black was from what Whatty in Australia calls a rattle can. This is not a restoration, just making it tidy/legal. The garage was cold and the finish was dull, so I put the heater on this morning and then did a second coat when the room was up to temperature and this time it dried shiny black.
Oh yes, the new plug and spare, and throttle cable 'A' came today (Sat).
I bought a new angle grinder and set about the huge lump of multi layered weld that was meant to be the sidestand bracket. After a good while and 3 cutting discs the added-on metal was gone, and It should look like this

but under all that weld I had this!

This is all that was left of the original bracket, so I decided to cut the lot off and make a replacement.
I cut a cardboard template, and then cut it out of some 8mm thick steel. Most of the cutting was with the angle grinder with a thin cutting disc in.
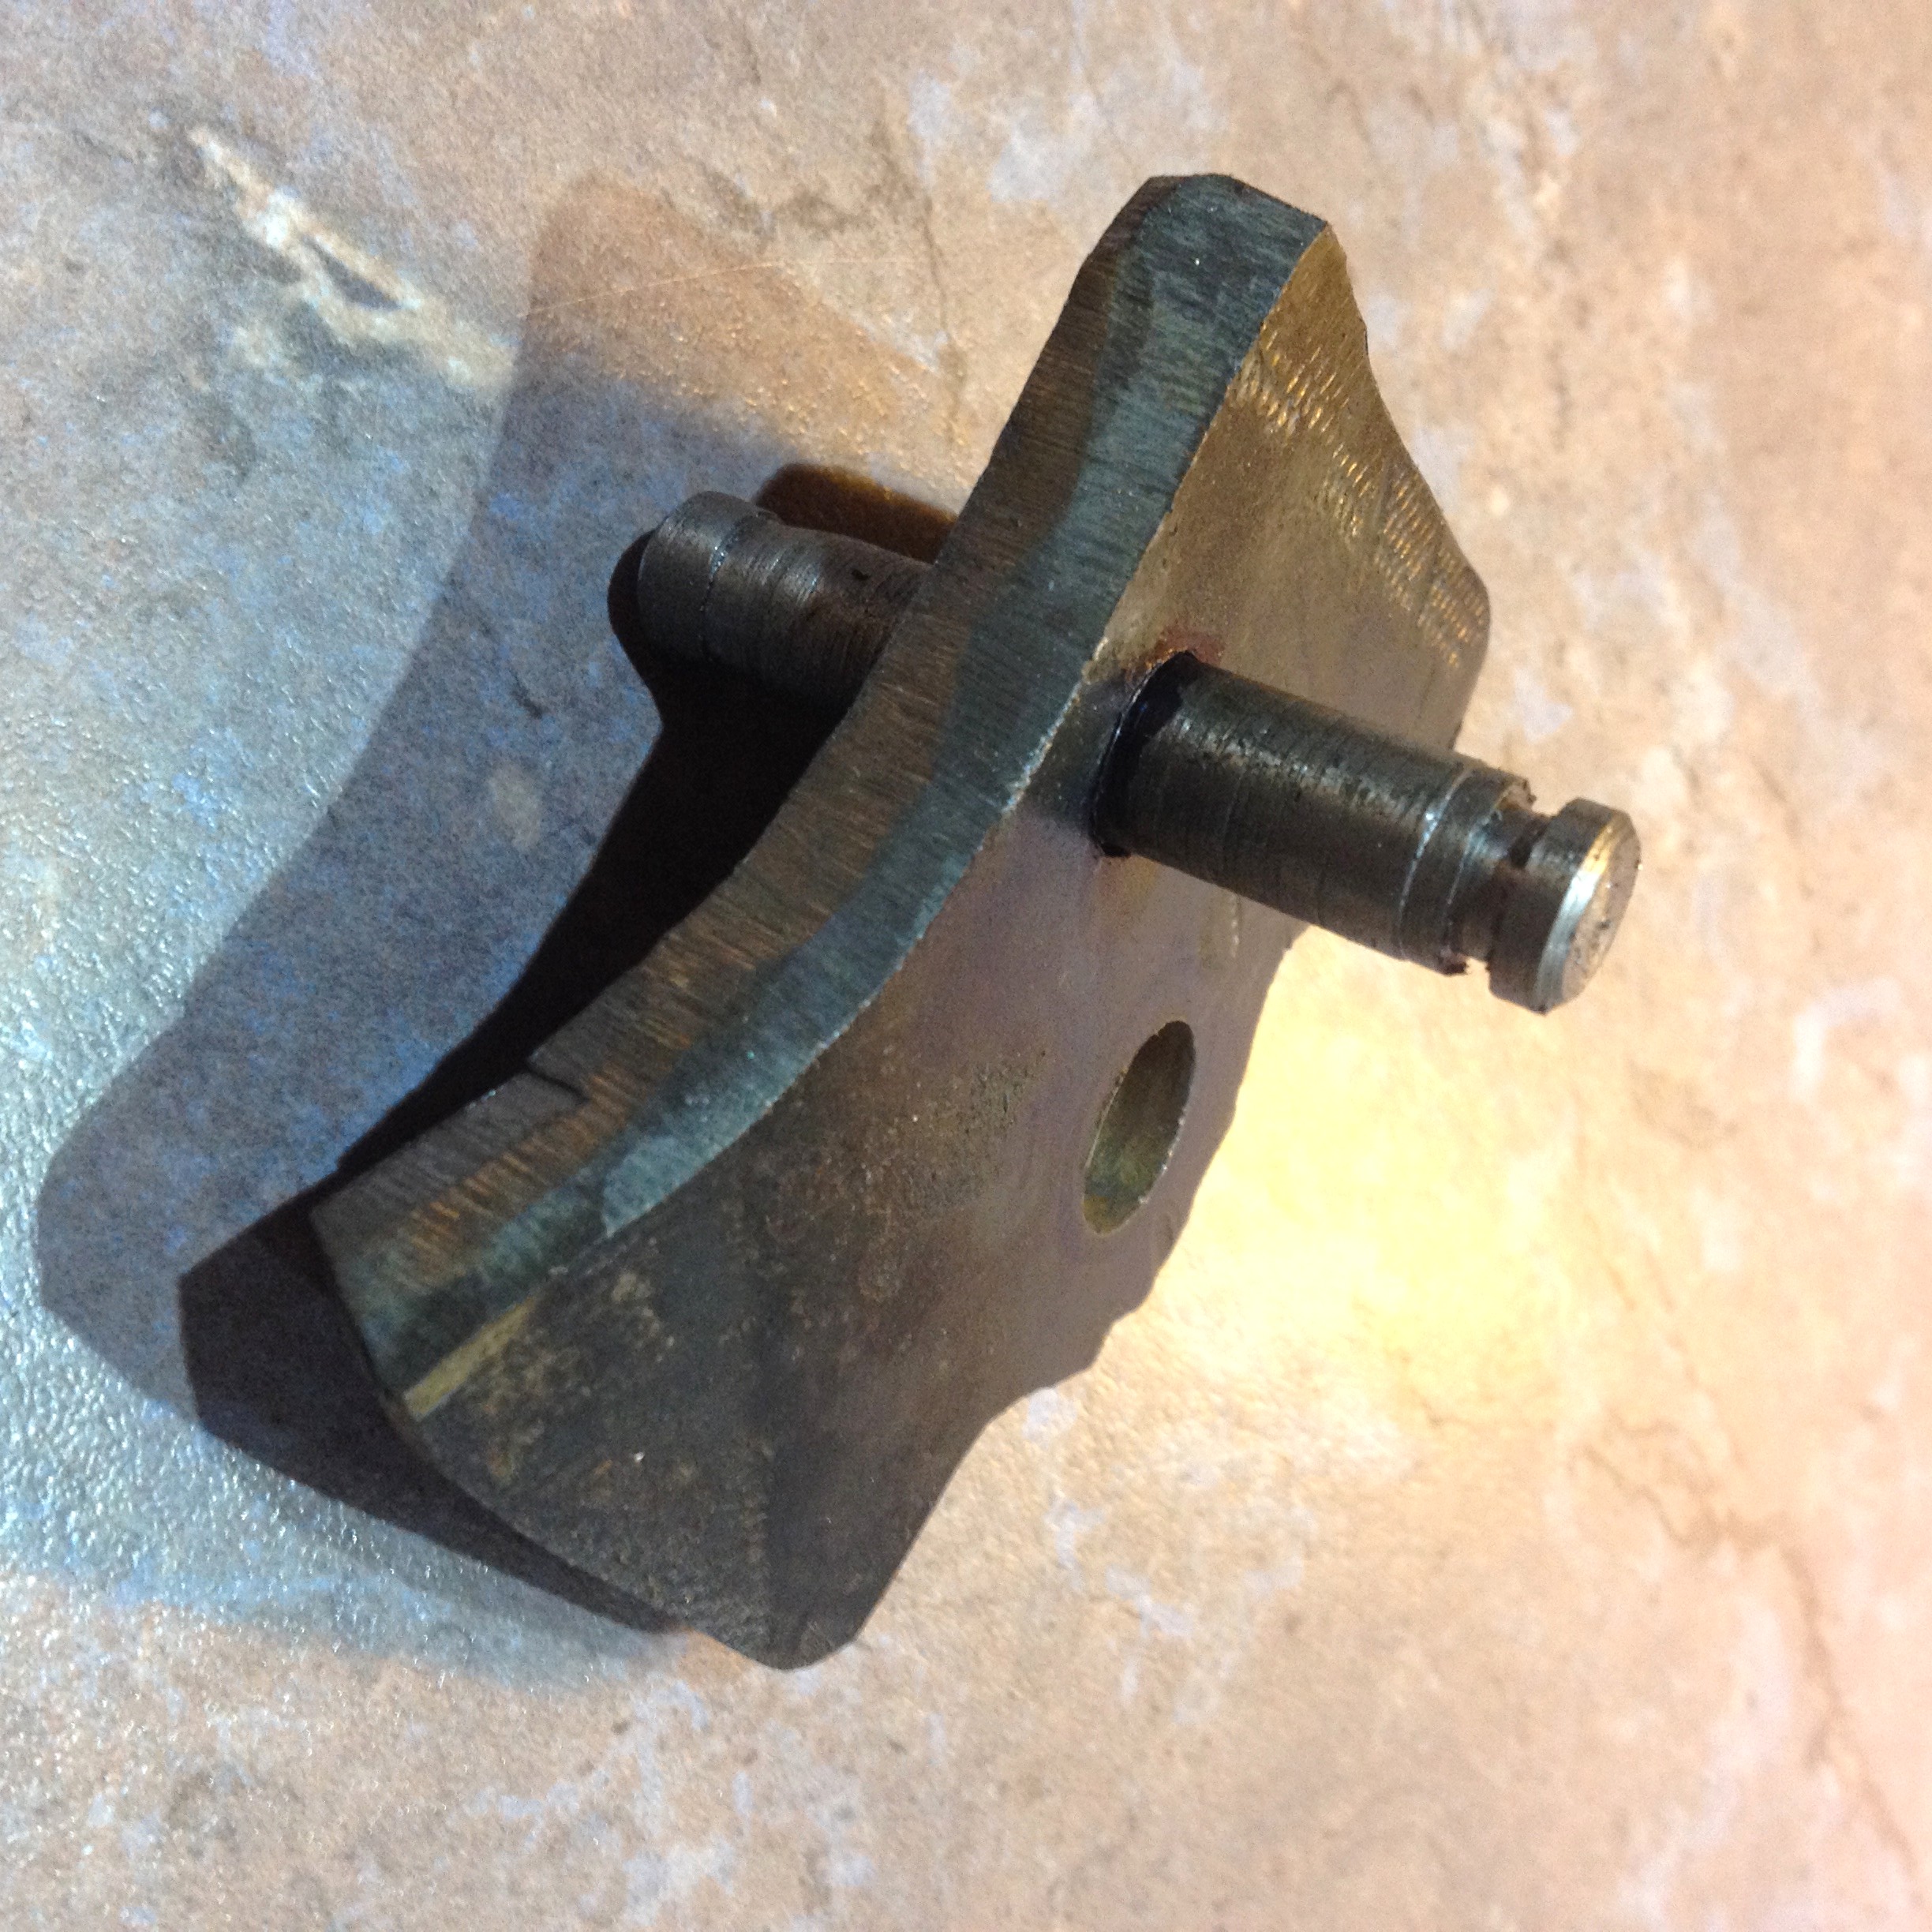
I tried to get the bends in, but it was very hard, especially the top one, even heating with an oxy-acetylene blowtorch. The result is this

shown with a new spring and a new pivot screw. The top spring mount runs through a 10mm hole and has a groove turned on the end to hold the spring. On the original, this pin sticks through 20mm each side, I have no idea why there should be 20mm on the inside but I have copied it; so with the 20mm each side and 8mm of plate the pin is 48mm long.
I have not welded the pin in yet ( I will weld it from the back) as I want to check that the groove I cut with a parting tool in the lathe is big enough, and I have had enough of doing it for today and a cold bottle of dry white wine awaits.
The hole for the pivot bolt is 12mm. Time taken altogether on this bracket today so far is about 3 hours. Now all I need to do is weld it onto the frame. The frame looks like there is a reinforcing tube inside it where the bracket goes. I'm not sure how neat it will all turn out, but it has got to be better than when I started!
I forgot to mention that earlier today I fitted the new Honda genuine throttle cables and twistgrip with 2 new stainless screws, and including a pair of the right handlebar grips.
Next Day: Today I fitted the side stand bracket on. I was right and the groove on the pin needed to be twice as wide as I had made it, so I did that first. There was some metal missing from the frame where the original bracket had been torn, before the previous repair, so I made good that and ground it back, then stick weld tacked it in place (with the stand leg on and the swinging arm and a damper back in rough place to check clearance etc.) from the rear and finally used the mig* welder to put a seam down on the front. I guarantee that this is NOT going to come off!
*By way of an aside, I asked Lovely Wife to pop down to the local Machine Mart branch as it was Sunday, the mig welder needed a new tip before I could use it for this job, and I had none left. She was greeted by 'and what have you been sent to get?' somewhat patronisingly.
I'd written down the correct part number for a pack of 5, and she was given the wrong ones by the sales numpty, so she had to go back. When she told them the part number was different to what she had asked for they said they'd only looked at the last part of the number. Then she got the right ones. How does that company make any money? When I go there I'm always the only customer in the store, and I know more about what they sell than their salemen do.
Back to the project.
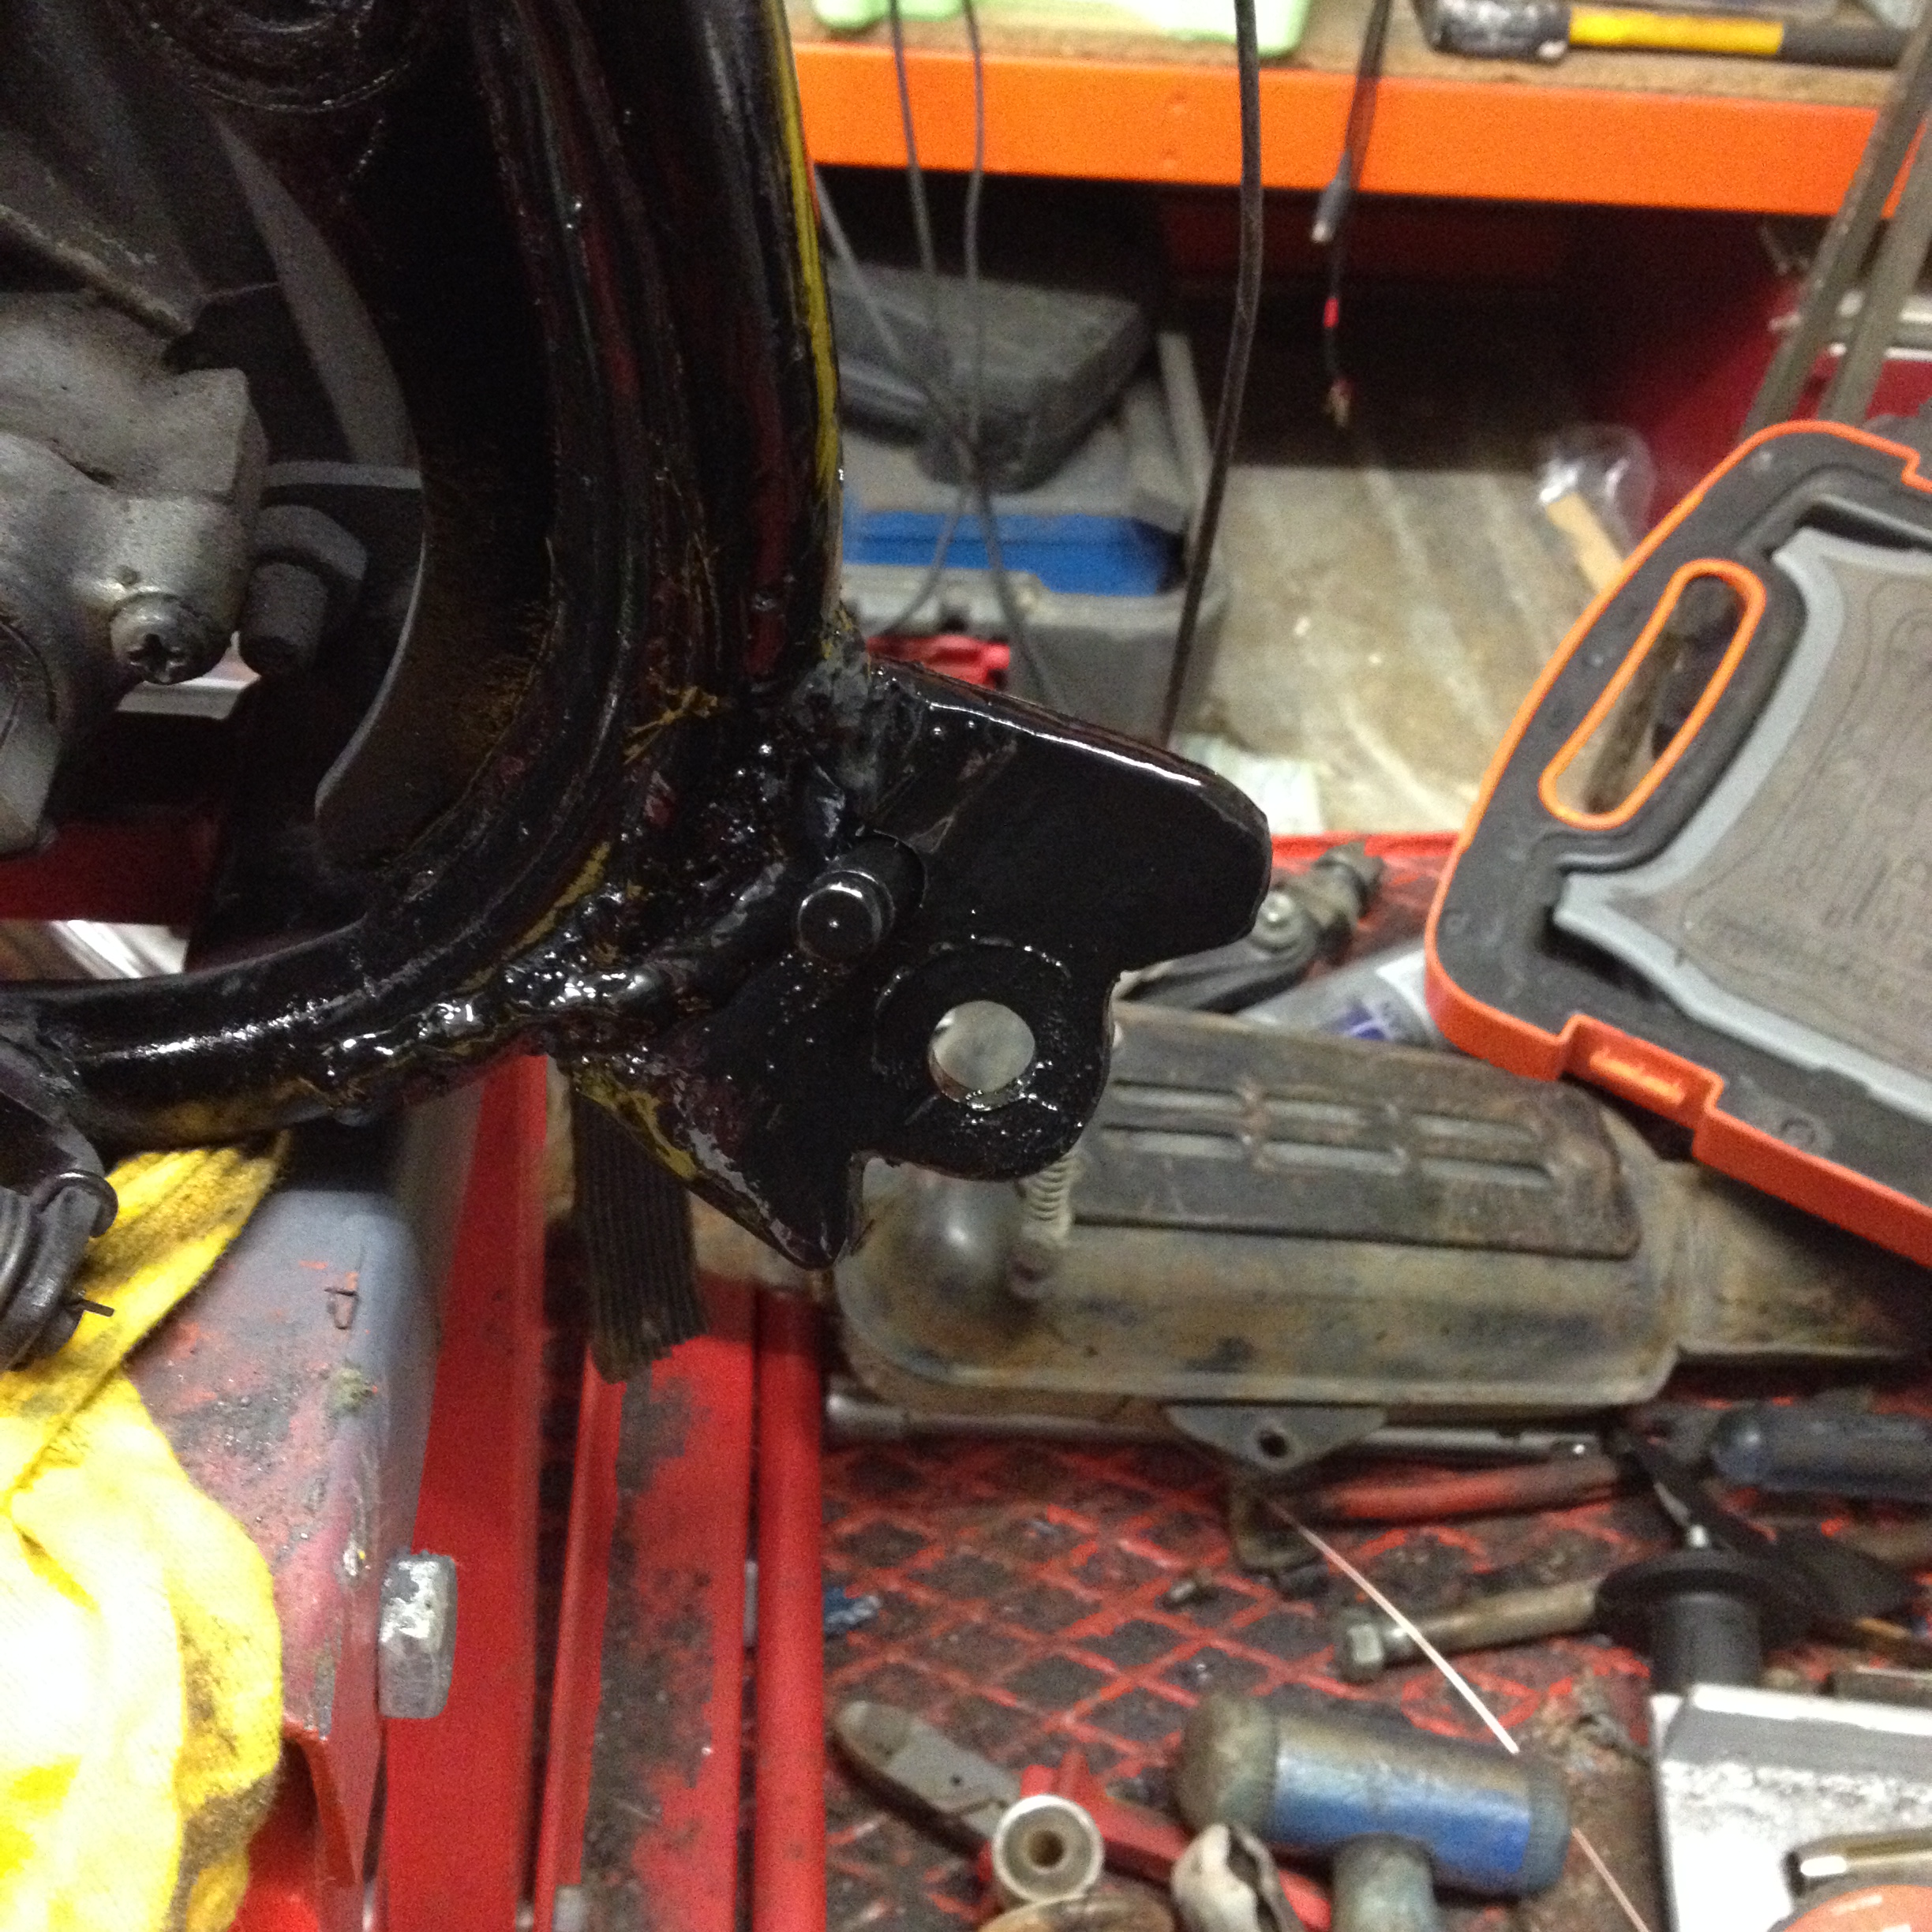
I will give it another coat of black tomorrow then fit the stand leg and spring. It looks OK to me, the leg is about right when up and although I ground a little more metal away from the stop position when the leg is down so that it leans slightly forward, it can be further tweaked when the bike is back together if need be.
I was a bit concerned that the correct spring didn't seem to be right, it was too long when I test fitted it.
I checked my other side stands and guess what? This one was different, the lower spring pin on the leg was a lot further up, making the correct spring too long.The one off the bike is the top one, I think it is off a different bike, possibly a later XL250R so I am not going to use it, I will use a spare one instead. I didn't like that rubber bit on the end anyway.

The bottom one in the photo above is a brand new one, only £15 from David Silver. See how the top one differs? Most have been repaired at the foot end at some time or other, they have a hard life.
Next job whilst the back end is off is to make a way to fix the two rubber grommets that hold the front of the rear mudguard on, without an airbox, and preferably without welding as I'd like to leave the bike as least cut up as I can in case anyone ever wants to put it back to original. Hmm. I wonder what would happen if I didn't bother as the mudguard is held on both sides at the top of the frame and the rear by the triangular plate at the middle of the back frame hoop? That should hold it tight. (Hahaha! see later).
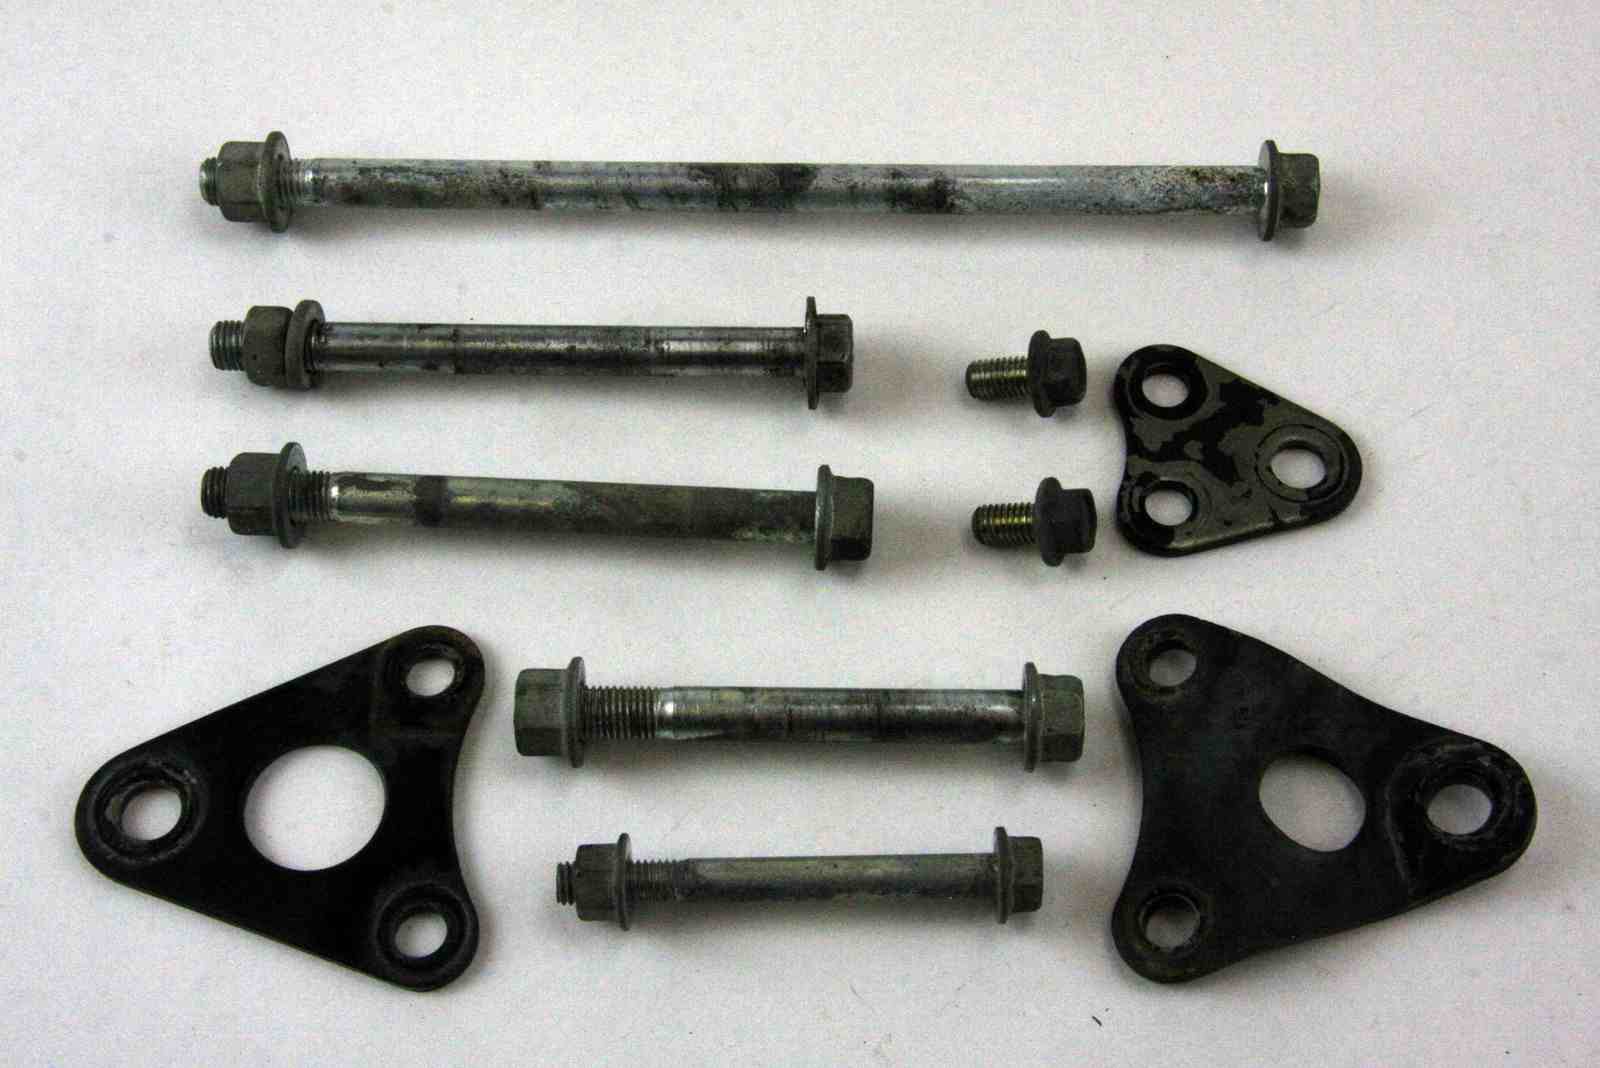
Finally I notice that pretty much all the engine mounting bolts are non-original on this bike. That suggests the engine has been out at some time. The correct bolts look like this if you are curious:
I fitted the rear footrests and 45 degree grease nipple on the loose swinging arm today,
Here is what it now looks like, much better.

and had a bit of a workshop tidy up, and the air filter came so I fitted it too.

It was sold as 42/43mm, but actually marked 42mm and I had a job getting it on until I put the rubber mounting bit in a pan of boiling water and softened it, then it went on a treat. I believe they call this a pod? It probably lets too much air in compared to the stock one which in my case I have not got.
I cleaned the swinging arm bearing and spindle bolt up, the latter in the lathe at highest speed with some Scotchbrite and then some 3000 grade (very very fine) wet and dry paper (used dry), then packed it with a new synthetic grease I am trying and reassembled it.
I couldn't resist just putting it all loosely in place before closing the garage door tonight.
I decided that the bike looked crap with a red back mudguard and a silver front one. The plastic of the red bit had several cracks and breaks so I mended them with a hot soldering iron from the inside, then filled them and gave it a coat of silver to match the front, and a coat of lacquer. It's still a bit rough especially under the seat where no one can see, but it will look better than the red one.
The two 22mm rubber mounting grommets (part number 61315-358-000) were cracked and perished so I have ordered two new ones that will come whilst I am away on jolly hols.
I wanted to do this now so that the paint and lacquer should be hard enough to fit them when I am back, using a dab of daisy (see earlier!). This is now done but the front of the mudguard is still floppy so I will make a bracket to hold it. I have also decided to renew the swinging arm bushes with the phosphor bronze ones that you can buy on ebay Germany, see below.

The bracket is now done; it's made of some flat stainless bar with two M6 captive nuts welded on underneath, the grommet plate is thinner to accomodate the thinner panel thickness needed for the rubber grommets. My stainless welding isn't very neat, but it won't fall off.

Here is a piccy of the bracket in place.
The phosphor bronze bushes have arrived from Germany, so they are next.
The Honda ones are like this. I'm not sure what they are made of, it seems to be a sort of plastic composite, or possibly pasta.
 the new ones are old school like this
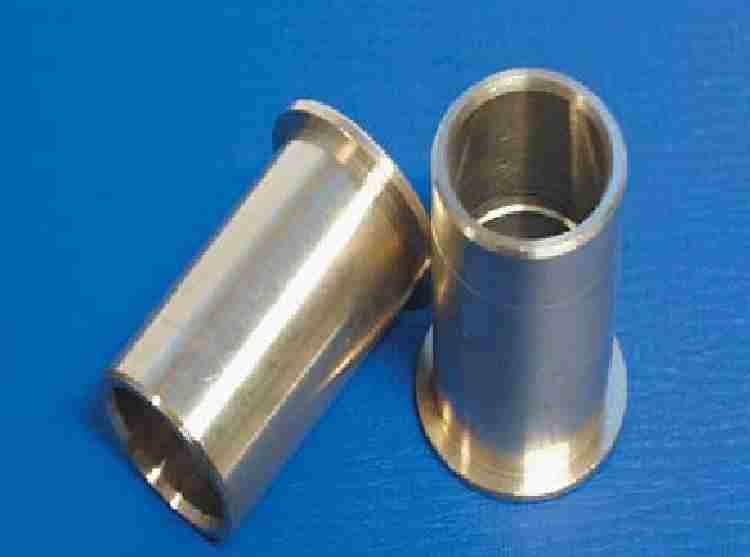
The AC horn has arrived. It can wait.
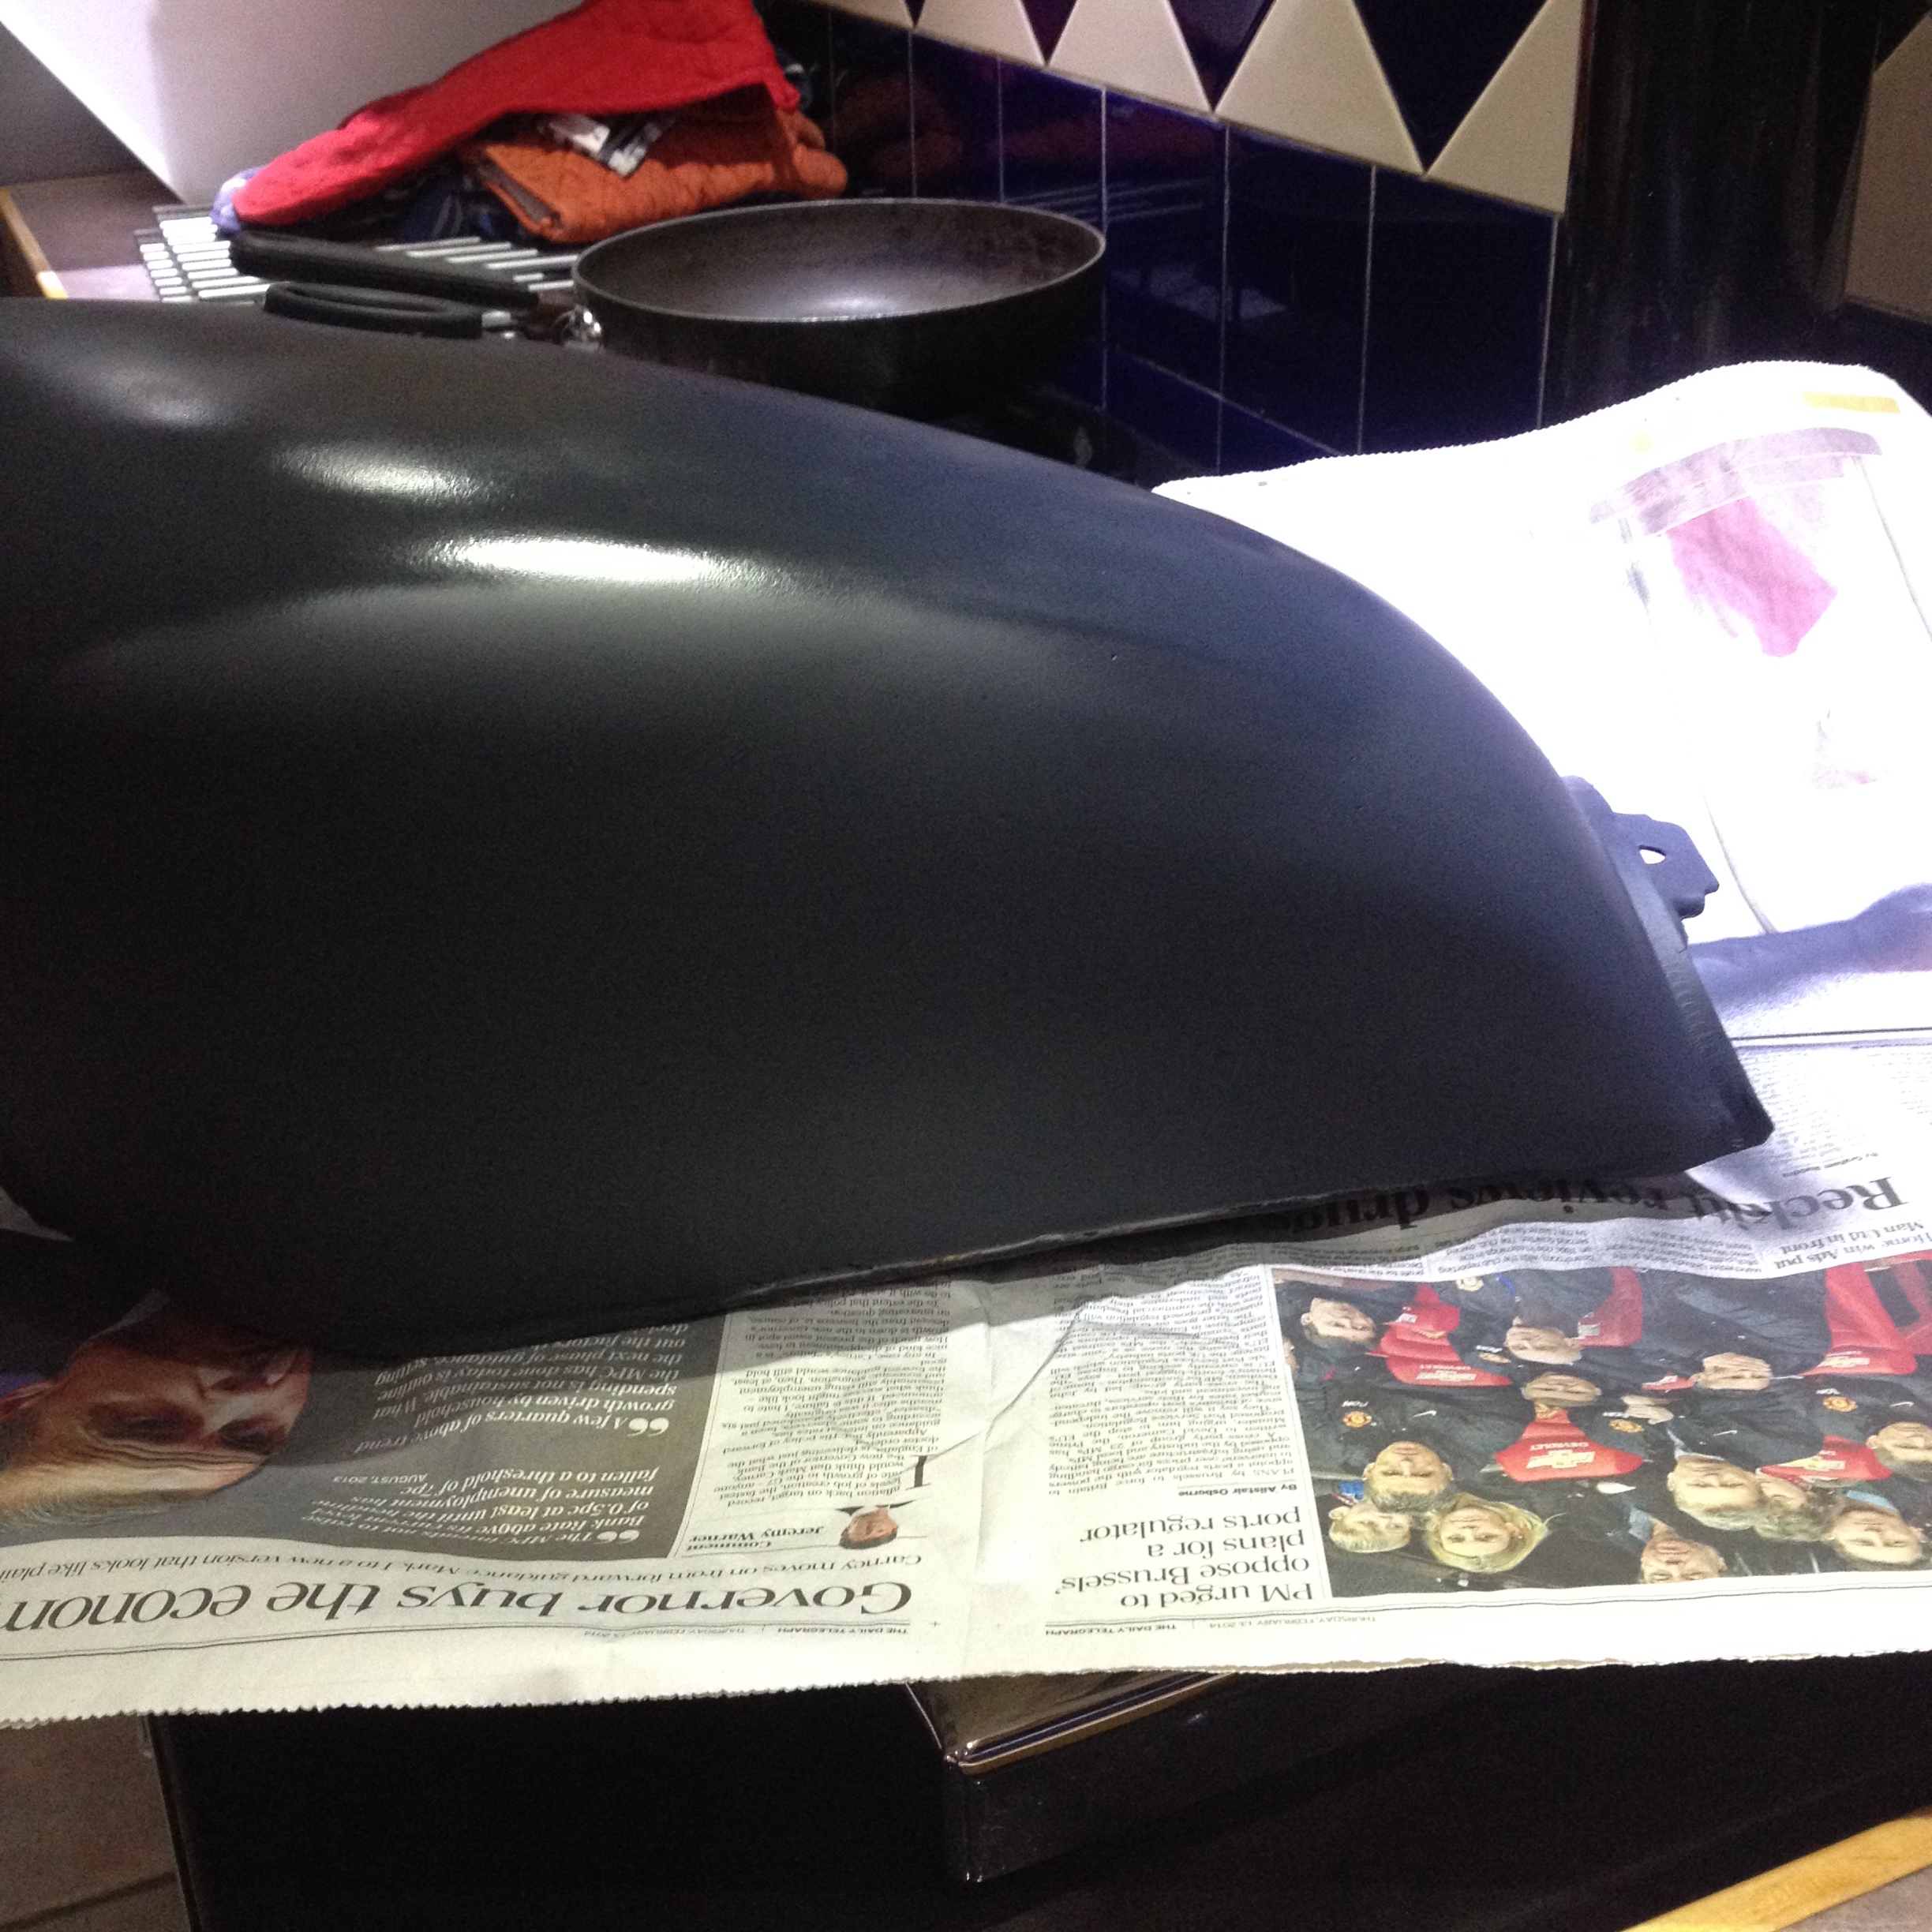
Apart from fitting the swinging arm bushes, the rear wheel, chain and sprocket covers, getting the engine going, wiring the new horn and a horn switch, kill switch, etc there is also the tank to address.

One side has a long strip on the bottom edge about ten/eleven inches long of what looks like Plastic Padding (body filler) on it.
Knowing you lot are likely to be saying 'whatever does he mean?' I have just gone out in the rain and unlocked the garage to take the above picture to assist you.
Interesting fact: You won't find many XL350 spares in France as this model wasn't imported into France except for 34 for the Police Dept in Paris. Wonder if any have survived?
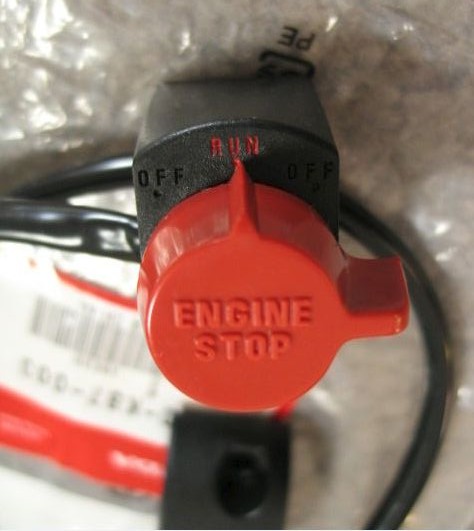
I have decided that the kill switch on the bike is shit so I have ordered one from David Silvers, 35130-KB7-003 which is a two wire one which I would prefer, this sort should do nicely and look good too.
When you buy one, you don't get any screws from Honda, they are always another part number. I will use a couple of M5 stainless ones I already have.
The swinging arm bushes are done.Phew!
Now previously I have removed these plastic/composite bushes in other XL swinging arms with a light tap, but not these ones, oh no.
I tried every drift I have, I even reshaped ones on the grinder, tapped, hit and sweated but would they budge? Not a thou. The problem is they seemed to have mated with the steel because they would NOT come out, and as they are a sort of glass reinforced plastic the tiny inside lip also breaks away when you use a drift. In the end I had to break them up and get them out bit by bit with a 1/4"wood chisel.
This was the largest bit that came out.

The removal seemed to take ages but at last the new bushes are in and there is now no play in the swinging arm, I am very pleased with the result, I would recommend this mod as a definite upgrade/improvement, and the bushes cost less than half that of the original ones. CMSL lists the price for the Honda ones as 46 euros a pair...
This mod, changing the steering races for roller bearings, and putting a smaller 42 tooth street sprocket on are my top three improvements to an XL250K.
The new ones just tapped in (with a soft faced mallet of course, or if you don't have one, protect the new bush from a hammer with a piece of wood) and fresh grease on everything then pop the arm back in, and nip up the spindle. Lovely!
I've mentioned that these were from ebay Germany (http://www.ebay.de) and you search for '2 Schwingen-Bronzebuchsen Honda XL 250 XL250K3' they cost 24.90 euros (£20.73 GBP) a pair, postage was 6.5 Euros. I have ordered another set for the rebuild XL250.
Thought I would fit an exhaust today, but I missed something! The exhaust for the 250/350 is pretty much the same except.... the mounting flange is different to the XL250 (18231-329-000), because the exhaust port is different on the 350 so the flange is a bit bigger, the bolt holes are wider apart too (18322-356-000) and the split collars are different.
I have 3 sets of the 250 ones in packets (18233-318-000) due to accidental over-ordering, but no nice new 350 (18233-283-010) ones, not available from Honda but are available as an OEM part from David Silvers, but only to order, so I have used the old ones. I did however fit a new seal (18291-286-306) as there was none in the head when I took the old pipe off .

top one is the 250 part, see how much smaller it is?

As you might expect, the 250 split collars are a good fit on the 250 flange but fall through the bigger hole on the 350 flange (top one above). However the exhaust is now on. I used one Lovely Wife brought back from the USA last year (with a note from Homeland Security who had opened her checked-in bag to look at it, probably just jealous).

Now for the rear wheel

The back wheel is now in, with kind assistance from Lovely Wife who tapped the greased up axle in with a nylon faced mallet whist I lined it up; she was passing the garage when I was doing it. The new chain is on and the back brake re-connected. Quite unrelated I also put a new sparkplug in the head.
Before I give up for today, I thought I would make the blank plate for the rear/tail light bracket, mentioned above somewhere. It is to cover the place where the tail light would be if I fitted a tail light, which I am not doing.
I cut a shape traced round the bracket with a sharpie, onto a scrap piece of 5mm stainless plate I found in the workshop, and ground it to shape, and drilled two M6.5mm holes. I then gave one side a polish with my old polishing mop on a spindle, result doesn't look too bad fitted onto the bike with a couple of M6 stainless screws and acorn nuts, I hope you agree.
Originally (a long time ago) this bike would have had a black bracket, which was missing when I bought it, but my spare one is chrome so I want to kinda match it with the polished stainless steel.
Maybe I will just do a first coat of paint stripper on the tank today too.
Final thought is that whilst fitting the swinging arm spindle I noticed the right side front footrest/peg is a pile of poo, it's rusty, got no spring, it's bent and has a random imperial nut and bolt from a 1956 Chevvy pick up truck or something similar holding it together, so I have ordered a new one, for once I don't have a spare.
The complete thing (50610-385-000) new is only about £20 plus tax from David Silvers, (94 euros at CMSL) most breakers want that for a used one. It's odd because they (DSS) want £15 plus tax for just the mounting plate. Whilst I was at it, I also ordered a plain petrol cap for the tank, as the rubber tube vent will look wrong, much much later on.
So a new day, and the tank now has no paint or filler on it. I also remembered I forgot to fit the chain lower guide so I did that first.
That is the good news, the bad news is that as I suspected, the filler on the tank covered a major problem..
The tank is perforated along the bottom seam. It is also dented (the dotted bit).
Now a shit hot metal worker at West Coast Customs would say 'just cut this out and weld in a new piece....' but my skills are limited and I would make a mess of it. The metal is very thin where it has holed but I might be able to fill the section with braze/bronze metal with oxy-acetylene and then rub it down, and fill it and the dent above with body filler and see how it looks. I have now tried brazing it, the paper thin steel just melted away like ice until I had 10mm wide holes. How I laughted, hahaha.
I put two patches of sheet steel over the worst holes, it leaked, I re-heated and reflowed the braze, it leaked, (did this 5 more times) it leaked less but still leaked, but it's so hard to see where from.
Finally, it didn't leak but was a mess of braze

but it is strong so I had a 'filler and wet and dry paper' session... and now it looks like this, however I
found that there were a lot more small dings, more dents, scratches in the steel, etc., I guess about fifteen altogether. I filled and rubbed them down and then primed again, with dark grey etch primer. This isn't ready to final paint, but it's starting to look like it, as I am getting bored doing this tank.
This is the 'good' side of the tank before paint stripping. The stripes are vinyl, except for the painted white stripe; click it to see it bigger, the dents and scratches are clearer. There are more on the other side.
My plan is to do the tank plain gloss black, in cellulose, and add a couple of Honda flying wing logos which I already have somewhere (still not located) but have ordered two more anyway in case the first ones remain hidden.
So I tried painting it black today, three things happened:
1. I was able to see yet more dings in the gloss shine that I hadn't filled.
2. Some of the stopper I used to fill some pinholes reacted with the cellulose paint and it sort of melted.
3. I got a run on the right side about two inches from the back of the tank.
Sigh, so I have filled the dings, and tomorrow will rub it down (again) and have another go.
Next day: same again, except for 3 above. Tomorrow I am going to grind off the affected areas and refill and rub down. I may try some two pack primer too. Grrr.
In other news, looking for inspiration with the wiring, I found in my wiring box that I have a complete wiring loom for a 1977 XL350 I must have bought sometime. I don't remember buying it but the package is from a bike breakers in the USA. Some of the black wrapping is torn or missing so I have bought some black self amalgamating tape and made it tidy again. I have put it on the frame, as a first fit.
It would make life easy to add an ignition lock/key (I also have this and a spare correct bracket to hold it) which may make it a bit less stealable, hopefully the unused lighting wires will just tuck away under the tank. The loom is a bit grubby so it has gone in the dishwasher tonight (lovely wife is away) and I will dry it out in the morning on the Aga.
I really like the kill switch that has arrived and I have fitted it to the bars, so I want a matching horn switch for the left side. The only Honda one that matches and has nothing but the horn button on it seems to be one from a Motorsport 1972, (part number 35250-329-671) everything else has other bits that I don't want on them, indicators, hi/low beam etc.
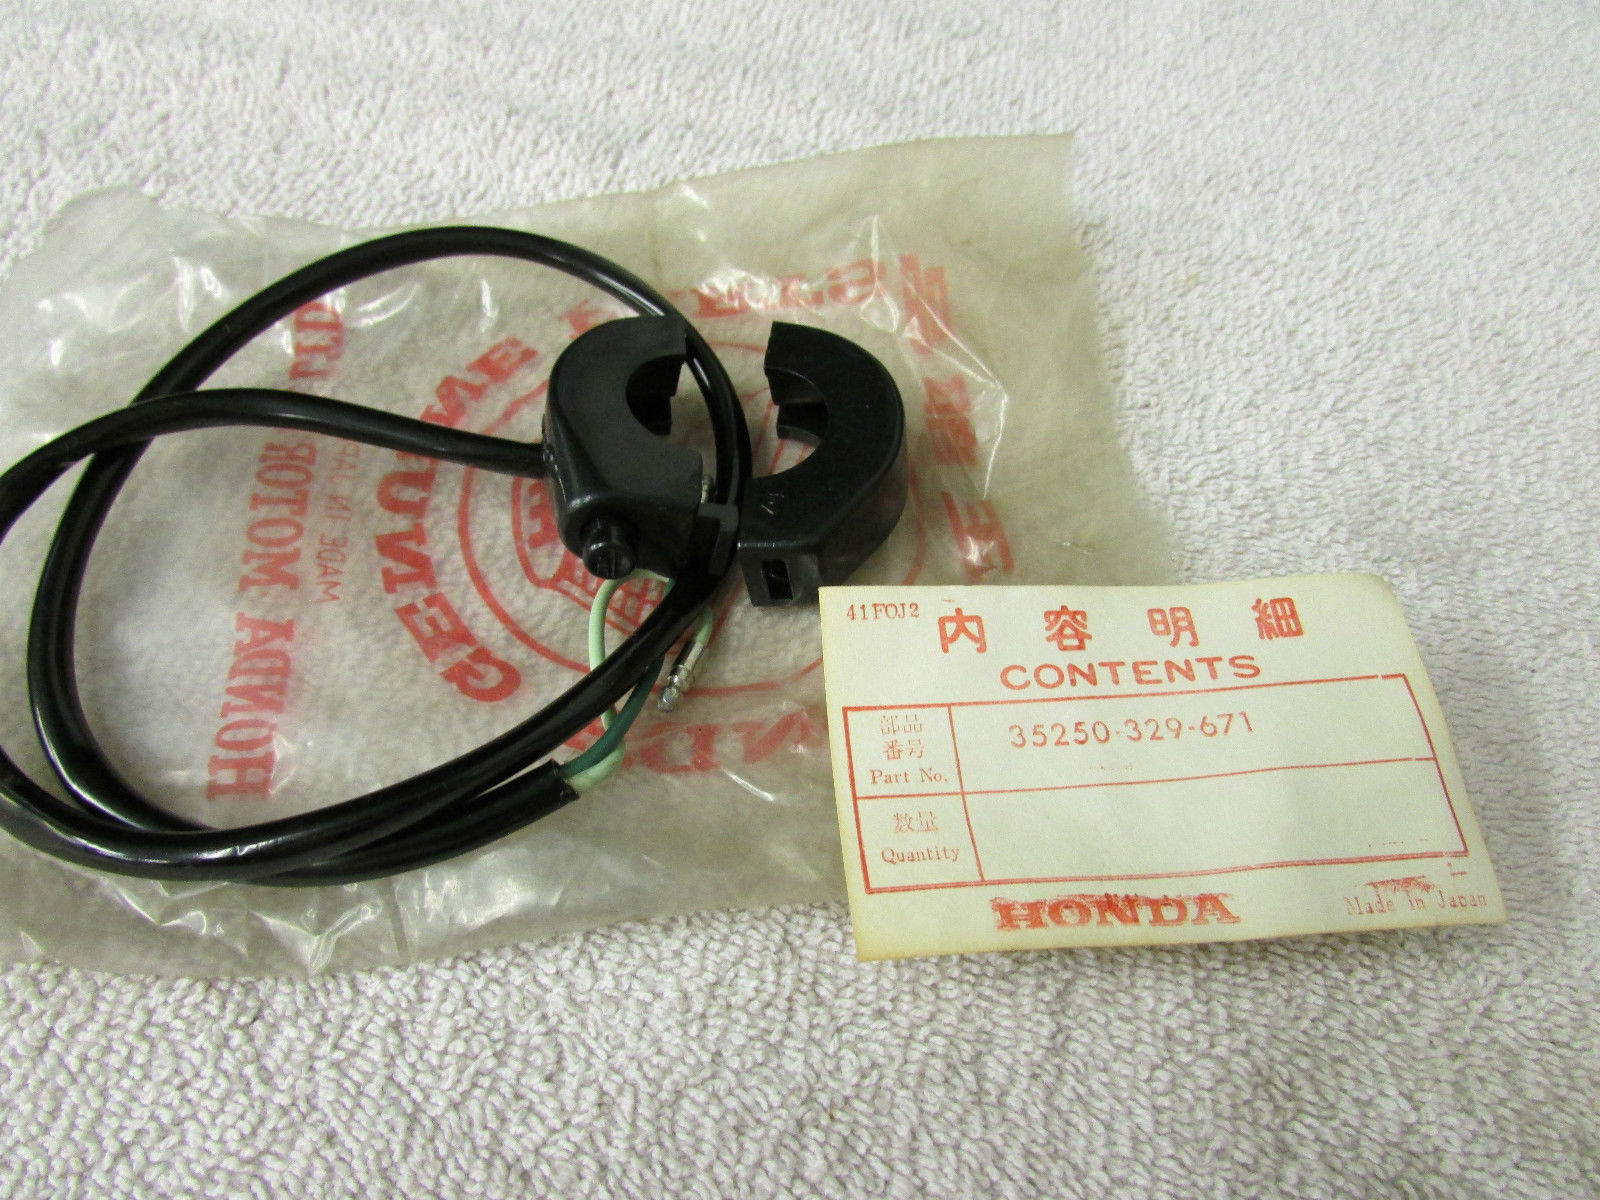
I spent ages looking for one, and even these are really hard to get, so I have bought a NOS one for stupid money from the USA and paid stupid postage and will no doubt be hit with stupid import charges. I am aware I have used the word stupid three times. However, it will look right (symmetry on the handlebars) and work.
The replacement foot rests came today from the USA (still waiting for the new one from David Silvers), so I will swop both the bad right hand one, and the left one too as it is also bent and whilst I had the black cellulose in the spraygun, I gave them and the ignition switch bracket a quick coat of black too, just to tidy them.

Compare the old one on the right with the 'new' one on the left. The old one was bent, broken, welded and had the bolt through it, no springs etc. you can see why it had to go in the bin.
Today I have worked on the tank again, fitted the ignition switch/bracket and the footrests, and put 3 new bolts on the front engine hanger bracket. I made a new earth sub loom as I am not going to use the headlight loom, although I have one, as it is not needed for this project and is a lot to hide under the tank. It looks like this:

I am going to use the ignition coil (black wire) on the alternator for the ignition (duh!) and the yellow and white winding that usually runs the lights to run the horn, and the internal illumination in the speedo. Why? Although I am not proposing lights at this time, I want to keep the moisture we have in the air in England from making condensation under the speedo lens, so it will be on whenever the engine is running. Part of the reason for using two of the windings is I don't want the horn to be powered from the ignition circuit, and to act as an engine kill switch! I'm not 100% sure it would but it might well.
I need the bike to look ok, because if it looks like a 'Bitsa' (what we oldies in the UK call a bike made from a pile of other bike parts, so named as it looks and sounds a bit like 'BSA') I risk getting a 'Q' plate, meaning a year of indeterminate origin, whereas I want a 1977 age related plate.
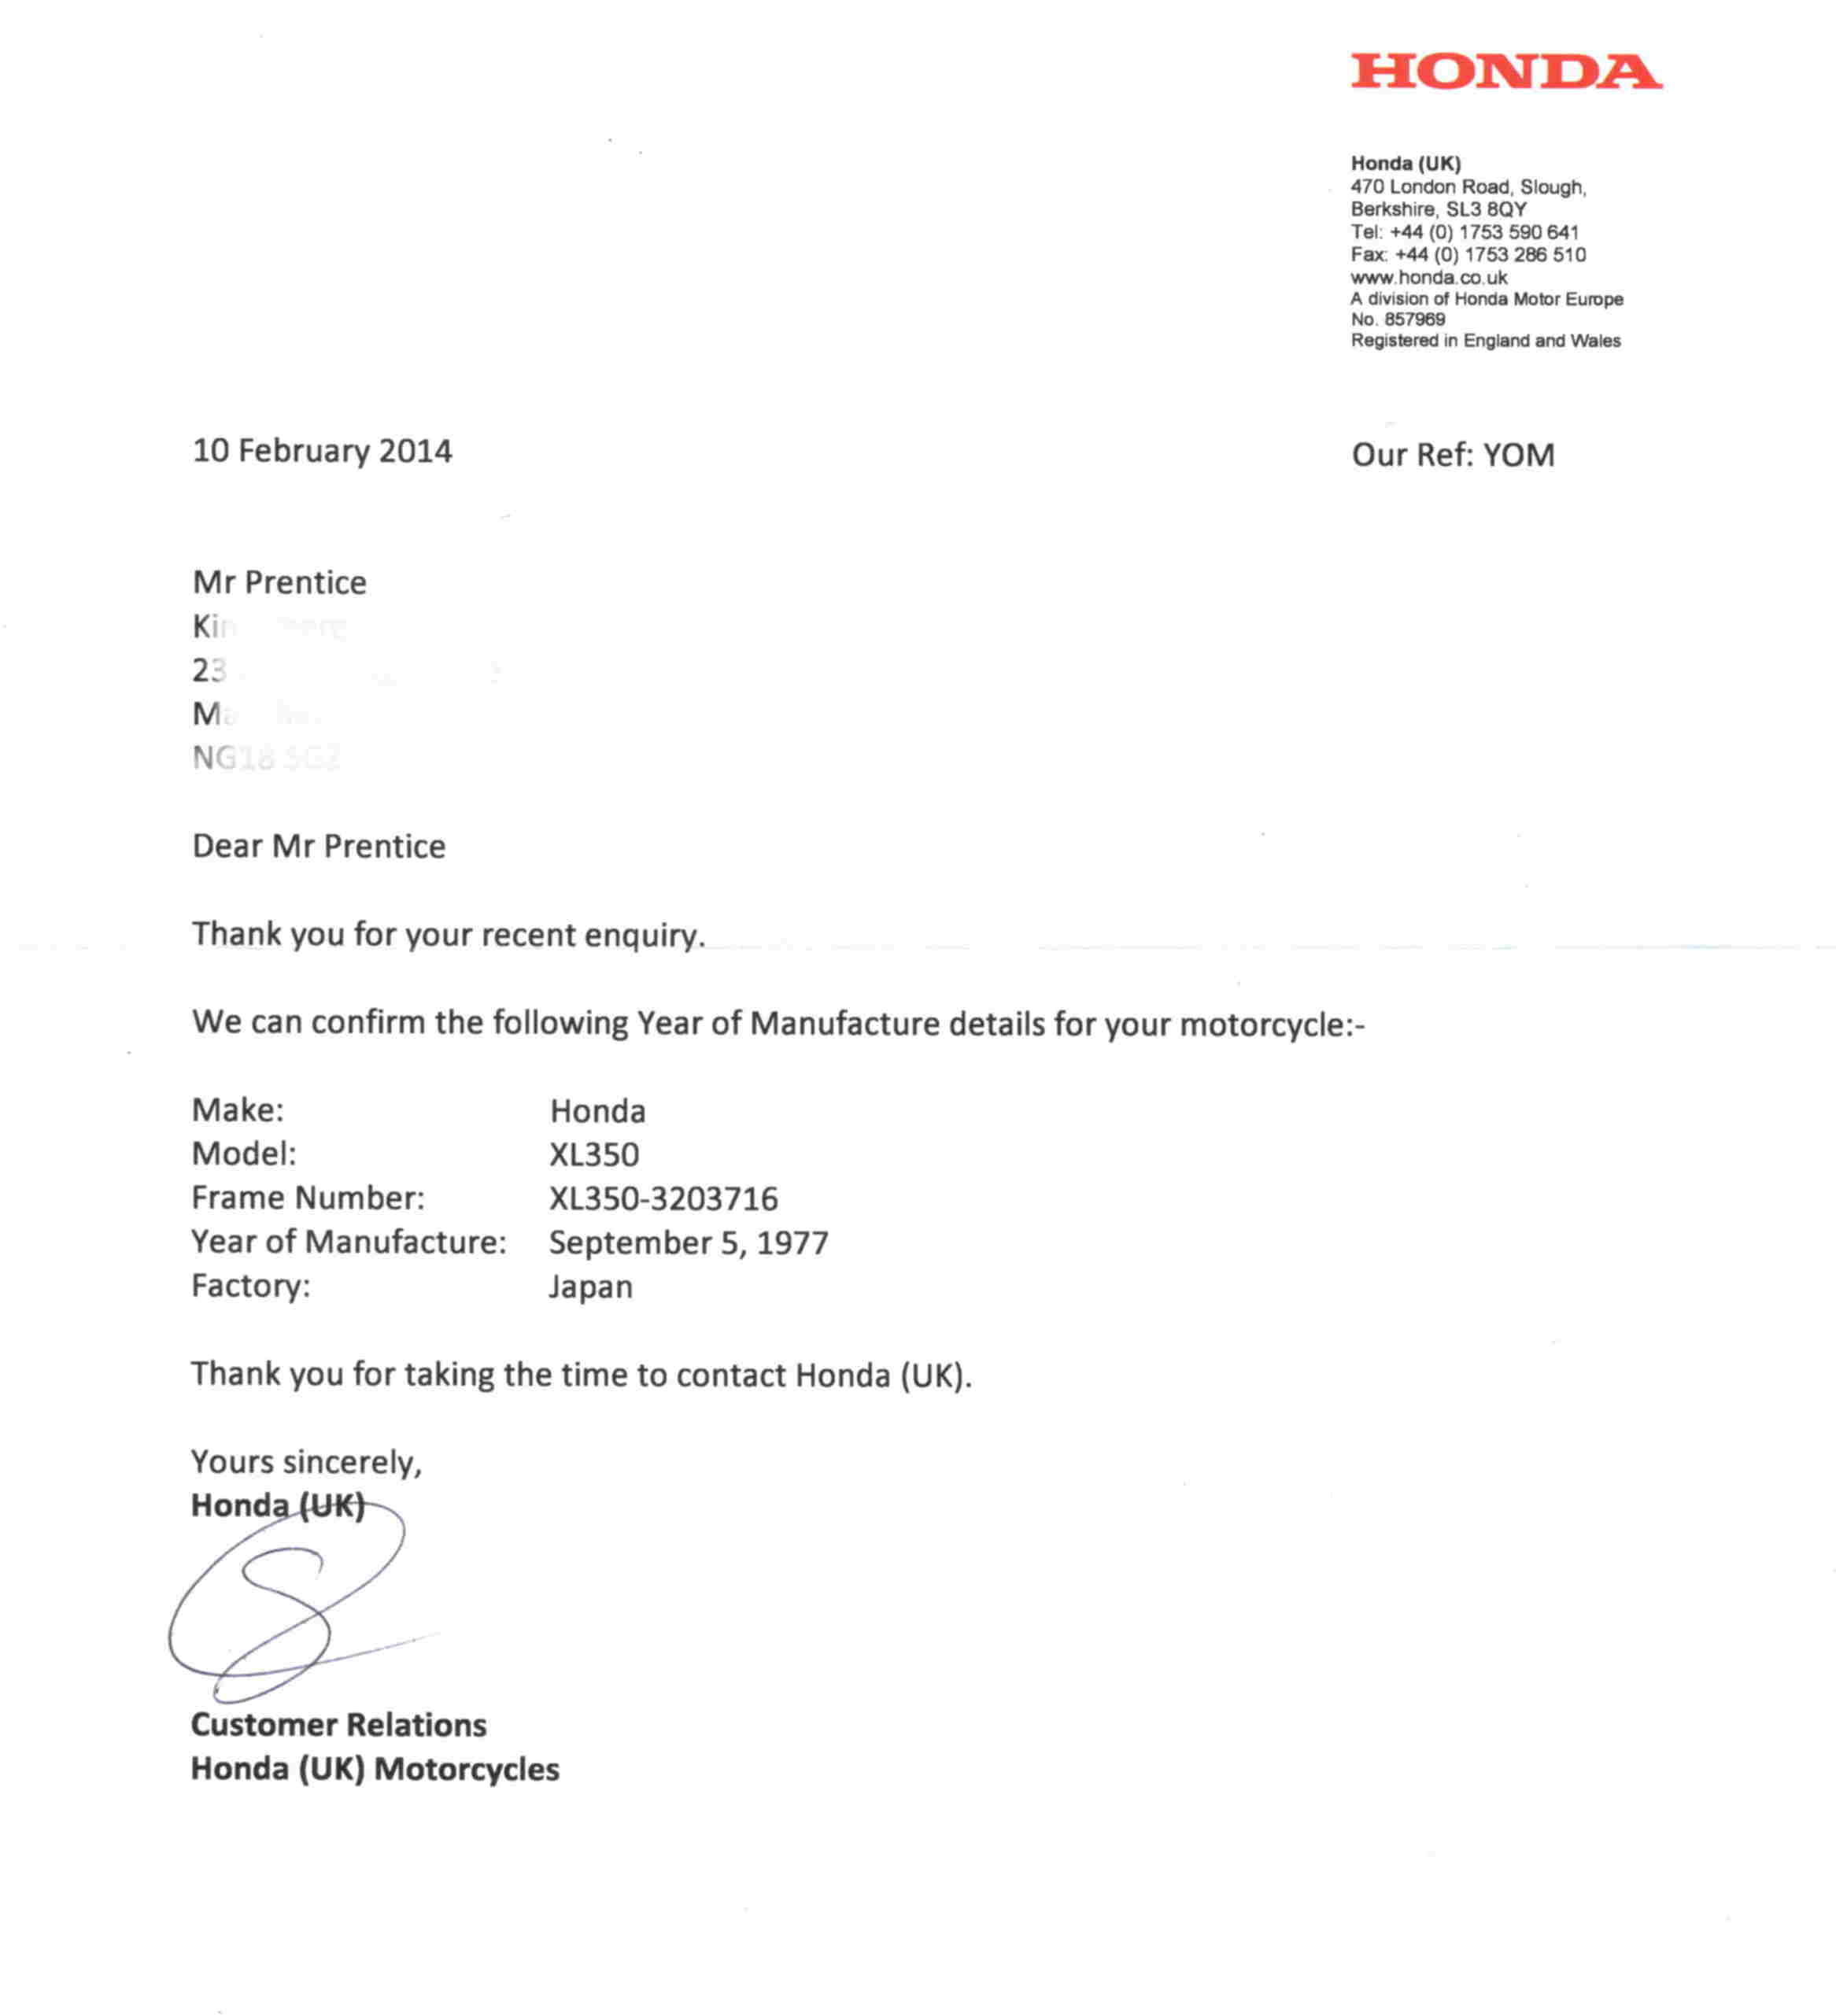
Meanwhile, Honda have now sent me the dating confirmation letter also needed to apply for a registration number in the UK. It looks like this:
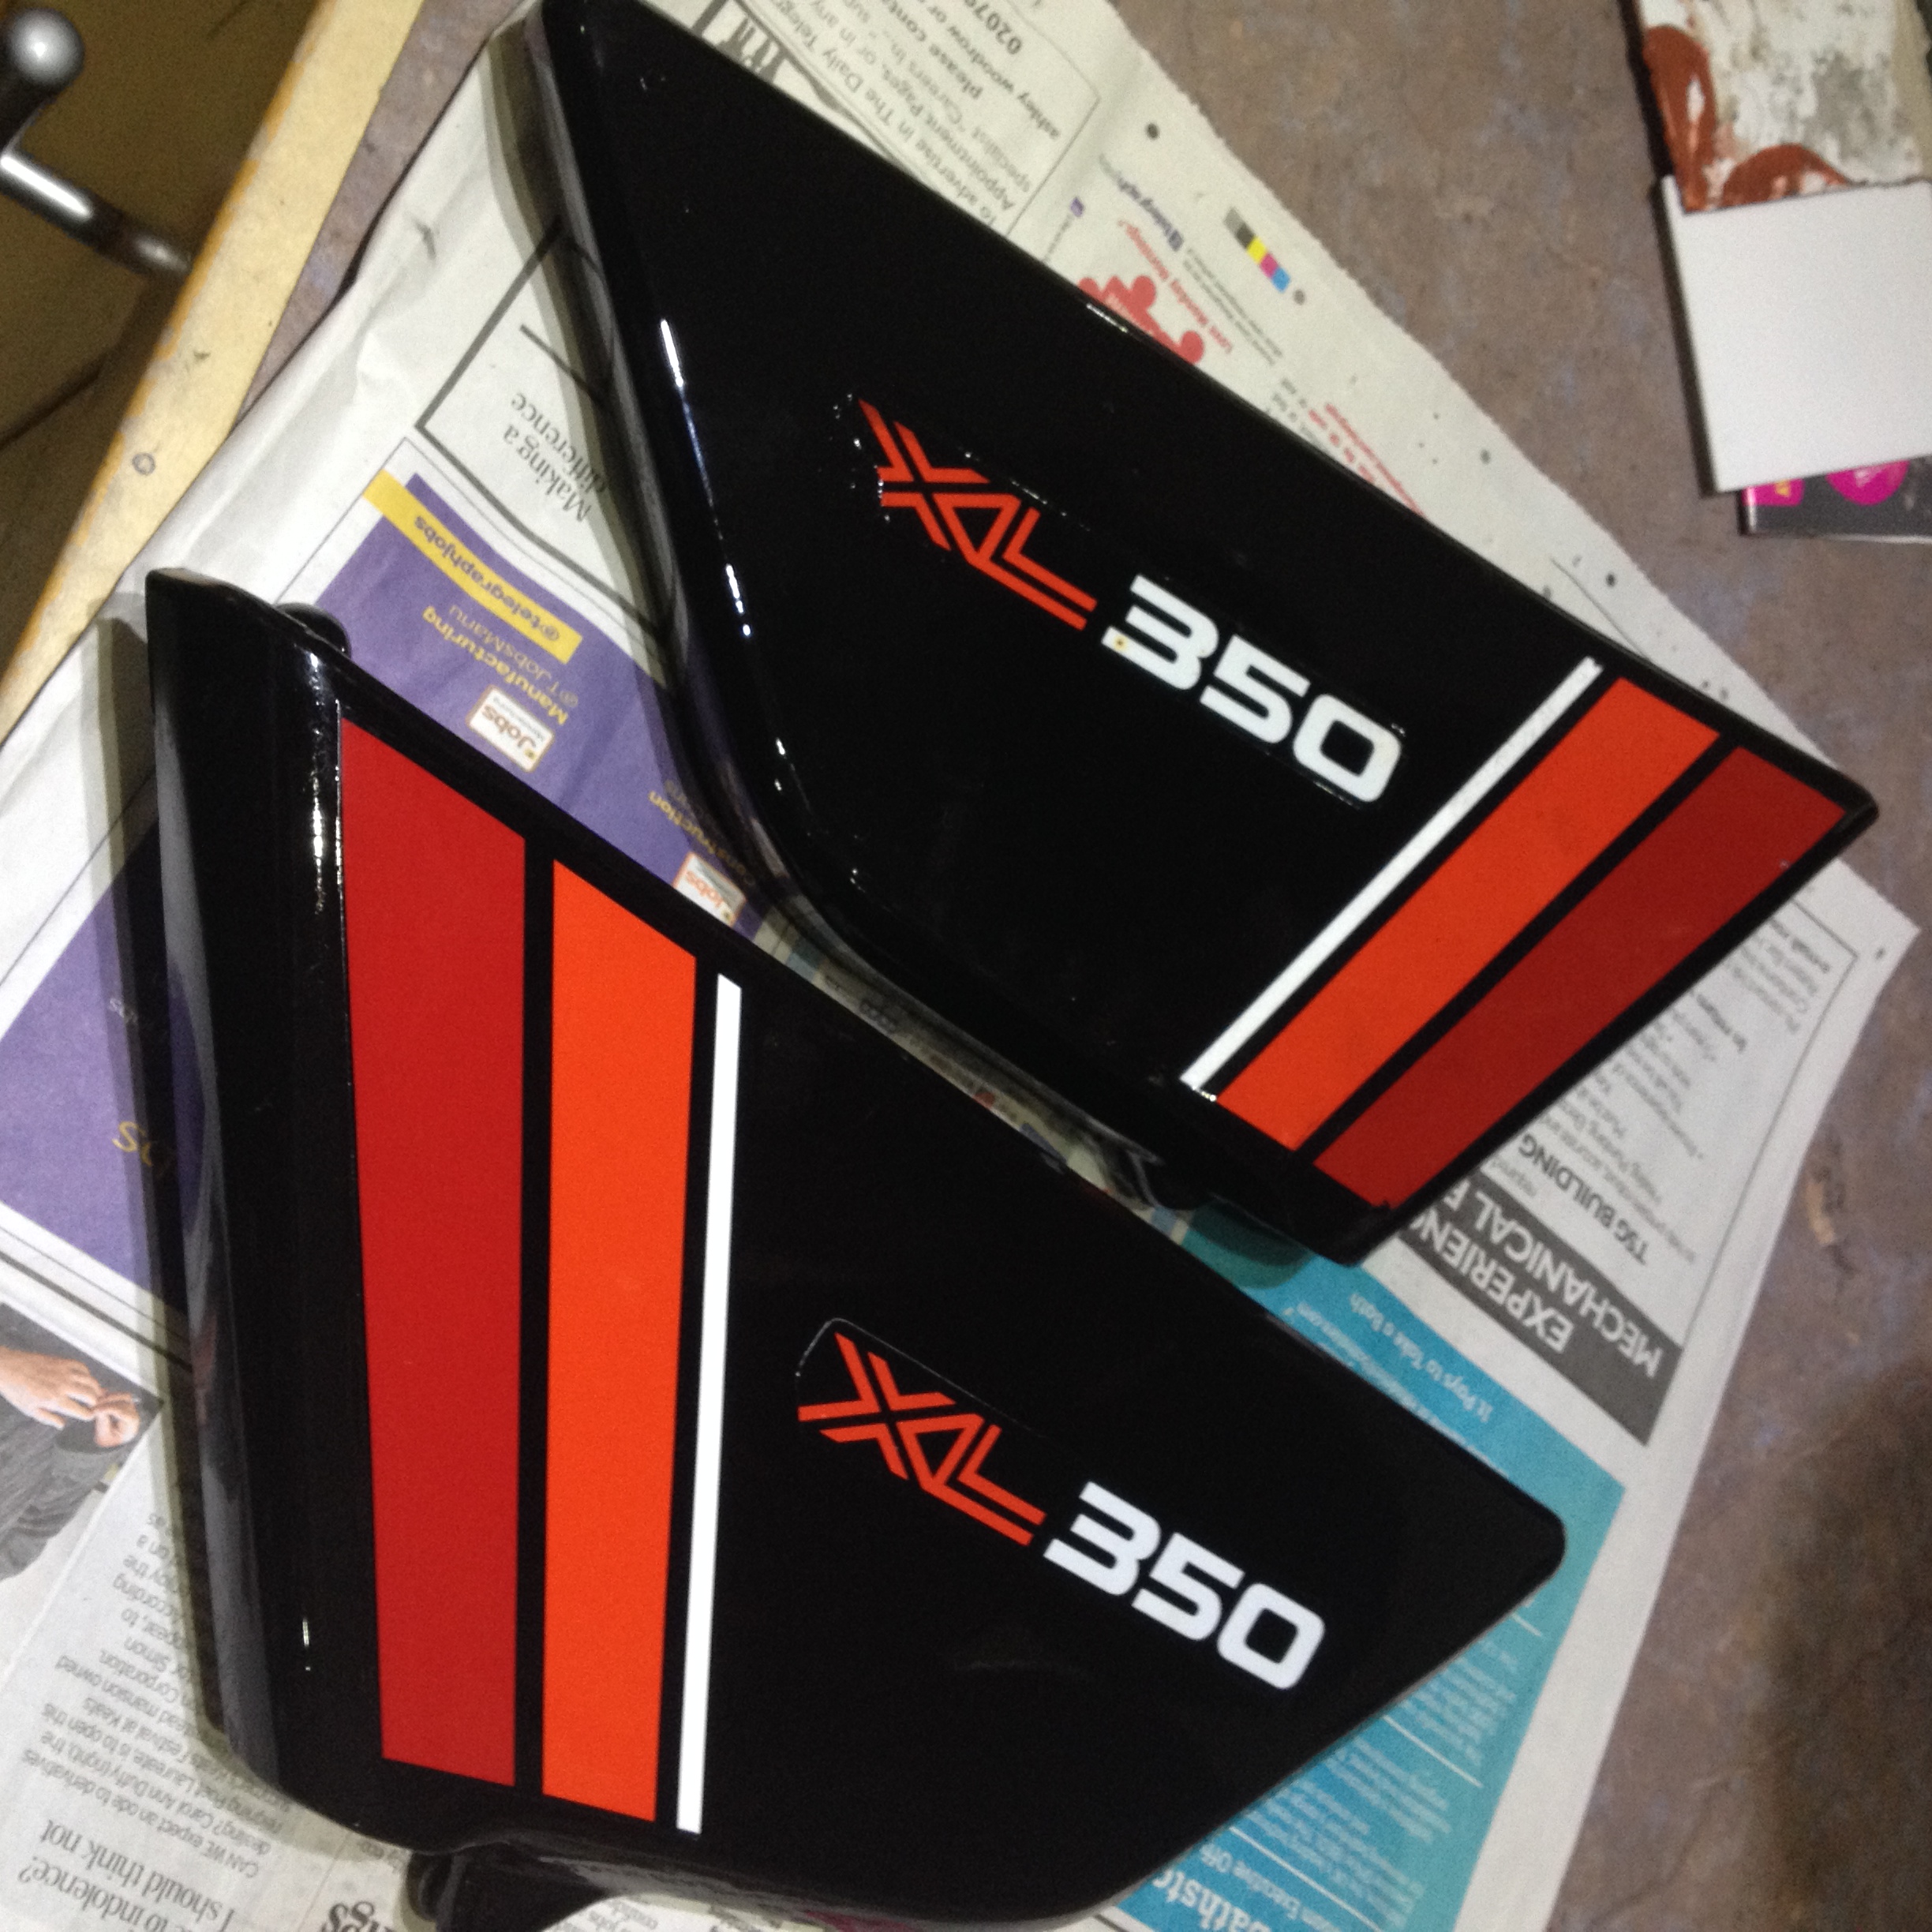
Whilst I was doing stuff today I remembered I had two 1977 side panels that I was going to refurbish and turn into xl250k3 side panels as they are the right shape and size. I think I mentioned this somewhere else on this site.
I don't need them for that now so I thought I would put them on this project bike. One of the rear lugs was missing, (as they often are), so I cast one with a dental molding material called 'alginate', used for making dentures and mouthguards, from one on another panel, in fibreglass resin and replaced it then filled and sprayed up the panels to look tidier like this, they were a bit scruffy but now look presentable and ready to use.
The tank decals came today, they looked like this

As you can see they are aftermarket ones printed on white vinyl, but there is an unwanted white edge outside the black lines where they have been cut out, that you would never get with a genuine Honda decal. Now this won't look good on my black tank, so I will need to get the nail scissors out and trim the white off, so the black edge alone shows. I hope it works!
(Yep, that worked, I am pleased with the result, I did the black cellulose in the garage, and the lacquer in the warm kitchen).
The lacquer is touch dry pretty fast, but still not rock hard even overnight, so I can't fit it yet or it may mark. I'm going to keep it safe in the house 'till it is fully hard. I will be strong and resist taking a photo of it gently placed on the bike....

The lacquer is two pack from an aerosol, it is not cheap at £11 a tin and I've never used it before but it really is very good, the nozzle has a nice even wide fan. The lacquer is over the whole tank, including the decals.
The finish even in my amateurish hands is glass like. It's so nice I am going to put a shiny new petrol tap (petcock) on it.
![]()
If I get chance tomorrow, I am going to see if the engine will start.
Update:
I checked for a spark then connected the carb to the workshop temporary fuel tank, pulled the choke and....... it fired second kick and started on third kick!
It did piss fuel out of the carb as soon as I turned the fuel tap on, so that needs looking at, but it ran! To be fair It ran like a bag of nails fuel wise, but that's OK.
I will remove the carb and replace/adjust/clean as needed. I would fit a new 'O' ring (part no. 91325-568-000 now 91304-704-000 ) for the head to carb insulator, The original ones are like a thin flat faced fibre washer. The ones available now are an O ring that is used in many places on Hondas, cars and bikes, but these can eventually get flattened and allow air to seep in, thereby leaning the mixture at the same time but I don't have the one for a 350 (size is 42mm x 2.4mm) so I may need some silicon to seal it till I do..
Tried that, it still leaked (spraying carb cleaner round the mating flange proved that. As the fluid temporarily blocks the air creeping in, the engine note changes. I await the postman with a 42 x 2.4 'O' ring.
I will replace the float level valve because that will be why the fuel was leaking out.
Result:
I see that the main jet in my carb (which is a Keihn PD01A) is a 105, should be a 115. The needle was on groove no. 4 counting from the top, which is correct but I have dropped the needle to no.3 as the new plug is a bit sooty, so I want to see if that leans the mixture.
The rest of the carb is now cleaned out, jets have been in the little ultrasonic bath I have that is meant to clean jewellery, rings etc. The carb is back together. The air cut off valve is fine, the diaphragm and springs are like new. No doubt the slightly smaller main jet is an attempt by the previous owner to lean the mixture up a bit as the 105 is smaller/leaner than the 115, so I may not change it.
I will refit the carb tomorow and sort the exhaust and see what happens.
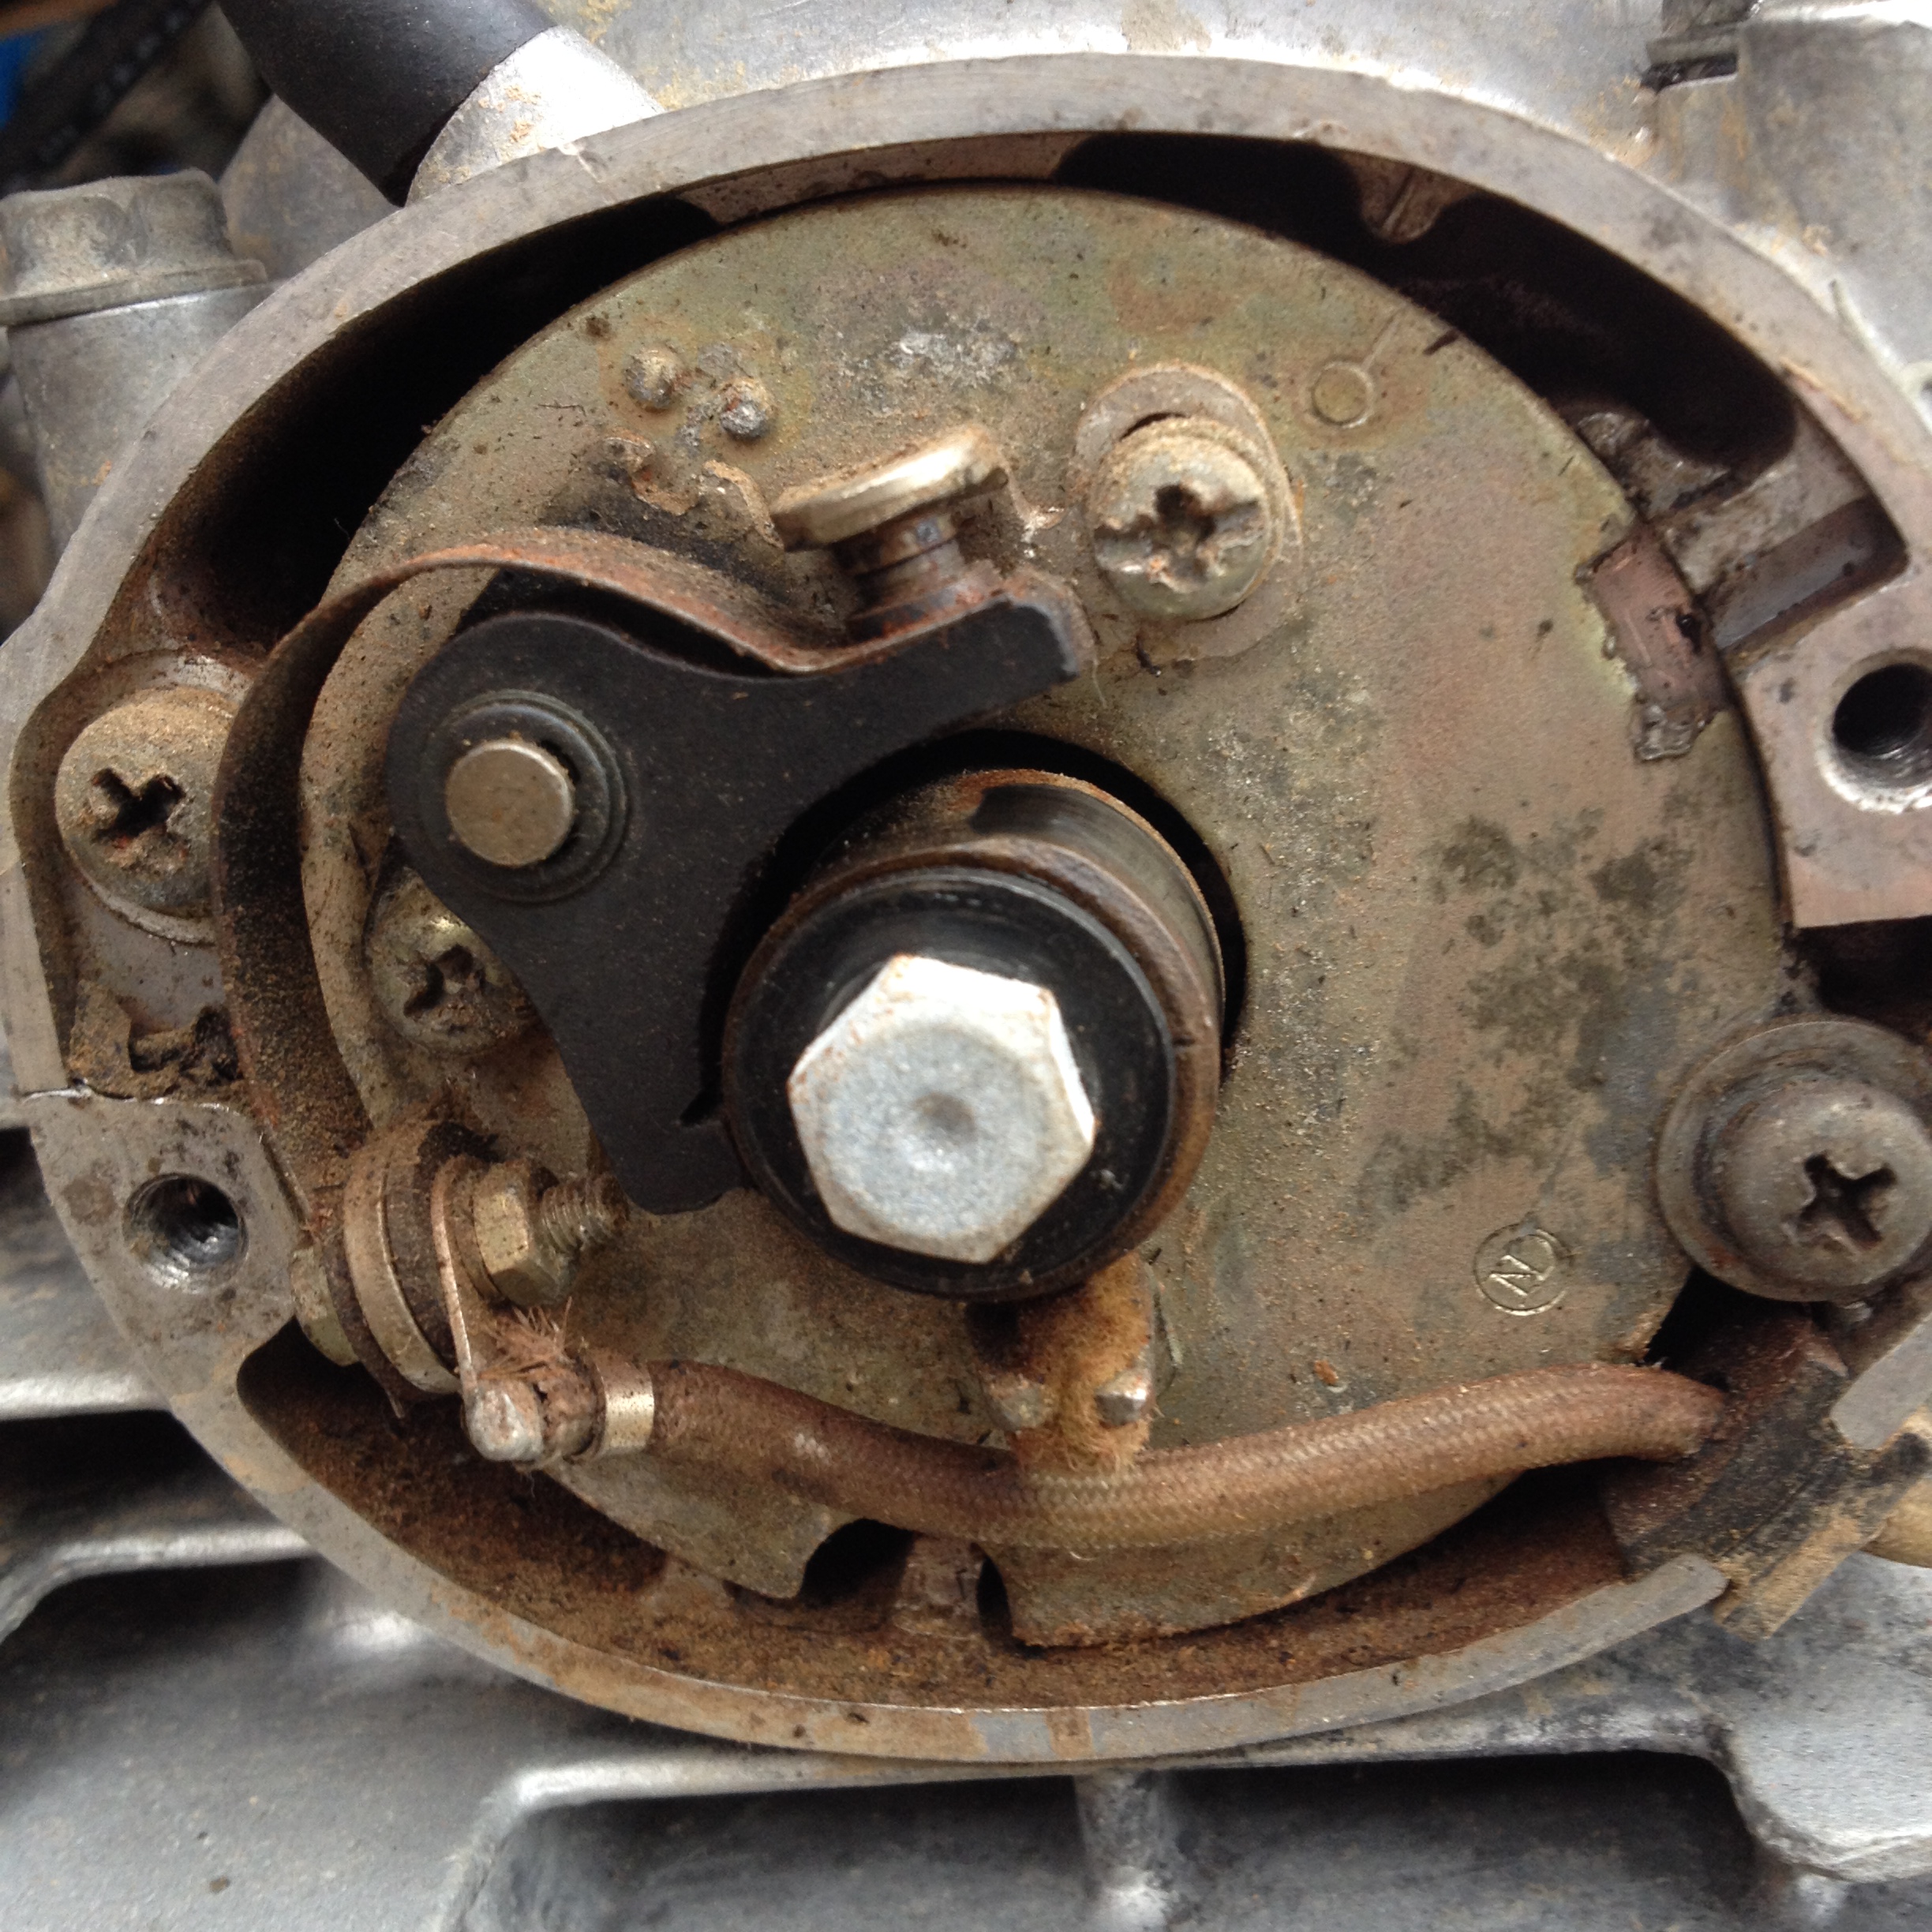
Although it ran the points look old and the felt that oils the points cam is not even touching the cam and is dry as bone, so new points are in, I've oiled and adjusted the felt (still available as part number 30205-300-154 costs about £2.50GBP) to wipe the cam.
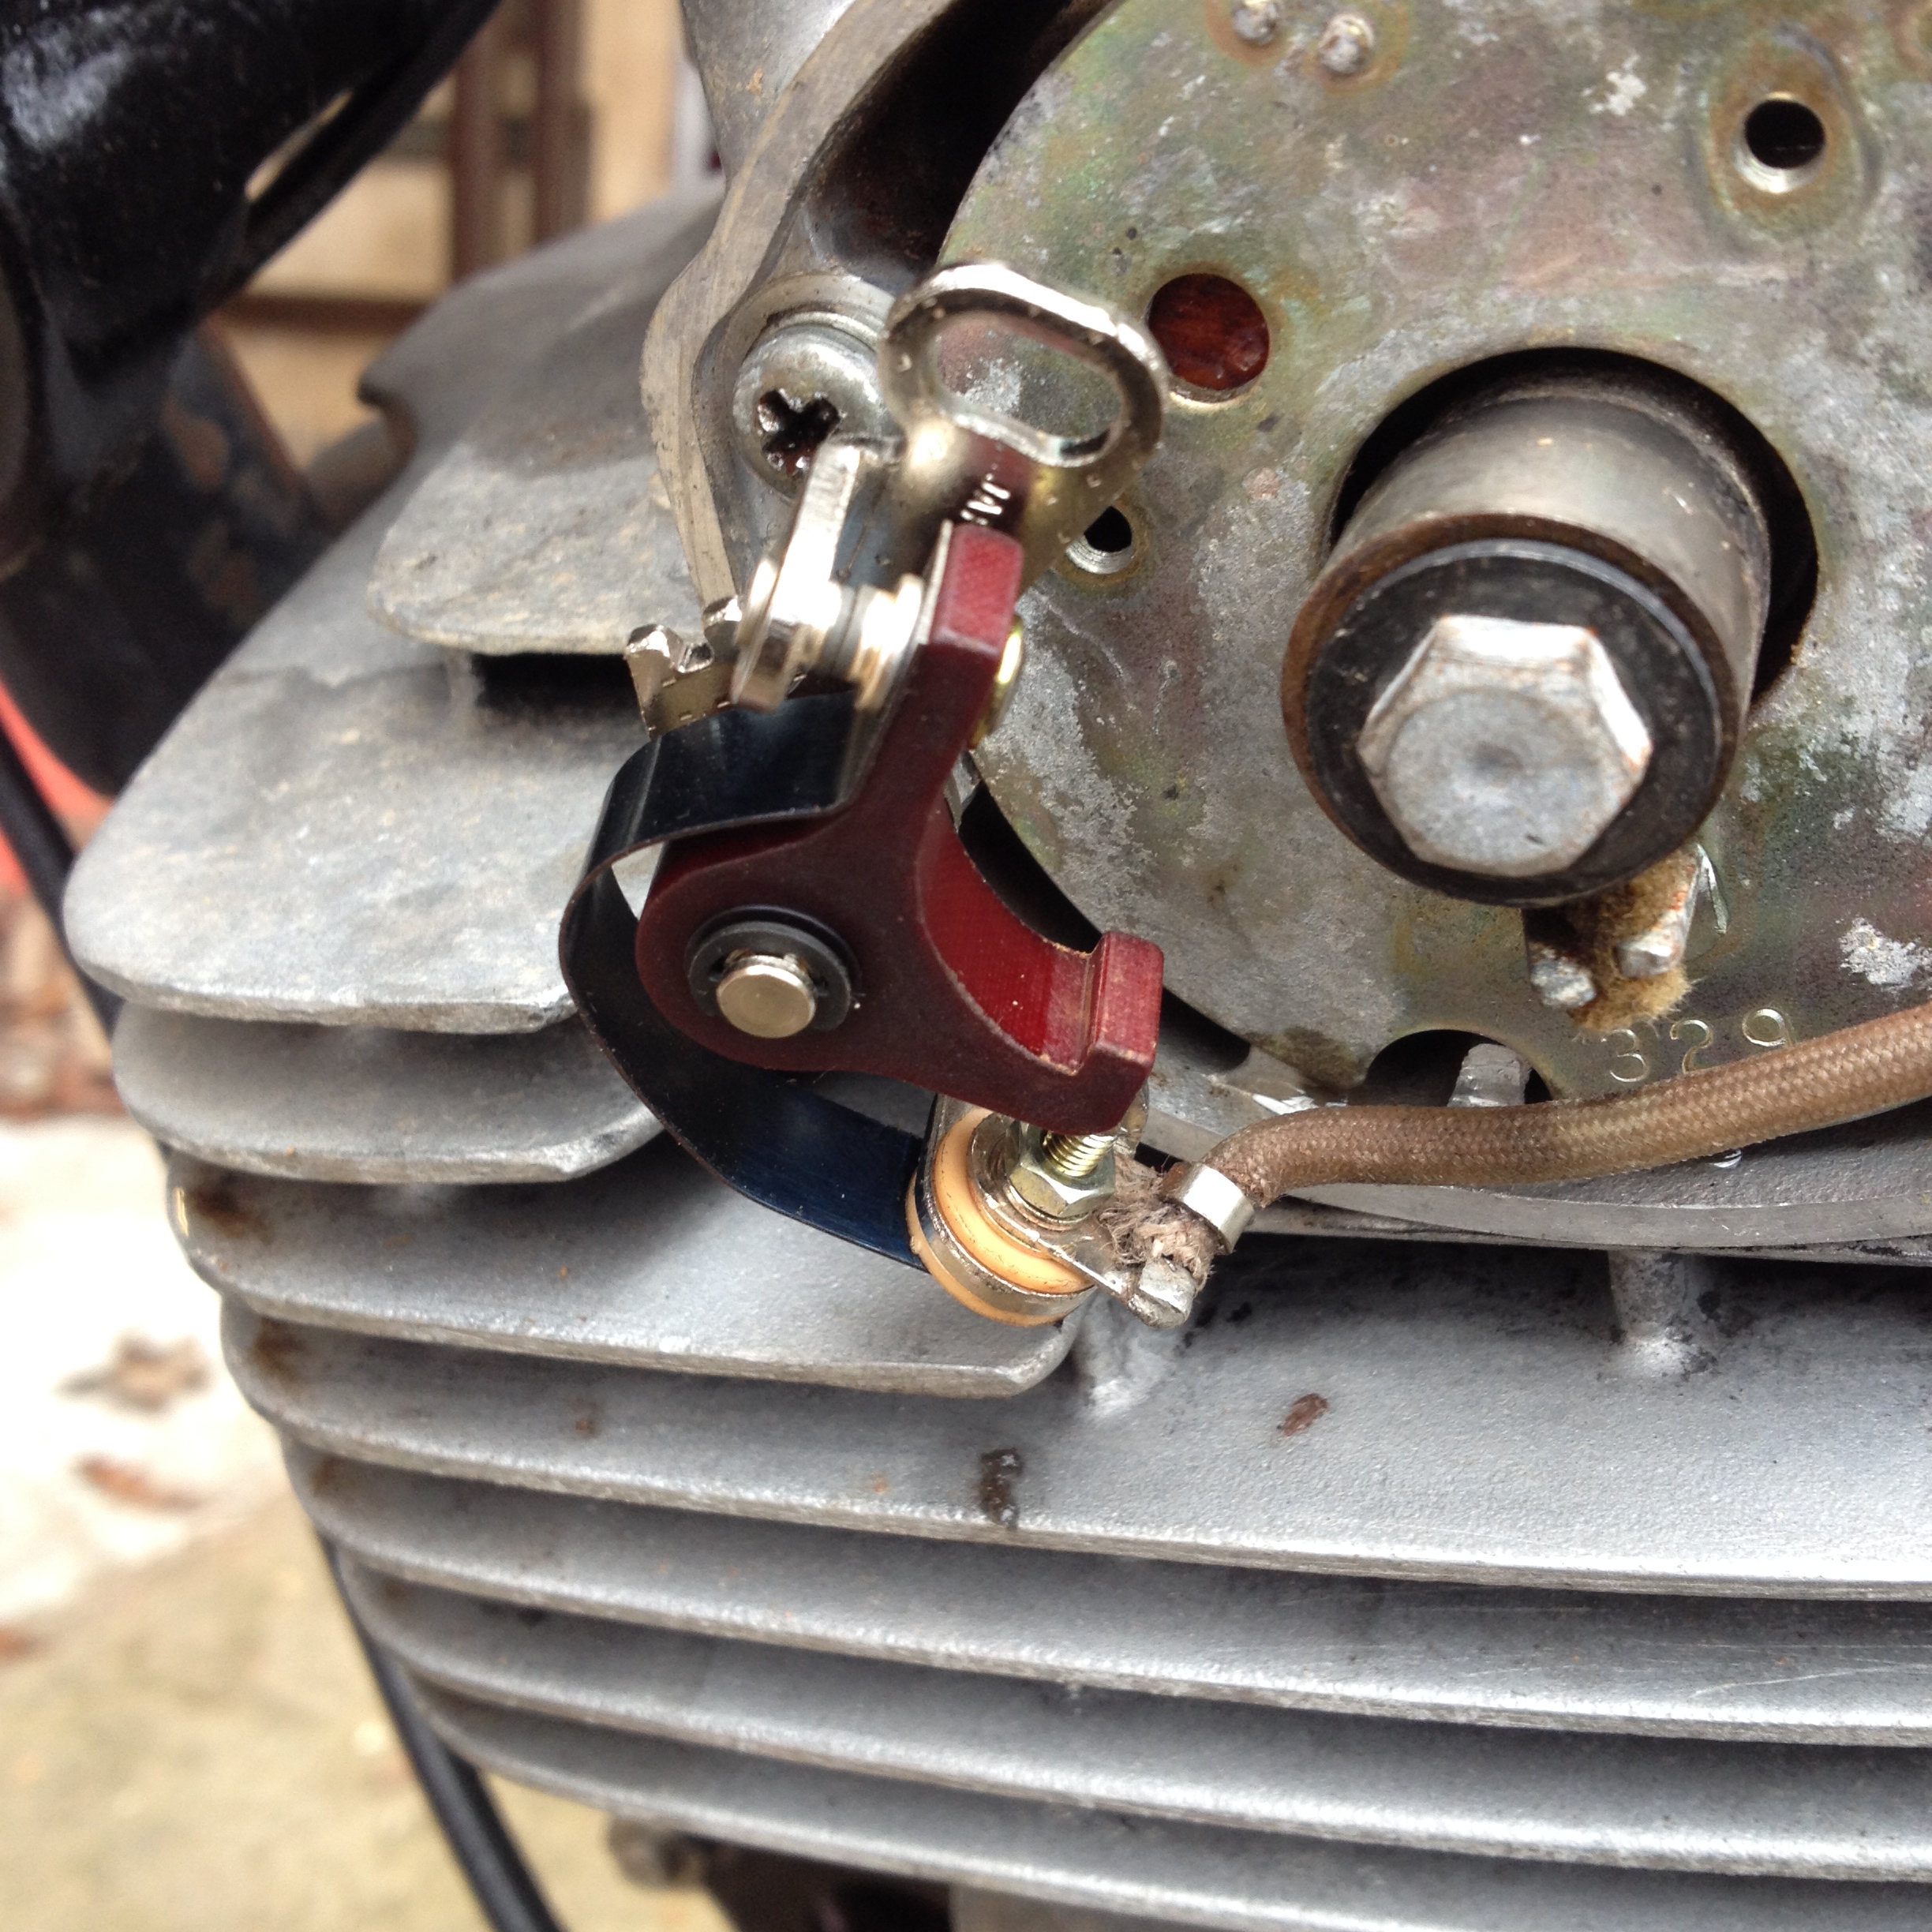
I find it a lot easier to connect the points wire onto the new points before screwing them onto the backplate. I will be honest and admit I set the gap by eye, old school, it still runs. I will check it after a day or two with feeler guages when it has settled in. The standard gap should be 0.3 to 0.4 mm or 0.012 to 0.016 inch (12 to 16 thou).
The AC horn works, (with a temporary two wire push till the new one arrives) although I needed to adjust the nut on the front to get the best (loudest) sound. As it is AC direct from the alternator coil, the sound is louder if the engine is revved, and the voltage increases.
The genuine Honda ignition switch works (it's really a kill switch that is key operated). The handlebar kill switch works. All the new wiring is done with crimped on Japanese 3.9mm bullet connectors in clear sleeves.
There is a minor leak from the joint between the exhaust header pipe and the rear boxes, that is fixable.
The speedo light didn't work because I didn't realise that the bulb was already blown. I have put a new one in, and will check it next time I start the bike up.
I am waiting for the head to carb insulator 'O' ring, and although there is a spark and it runs, I decided to do the new coil/old frame modification mentioned somewhere on this site . I did it as before, but this time I put a blob of the black Plasti Dip discussed on the Cramper page also elsewhere on this site over the solder joint, much like the original coil has. It has dried overnight, and is now fitted.
I did the coil upgrade because I want to eliminate the possibility of a weak spark from my tune up, sometimes with these old XL Hondas, the combination of a fairly small voltage produced by kick starting, and a tired coil can result in a poor spark and affect performance or reliable starting.
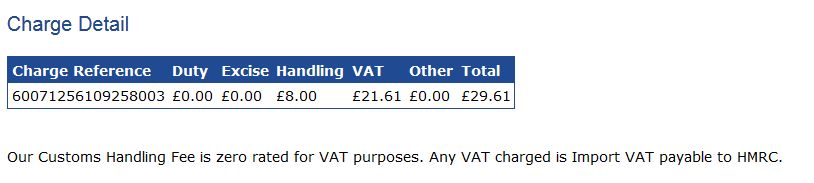
Also, because the carb is running odd jetting, (and I don't know what else may have been changed, such as the needle) I have ordered a new/old carb from ebay that looks in very good condition and is un-modified, to serve as a spare and as a yardstick when trying to get the engine running right. God knows what the import duty will be.
update: I know what it is, I just paid it. I tried to pay Parcelfarce online 3 times with my debit card and once with my credit card, all these attempts failed, so I paid it by phone with the same debit card. Should be here in 3 days time. The import charges = $50 US, HMRC is Her Majesty's Revenue and Customs, ie. the IRS in the UK. We can only import an item not exceeding £15 ($25 US) without paying tax....
At least if I need to I can have a stock carb, new points, new coil as a starting point.
I have a couple of spare XL250 carbs Keihin model 074A, but the XL350 carb is a different model PD series 01A (still Keihin) and also has a bigger front mounting flange.

I did find the tank decals today, in the wrong box. They are even smaller than I remembered, I'm glad I didn't try to use them. The bigger ones are more like the originals and look great on the tank.
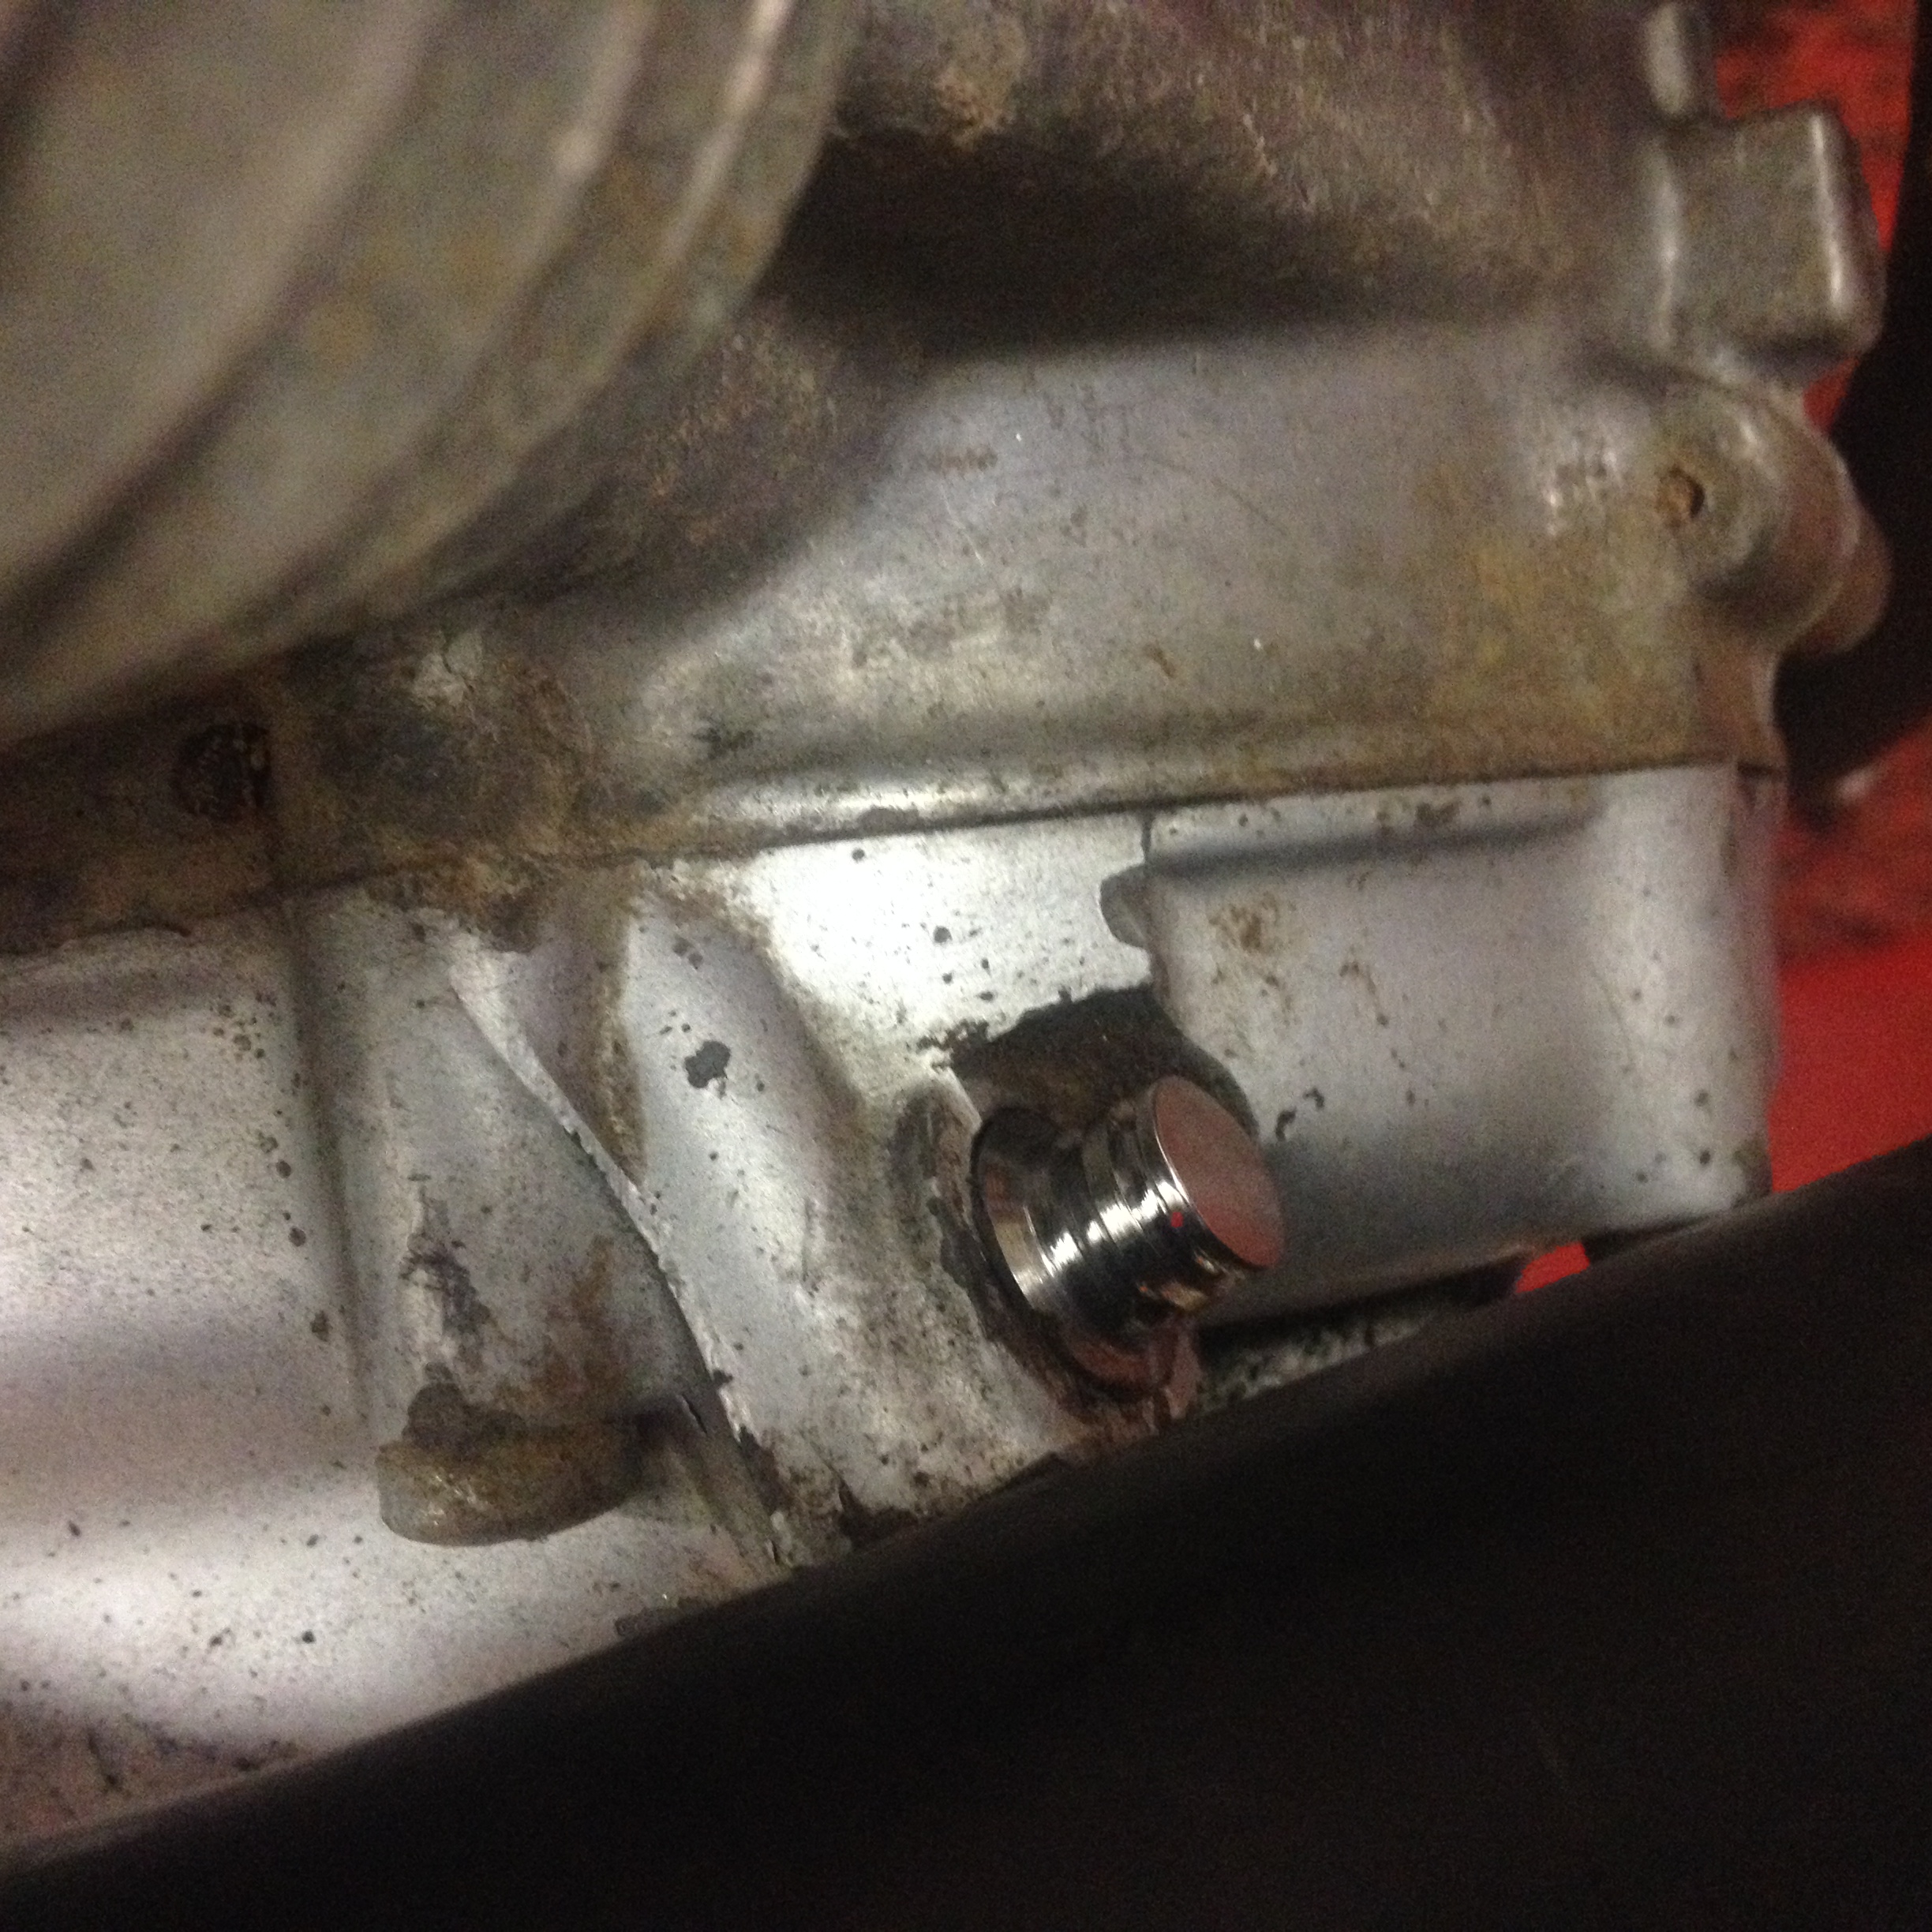
I am not fitting the tacho at the moment (I do have one....) so I thought maybe if I blanked off the hole on the right hand crankcase where the tacho cable comes out it would stop muck or spiders getting in, so I made a plug from some 15mm stainless. The small grooves are to grip it if it is tight and doesn't want to come out. Not sure if I will really use it or not! OK, so I was bored while I await the postman with the 'O' ring; I was so bored I polished the round stator cover and points cover plates too.
Yeah I fitted it.
The new 'O' ring for the head to carb mount/insulator came today, so fitted that too.
Next day: I thought it would be a good day to do the fork seals. First, I spent an hour fixing my bike lift as it wouldn't go up very high then after some new fluid etc and much swearing/cussing and the use of two trolley jacks, it was fixed. The problem is you can't top up the lift's hydraulic fluid unless the lift is raised, but it doesn't raise without the fluid. You get the picture. I bought it twenty years ago from a closing down BMW dealer, and it was probably twenty years old then. It is German, and I did have new seals made for it (I couldn't buy them anywhere) which I fitted last year. It is built like a Panzer tank.
This is the fork leg before I started...

When I had sorted that out, I dropped the forks out one at a time, after removing the front wheel and mudguard. Oddly, no fork oil came out of the drain screws on either leg. Hmmm.... I checked the top covers were not perished, and were re-usable, then had a look at the top seal on the first leg.
It was not a pretty sight! It is the worst looking one I have seen, as it was full of crap. Then I looked at the spring...... and the bottom pipe....
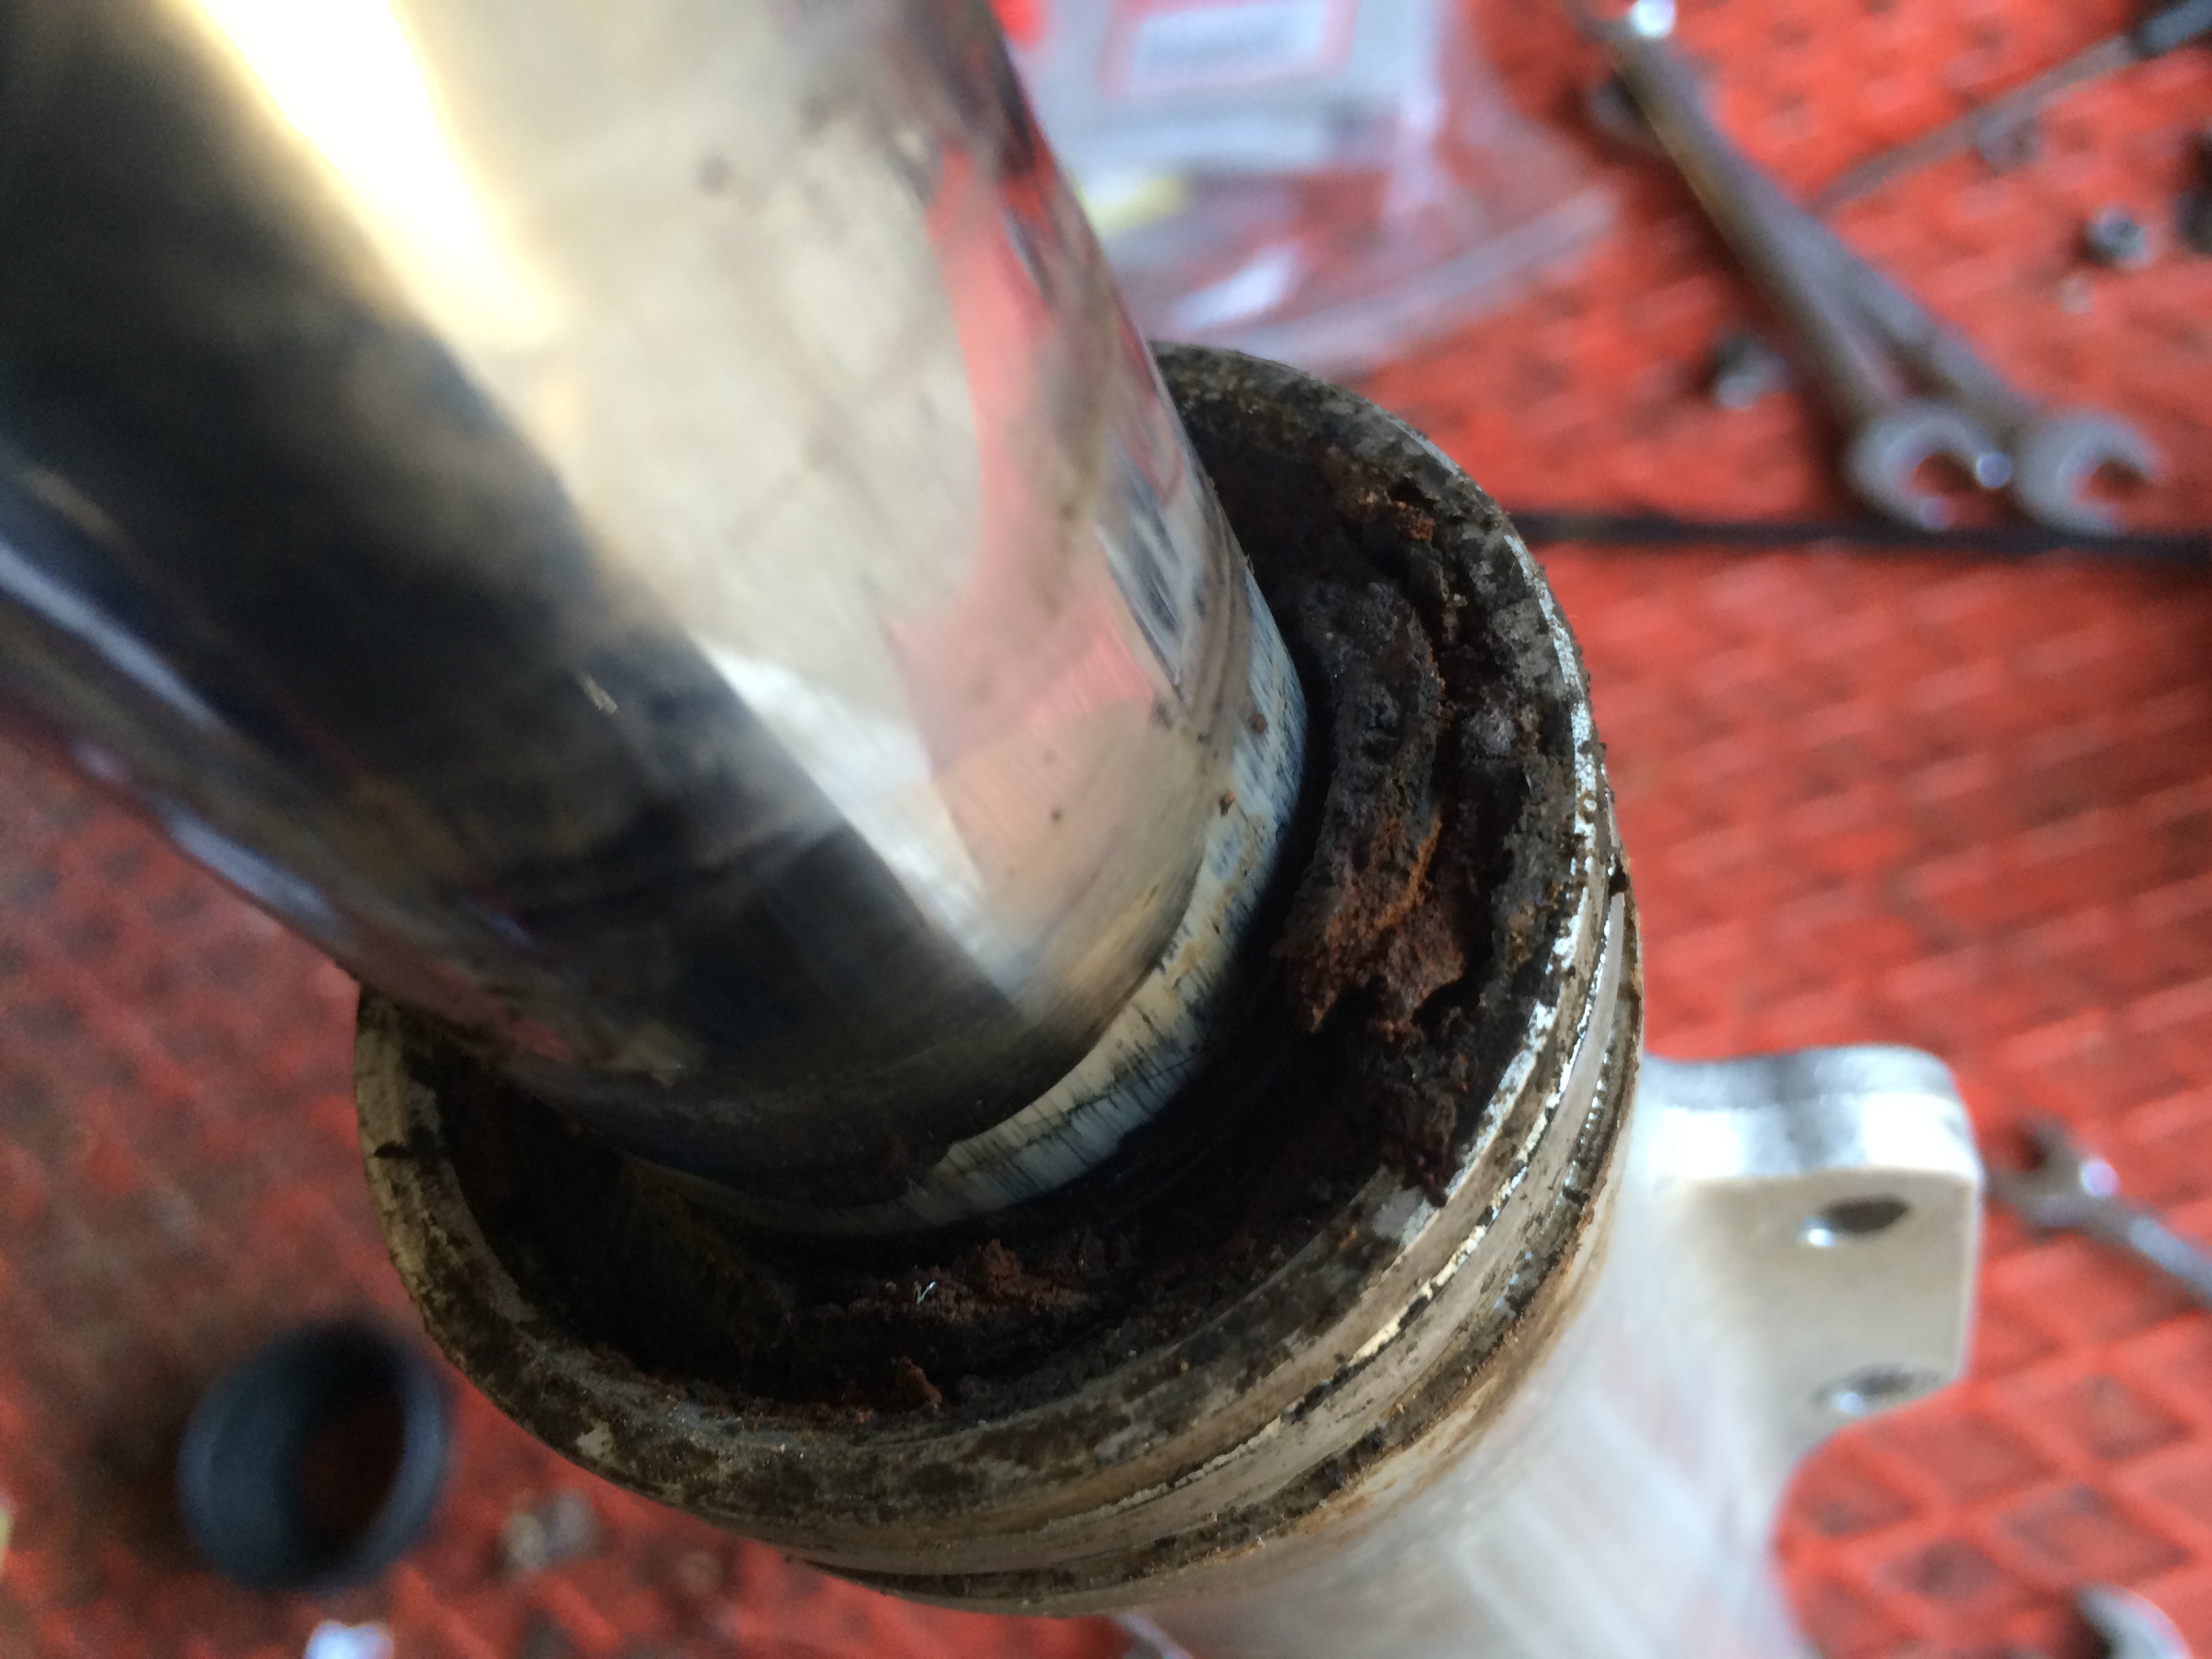

There was absolutely no damping oil in either fork leg, they only had some muddy water in them! It must have been fun to ride...like a pneumatic drill.
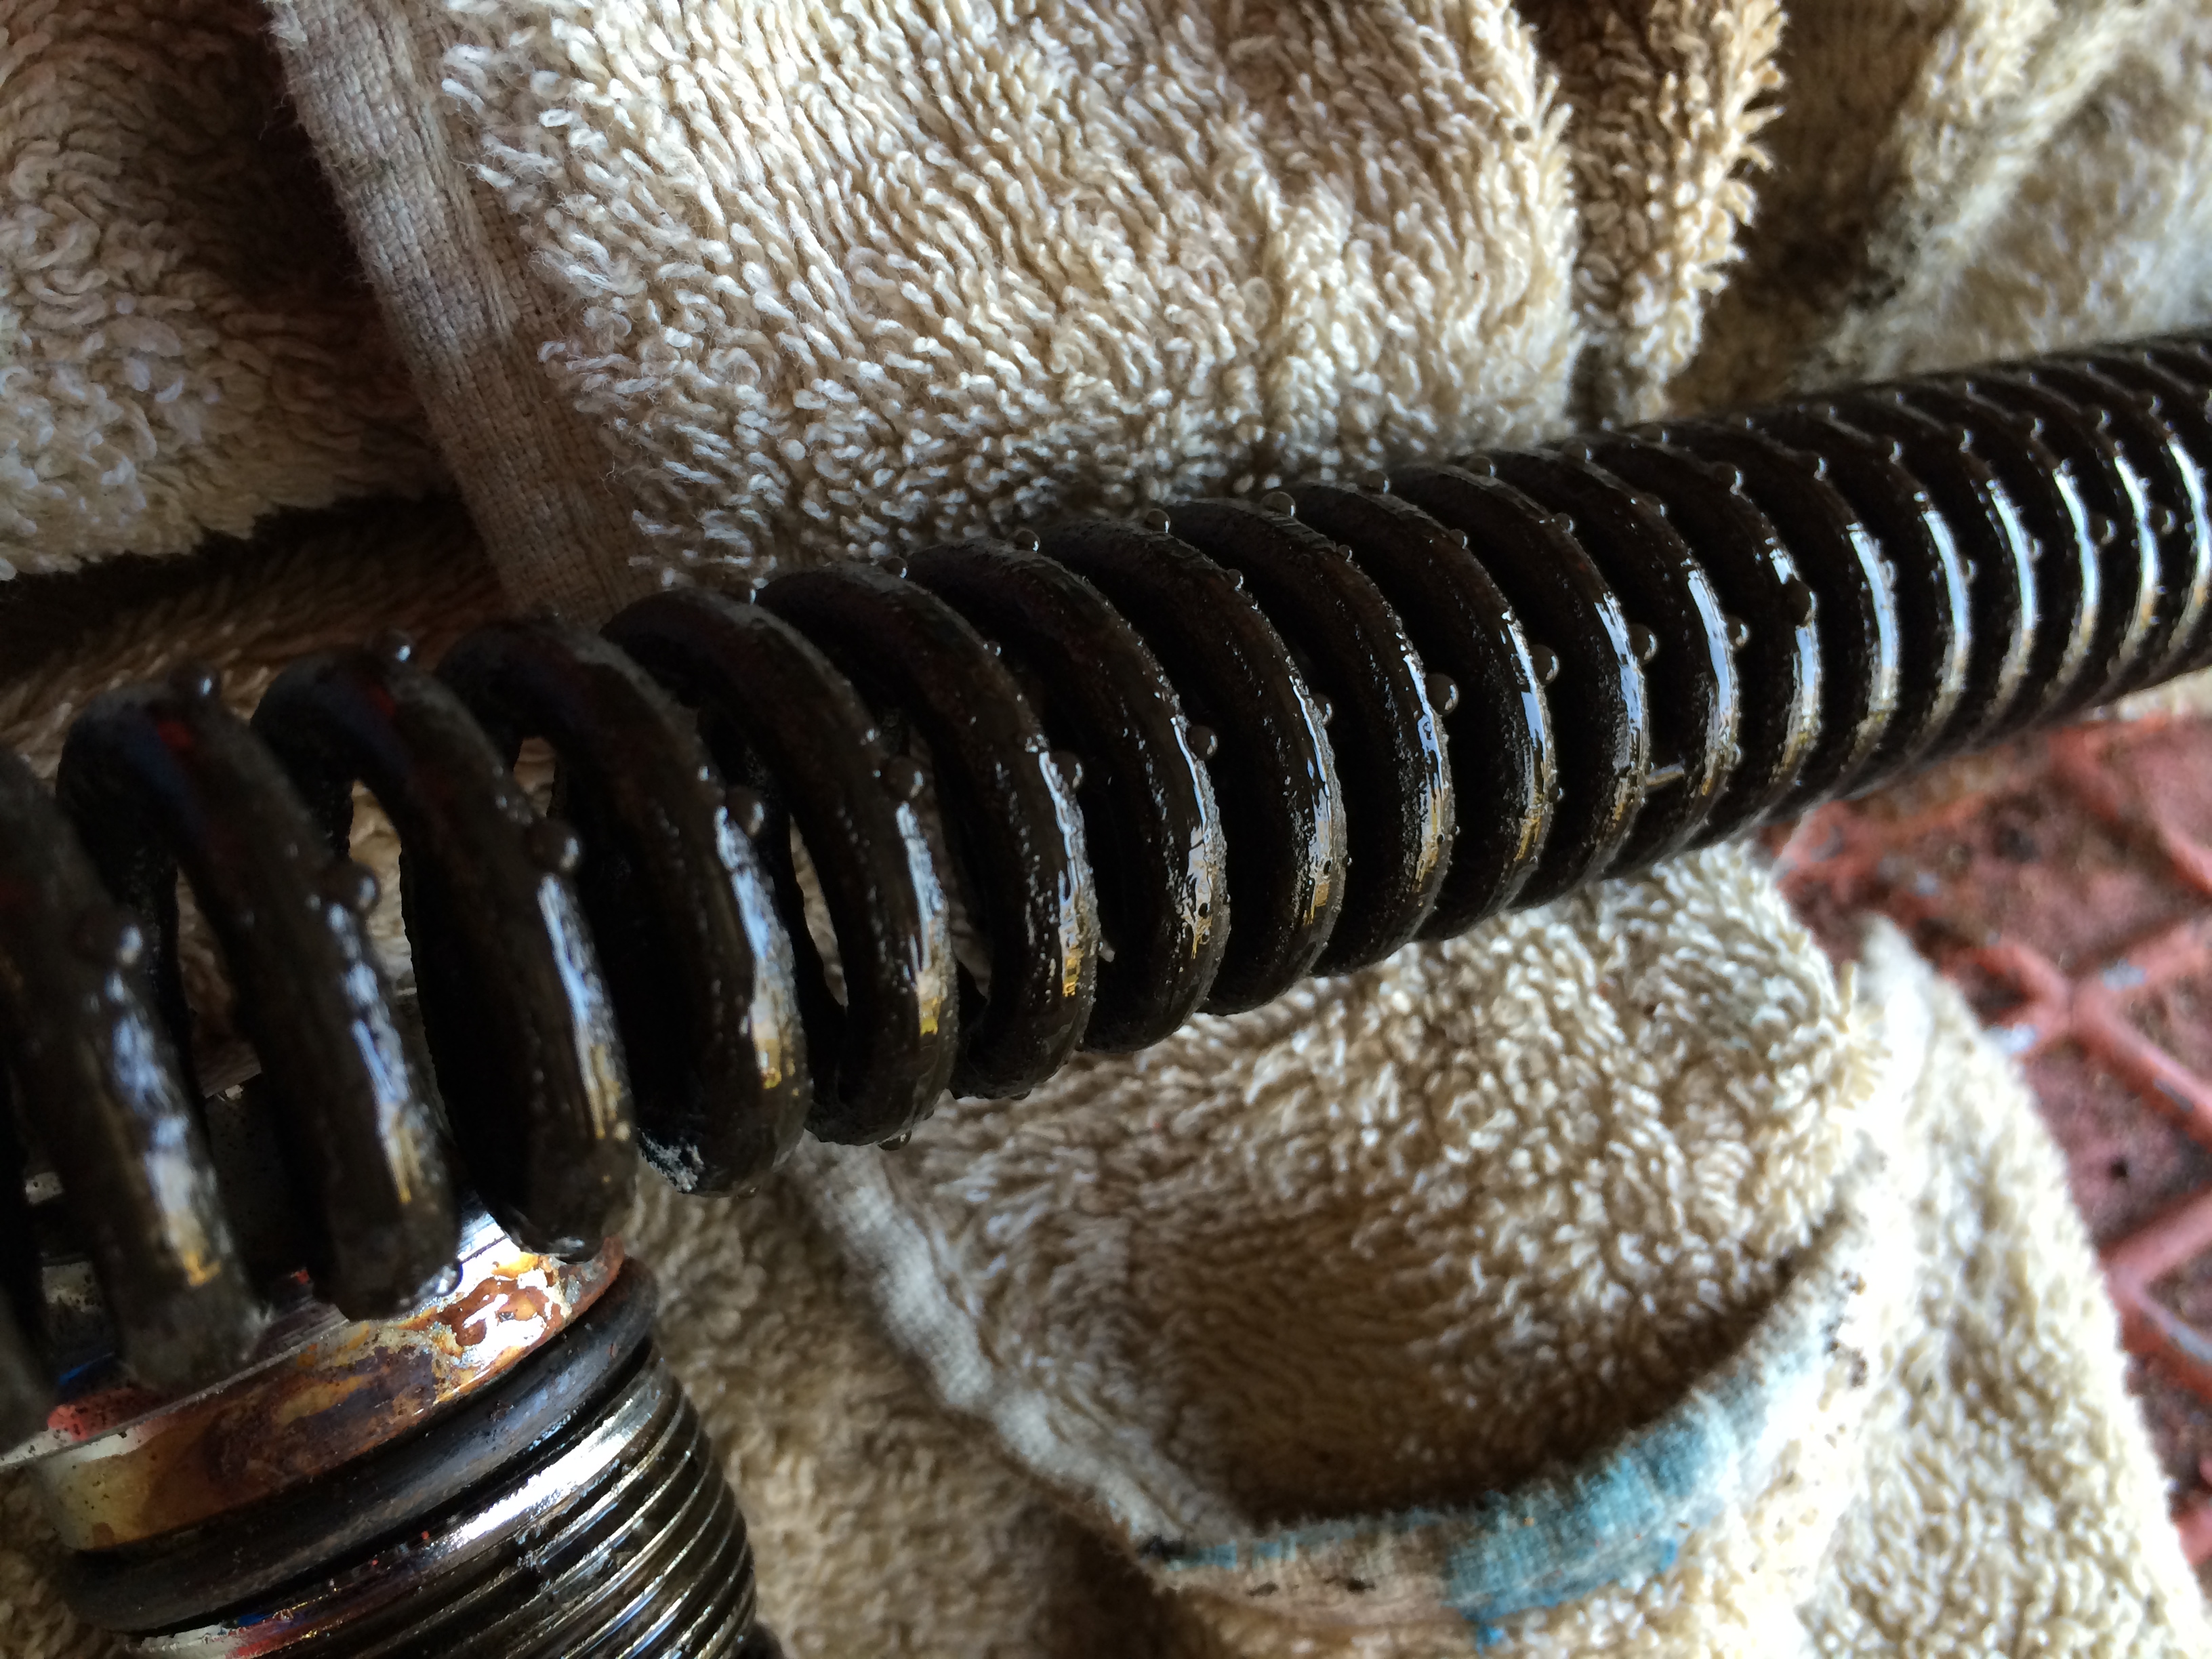
So I set about cleaning them out, washing them with petrol (gas) then hot soapy water, and then fitted new top seals, 170cc of ATF fluid, and reassembled them. The brake plate side (nearside/left) was odd because there was oily mud on the spindle, turned out that the bottom M8 allen head bolt was loose and had no copper washer. I replaced the washer, but my stock ones were slightly too big to fit the recess for the bolt head so I had to first trim a little off the outer edge on the grinding wheel. It is all back together now, but this job took all afternoon, so I ran out of time to do the exhaust joint. I haven't gone into much detail on these forks, as you can get more detailed front fork stuff on this site by looking HERE .
That's better.
Now getting the engine to run right has been a bit of a chore, it was getting as long as War and Peace so I have put it warts and all on a new page which you can see by clicking the XL350 engine and carb stuff button below.

Just to recap, so far the new or replacement parts fitted to this project are as follows:
Front and rear tyres, inner tubes rim tapes
Plug
Points and points cam oiler felt
coil condenser ht lead spark plug cap
Swinging arm bushes
Kick start oil seal
Kick start pawl
Front mudguard with bolts
Seat
Rear footrests
Front footrests
Exhaust gasket and flanges
Carburettor
Both push and pull throttle cables, choke cable
Rear shock absorbers
Wiring loom
Horn
Horn switch
Engine kill switch
ignition switch bracket with switch and key
Front and rear sprockets
Front sprocket cover and screws
Rear chain
Engine oil
Handlebars
Front brake lever
Clutch lever and perch
Speedometer and bracket and speedo cable, wire guide on forks with bolts
Air filter
Front engine mounting bolts x 3
Front fork oil seals and oils and drain screws
Rear number plate bracket, bolts
Clutch cable
Front brake cable
Front brake cable guides
Manifold O ring
left and right side panels
Oil filter O ring
Fuel tap
Rear tank mount rubber
Fuel cap
Stator cover
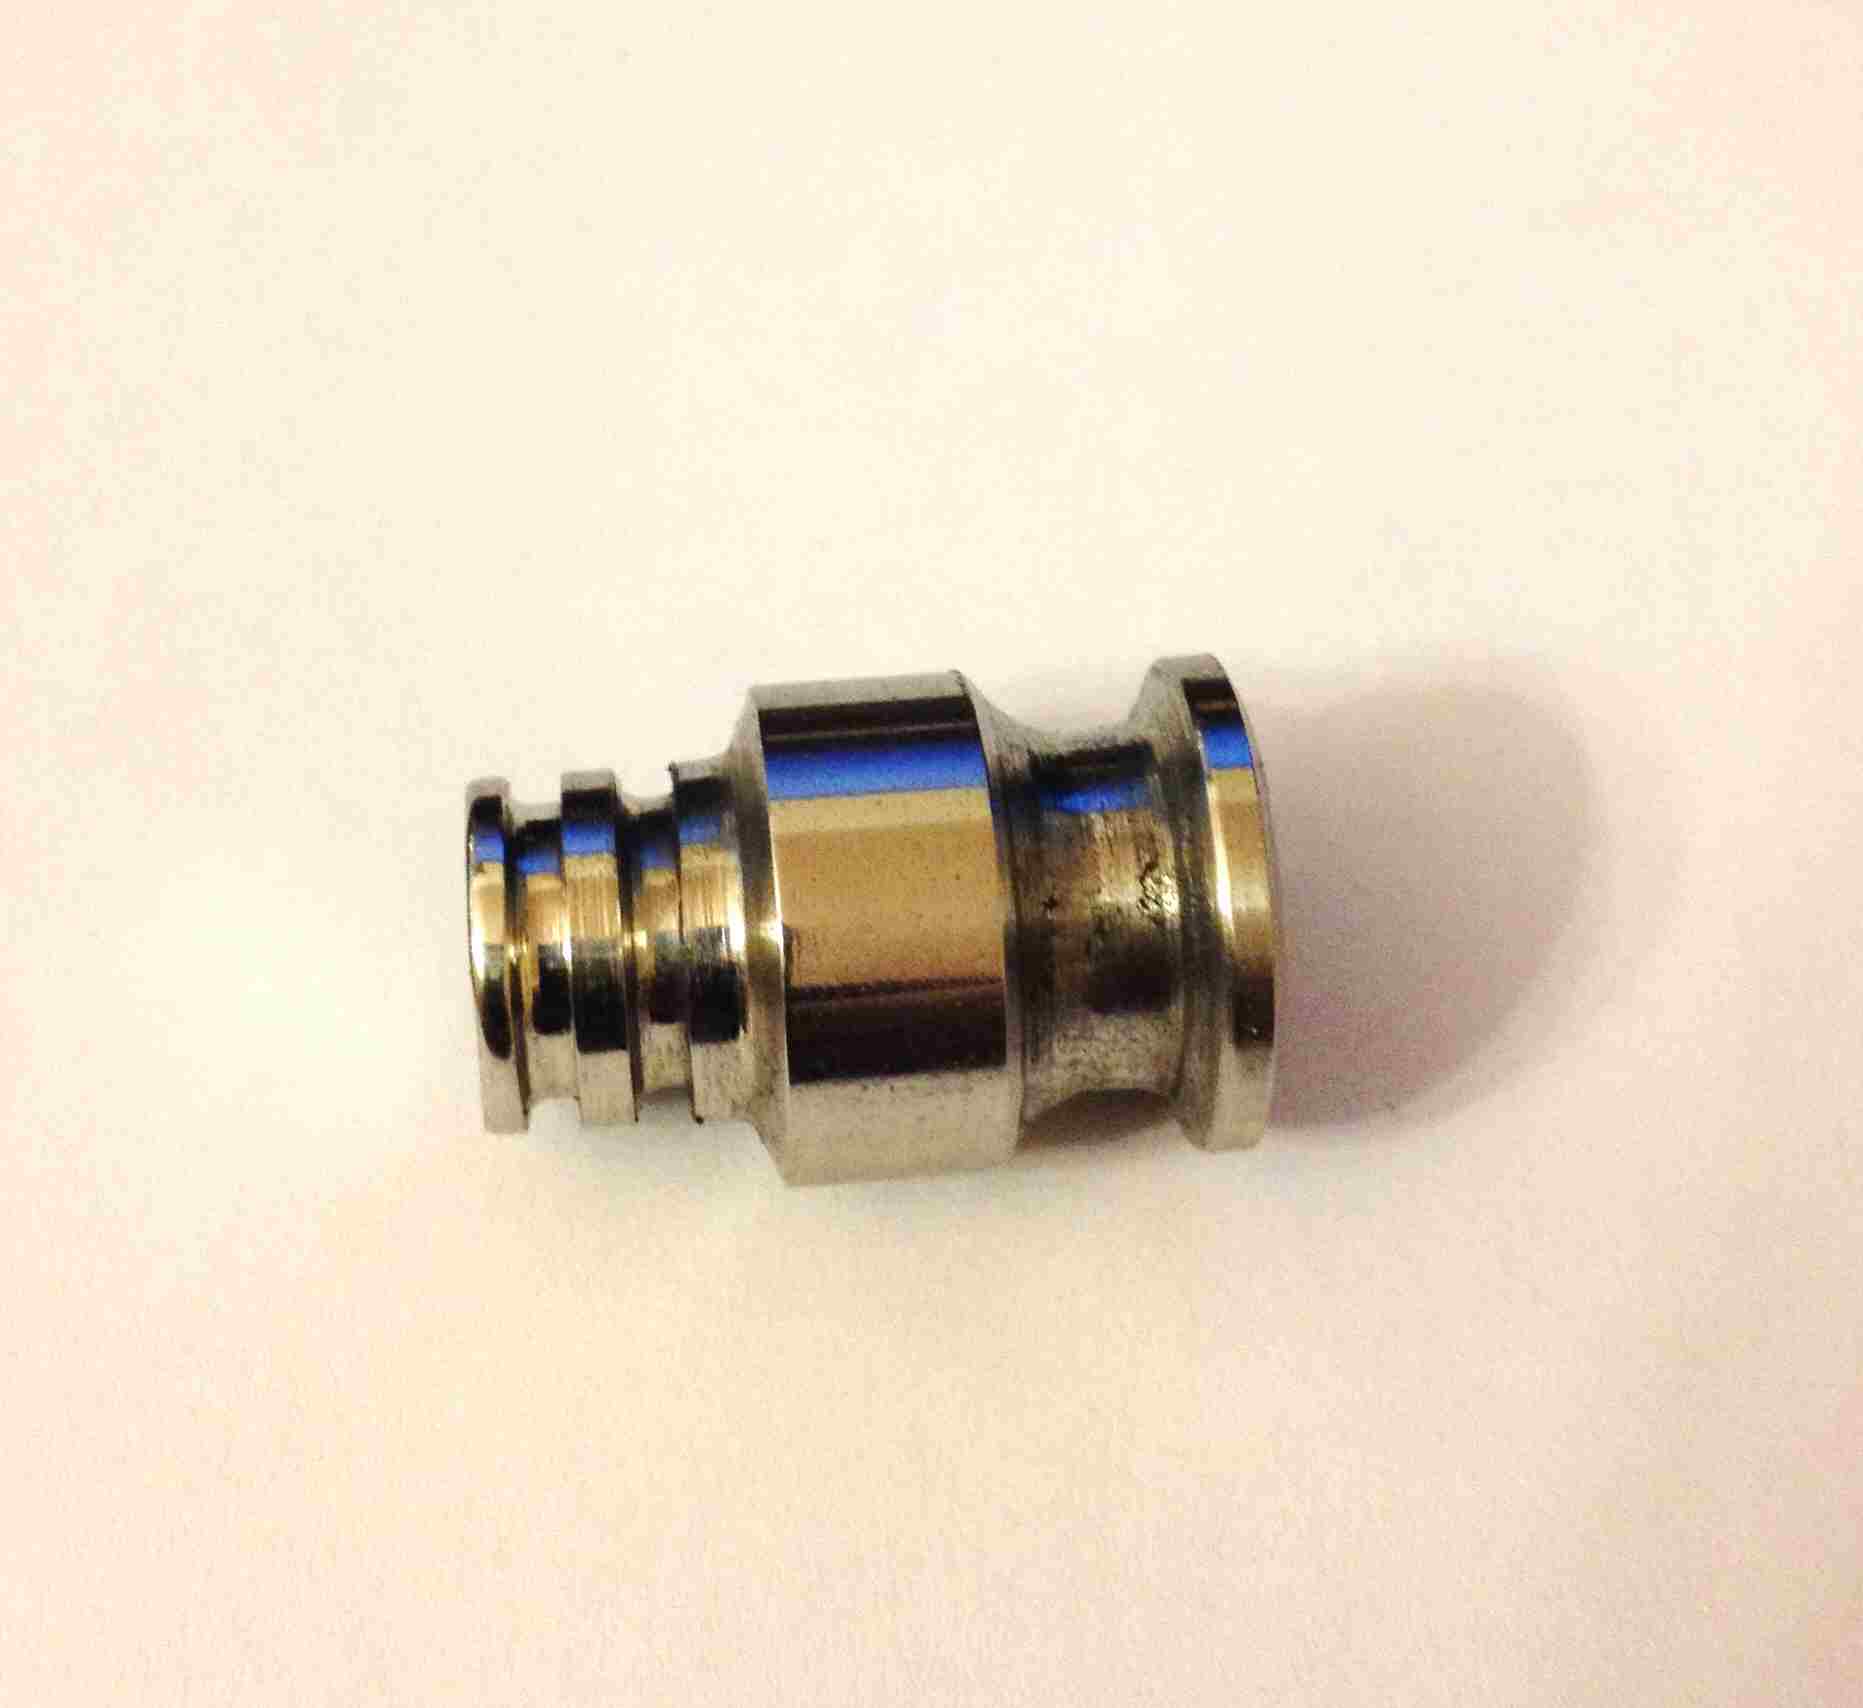
Magnetic oil drain plug
Side stand plus spring and pivot bolt
Toolbox and tools
So today (28th April 2014) I took it for the Government M.O.T. test and it passed, so I have ordered the forms (form DVLA V55/5) needed to register it and get a tax disc. I will update as it the red tape progresses.
Update:
now the 13th May and still no forms in the post. I will have to re-apply for them today. See what I mean about red tape?
Then I had a look in my garage and remembered an old friend from 1975 that I drove into the garage about 1998 and left forgotten, and with half an inch of dust on it, a part seized caliper, and two flat tyres, so I dragged it out today pumped up the tyres, knocked the caliper with a rubber mallet and gave it a wash. It is 100 percent original, 10,000 miles. To keep or to ebay? Hmmmm.... I have ordered a new battery.


