Next the new engine covers adventure - Part one
As part of the preparation for putting the engine back together in the frame, I decided that I wasn't going to rebuild the engine as it ran very well before I took it out, it has only done 10,000 miles and was sweet as a nut, However the side cases were both unpainted and a bit horrid. I think a previous owner must have stripped them and maybe polished them. Sadly these are not aluminium but magnesium which doesn't like our acid rain, and they were a bit sad and neglected.
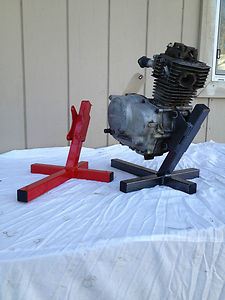
I saw simple engine stand on the internet like this
so I made one, took 20 mins. It is basic but really useful. I only used steel I already had lying around, so cost was nil. Mine looks like this:

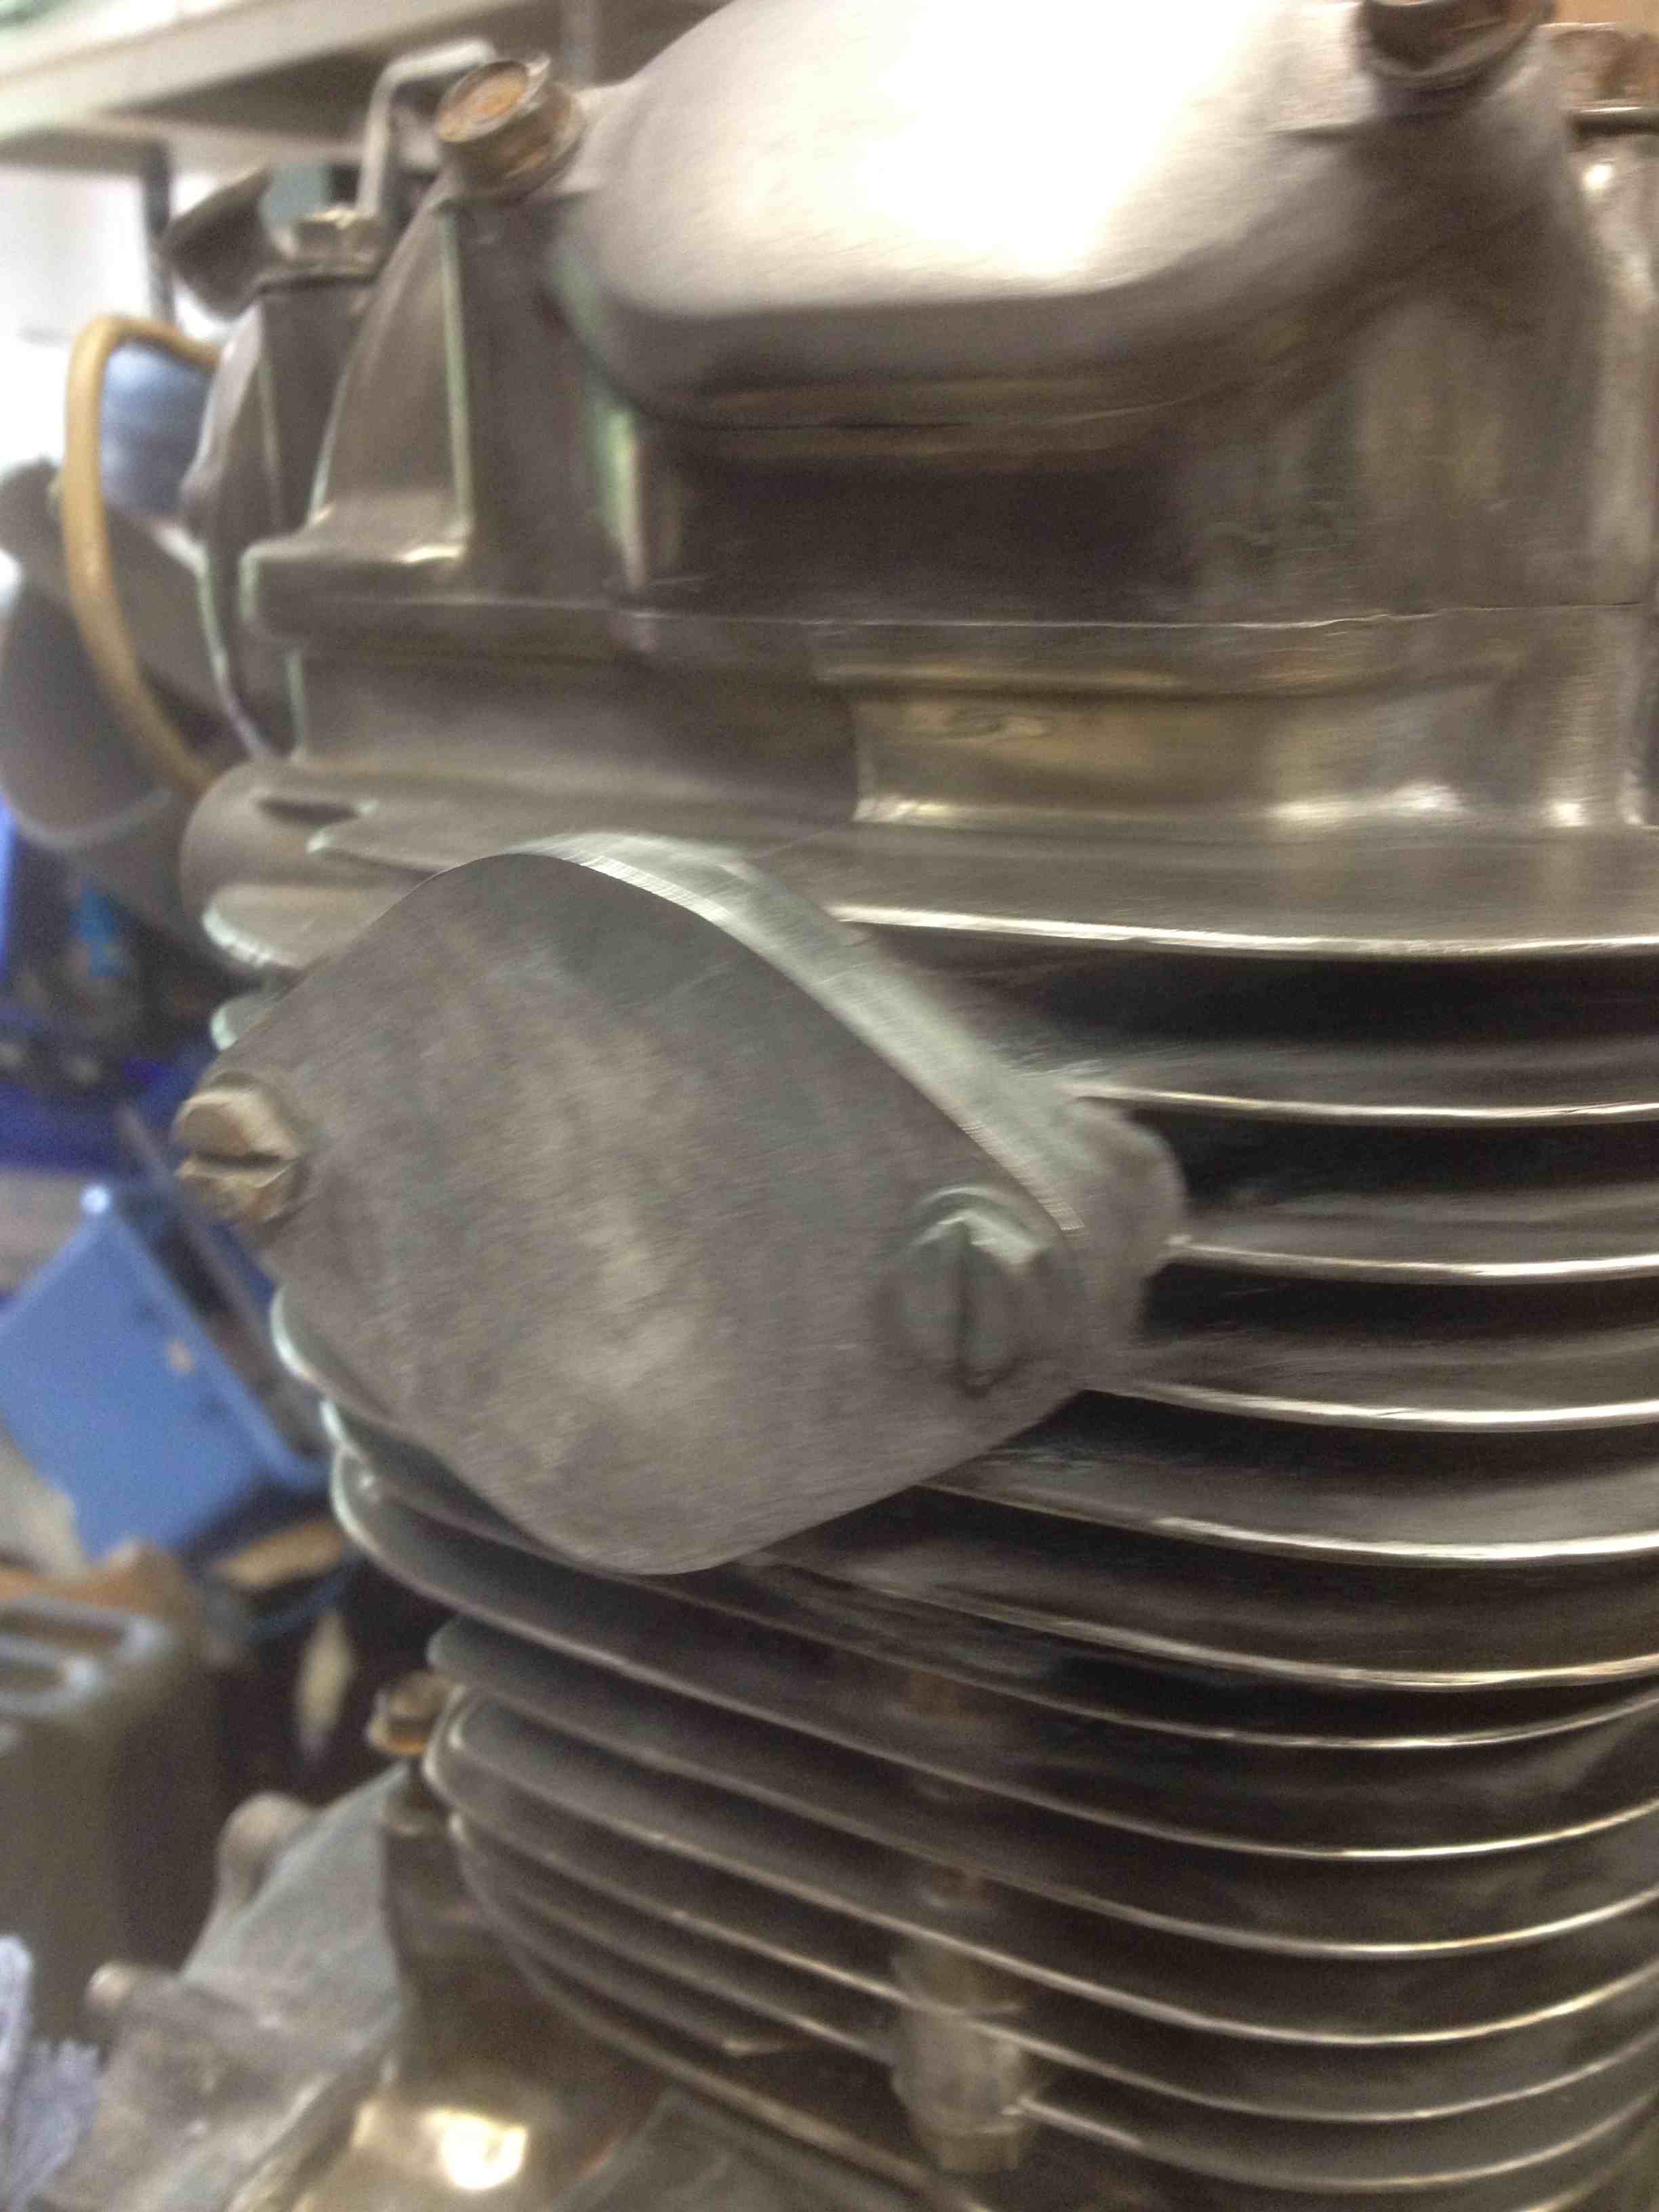
before working on the engine I made an alloy plate to block off the carb mount and turned a spare piece of ally and made a short bar to block the exhaust port, to keep them sealed
 and
and 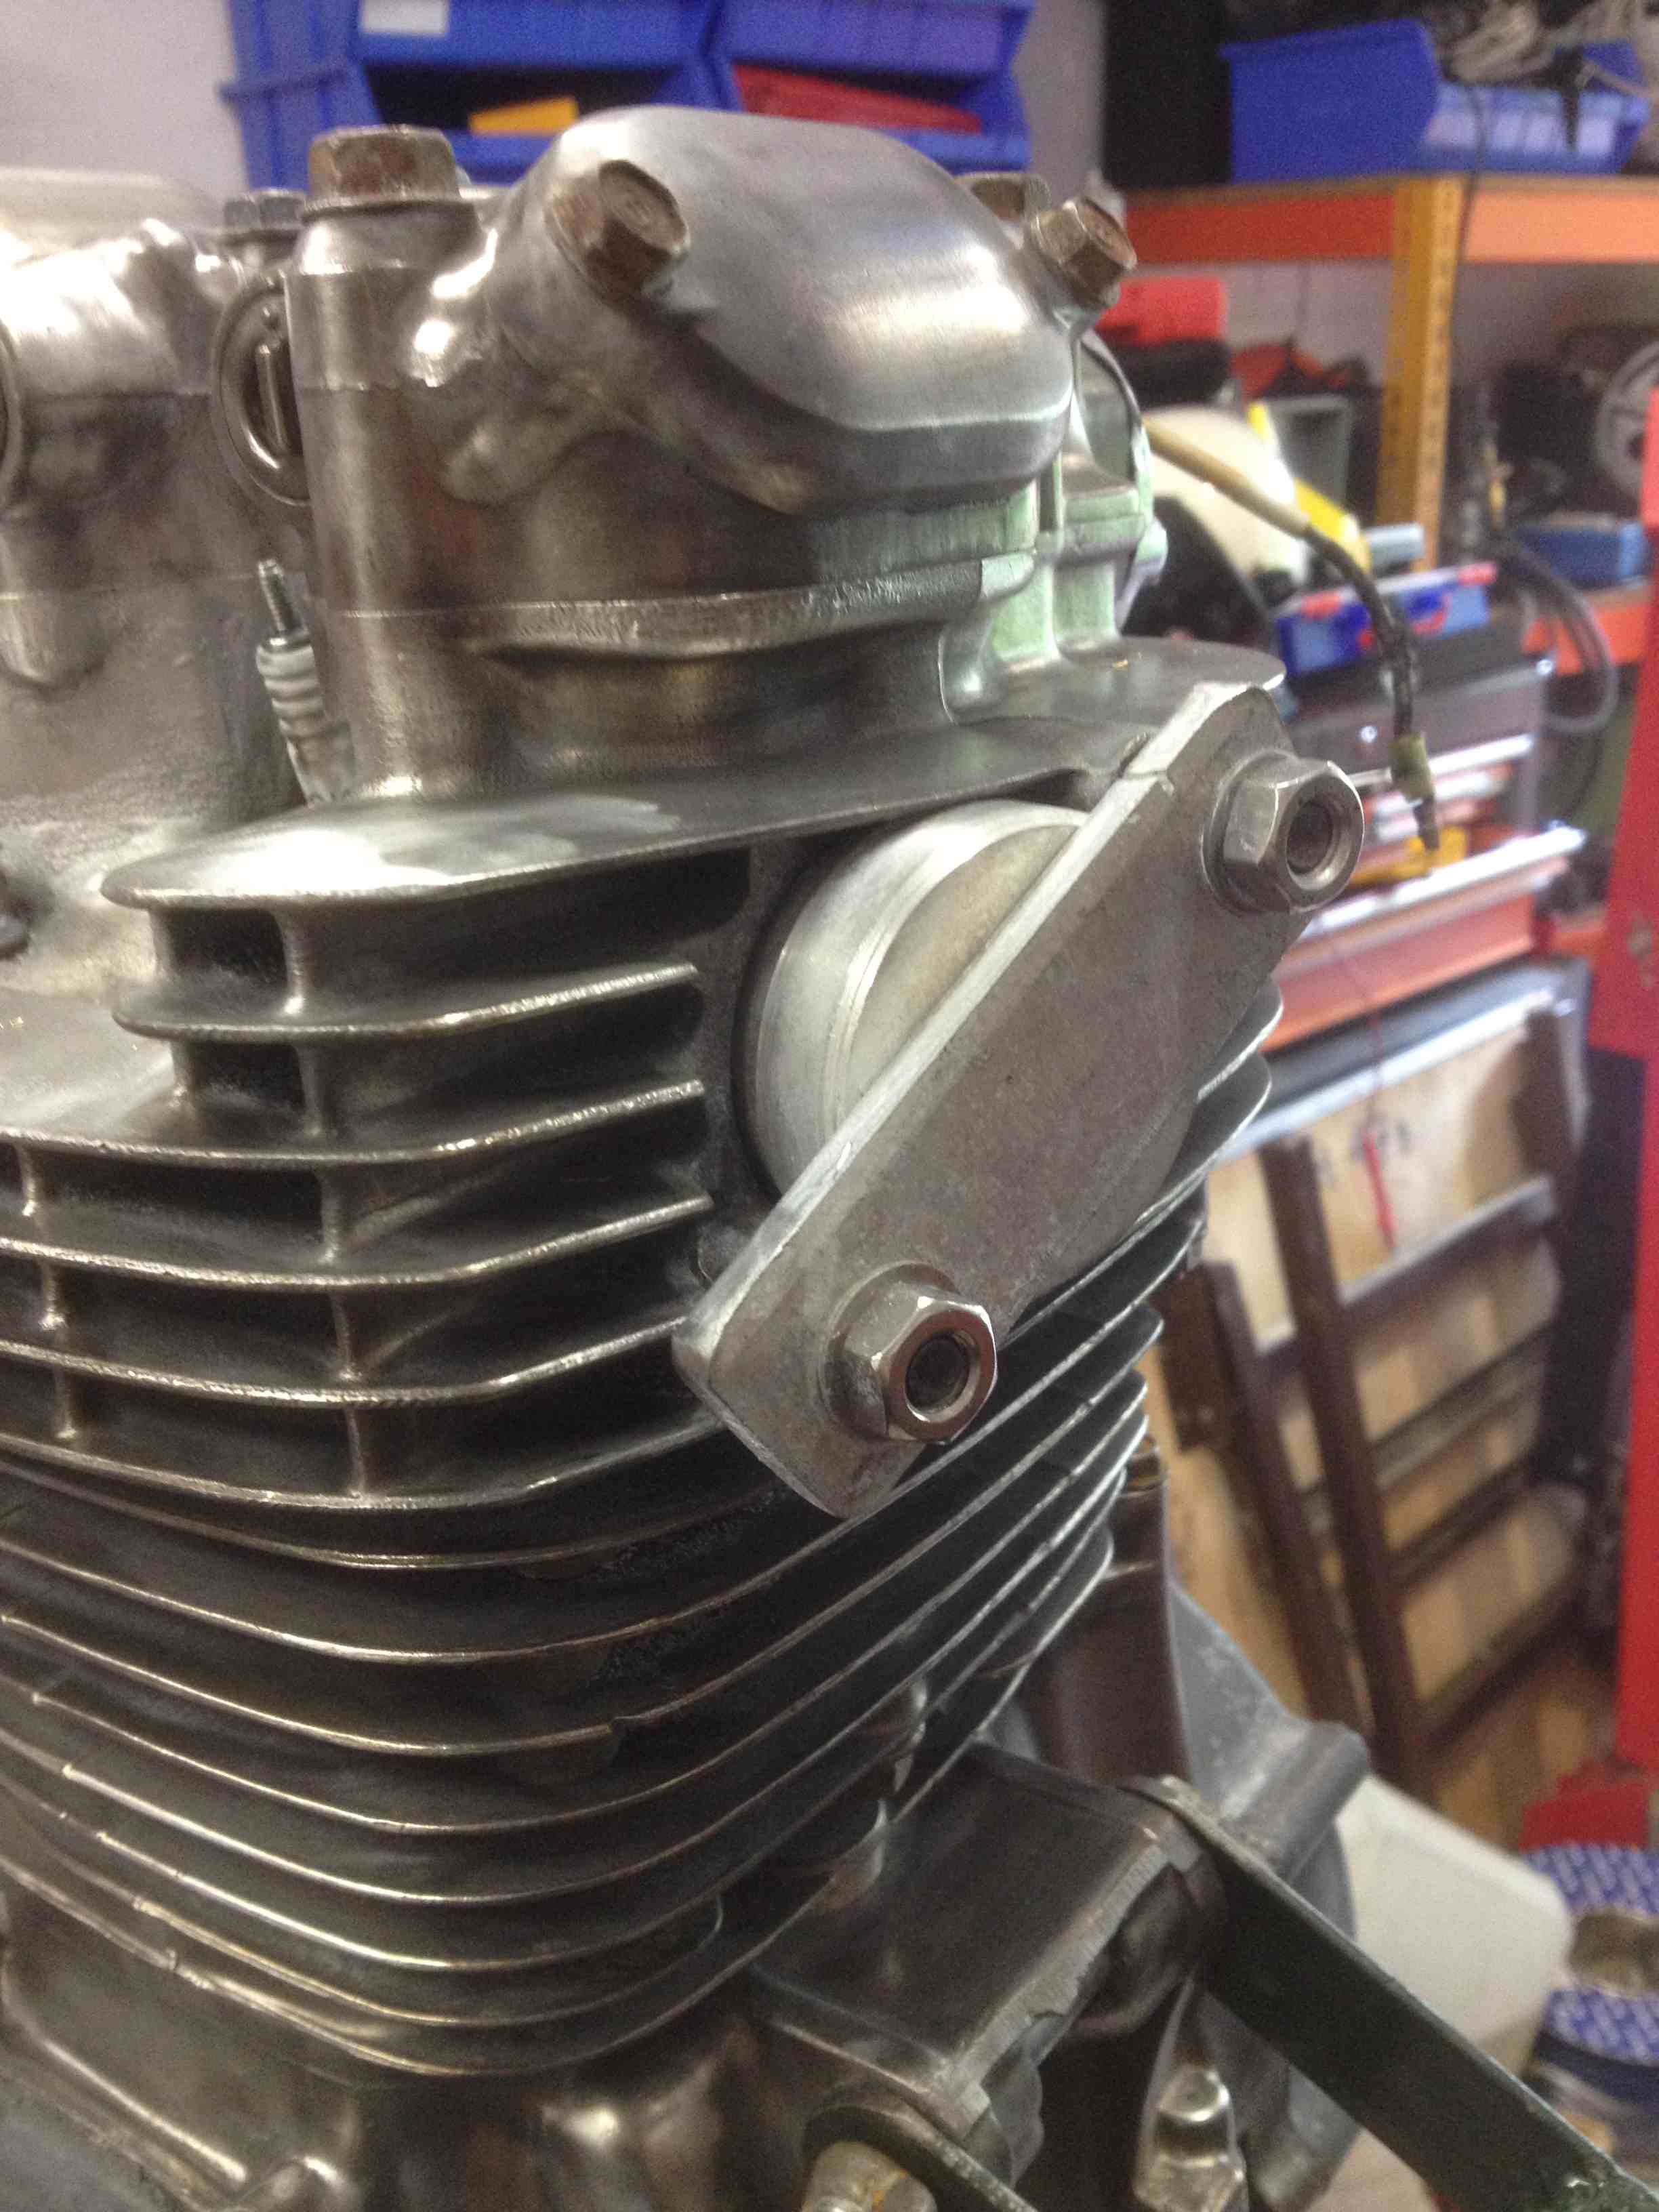
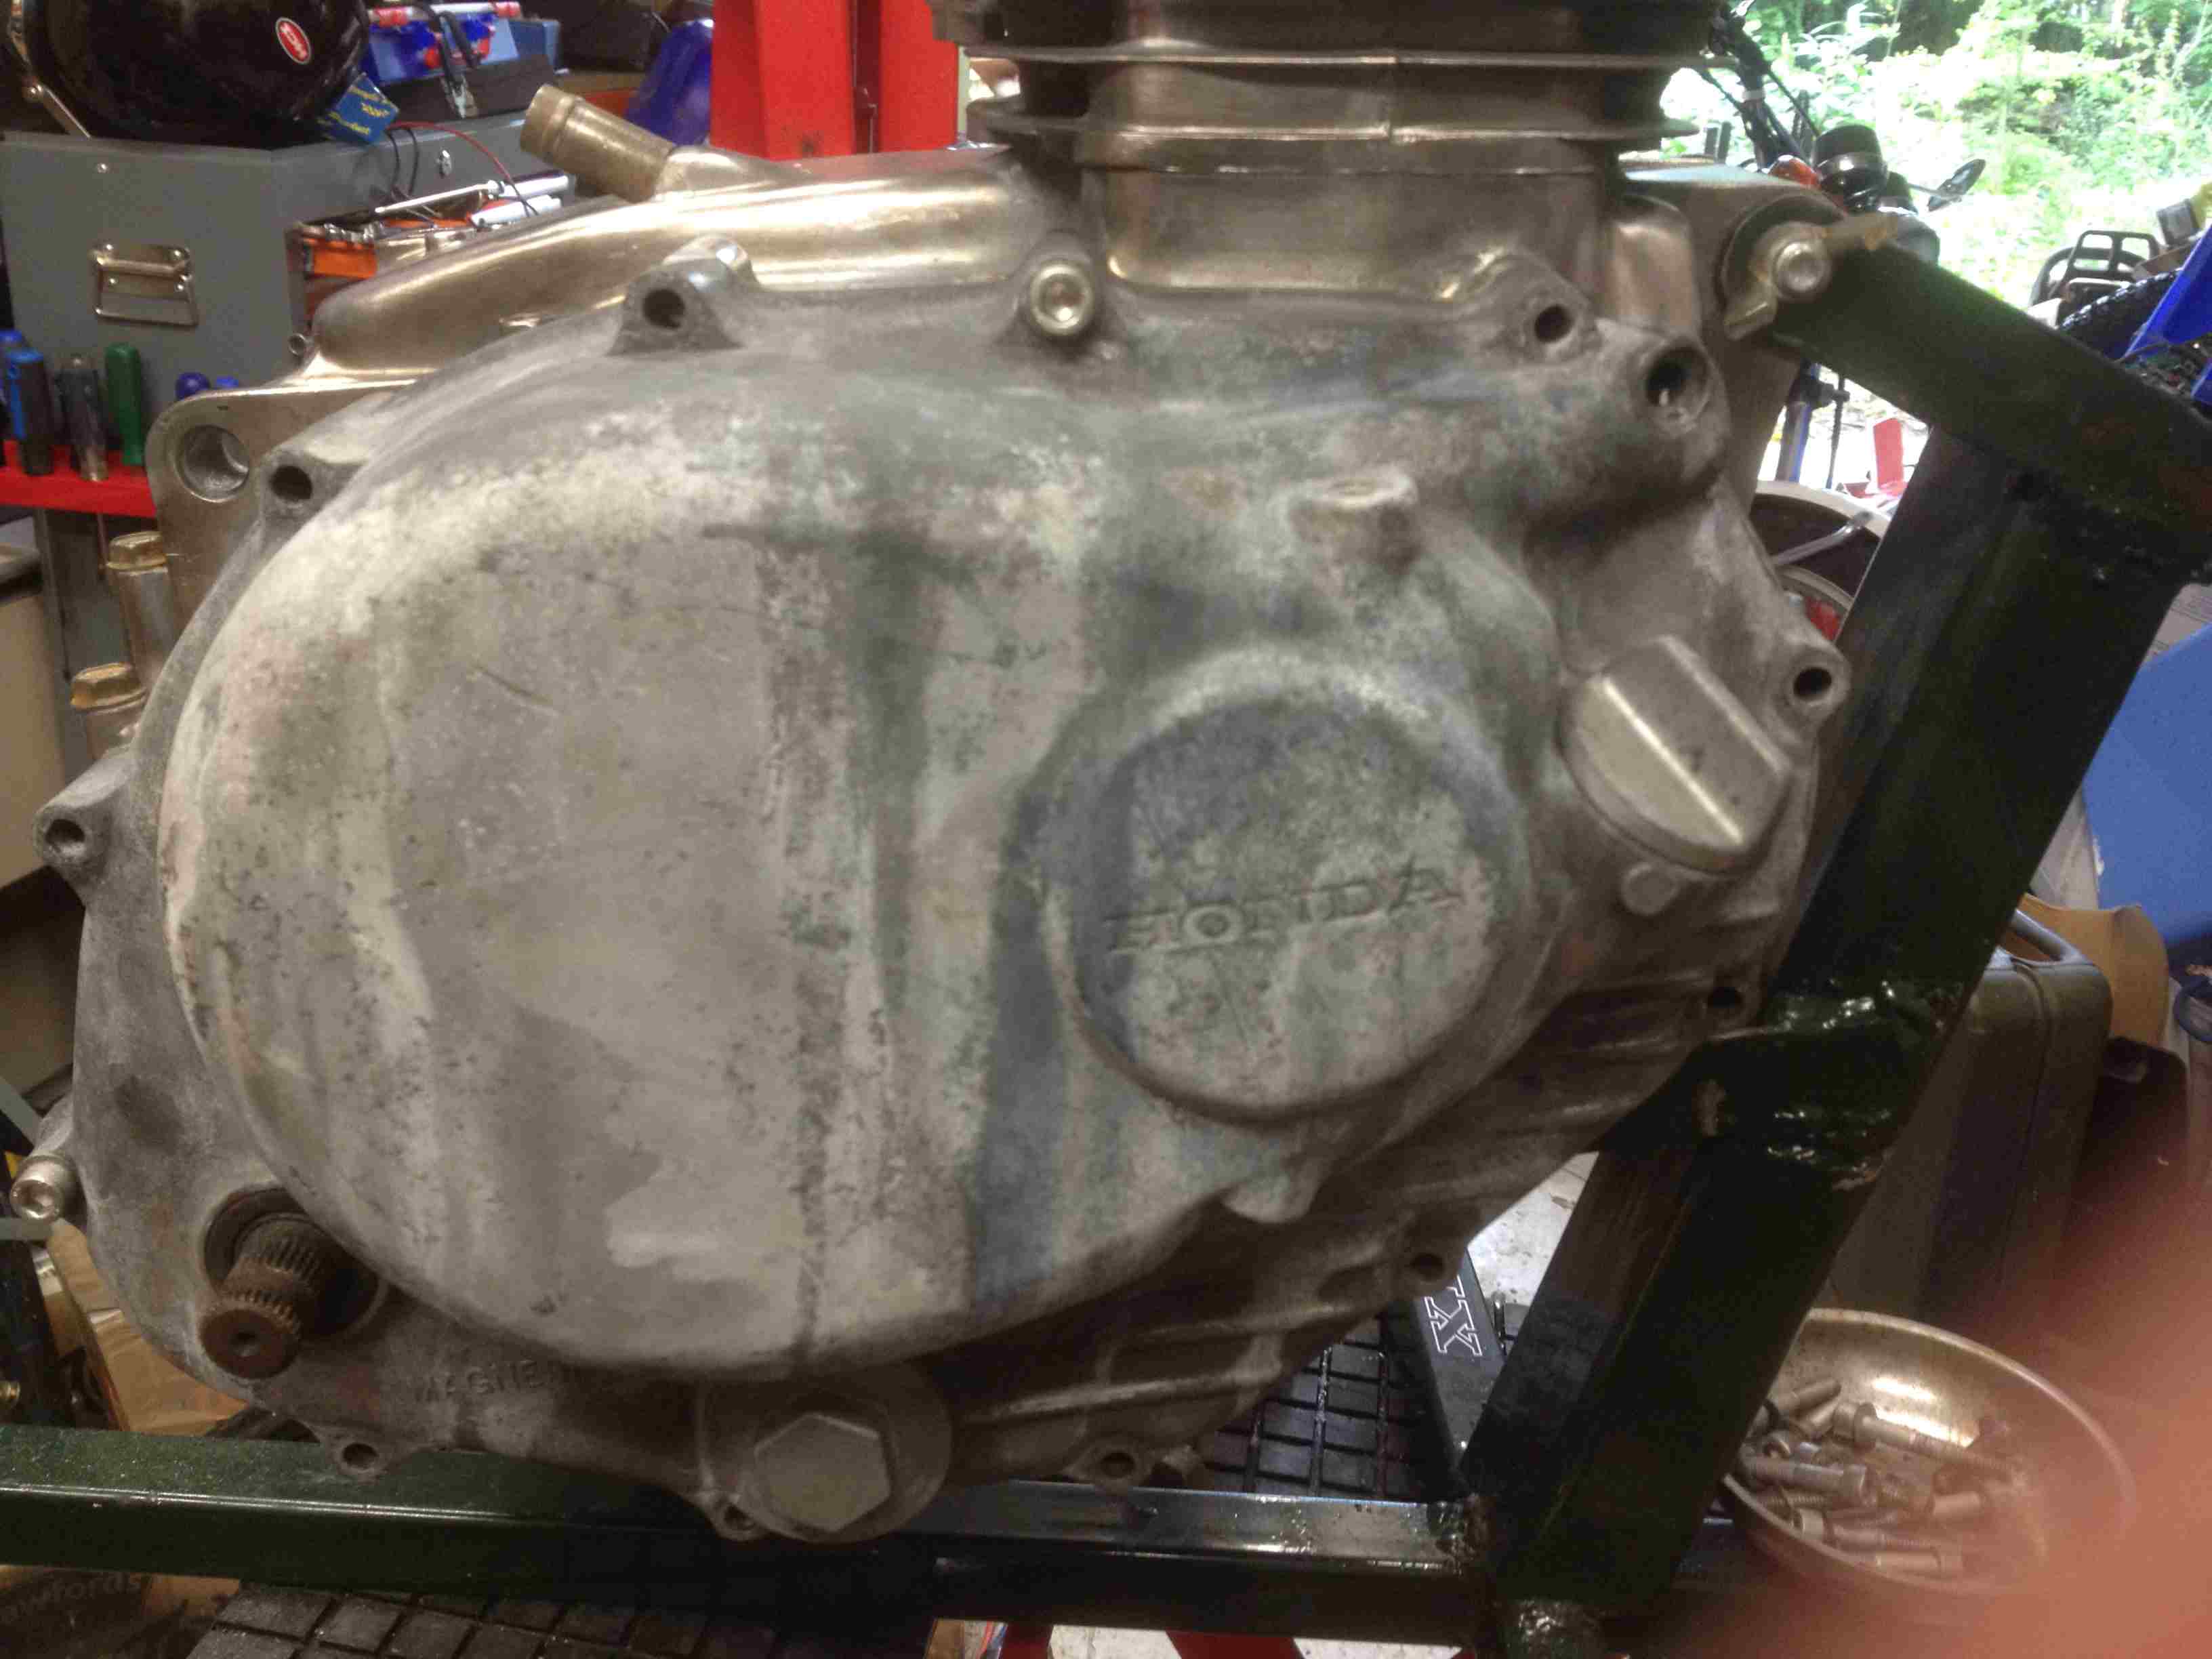
So, off came the clutch cover but where someone had fitted the exhaust it appears they had the pipe fouling the top of the clutch cover so they had simply ground it away. This made a hole in the screw tunnel like this,
so I decided this was not worth saving, but I found a NOS one cheap and that will now go on instead, I paid £25 for it and that was a bargain as it also gave me the correct silver finish to match to. I put a new 'O' ring on the dipstick and another on the inspection cover, and fitted a kick start shaft oilseal. I have not yet fitted the tacho shaft because when I popped the shaft out of the old cover, I heard the bottom thrust washer that is very small go 'ping' and land somewhere, but I couldn't find it. Grrrr!
I managed to order one from CMSL, and it has now arrived, and is safe in a sealed bag with the shaft. By the way, whilst the cover is painted silver, the inspection cover at the bottom is bare metal, and the one fitted is also new.
Most of the original ones are worn and it is hard to know what they would have looked like new. Whilst cleaning up the crankcases (see later) I refitted the old one with a couple of screws to keep the clutch etc clean and free from debris.
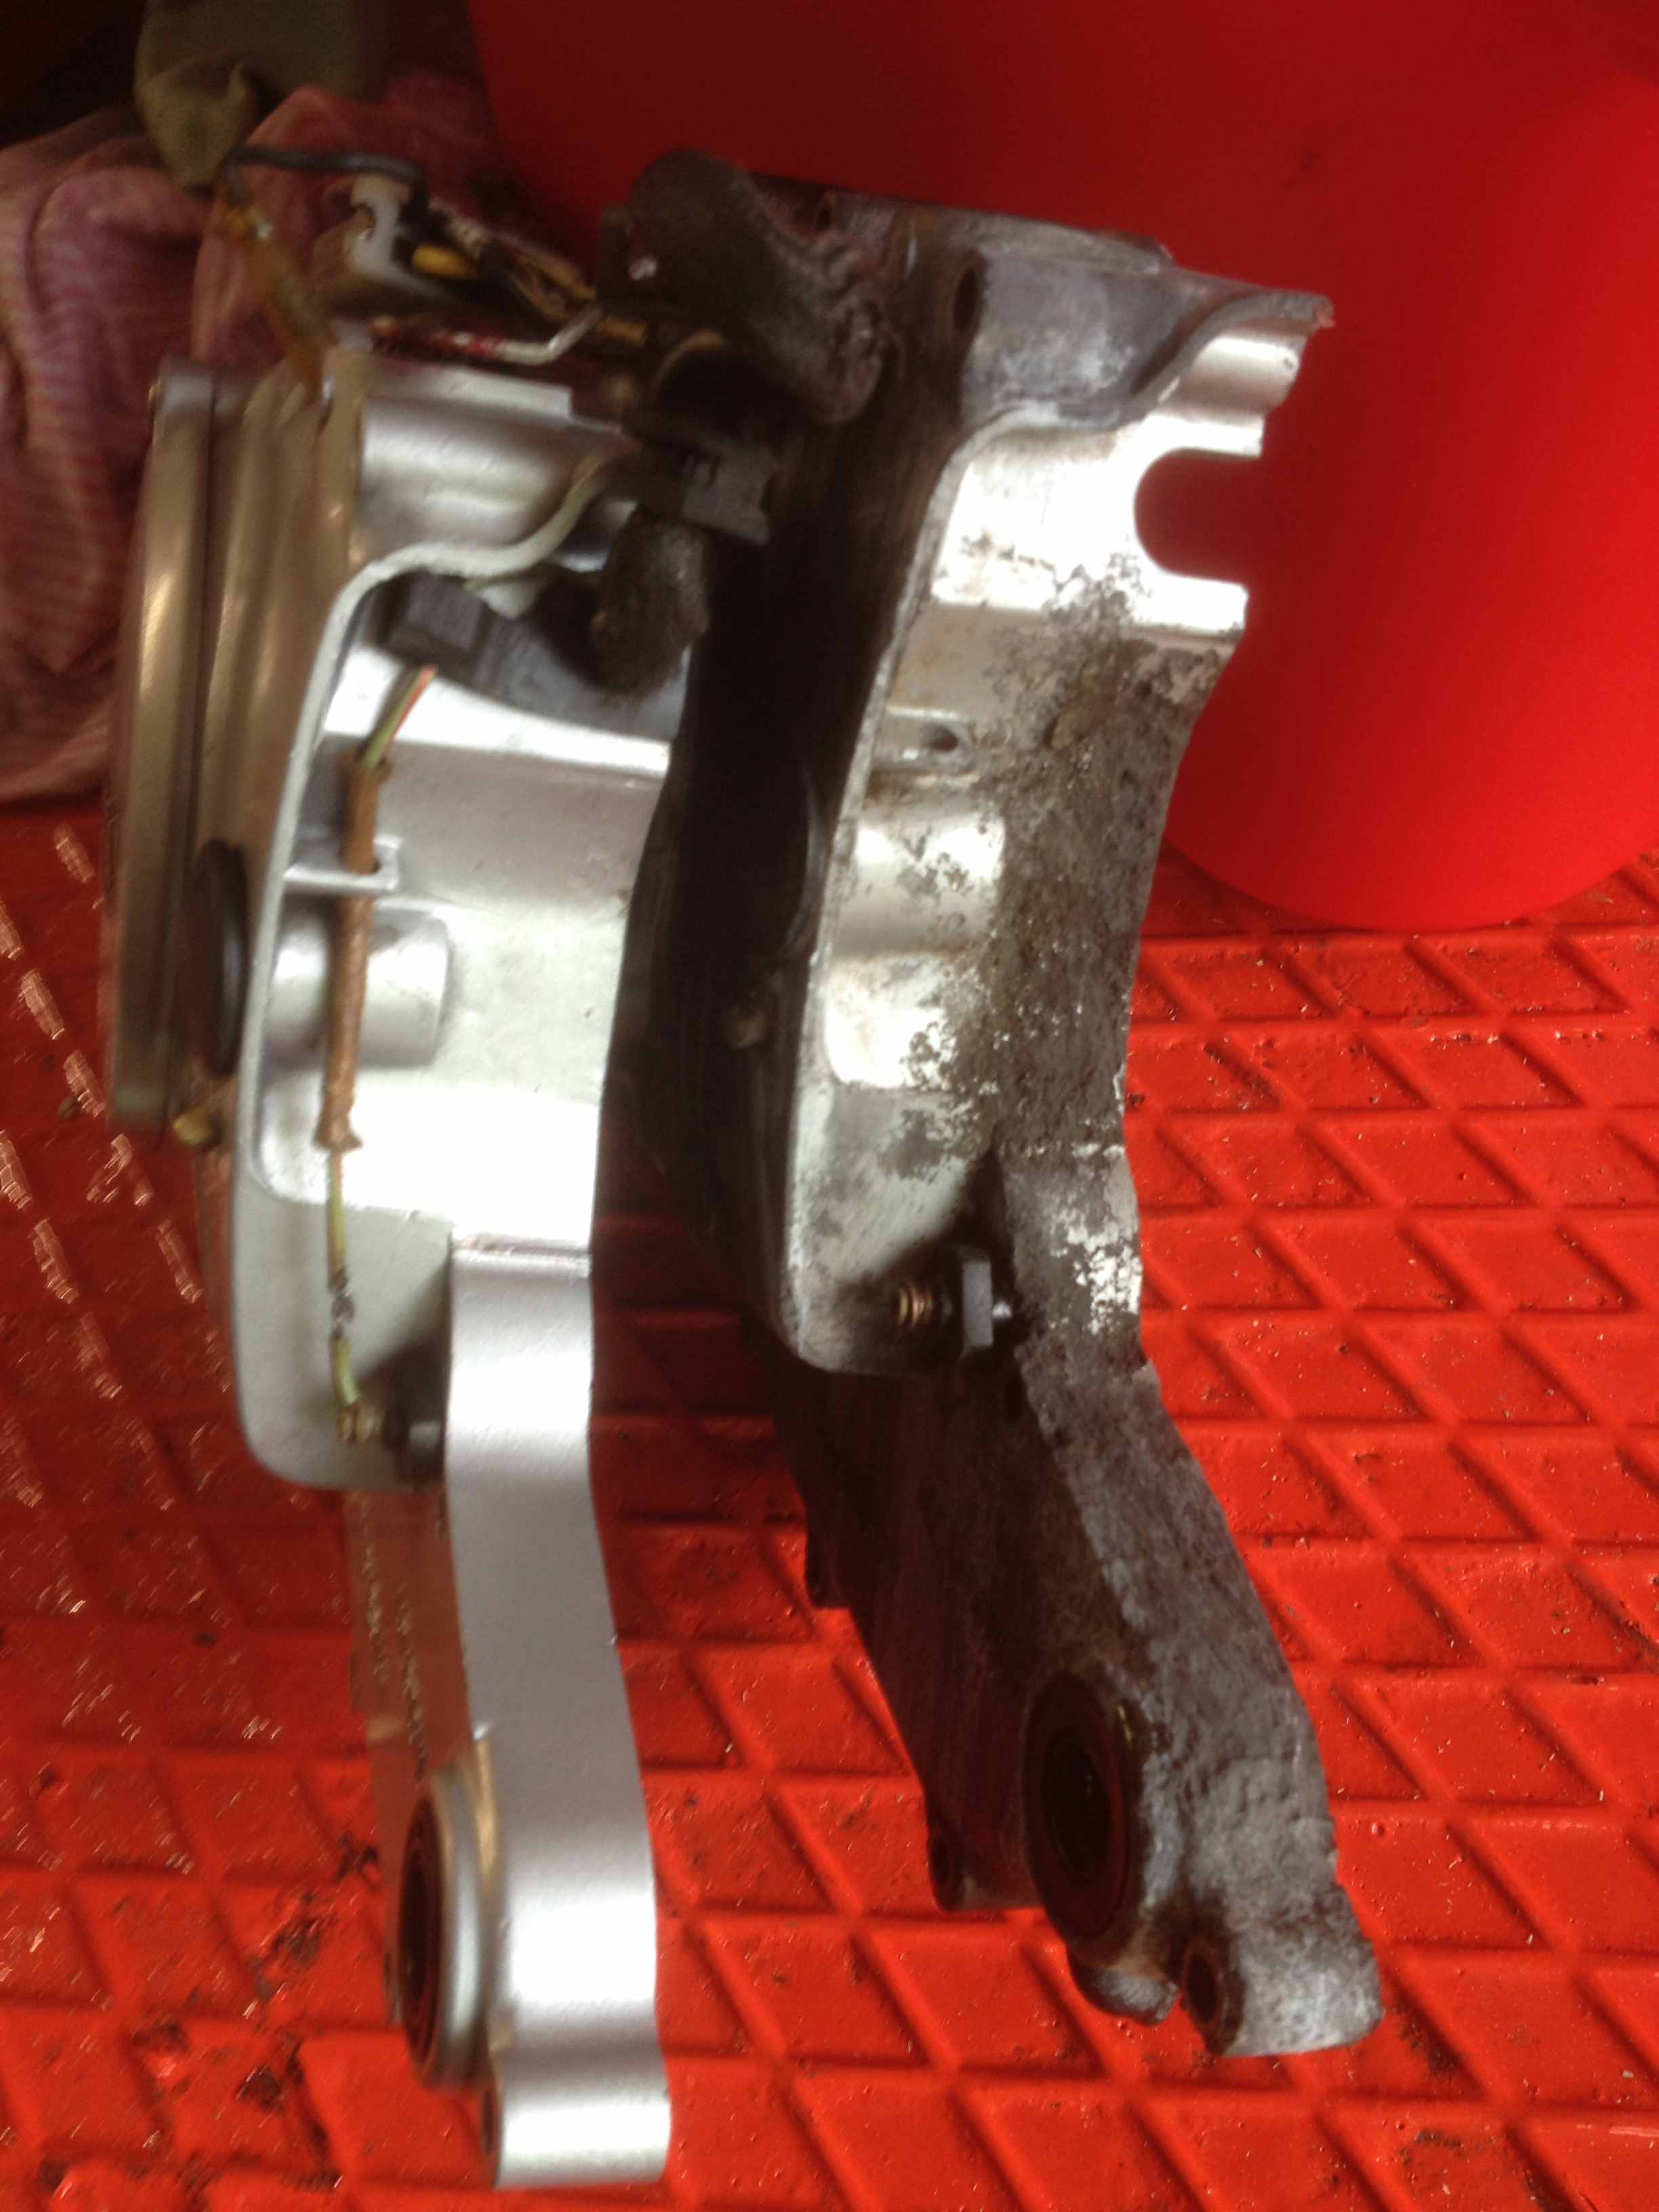
The stator side cover was a bit harder. The cover was in a bad way. The clutch actuator was seized solid and the case was full of cement hard crap. The lever return spring had rotted and there was no bit left to stick into the little hole in the arm. I tried to extract the arm, and the needle bearing collapsed.
The clutch actuating arm parts look like this (these are not from my bike....)
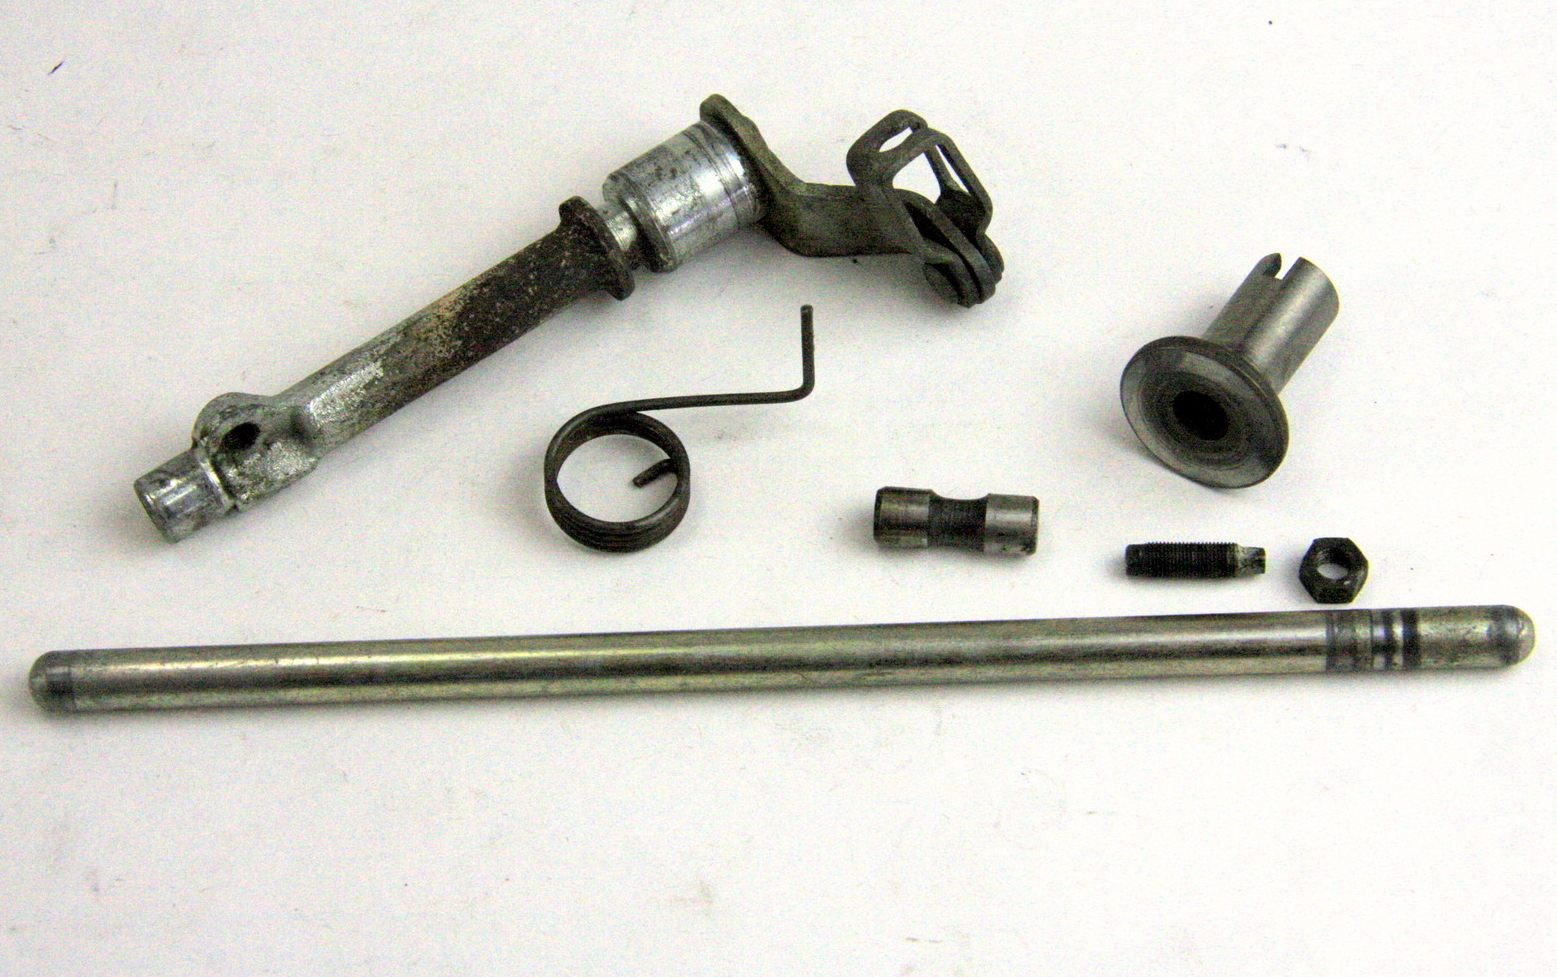
They are
1. The arm and shaft
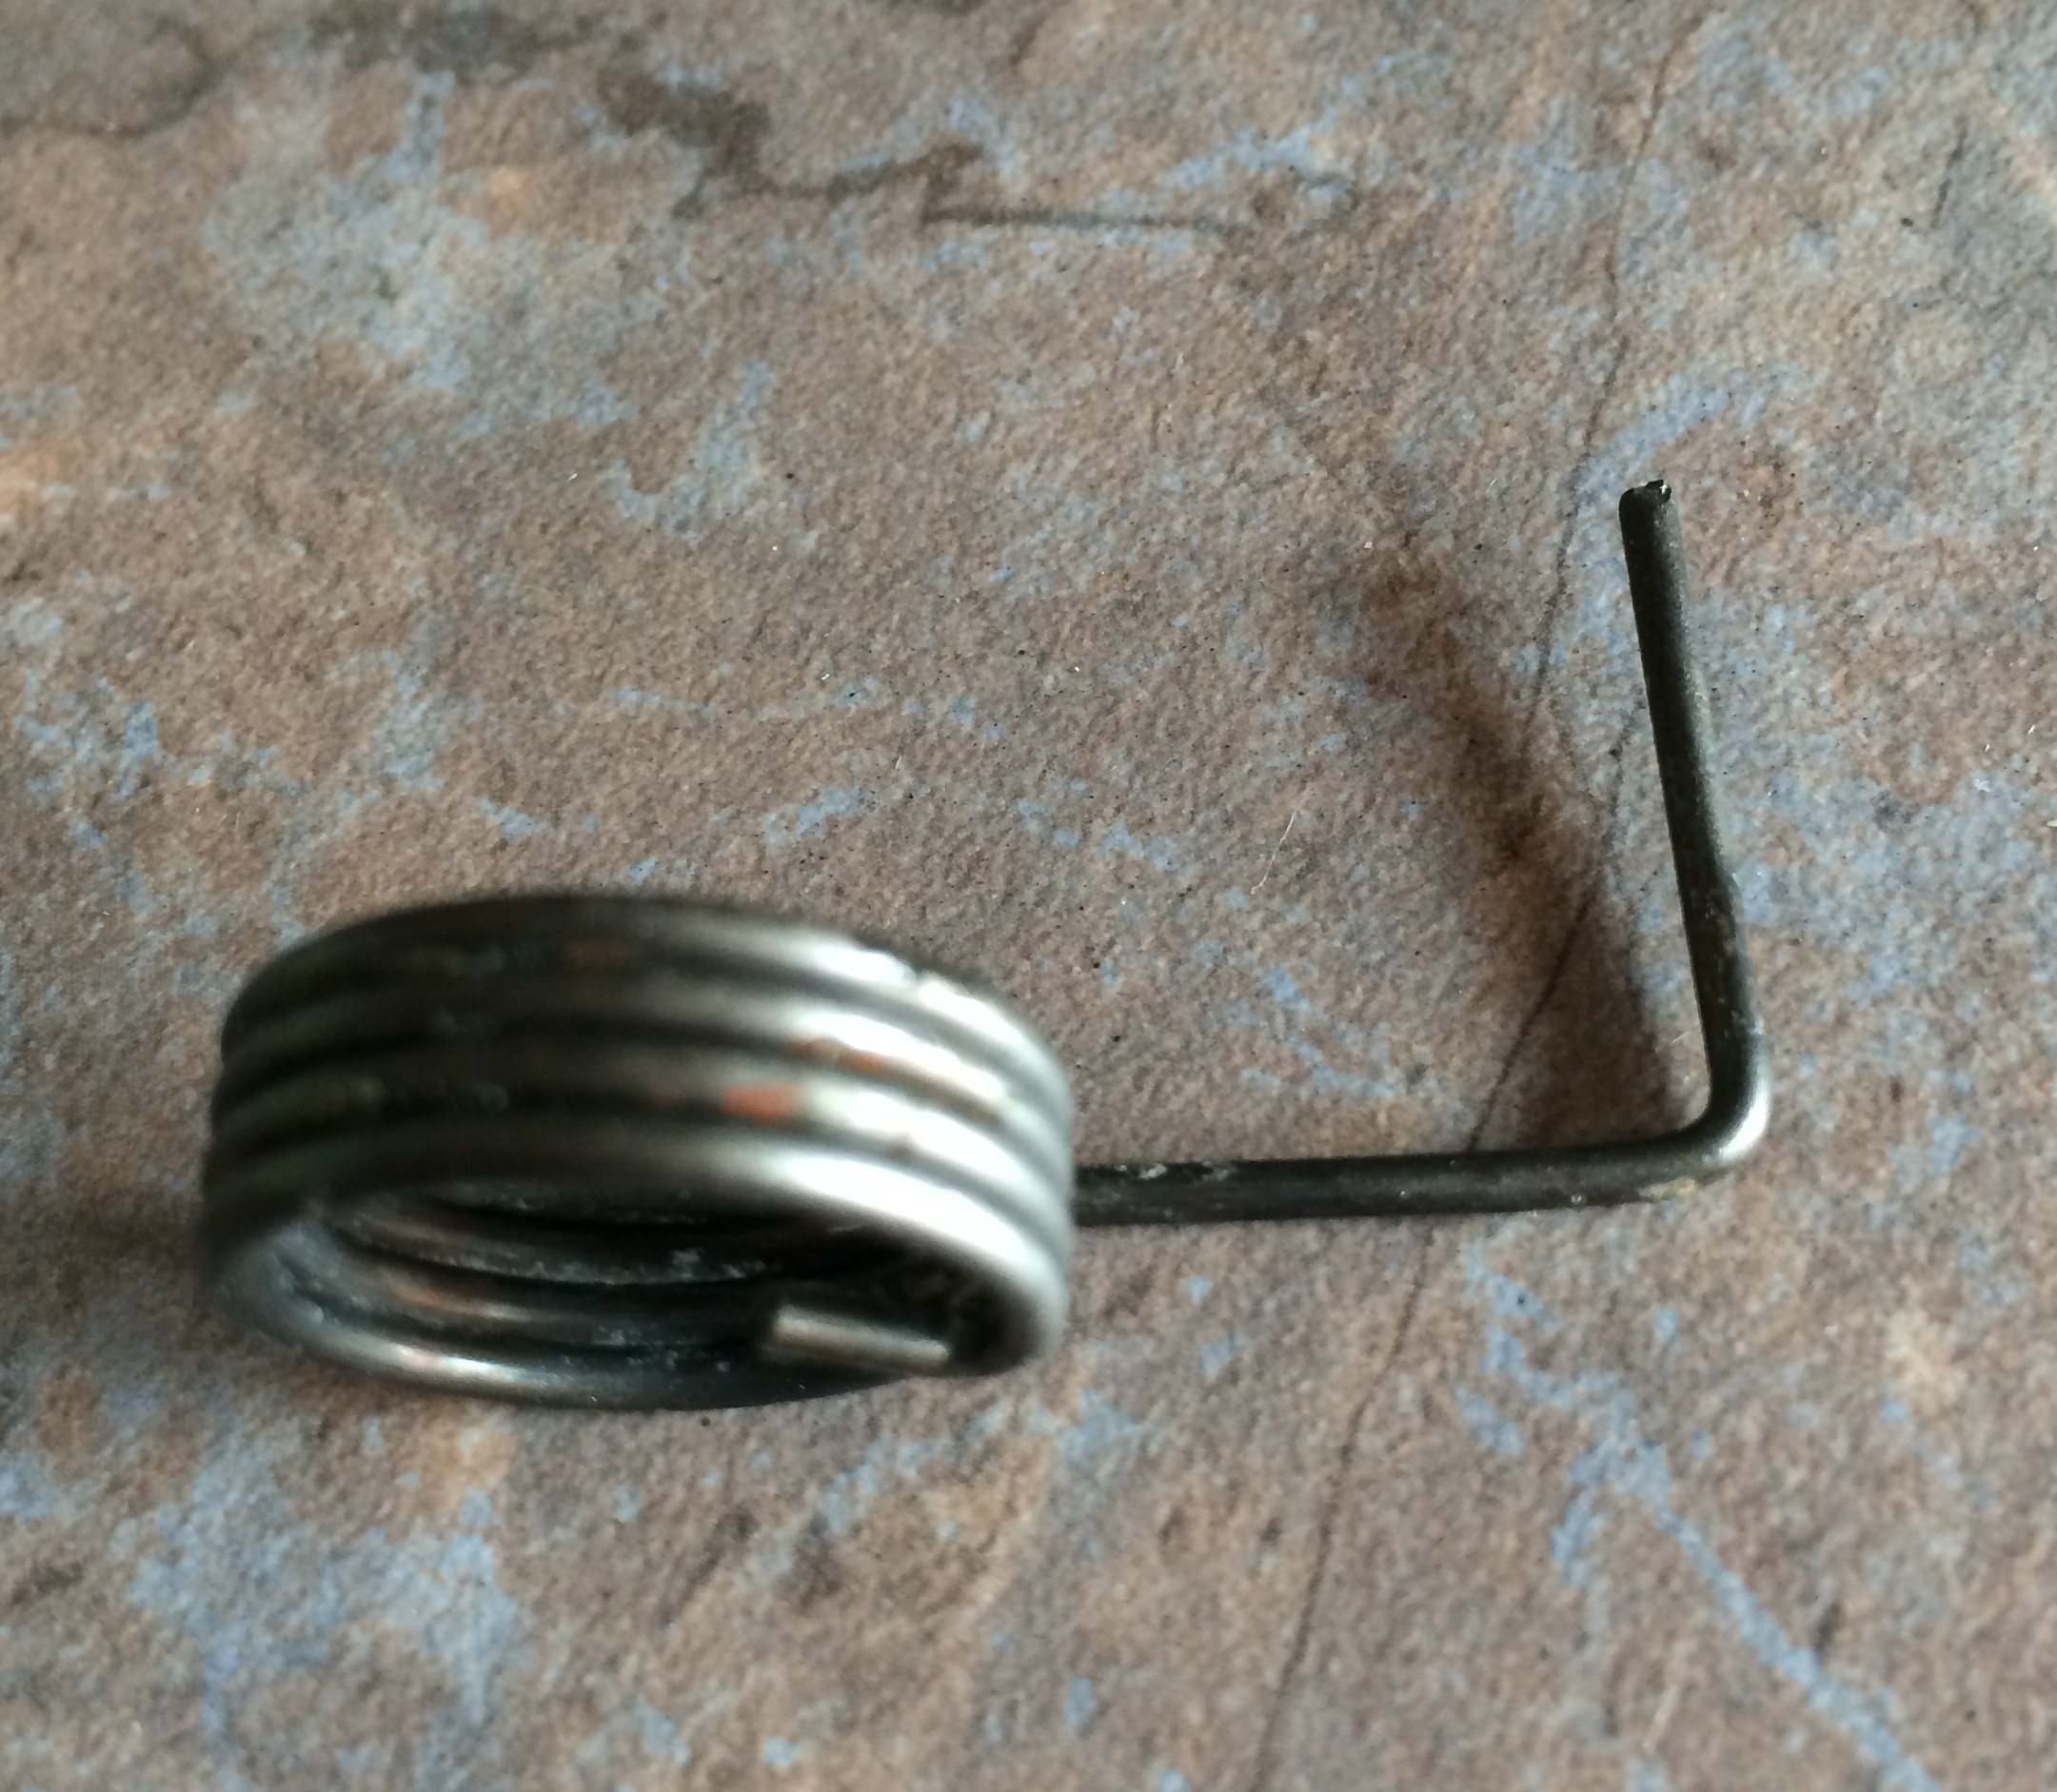
2. The return spring ( mine was rotted away but I'd got a spare one from Thailand on Ebay)
3. the adjuster and locking nut (has to be removed to get the shaft out of the cover)
4. the push rod
5. the lifter rod piece (dogbone shaped) and
6. lifter (mushroom shaped)
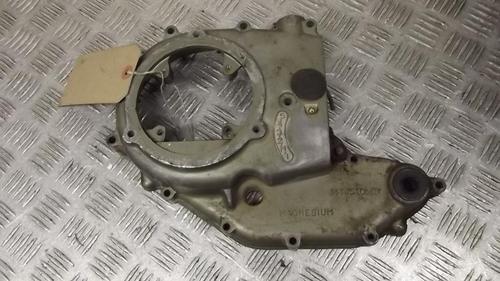
After I got it off I decided the arm was beyond saving. the spring (not currently available from Honda) was scrap as it had rusted so the part that goes in the arm was gone, and despite all I tried I couldn't clean out the rock hard crap. Looking on ebay UK I found a second hand cover from a bike breaker in Stoke with no round stator cover and no stator coils.
The cover was however complete with a very good actuating arm and a shiny spring so I still have the spare one from thailand. It was really nice for £65 so I bought it. A common wear fault on these is that the bottom of the actuator arm runs in the magnesium casting,whereas the top has a needle bearing; that's why there is a grease nipple there, just below the rubber adjuster hole bung. If you don't keep it greased, the magnesium will wear, and the clutch action will be crap. See part 2 below for a solution to a worn out cover.
When it arrived, as it was used, it was of course oily and greasy....
Bloke Tip: A great tip for thoroughly cleaning this sort of part is to wait until your wife/girlfriend/partner has gone to bed, then put the parts to be cleaned in the dishwasher and set it to full wash, with dishwasher tablet/powder. The next step is to make sure you are up first in the morning when you retrieve the sparkling clean degreased items and put them away in your garage or workshop, then take her a cup of coffee in bed with an innocent look on your face. I have done cylinder heads, brake parts, clutch baskets etc with excellent results.
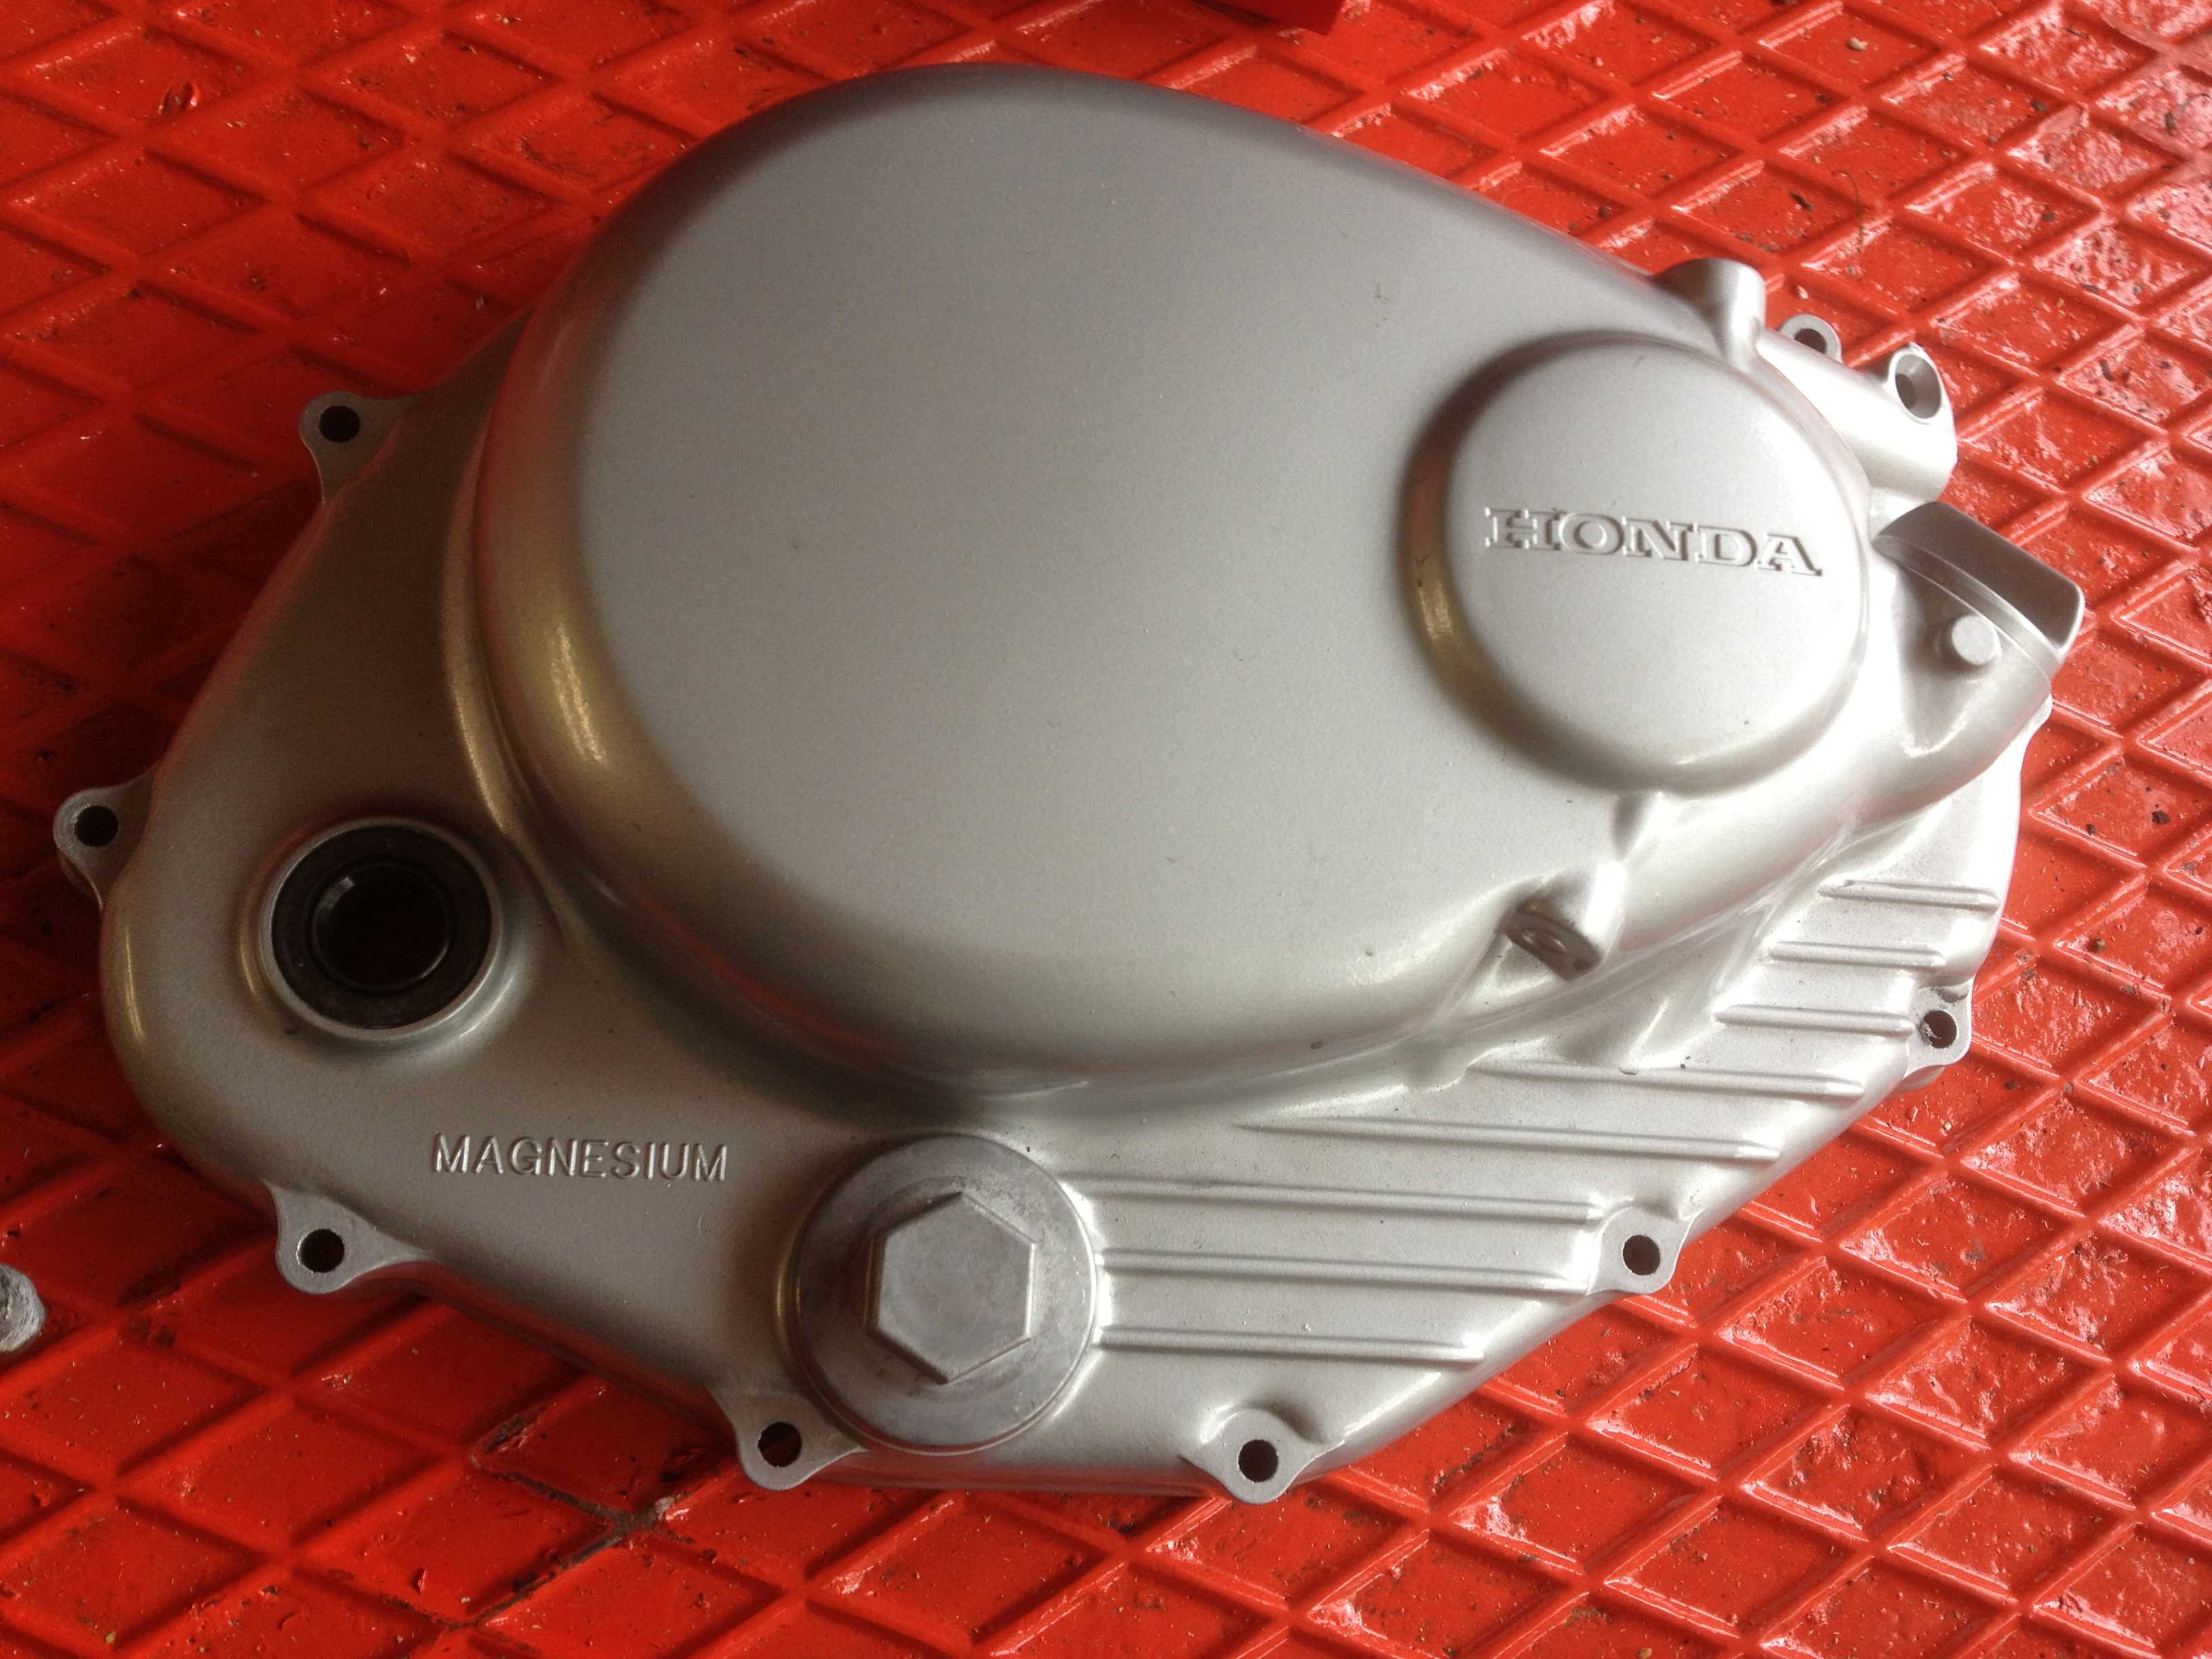
I stripped the old worn silver paint off with a tin of paint stripper, dried it then used a scotchbrite polishing mop on a spindle, first coarse then fine, then etch primed it and then 3 coats of alloy wheel refurb paint, and 2 coats of alloy wheel clear lacquer all from spray cans.
I did the same with the stator cover then re-blacked the HONDA name on the stator. That was fun. I used a dispensing syringe the fill the recess holes with black enamel and then carefully rubbed the small excess off the lacquer with cotton buds dipped in white spirit. It took a while but was worth it.
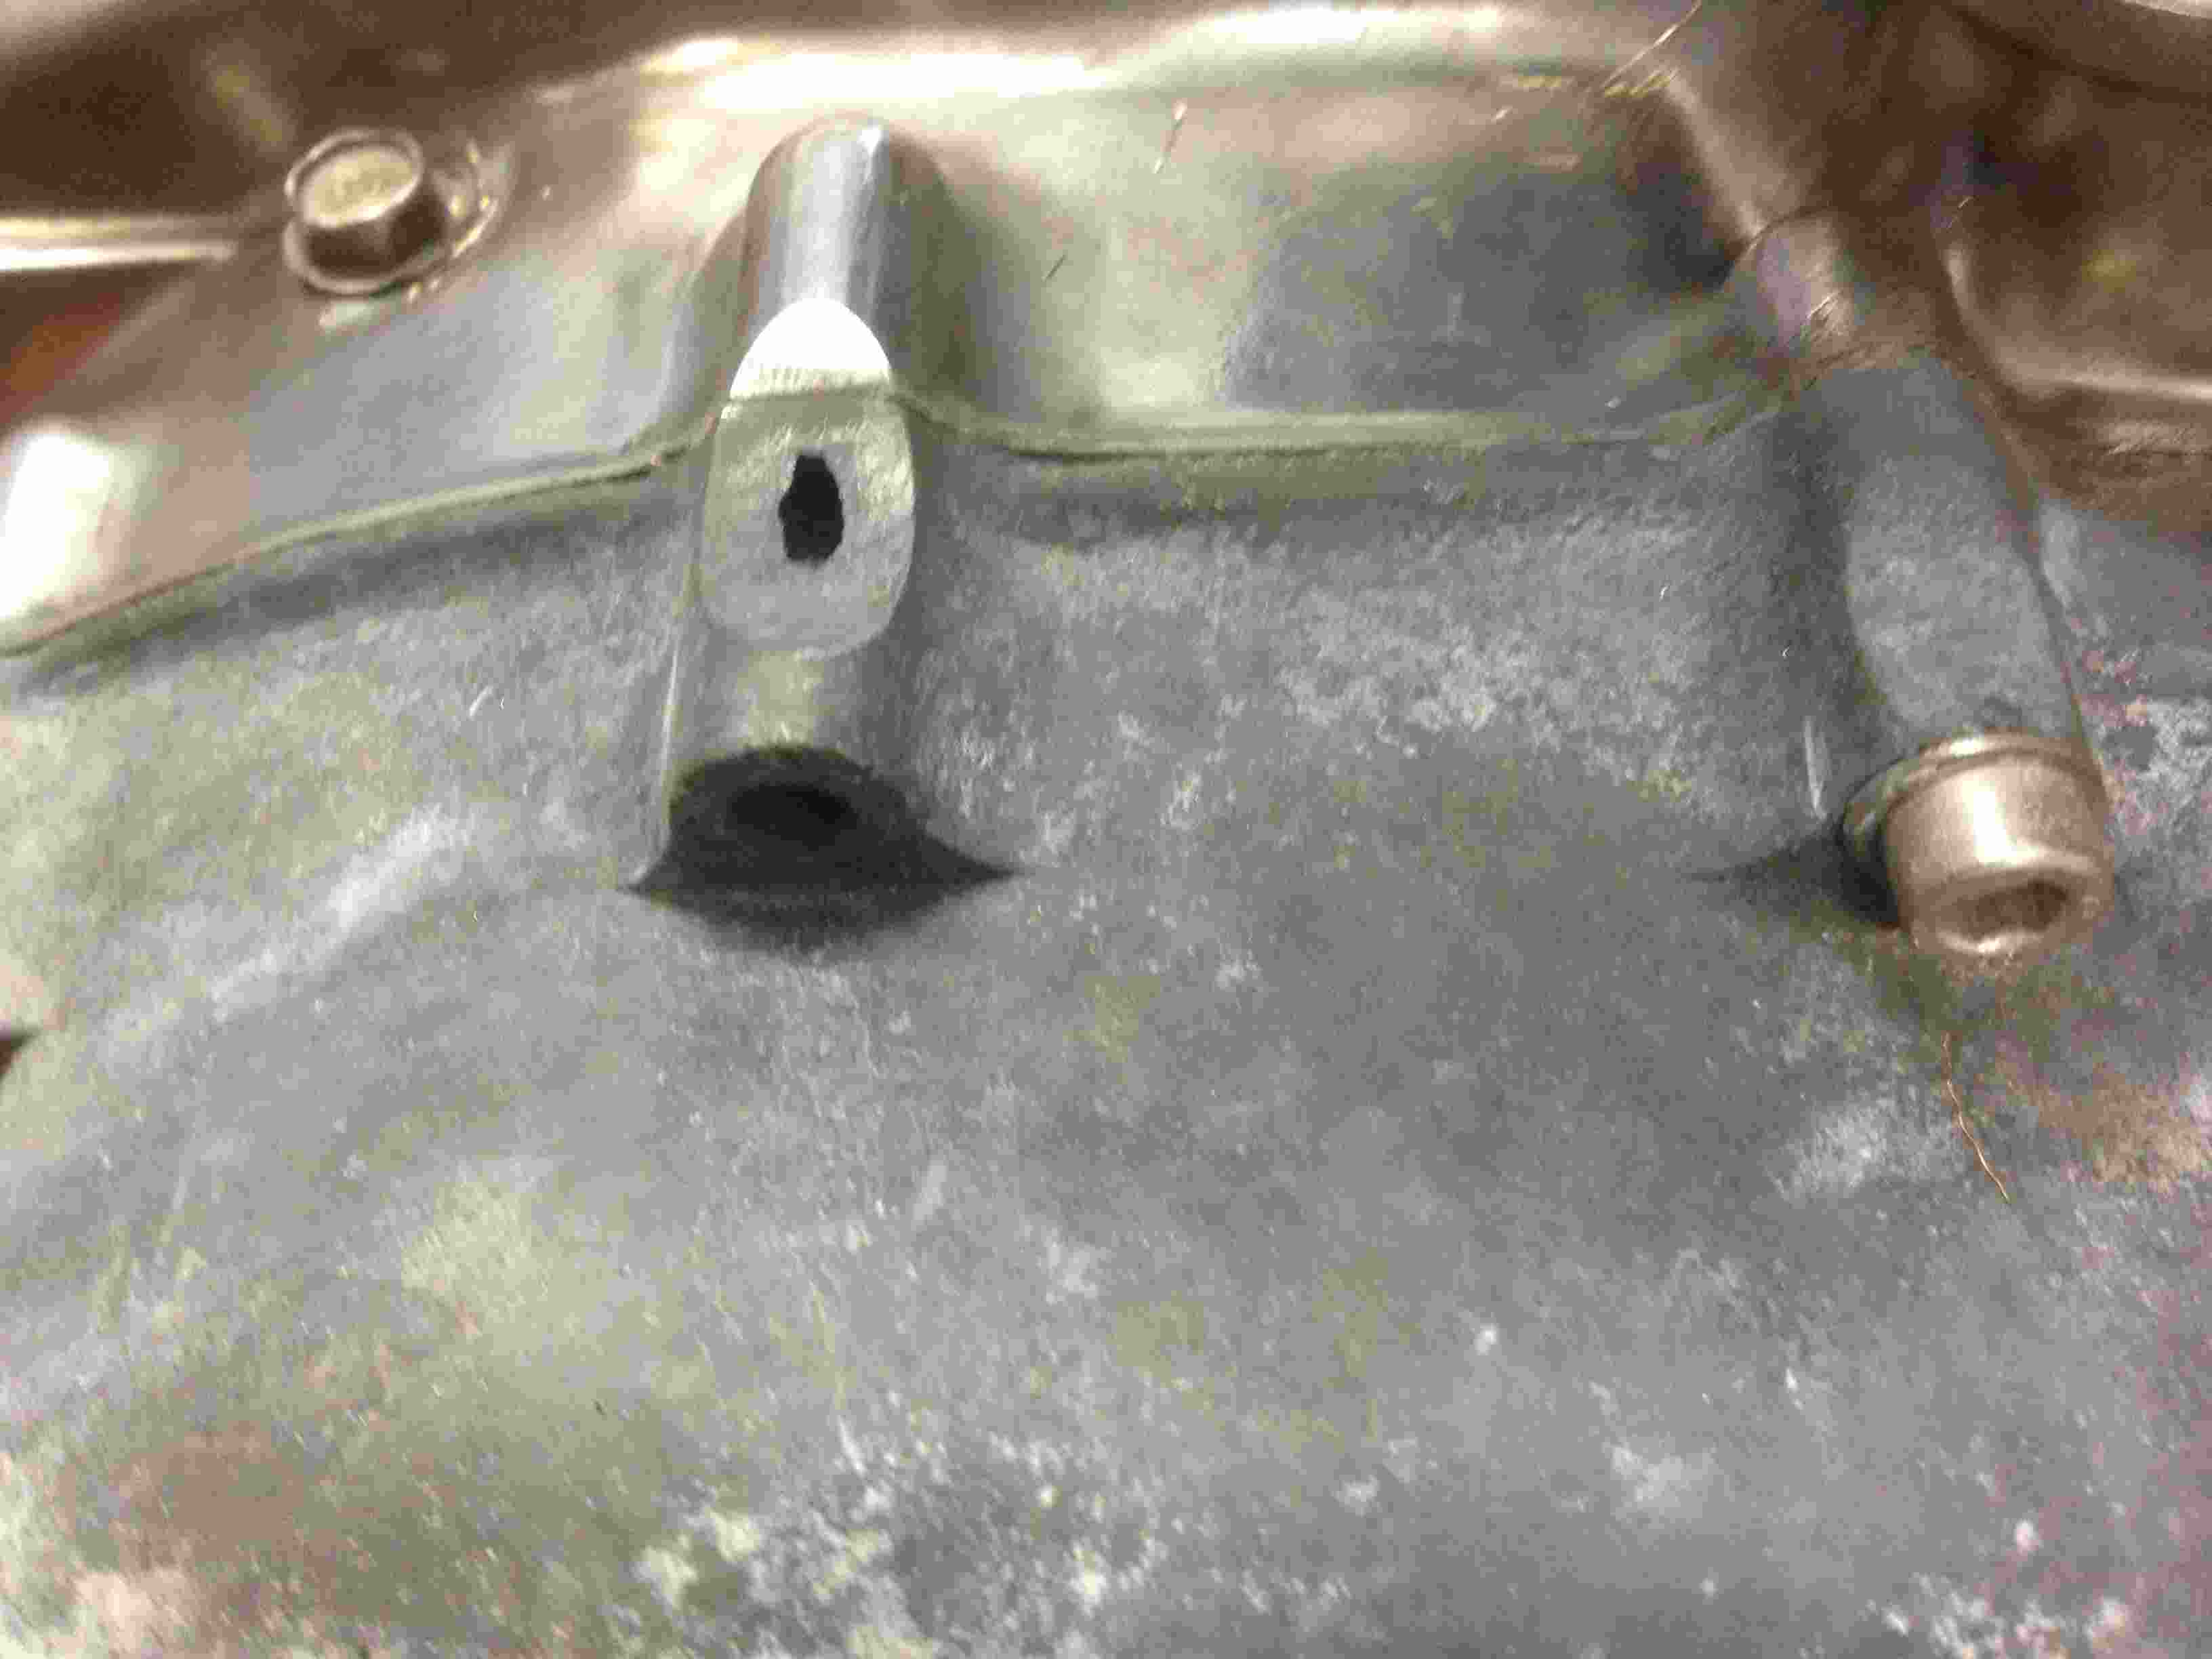
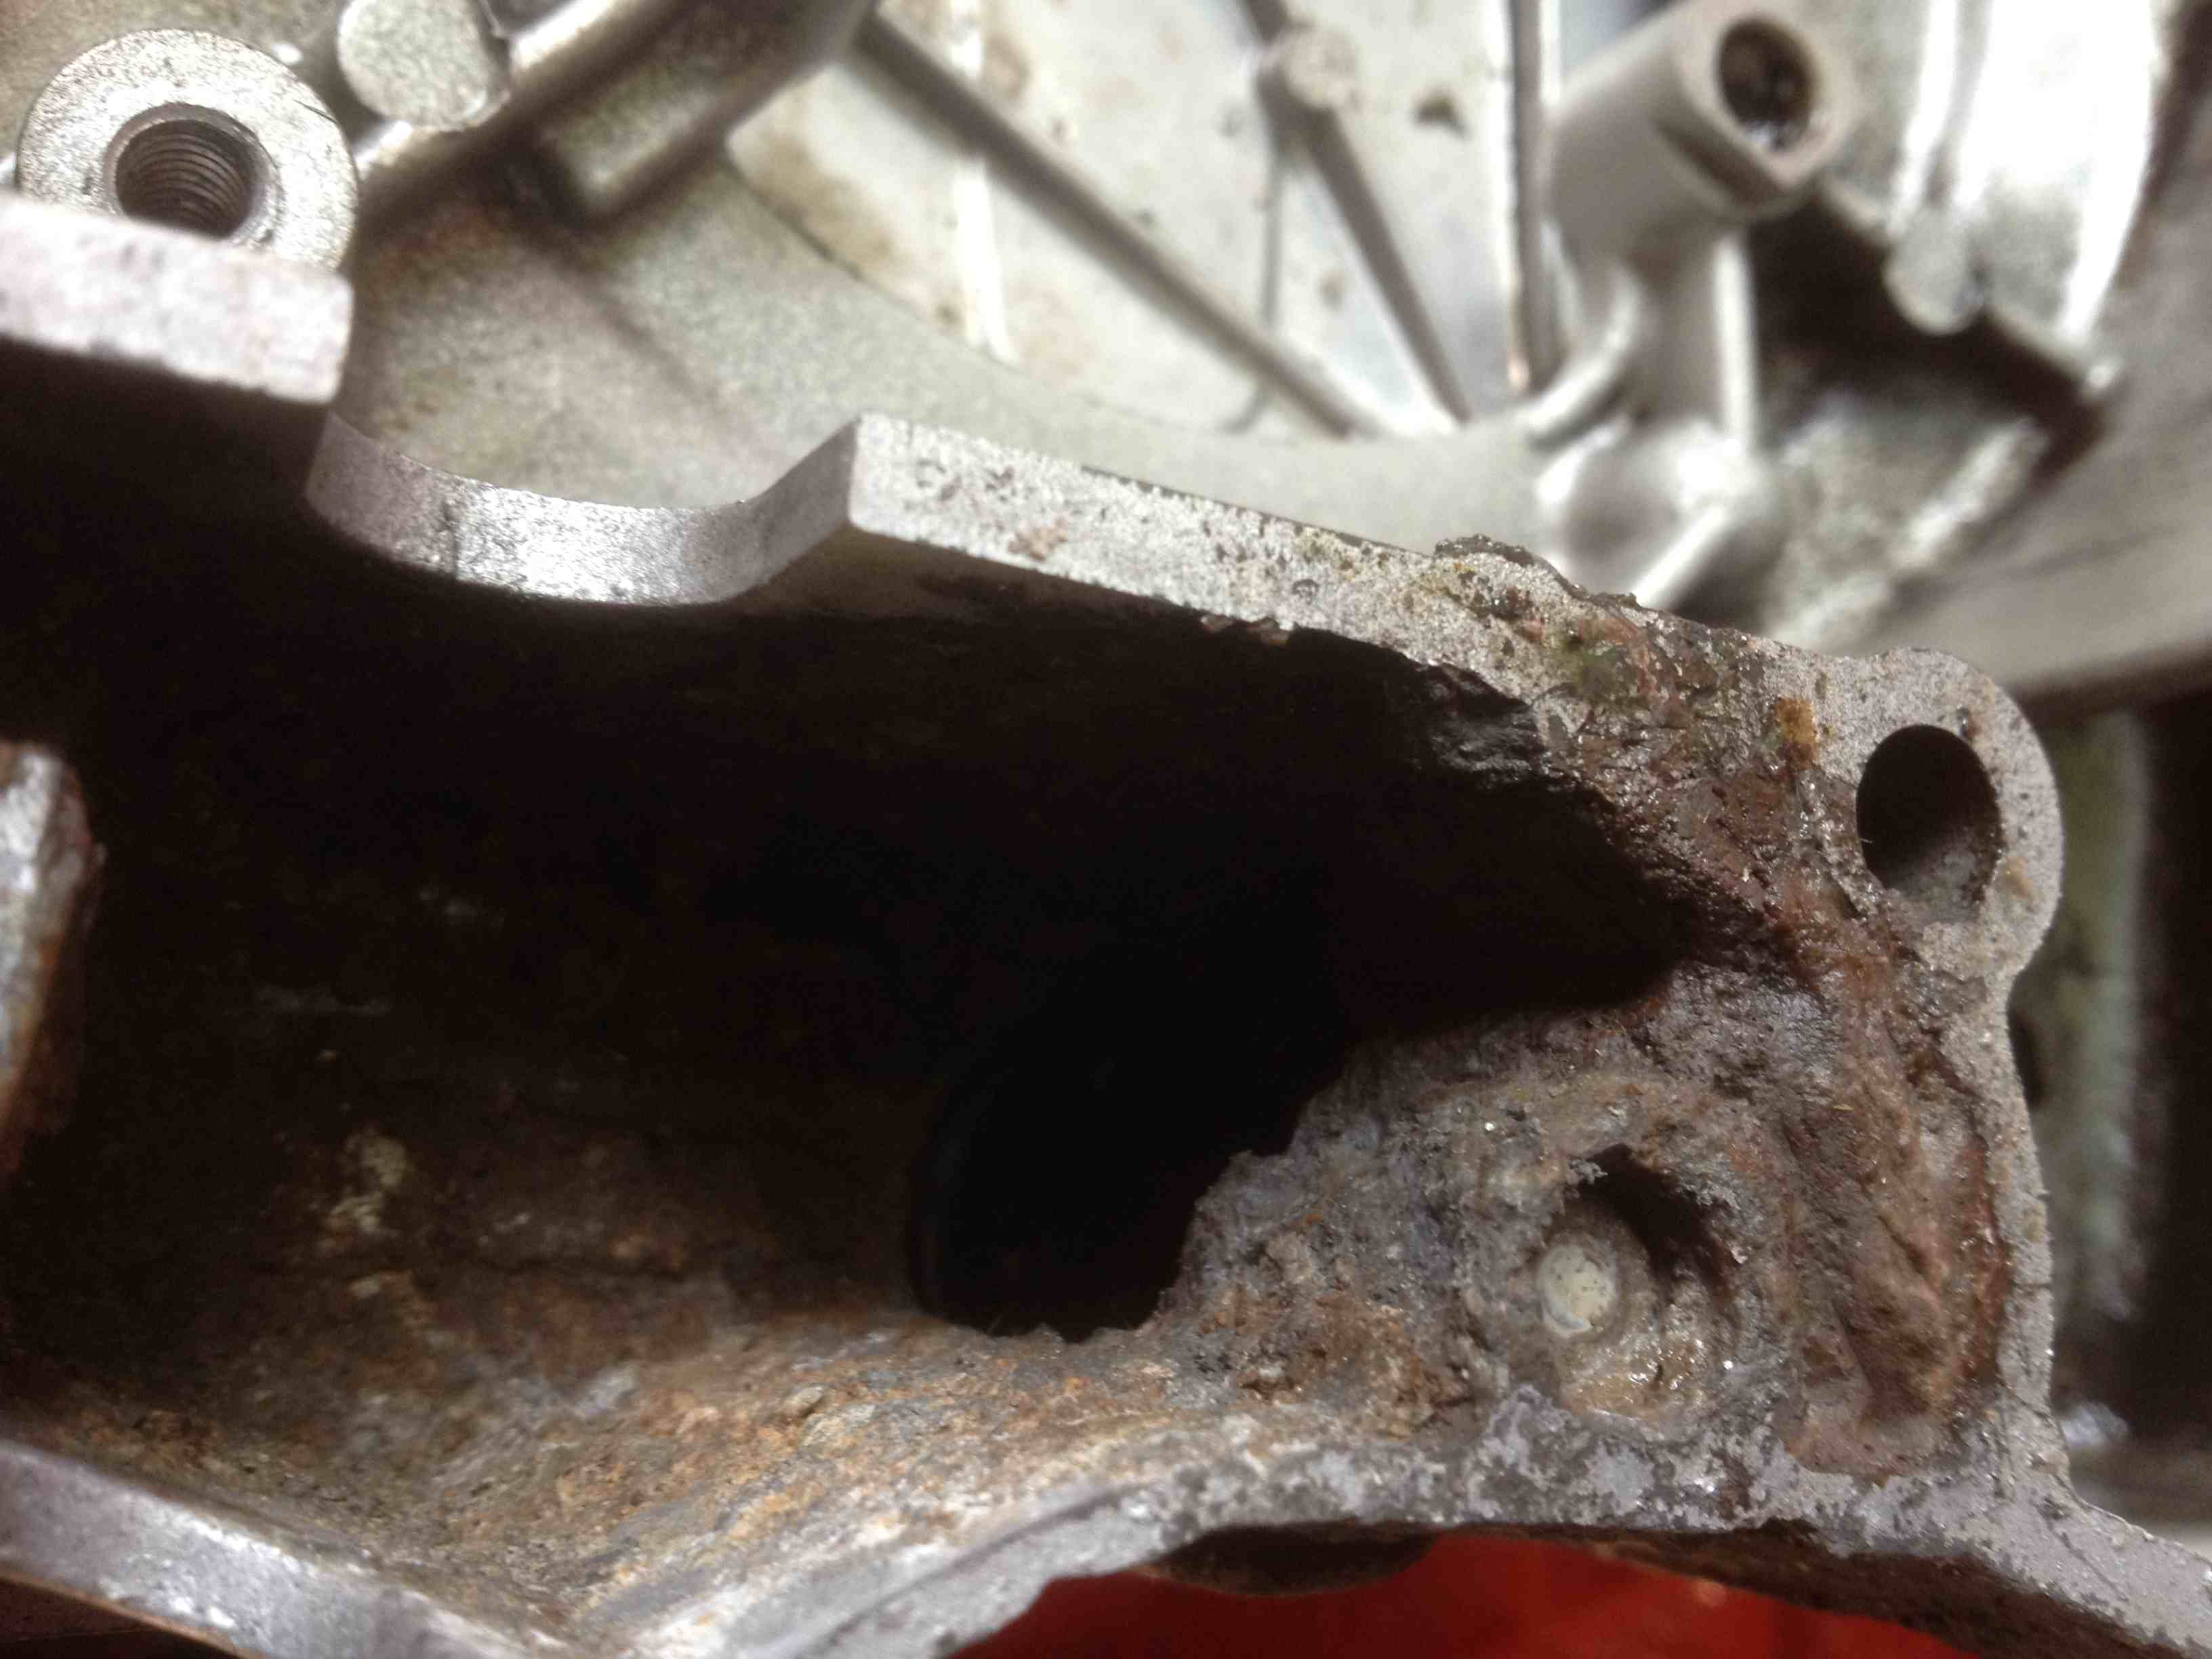
Then new seals on the clutch actuator with high temperature Silkolene racing grease and new seal for the gear change shaft, finally a new 'O' ring for the stator cover and 3 new screws. I swopped the stator coils from the old cover. As with the clutch side, I used the scrap cover to keep the stator side clean and dry while I cleaned the crankcases. The picture of the engine on the stand shows the old cover on for this purpose. Here is a picture of the encrusted stuff that wouldn't come out with degreaser, steam cleaner or with a chisel! I think some of it must be from the very rusty actuating arm that has merged with the magnesium.
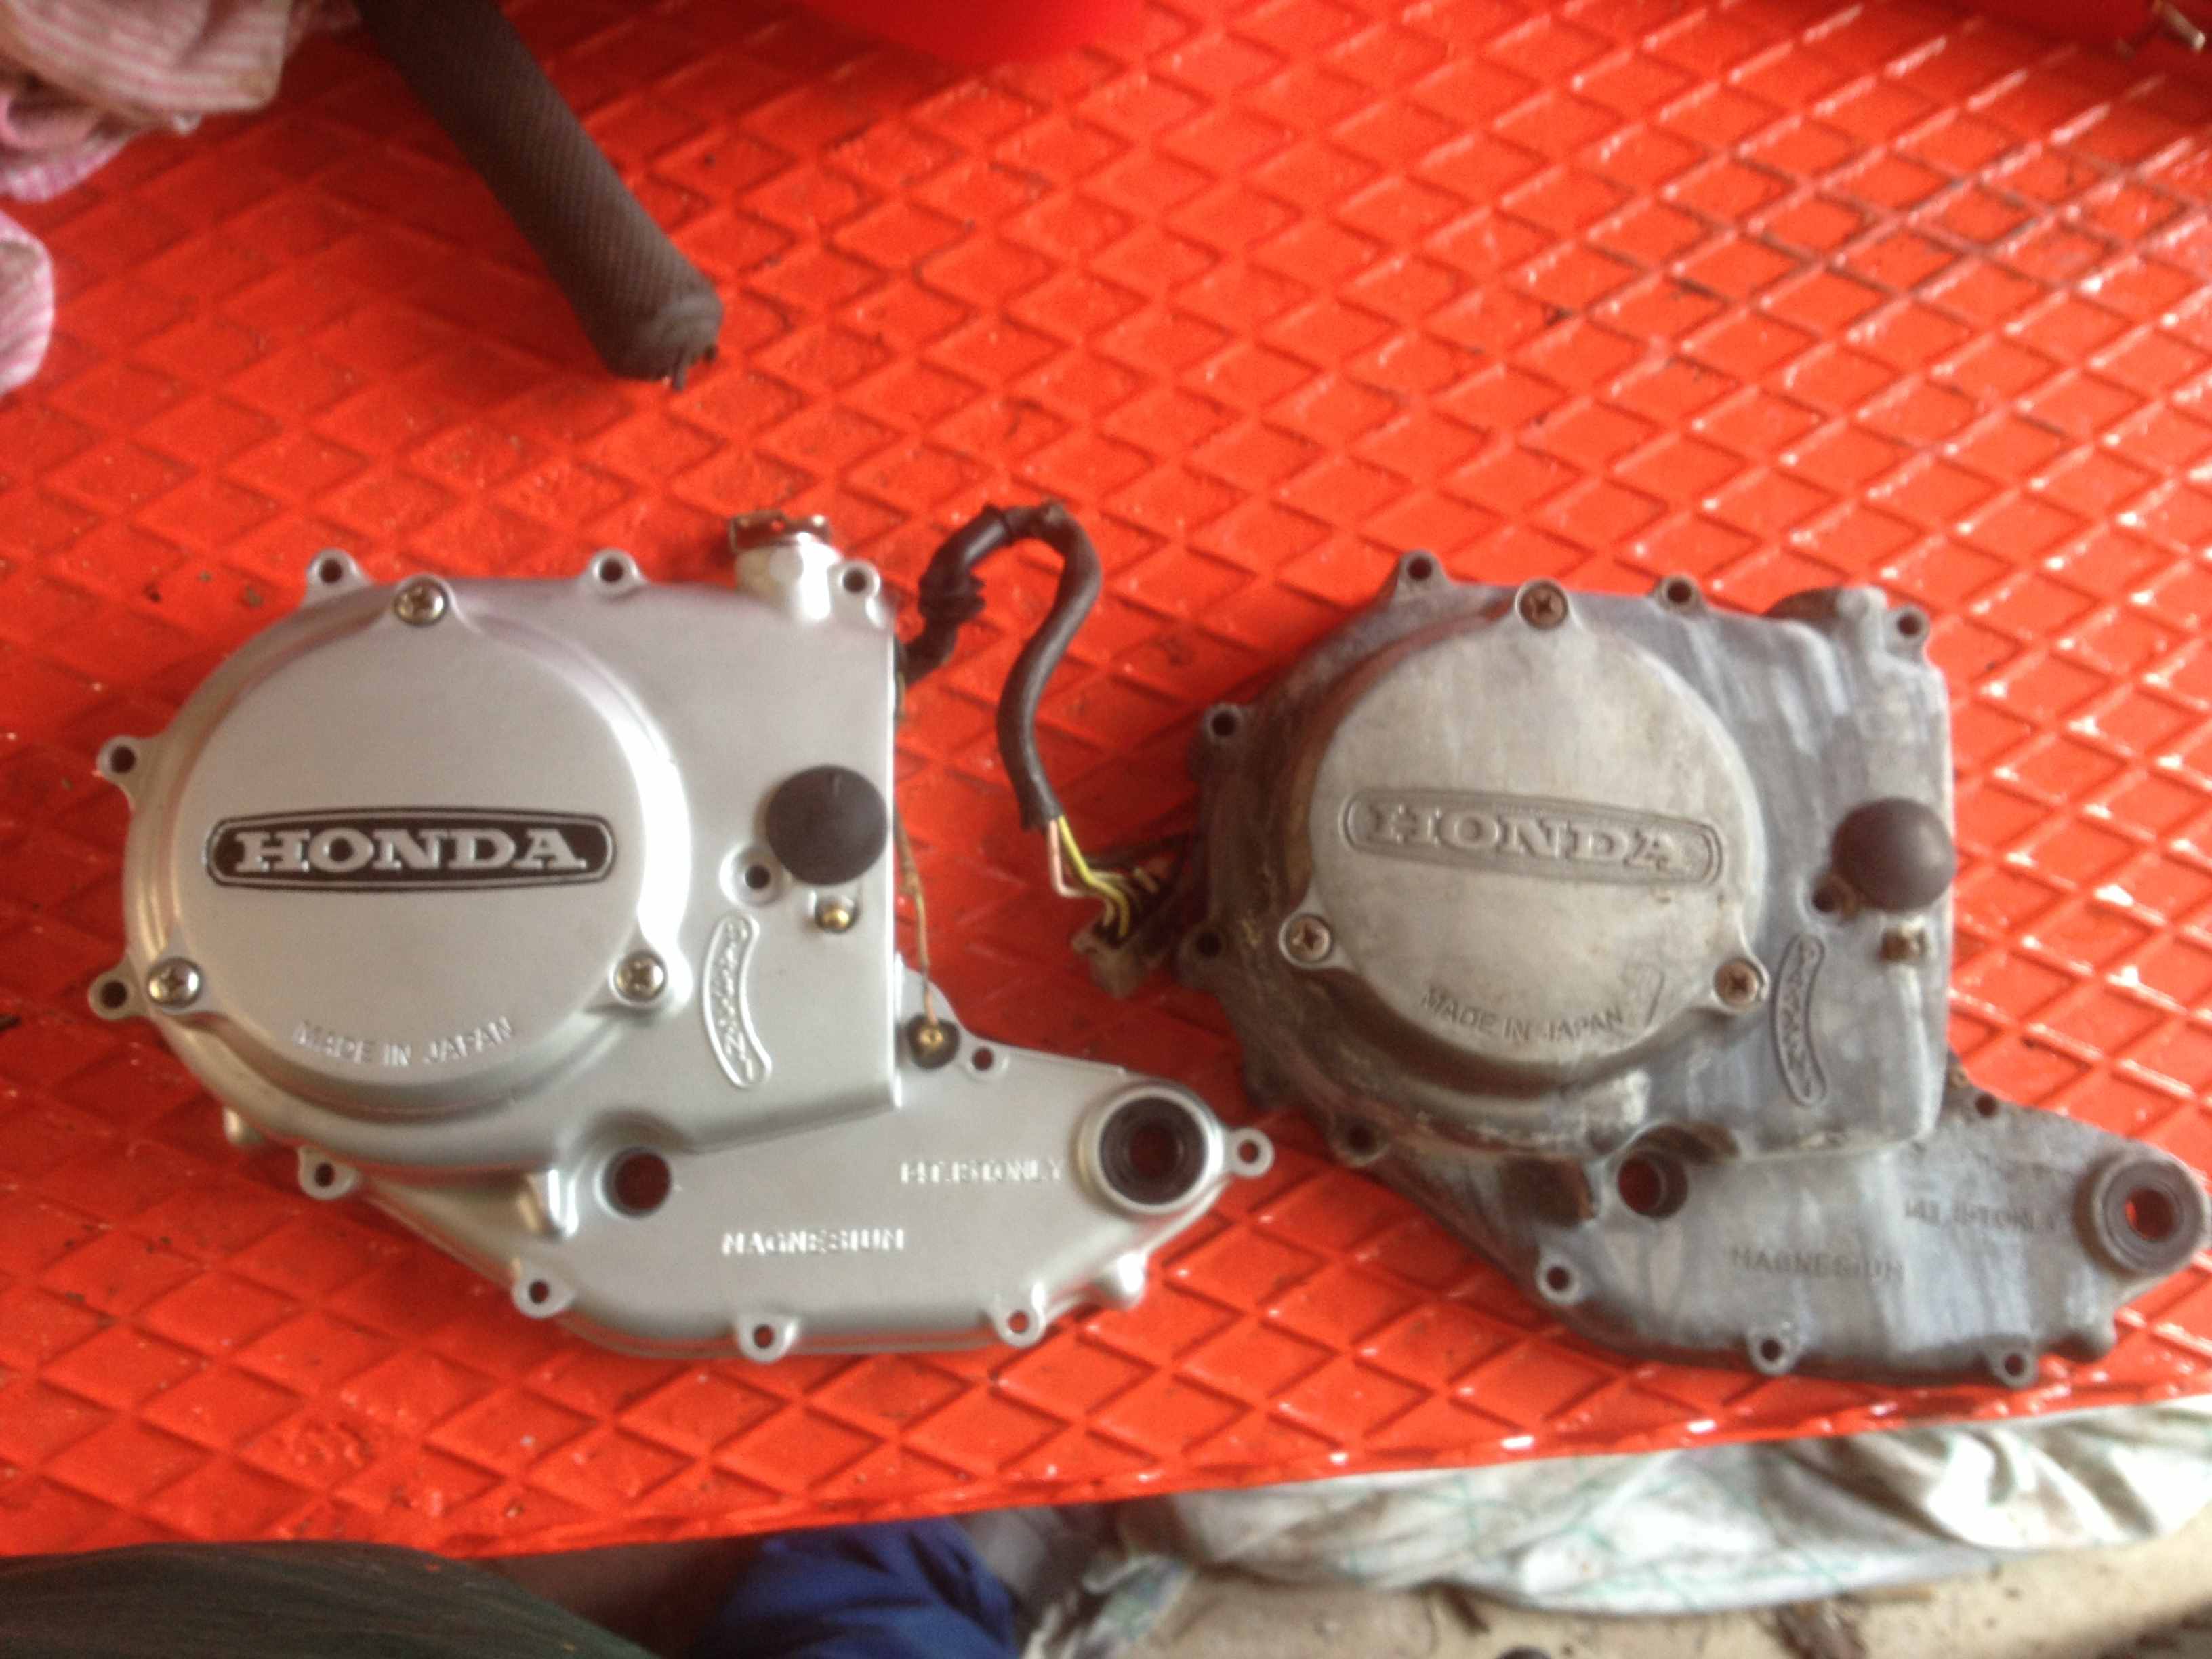
compare these of the old and new.
and here is both the refurb cover and the original:
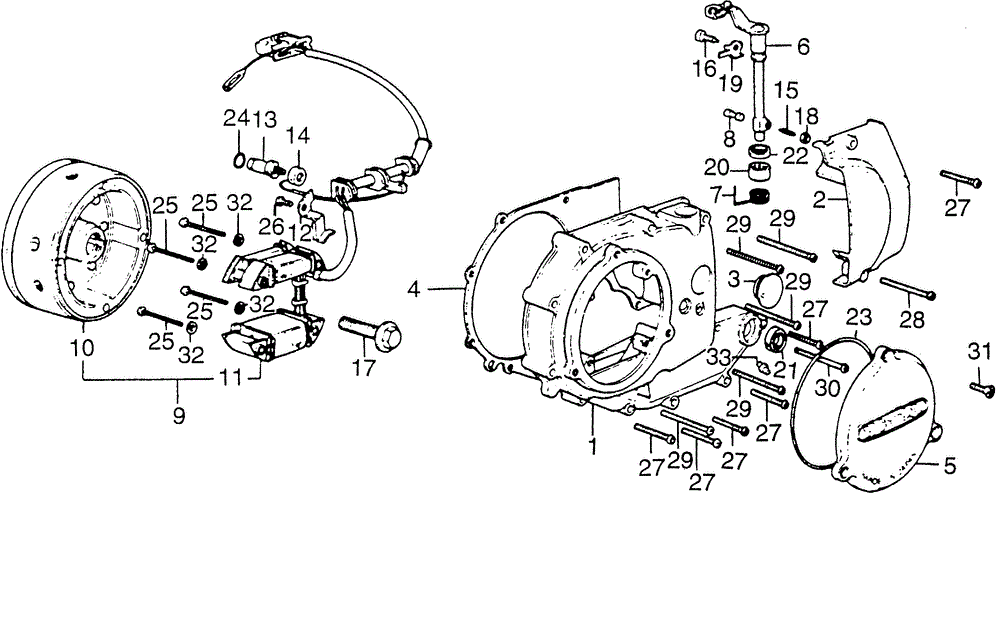
and here is the schematic
I have got new JIS screws and a gasket set so the side covers are done! So what should have been a fairly simple clean and tidy turned out to be more expensive (but not too bad) and harder than first thought.
PART TWO - bushing the clutch actuating arm
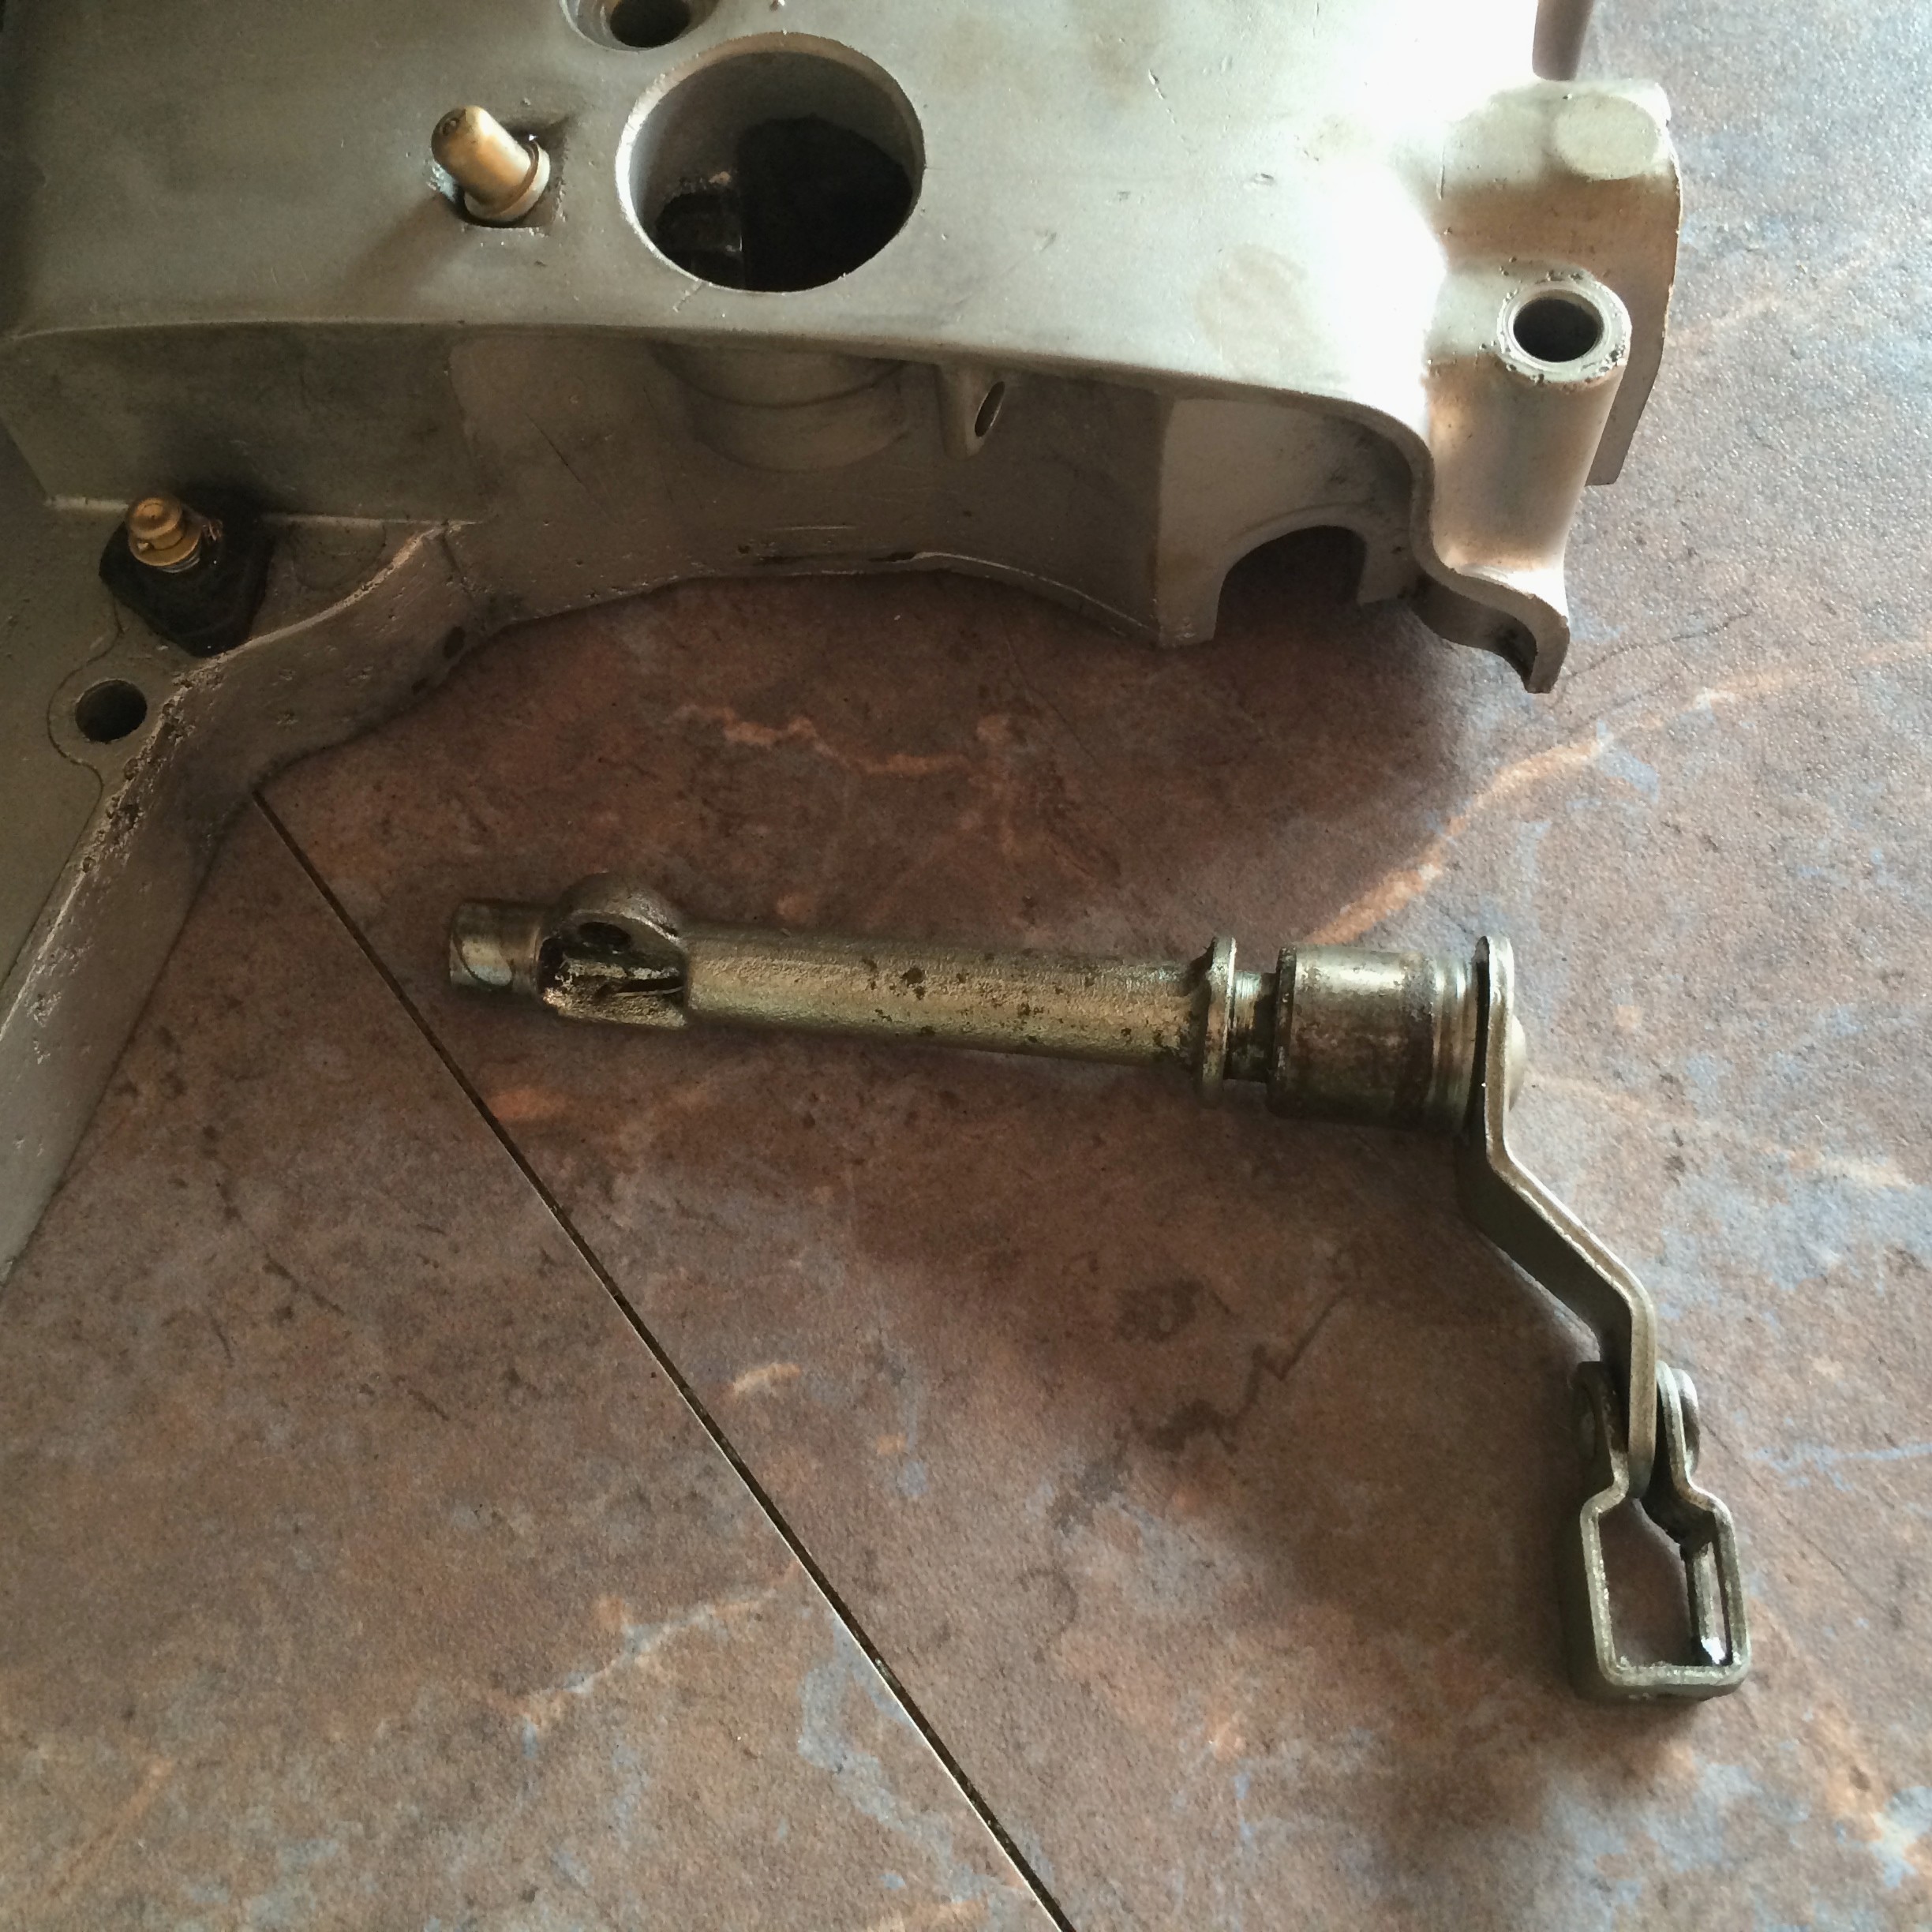
Since writing the above last year, I recently bought another used stator cover online that seemed to be in pretty good condition, but when I got it in my hands, and had a look at it properly, the main problem was the actuating arm where it goes into the cover at the lower end.
Unlike the top which has a needle bearing, there isn't a bush or bearing here, it just runs in the magnesium of the cover. This one was wobbling about quite badly at the lower end, so I thought we should spend and hour and fix what is a common problem on XL 250 and XL350 bikes.
First step is to remove the cover from the engine, (usually fighting all those nice JIS screws that someone has mangled with a pozi screwdriver), and then remove the arm. You can't do that unless you remove the adjuster that is under the rubber plug. You need an 8mm socket or nut spinner and out it comes, the nut and the actual threaded adjuster. You also have to remove the m6 bolt inside the cover, by first bending down the locking tabwasher that the long arm of the spring sits under.
Carefully remove the other end of the spring that goes into a small hole in the arm. Some of my old covers like the one described in part one above were so bad, the spring had rotted/rusted away and the bit that goes in the arm had gone forever! This one is very good. The arm can then be withdrawn. When putting it back don't forget to slip the spring back on the shaft!
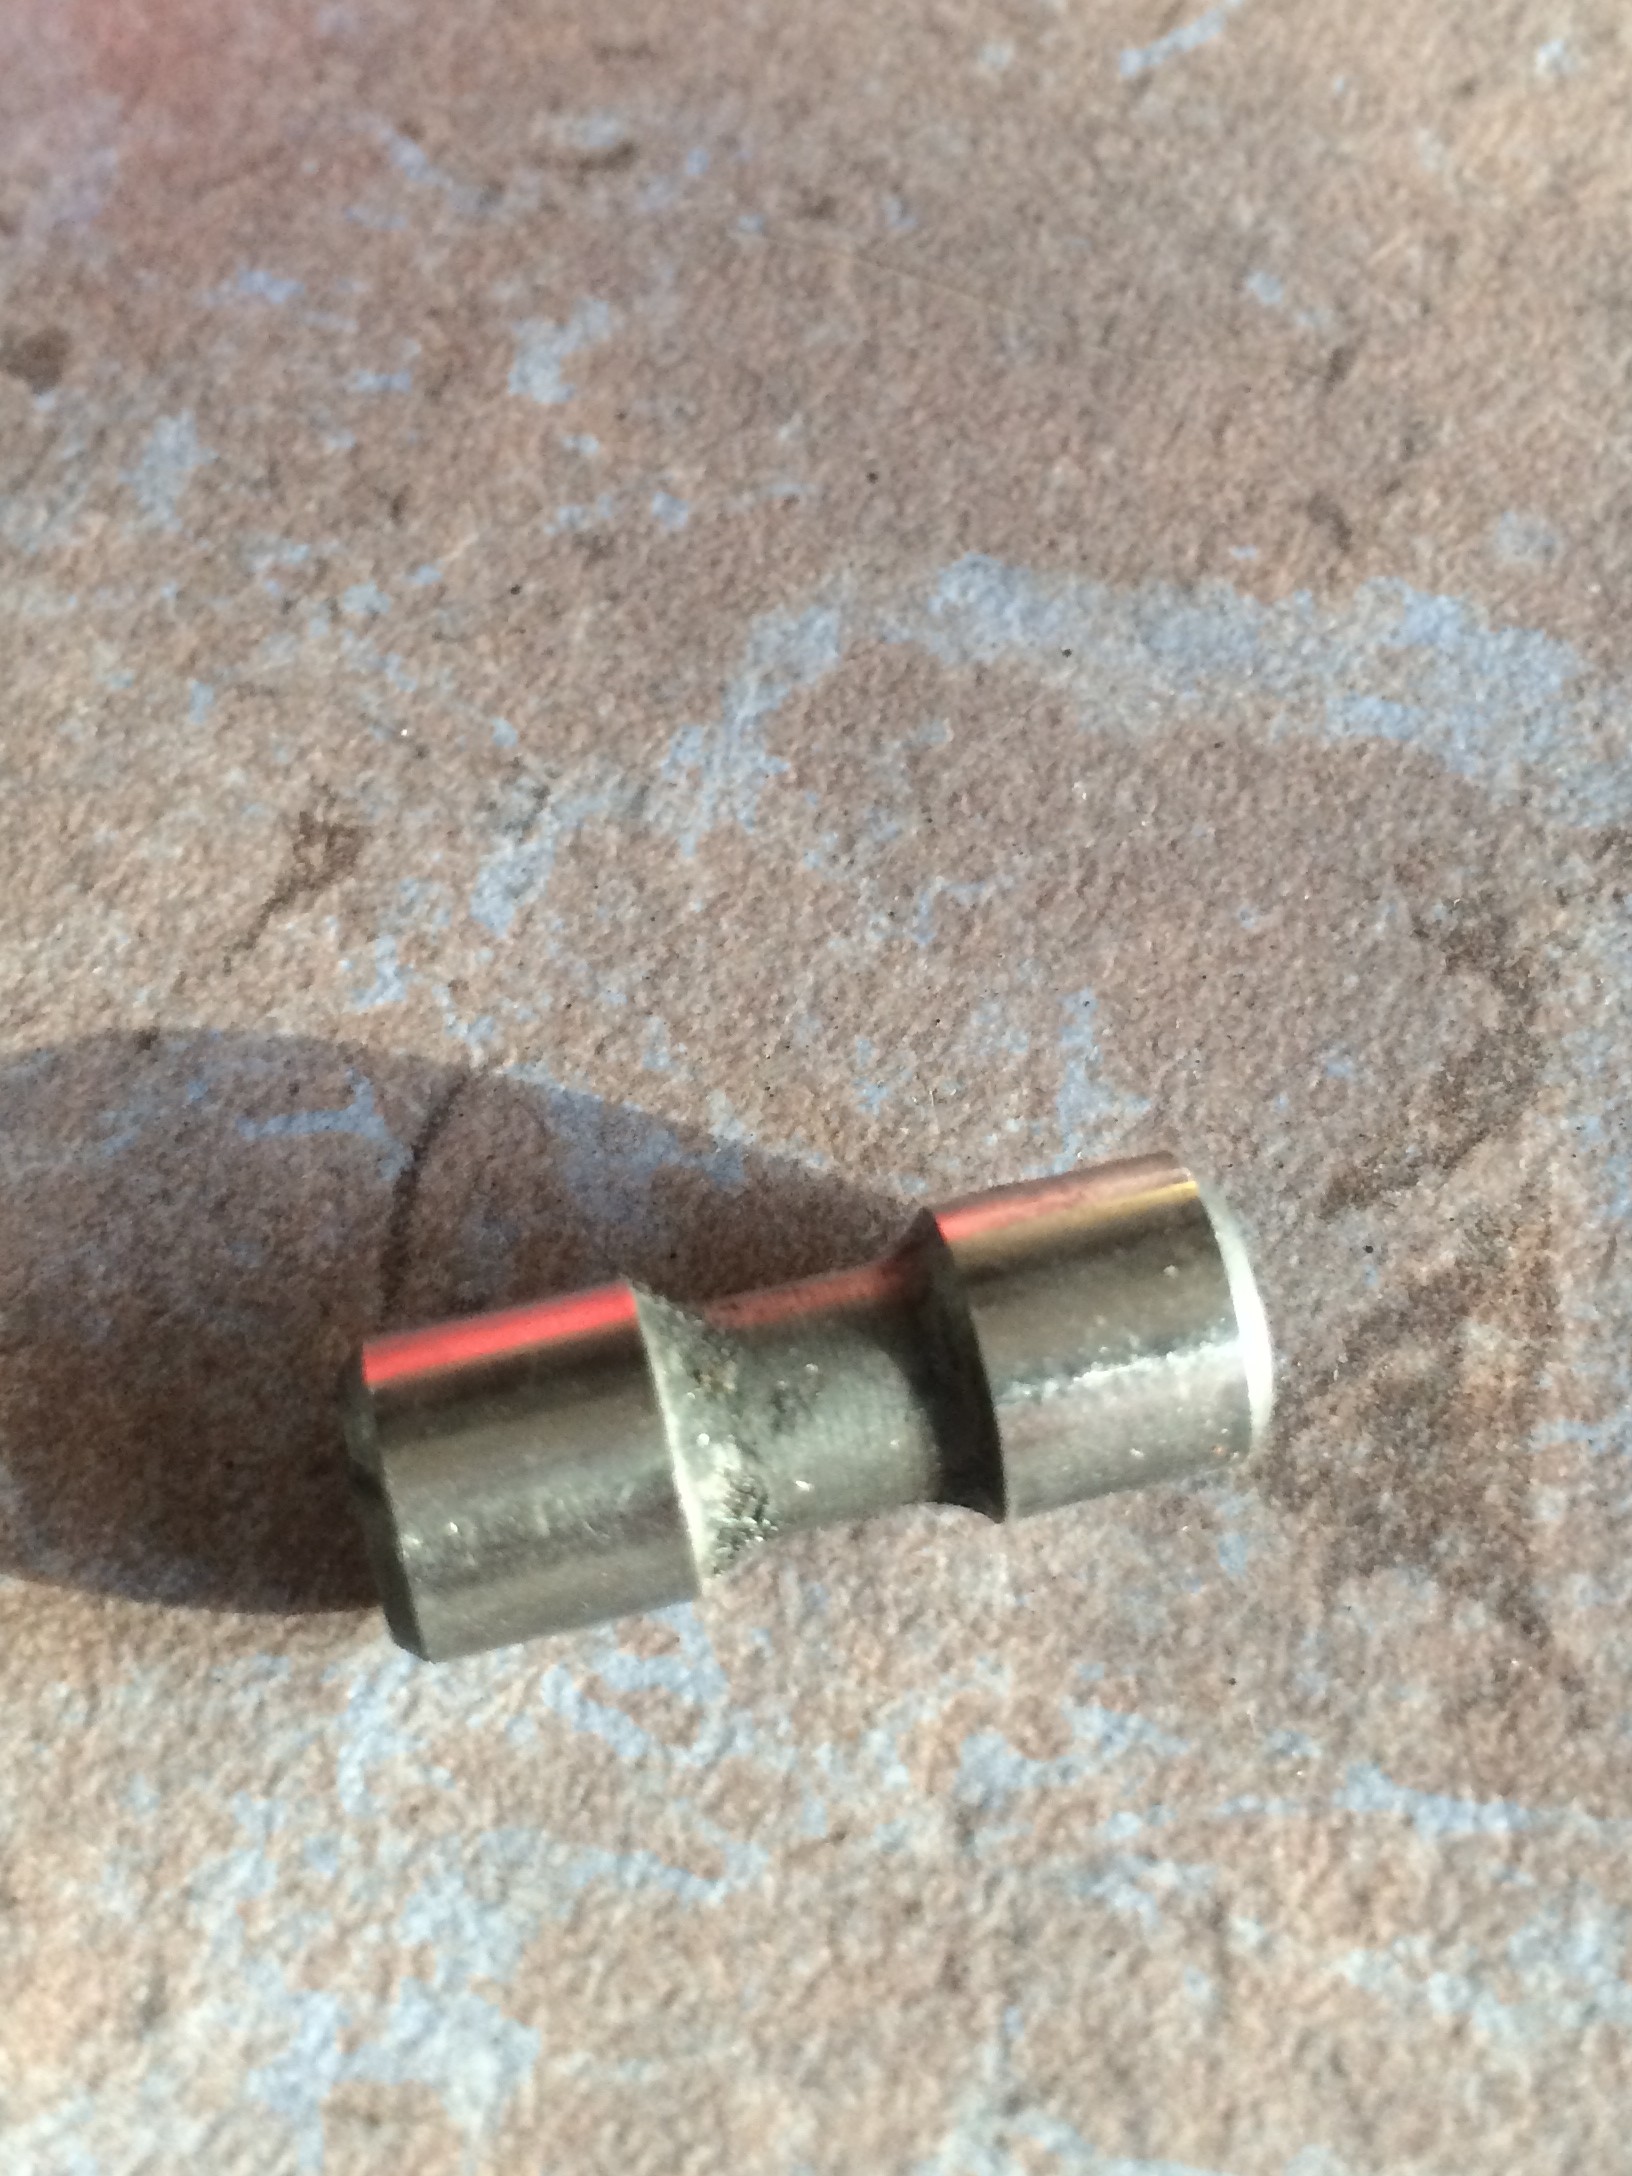
Be careful that the part that Honda San calls the 'piece,lifter' (part no. 22841-329-000) doesn't fall out and get lost. This part is what the adjuster presses on, and it in turn presses the clutch rod. It looks like this:
The top oil seal (part number 91206-329-154) is an odd size, it's 22mm x16mm x 3.5mm; however there are easier ones to get, 4mm deep not 3.5mm but would get you going.
Mine was rock hard and so I will fit a nice new one. Under this is the needle bearing which should be inspected, mine was ok but gritty (like someone has been beadblasting gritty) so I blew it out with carb cleaner, and will re-grease later. The size is 16 mm (inside diameter) x 22mm (outside diameter) x 16mm (top to bottom). These can be had for very little online, or genuine Honda ones for more. I have had all the needles simply fall out of this bearing when the actuator arm is withdrawn, before now.
I measured the end of the actuating arm that goes into the hole in the cover, and it is 10mm diameter. It has worn the magnesium away to an oval, through lack of maintainance/grease so I reckon that if I can bush it out to 12mm, with a 10mm hole in the bush we should be OK. That will leave a 1mm wall in the little bush, quite strong enough.
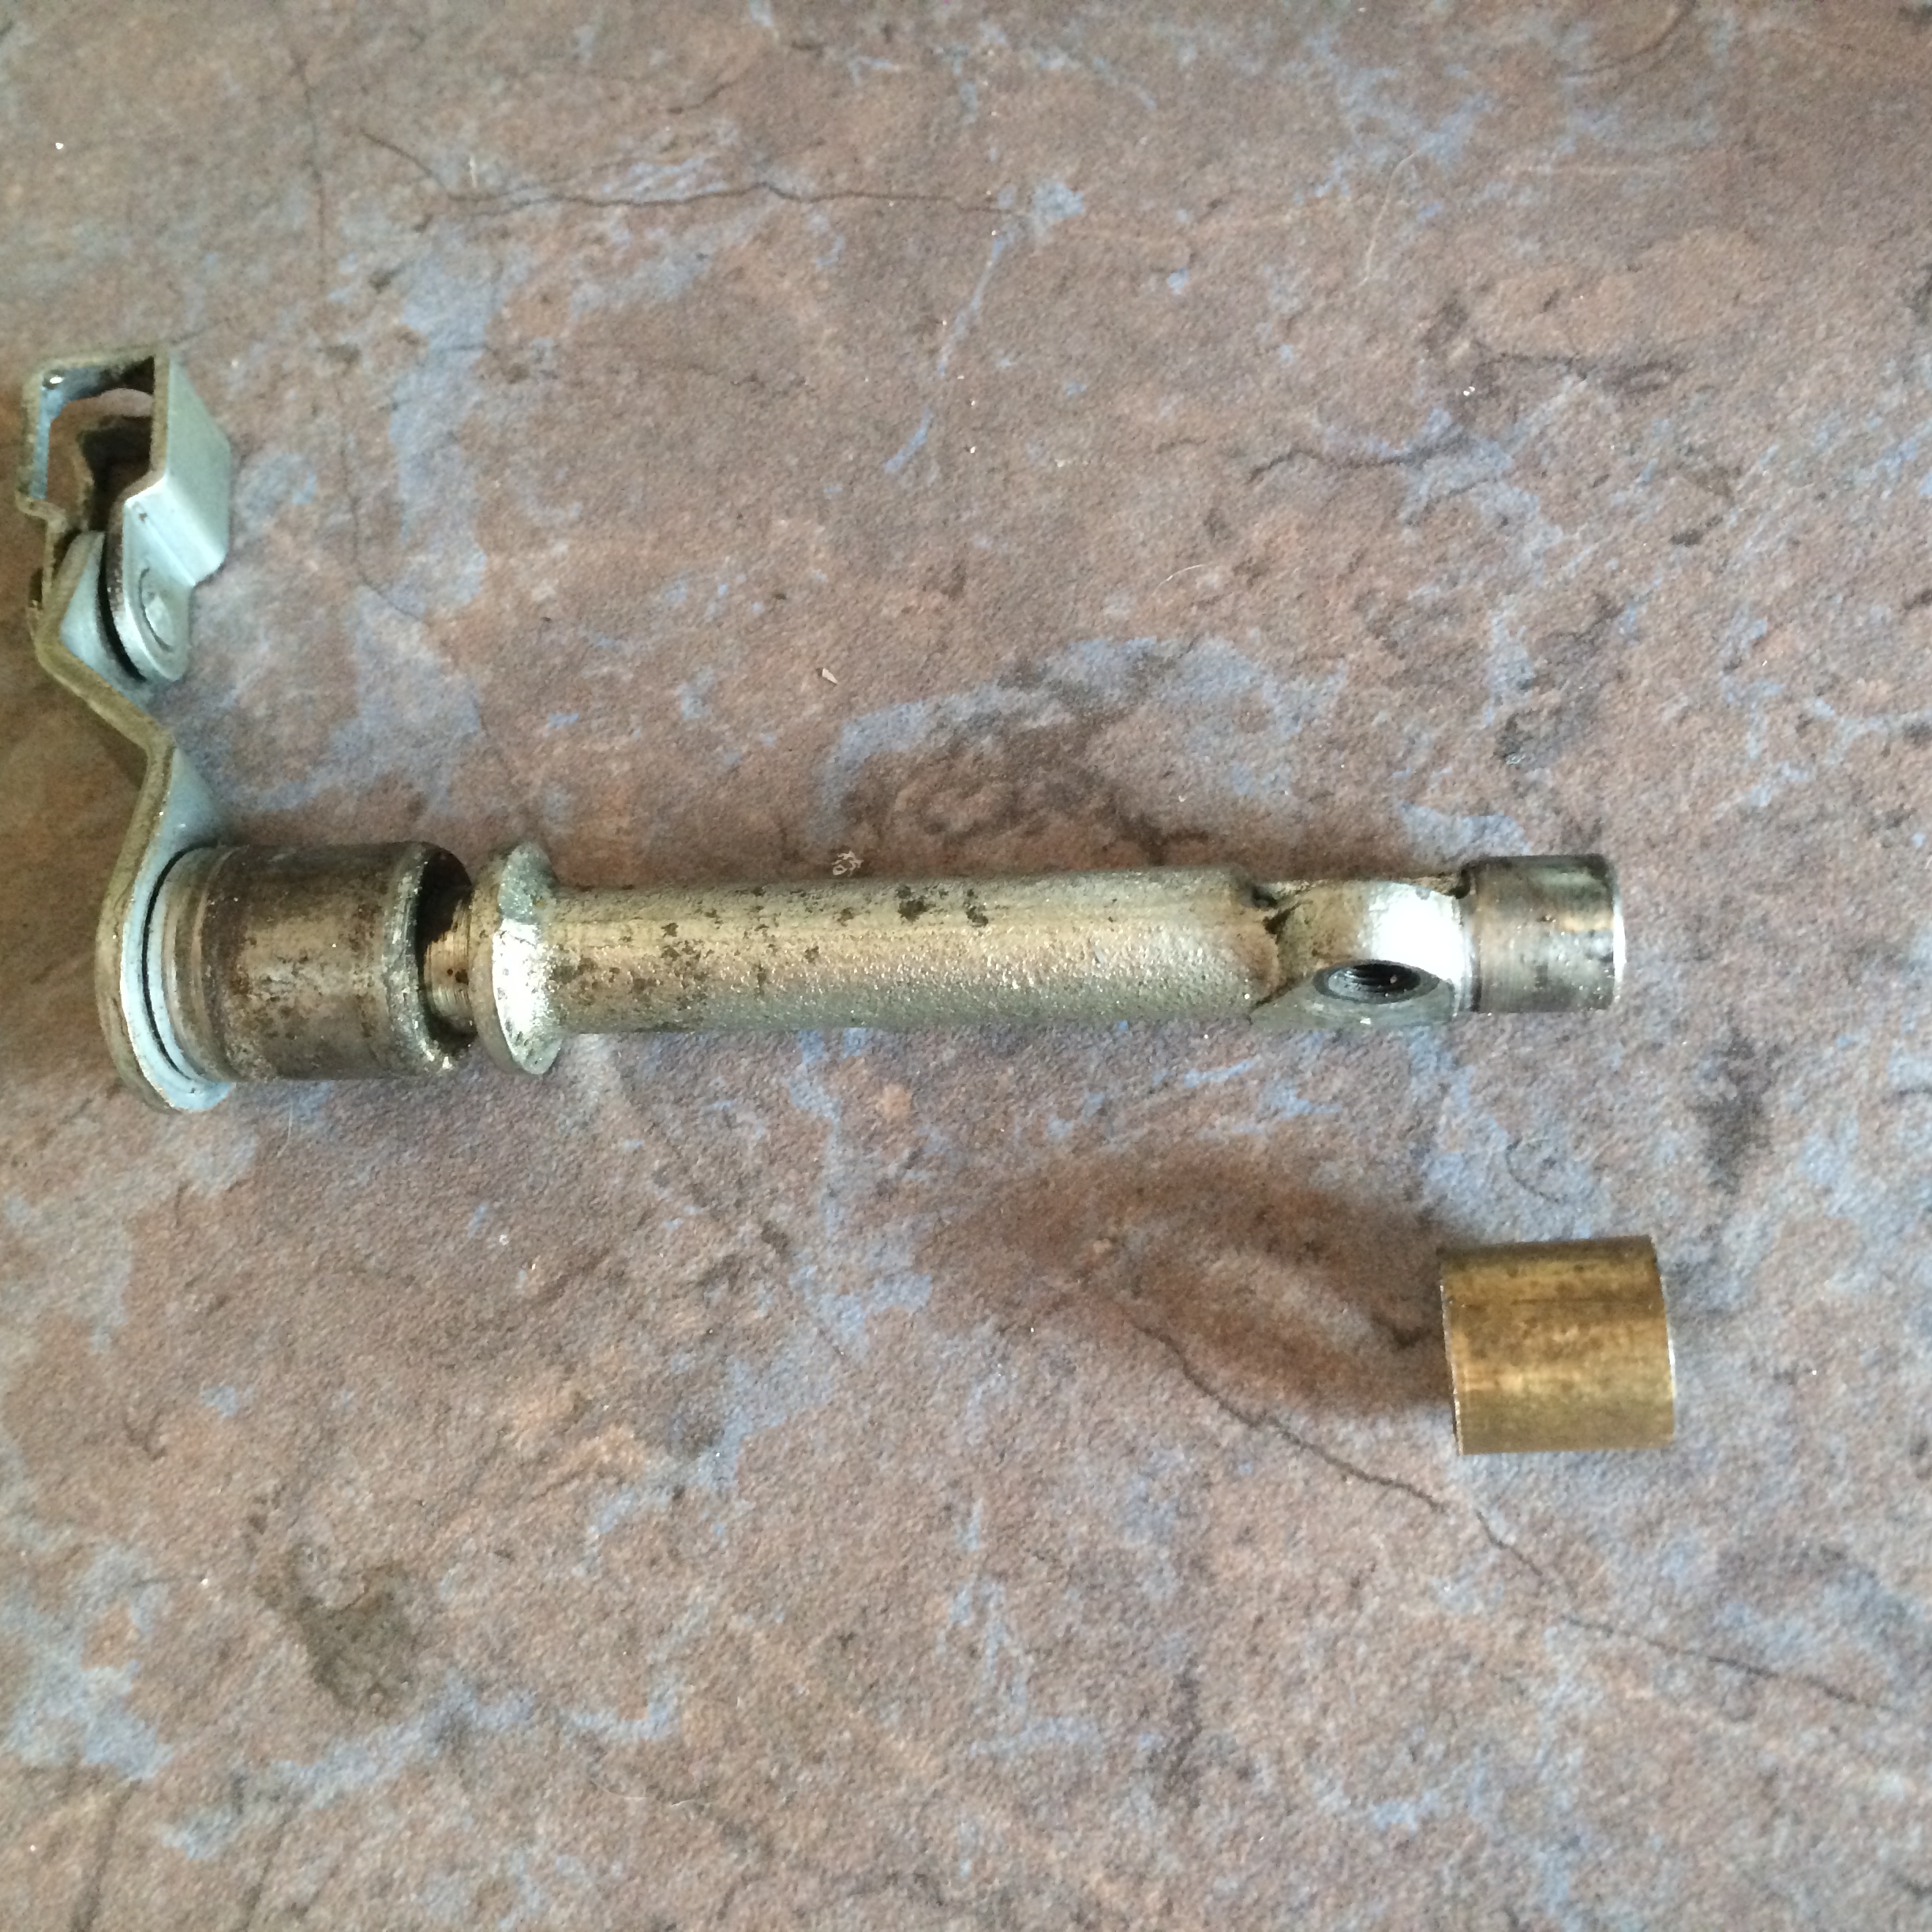
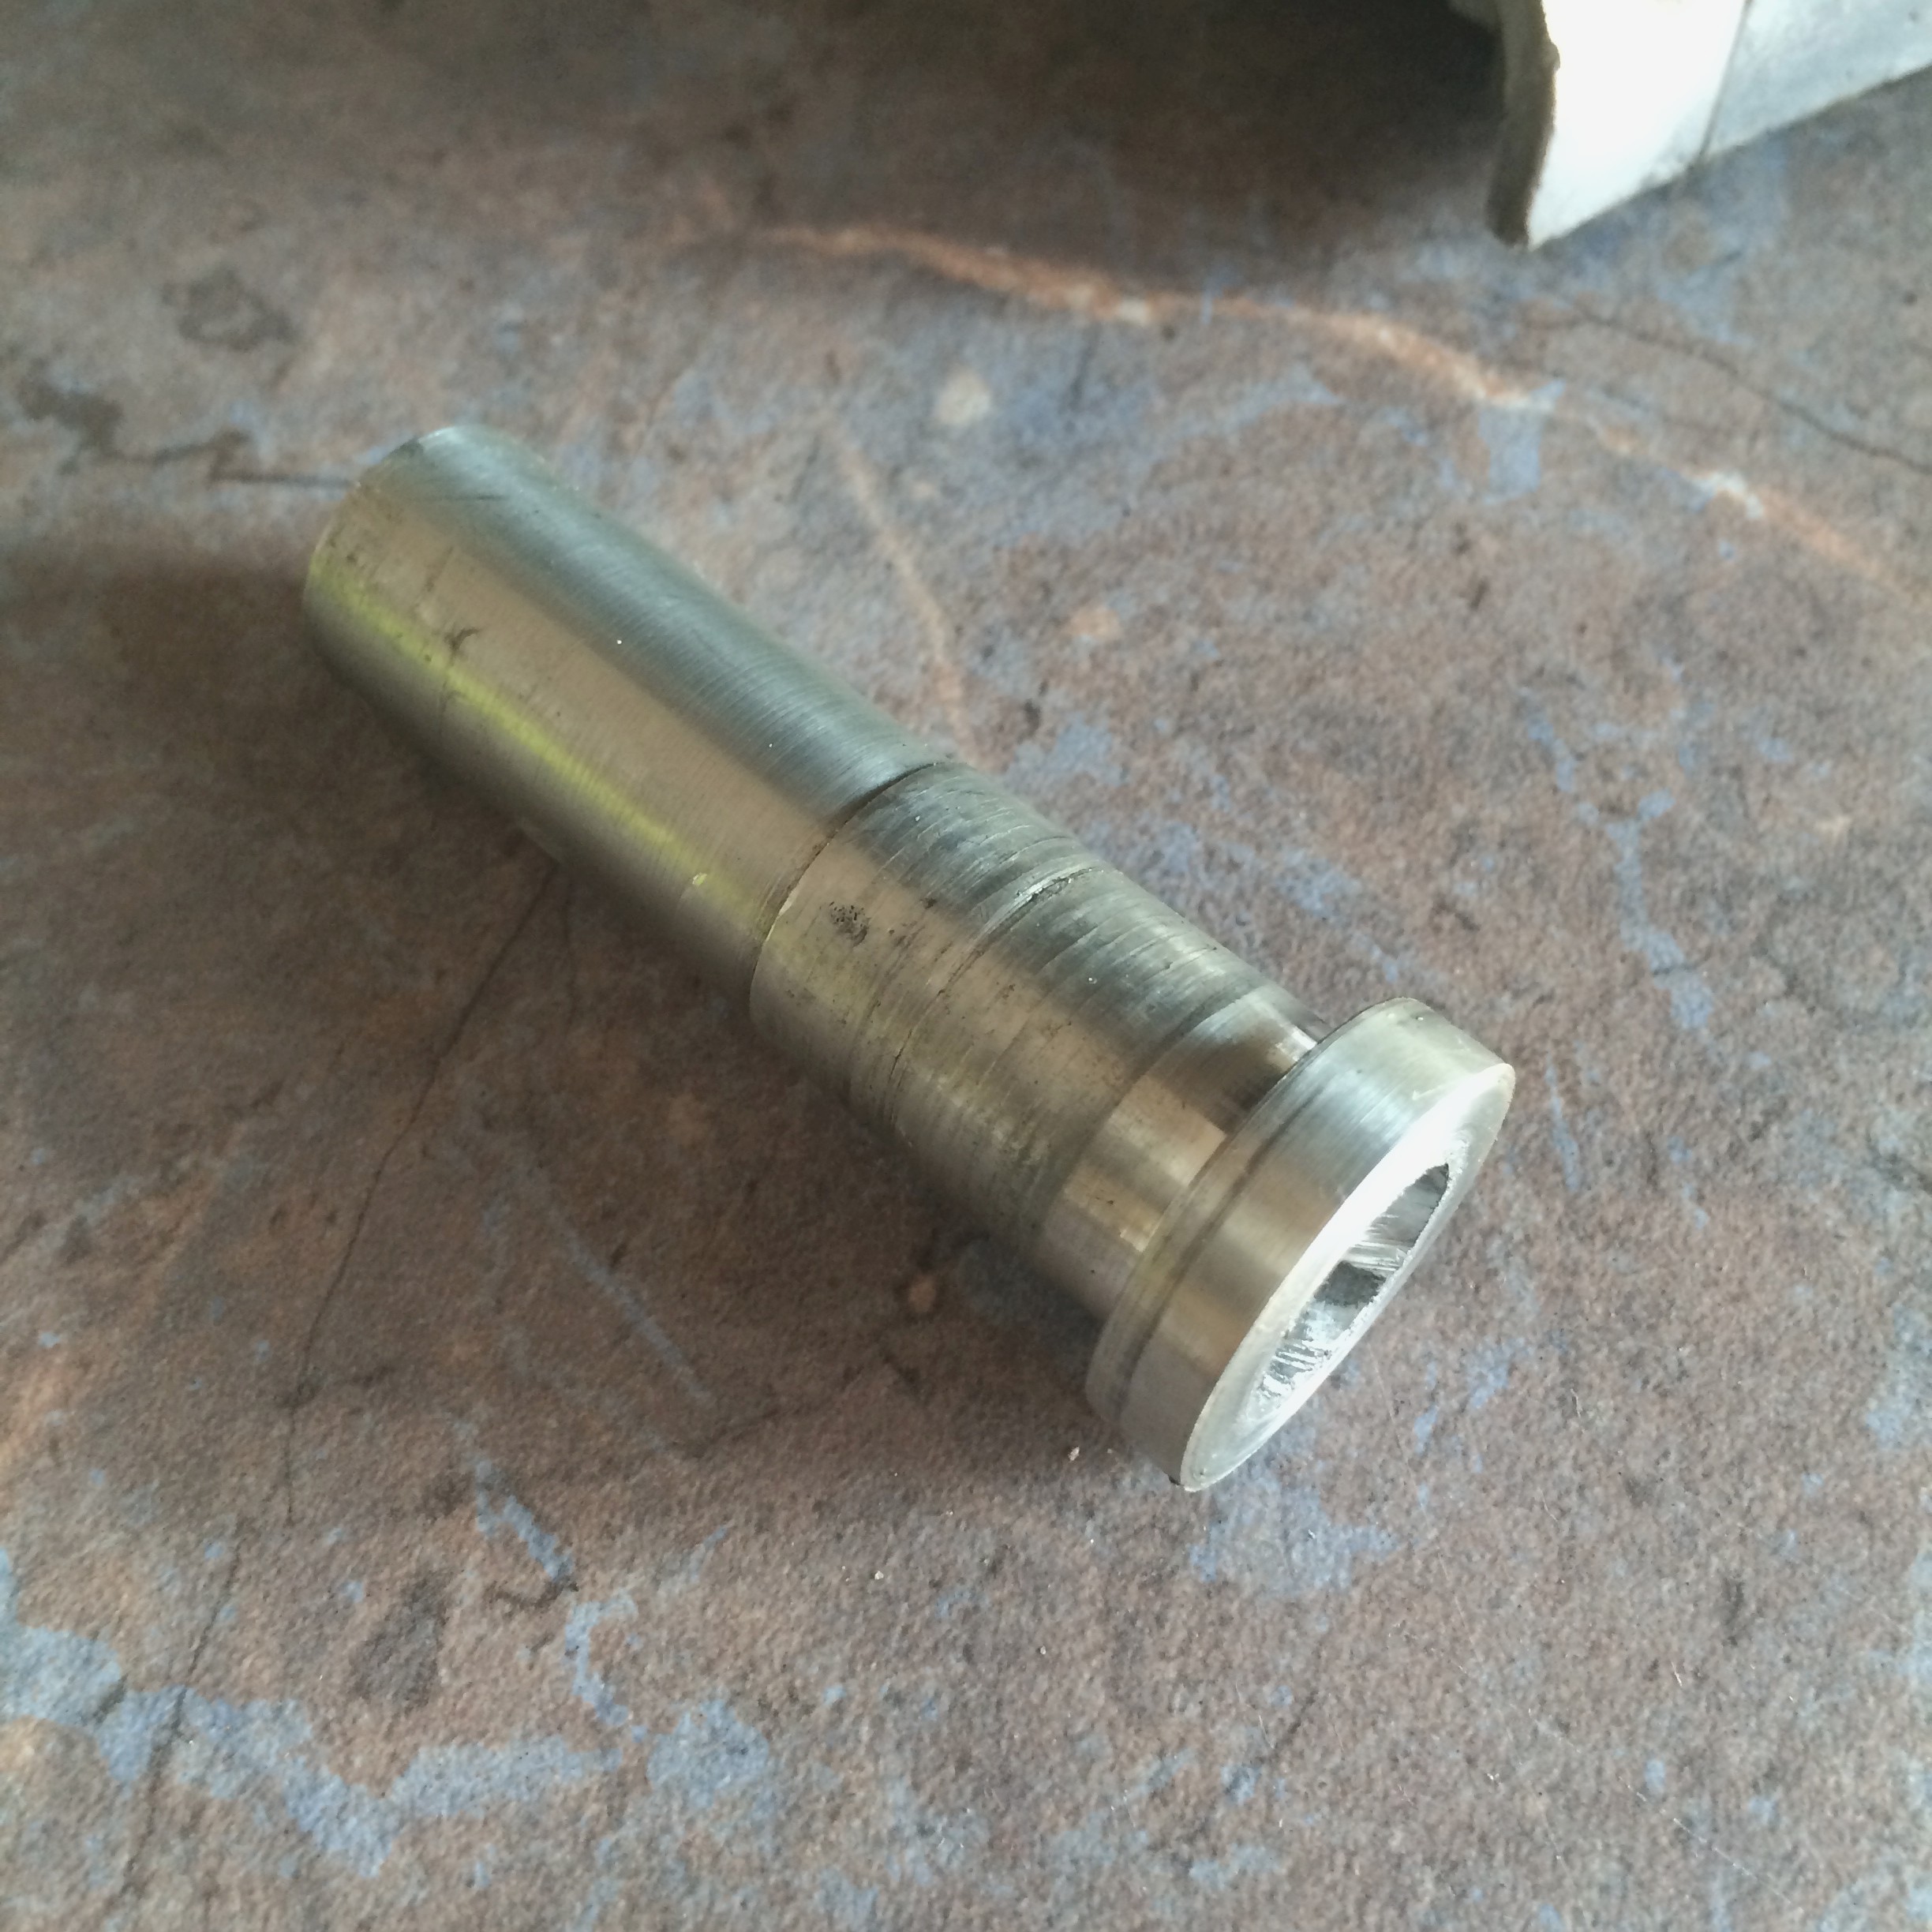
I will make the bush from brass, because I found a small bit 30mm long that will do the job nicely. The picture below is the arm and the bush before trimming the height.
How to open the oval worn hole to 12mm and keep it round? I had a think and then I made an aluminium drill guide in my old lathe, with a 22mm shoulder and a 12mm hole down the middle. I kept the area under the head at 16mm so it would fit in the needle bearing. I only chose the aluminium because I had a spare bit. I nipped it into place using the m6 screw that is the top locknut. Don't overdo it or the drills will pinch.
 and in place
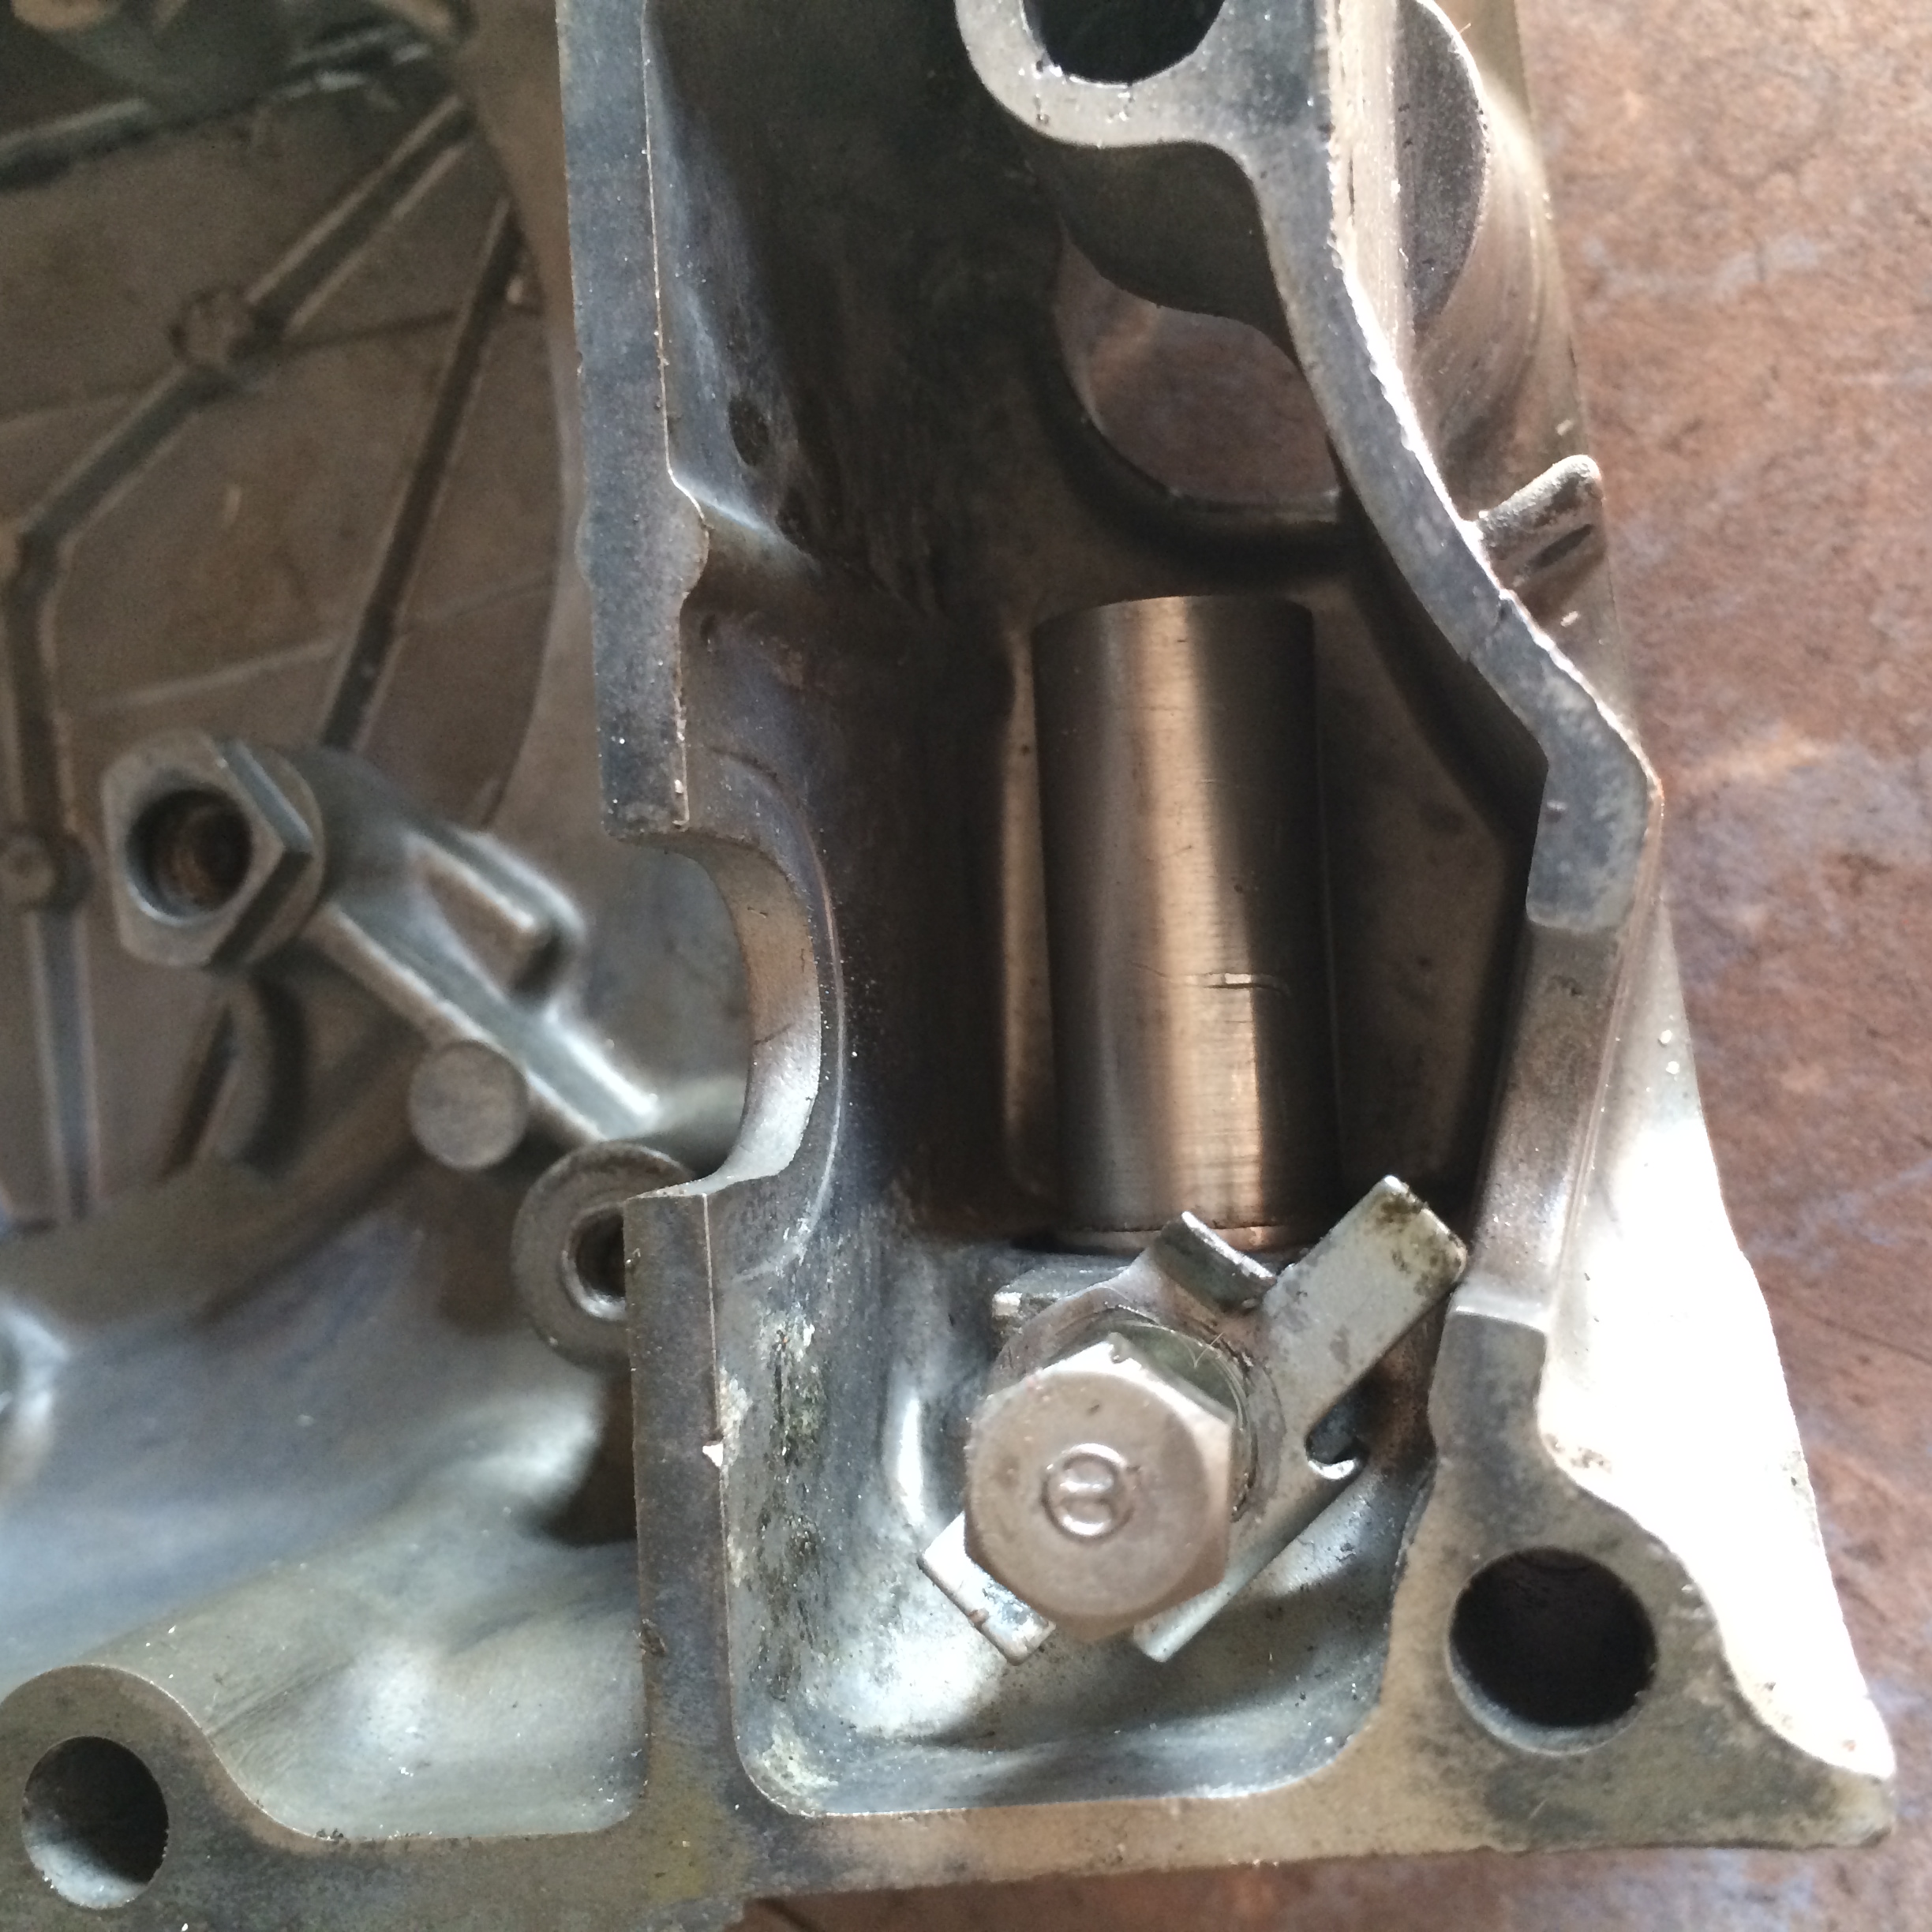
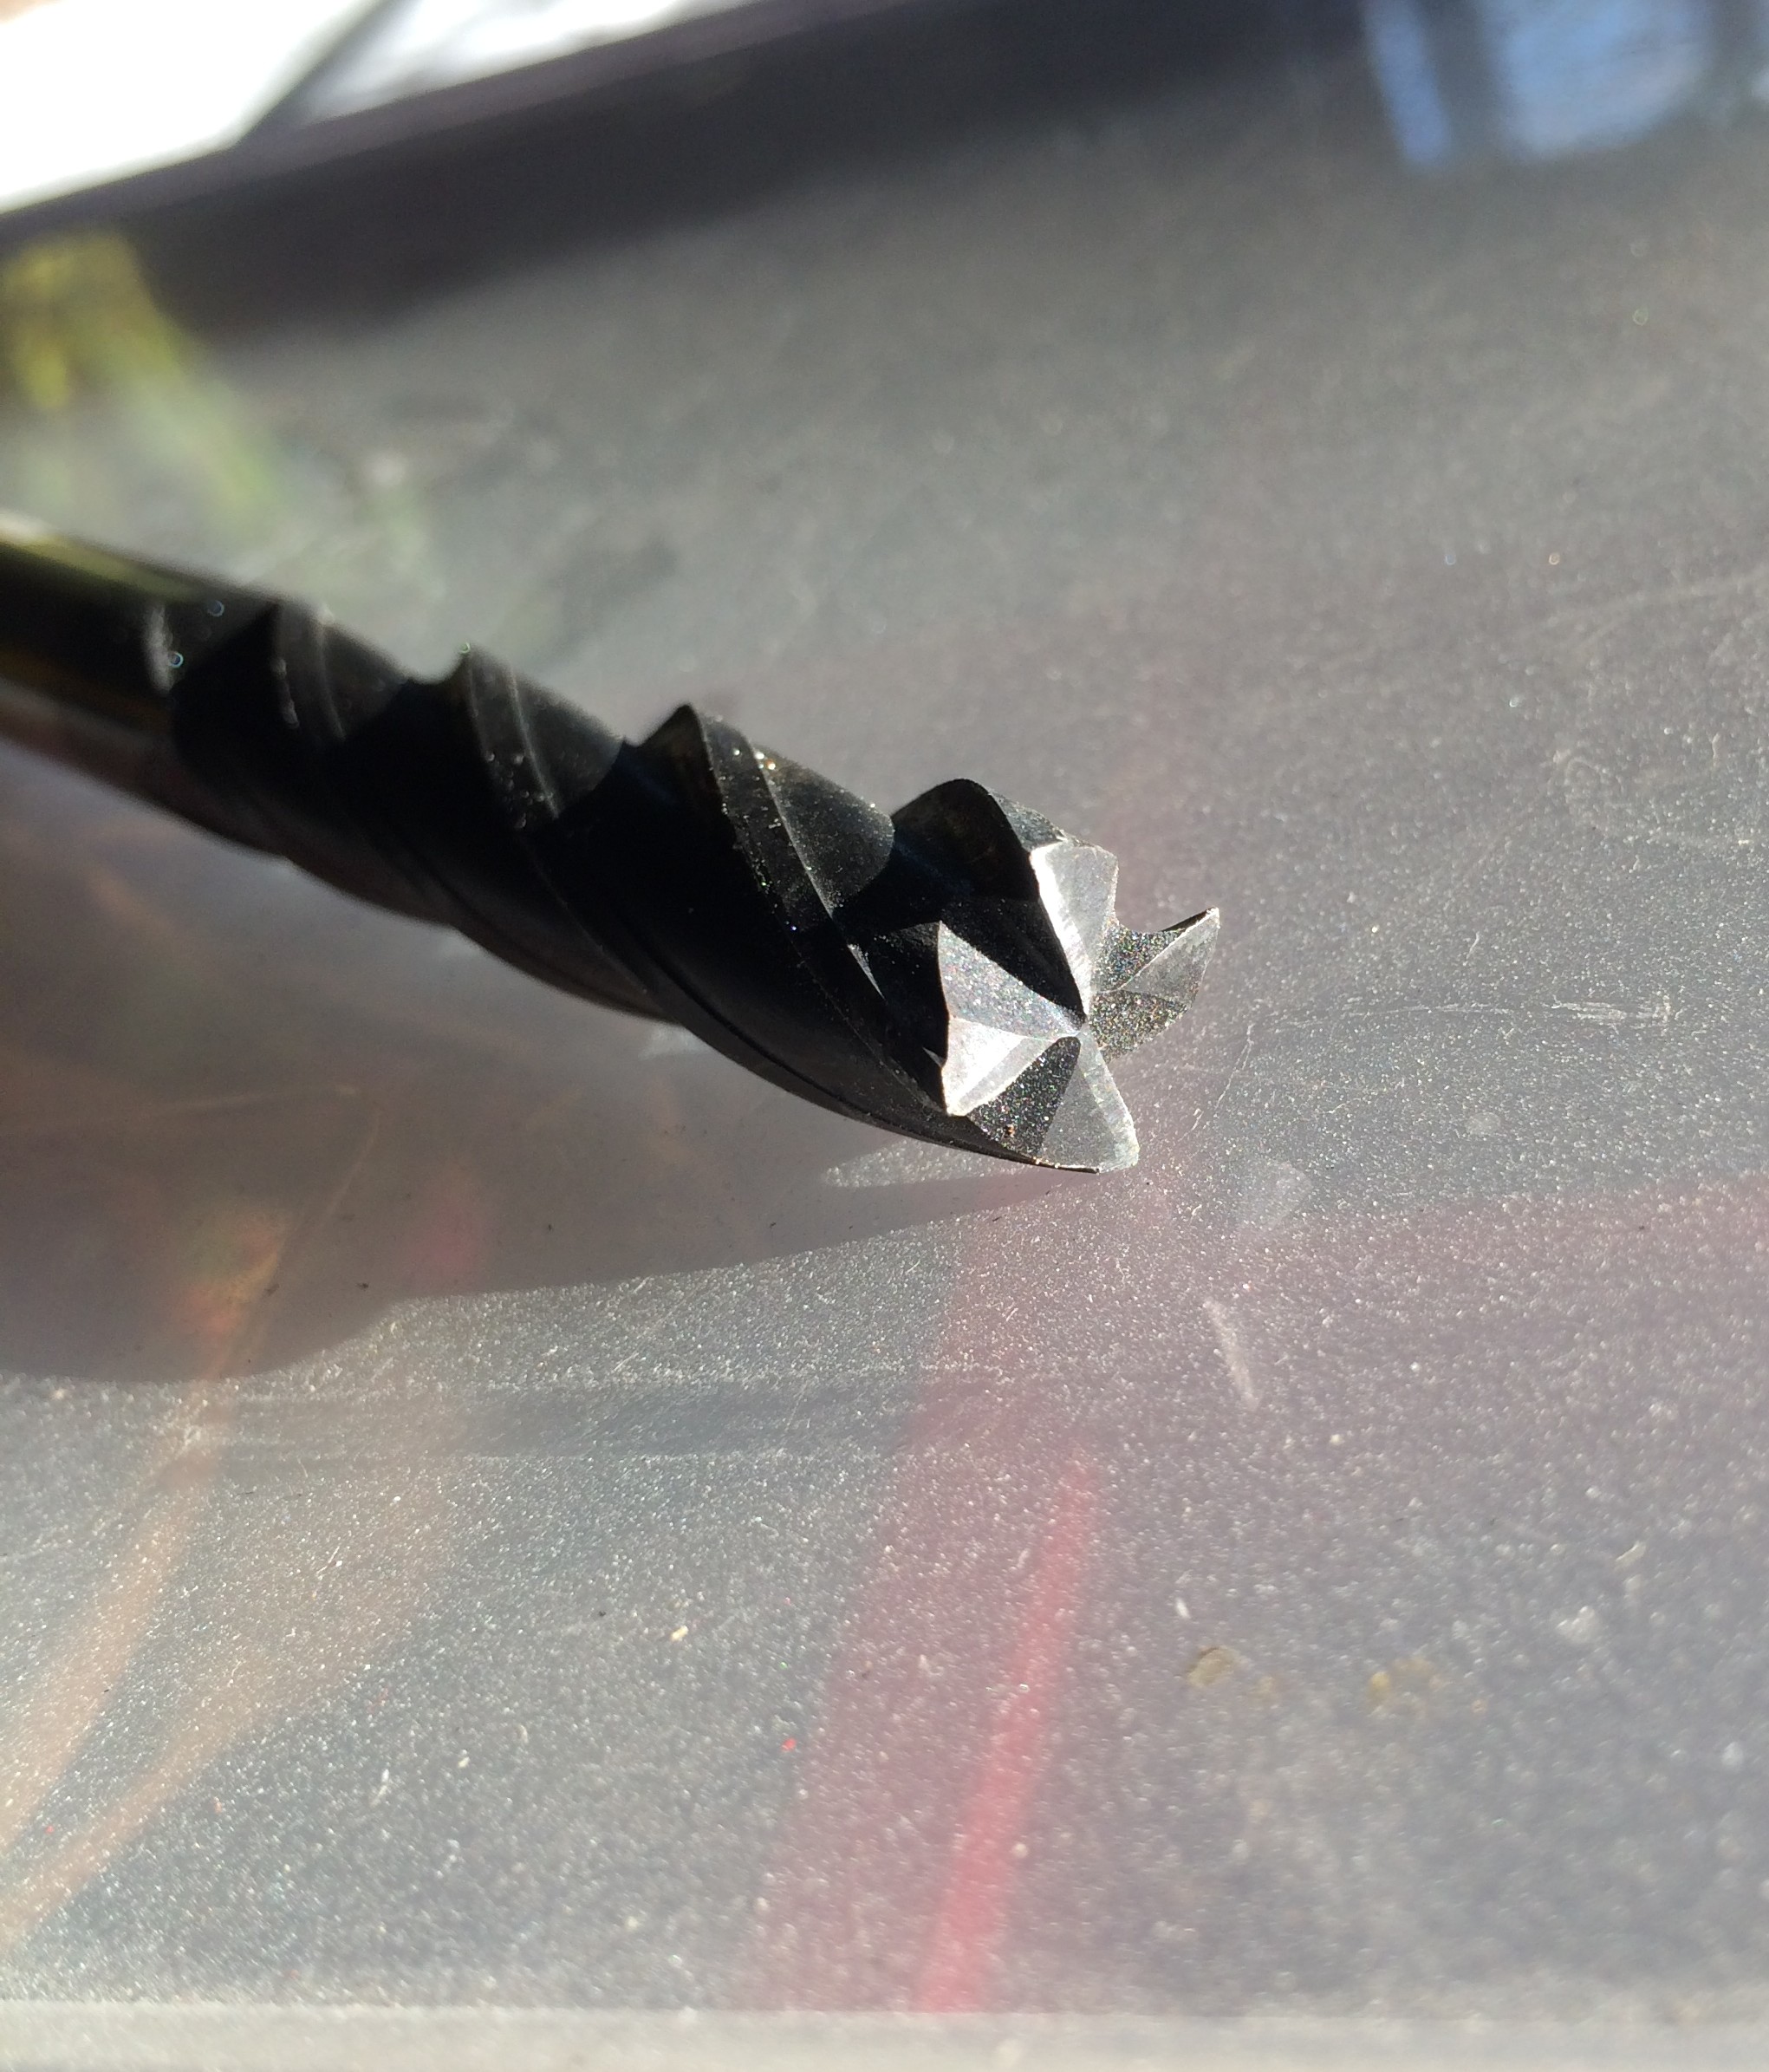
I carefully drilled out the oval hole with the drillbit through the guide just using my cordless drill, on low speed, making sure not to go too deep, and then I thought I would run a milling cutter down to square off the bottom of the hole, as the drill bit would have left a 'V' shaped bottom to the hole; although this isn't really necessary, I just felt it would be nicer.
 and in the drilling guide
Next step was to make the bush from the brass. This involved finding a scrap of 12mm diameter brass, and drilling first an 8mm then a 10mm hole in it. Note
I didn't run the 10mm drill all the way through, I have only an 8mm hole in the bottom of the bush, so that the bottom of the arm sits on brass not magnesium.
I offered the actuator up with the brass bush on the shaft and then trimmed the length, making sure that the adjuster still lined up with the 'piece, lifter'. When all seemed well, although it was a snug fit, I push fitted the bush with a smear of epoxy glue, and left it to set.
The result is excellent, I am very pleased, and there is no play anymore, good as new. Re-assembly with fresh grease, and it is done. I just need to order the oil seal.....
I am lucky to have a small lathe. If you don't have a small lathe the next best thing is a friend with a small lathe.
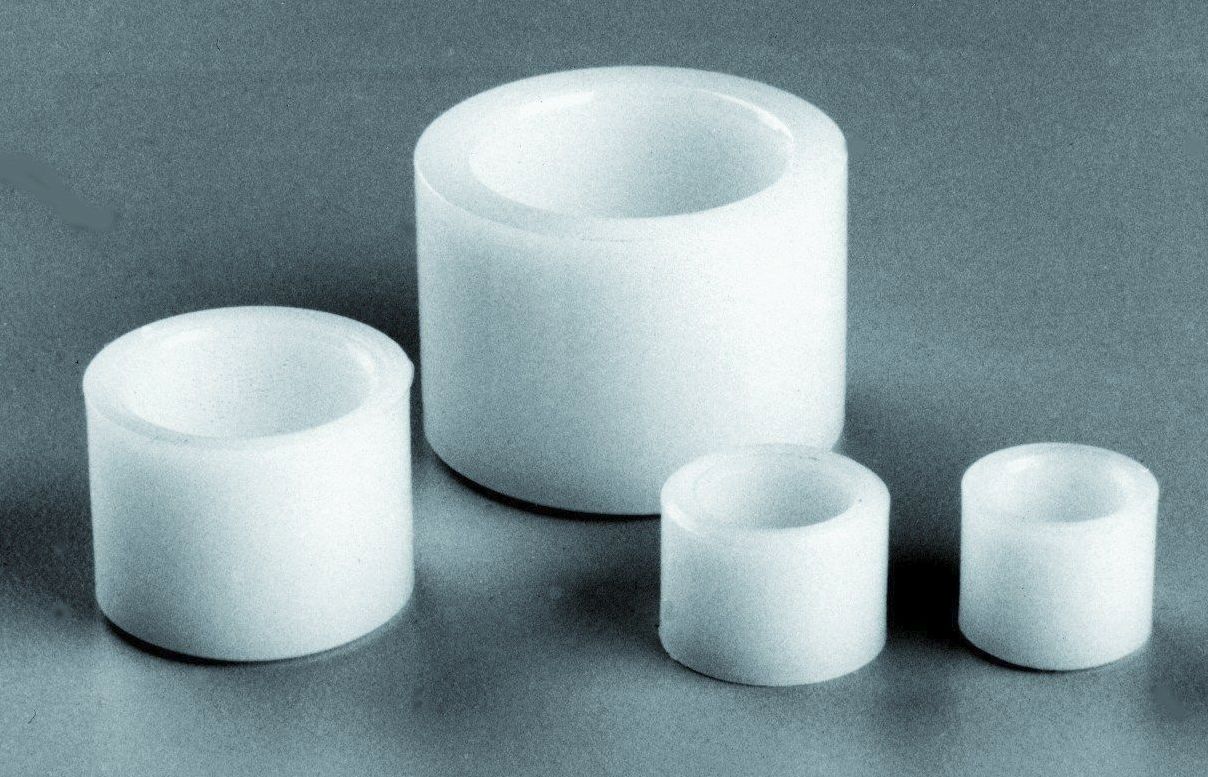
Tip: If you can do the line drilling, you don't have to make a bush you could just as well buy a nylon bush and insert it, it would work just as well. I found these on ebay for £1.48 for four. The seller had sizes including 10 x 12 x 10 which would be ideal. The eBay item number was 281270288549.
I never really know if anyone reads this stuff, but I hope this may have been helpful to someone, somewhere. Happy riding!


