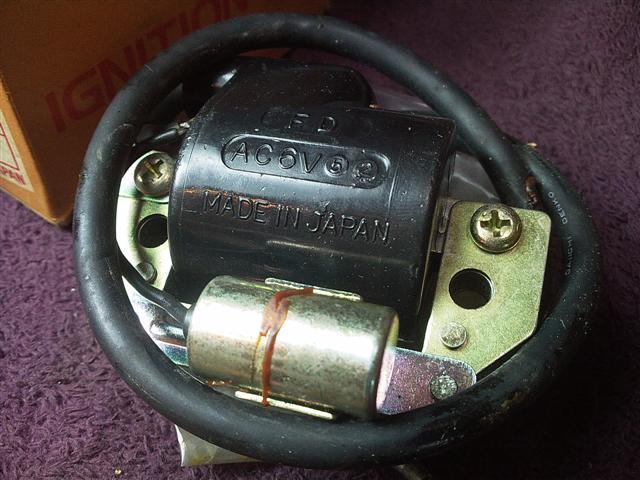
 compare to original one
 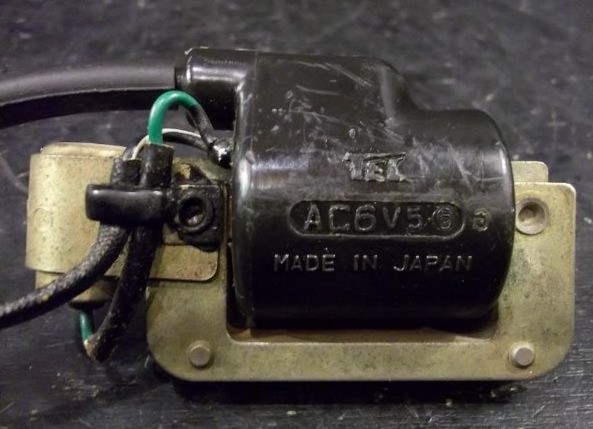 They are both AC6V models.
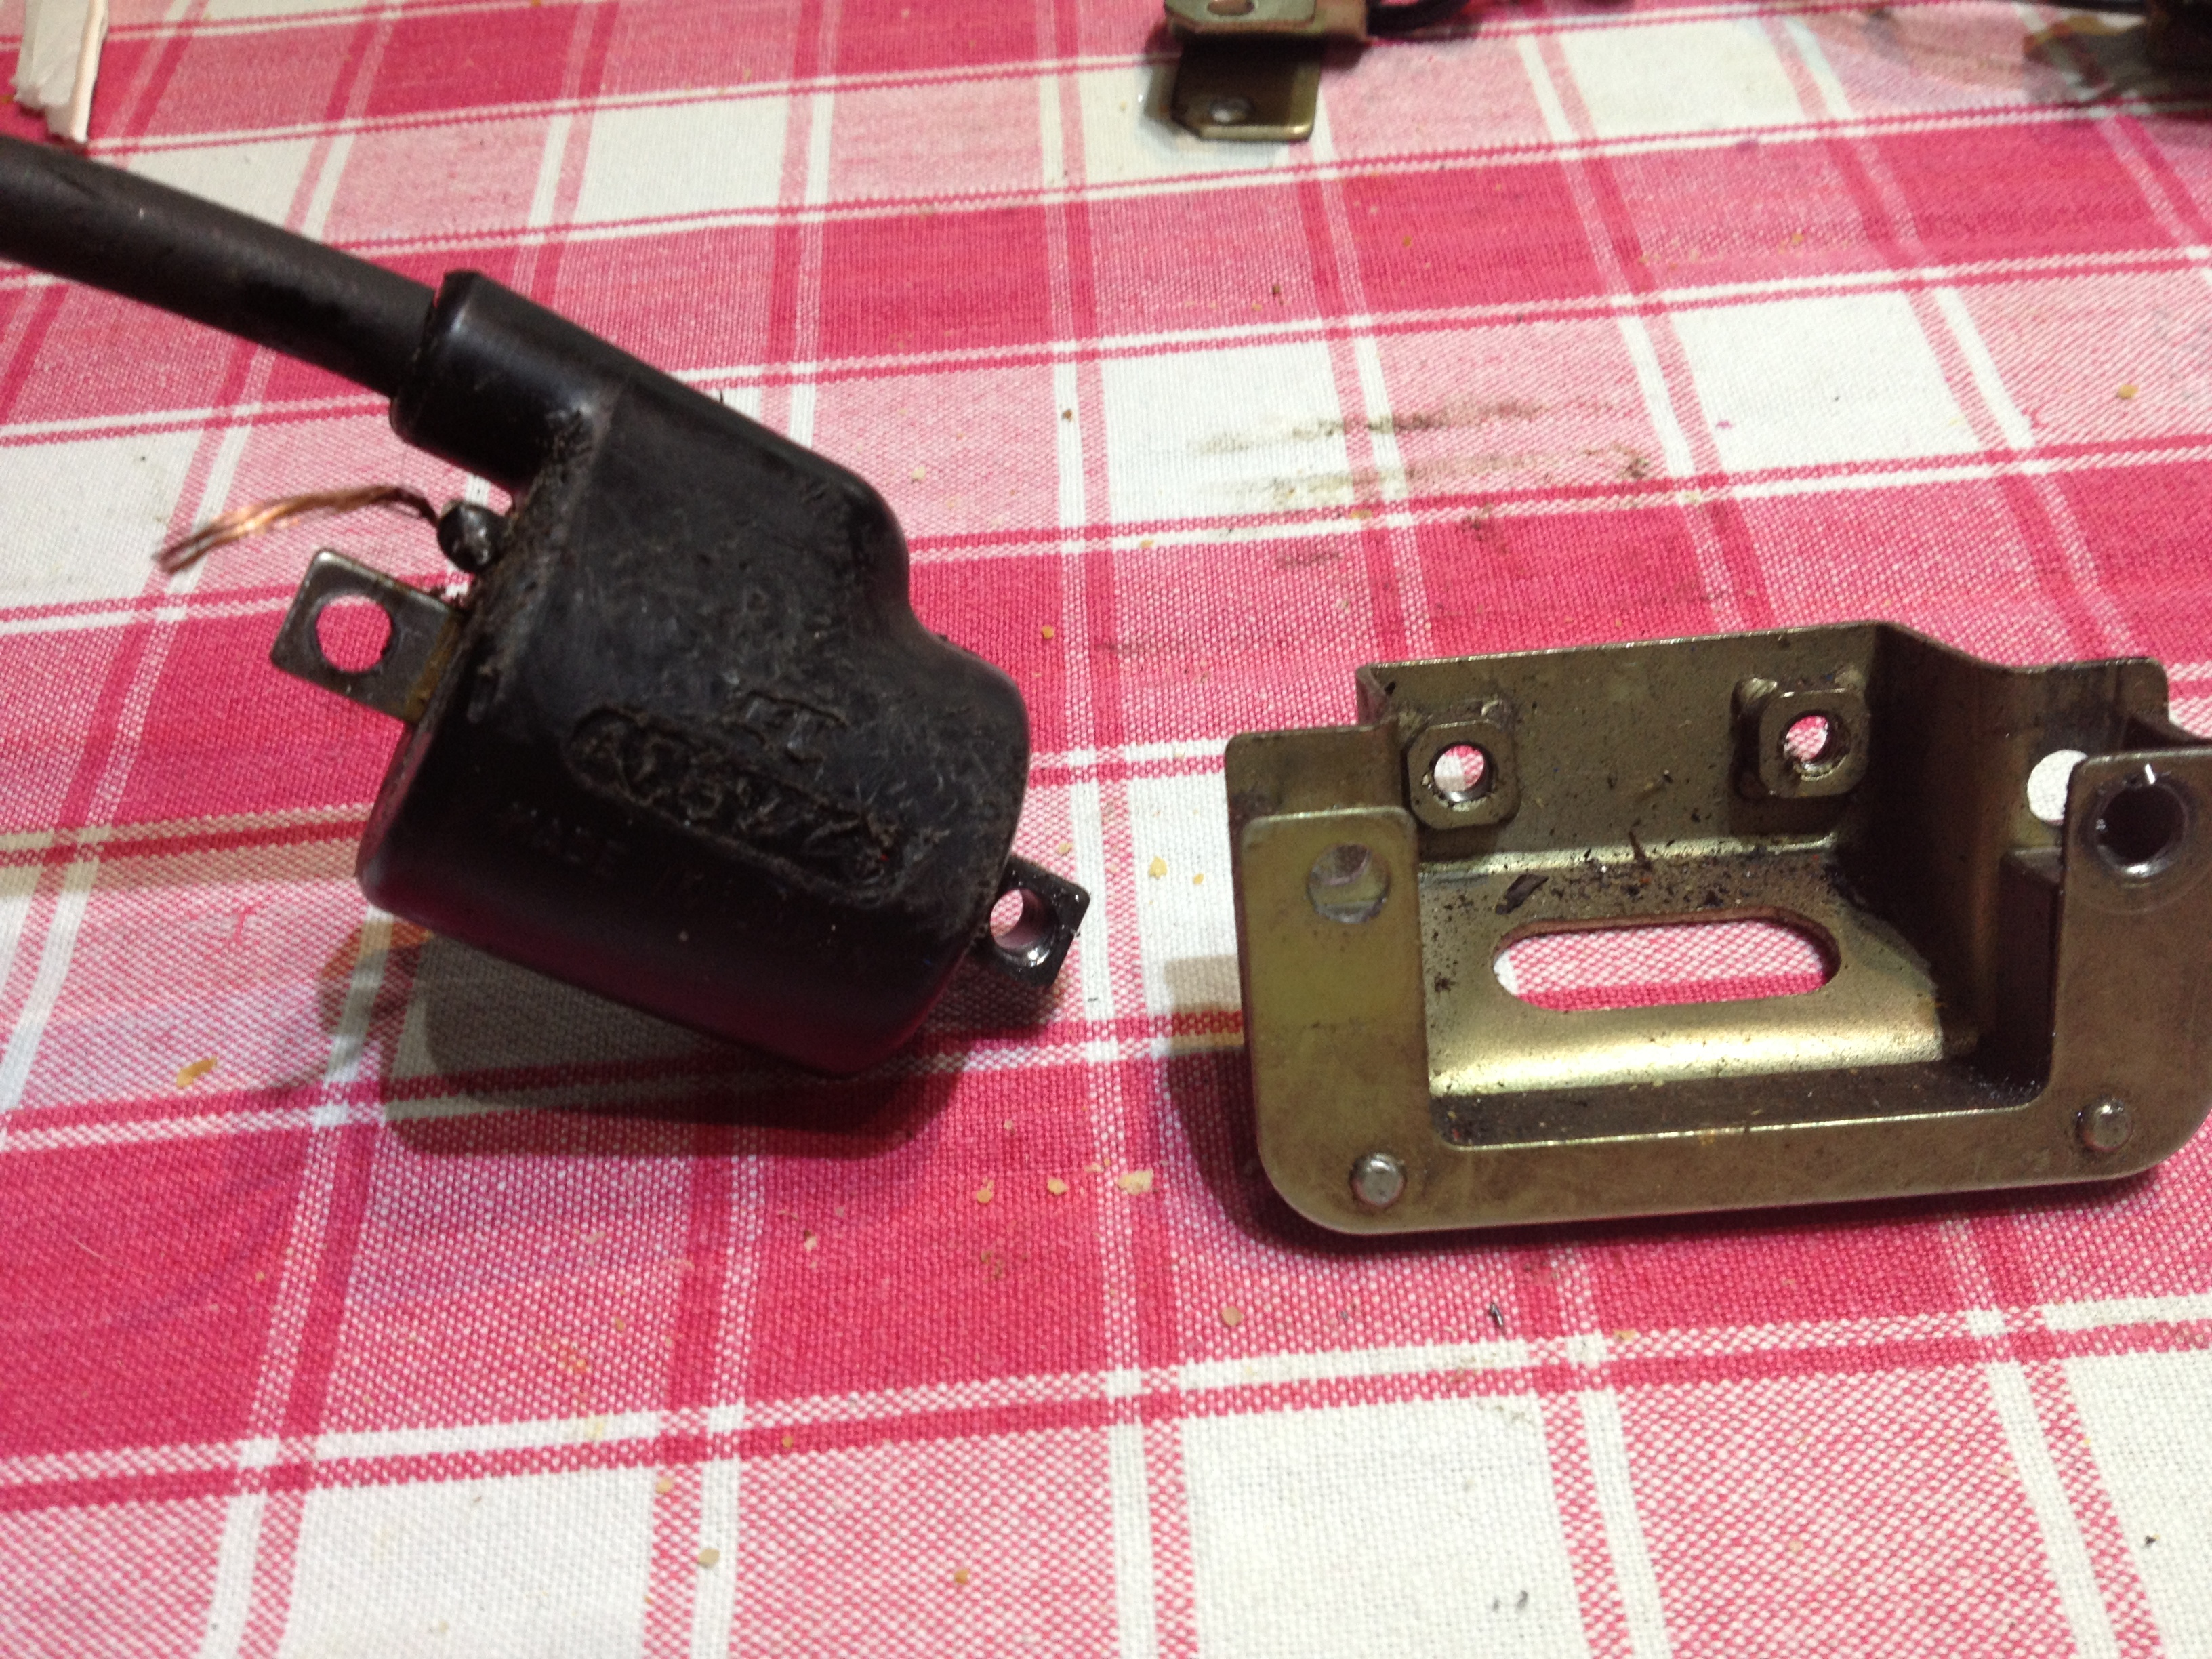
Ignition coils and the XL250/350:
The ignition coil is part number 30530-376-405 and comprises of a coil with HT (high tension=lots of volts) cable out onto which a suppressor cap is fitted by winding the cap via a kind of self tapping screw built into the cap, onto the HT lead.
There is an LT (low tension=low volts ie. 6) cable that comes from the points via a japanese style bullet connector, and a condenser (a capacitor) to prevent the points arcing and burning out prematurely.
The coil is riveted (as is the condenser or capacitor) onto a bespoke steel holder that when new is passivated zinc plated in a yellow/gold colour.
The earth or ground is made to the frame via the body of the coil so the metal needs to be clean on the coil and the fame, and the mounting bolts tight. A bad earth/ground at this point will stop your bike running.
Now, the coils will age and after nearly 40 years they will have some breakdown in their internal insulation which comprises a thin coat of lacquer over copper cable that is quite fine and delicate.
There is no option if your spark is weak or non-existant but to replace the whole unit. However part 30530-376-405 is obsolete, (and 86 euros/US dollars from CMSL even if they had any which they don't) and rare to find NOS, and therefore the only choices seem to be to:-
1. fit another type of new coil (must be a 6V one) and condenser,
2. get one from a bike being broken for spares, but that will also be as old.
However, it occurs to me that since the actual coil bit (the black plastic encapsulated bit) is standard to many Hondas, why not just drill out the rivets and fit a new middle bit? Then I saw on ebay in Thailand this one:
compare to original one They are both AC6V models.
Basically the new one which is £21 free postage even unscrews (yippee), ie no rivets apart from the condenser, so if I drill out the rivets on the old and re-use the screws on the old one that I take from the new one and remount the new condenser, and the original cable retainer I should have a fantastic new coil that looks right and mounts right. The spacing of the two holes is a few millimetres different from the older XL250 ones, and the coil won't sit against the frame without the K3 coil frame.
I happen to have a spare coil that looks good but has a weak spark, so I'll do the swop on that one and tell you how it goes. The sun set, rose and set again, then I had a minute or two
Later...............
So today the new coil came from Thailand, part number 30530-439-900 sealed in the original Honda box.
Side by side the original and new doner look like this:
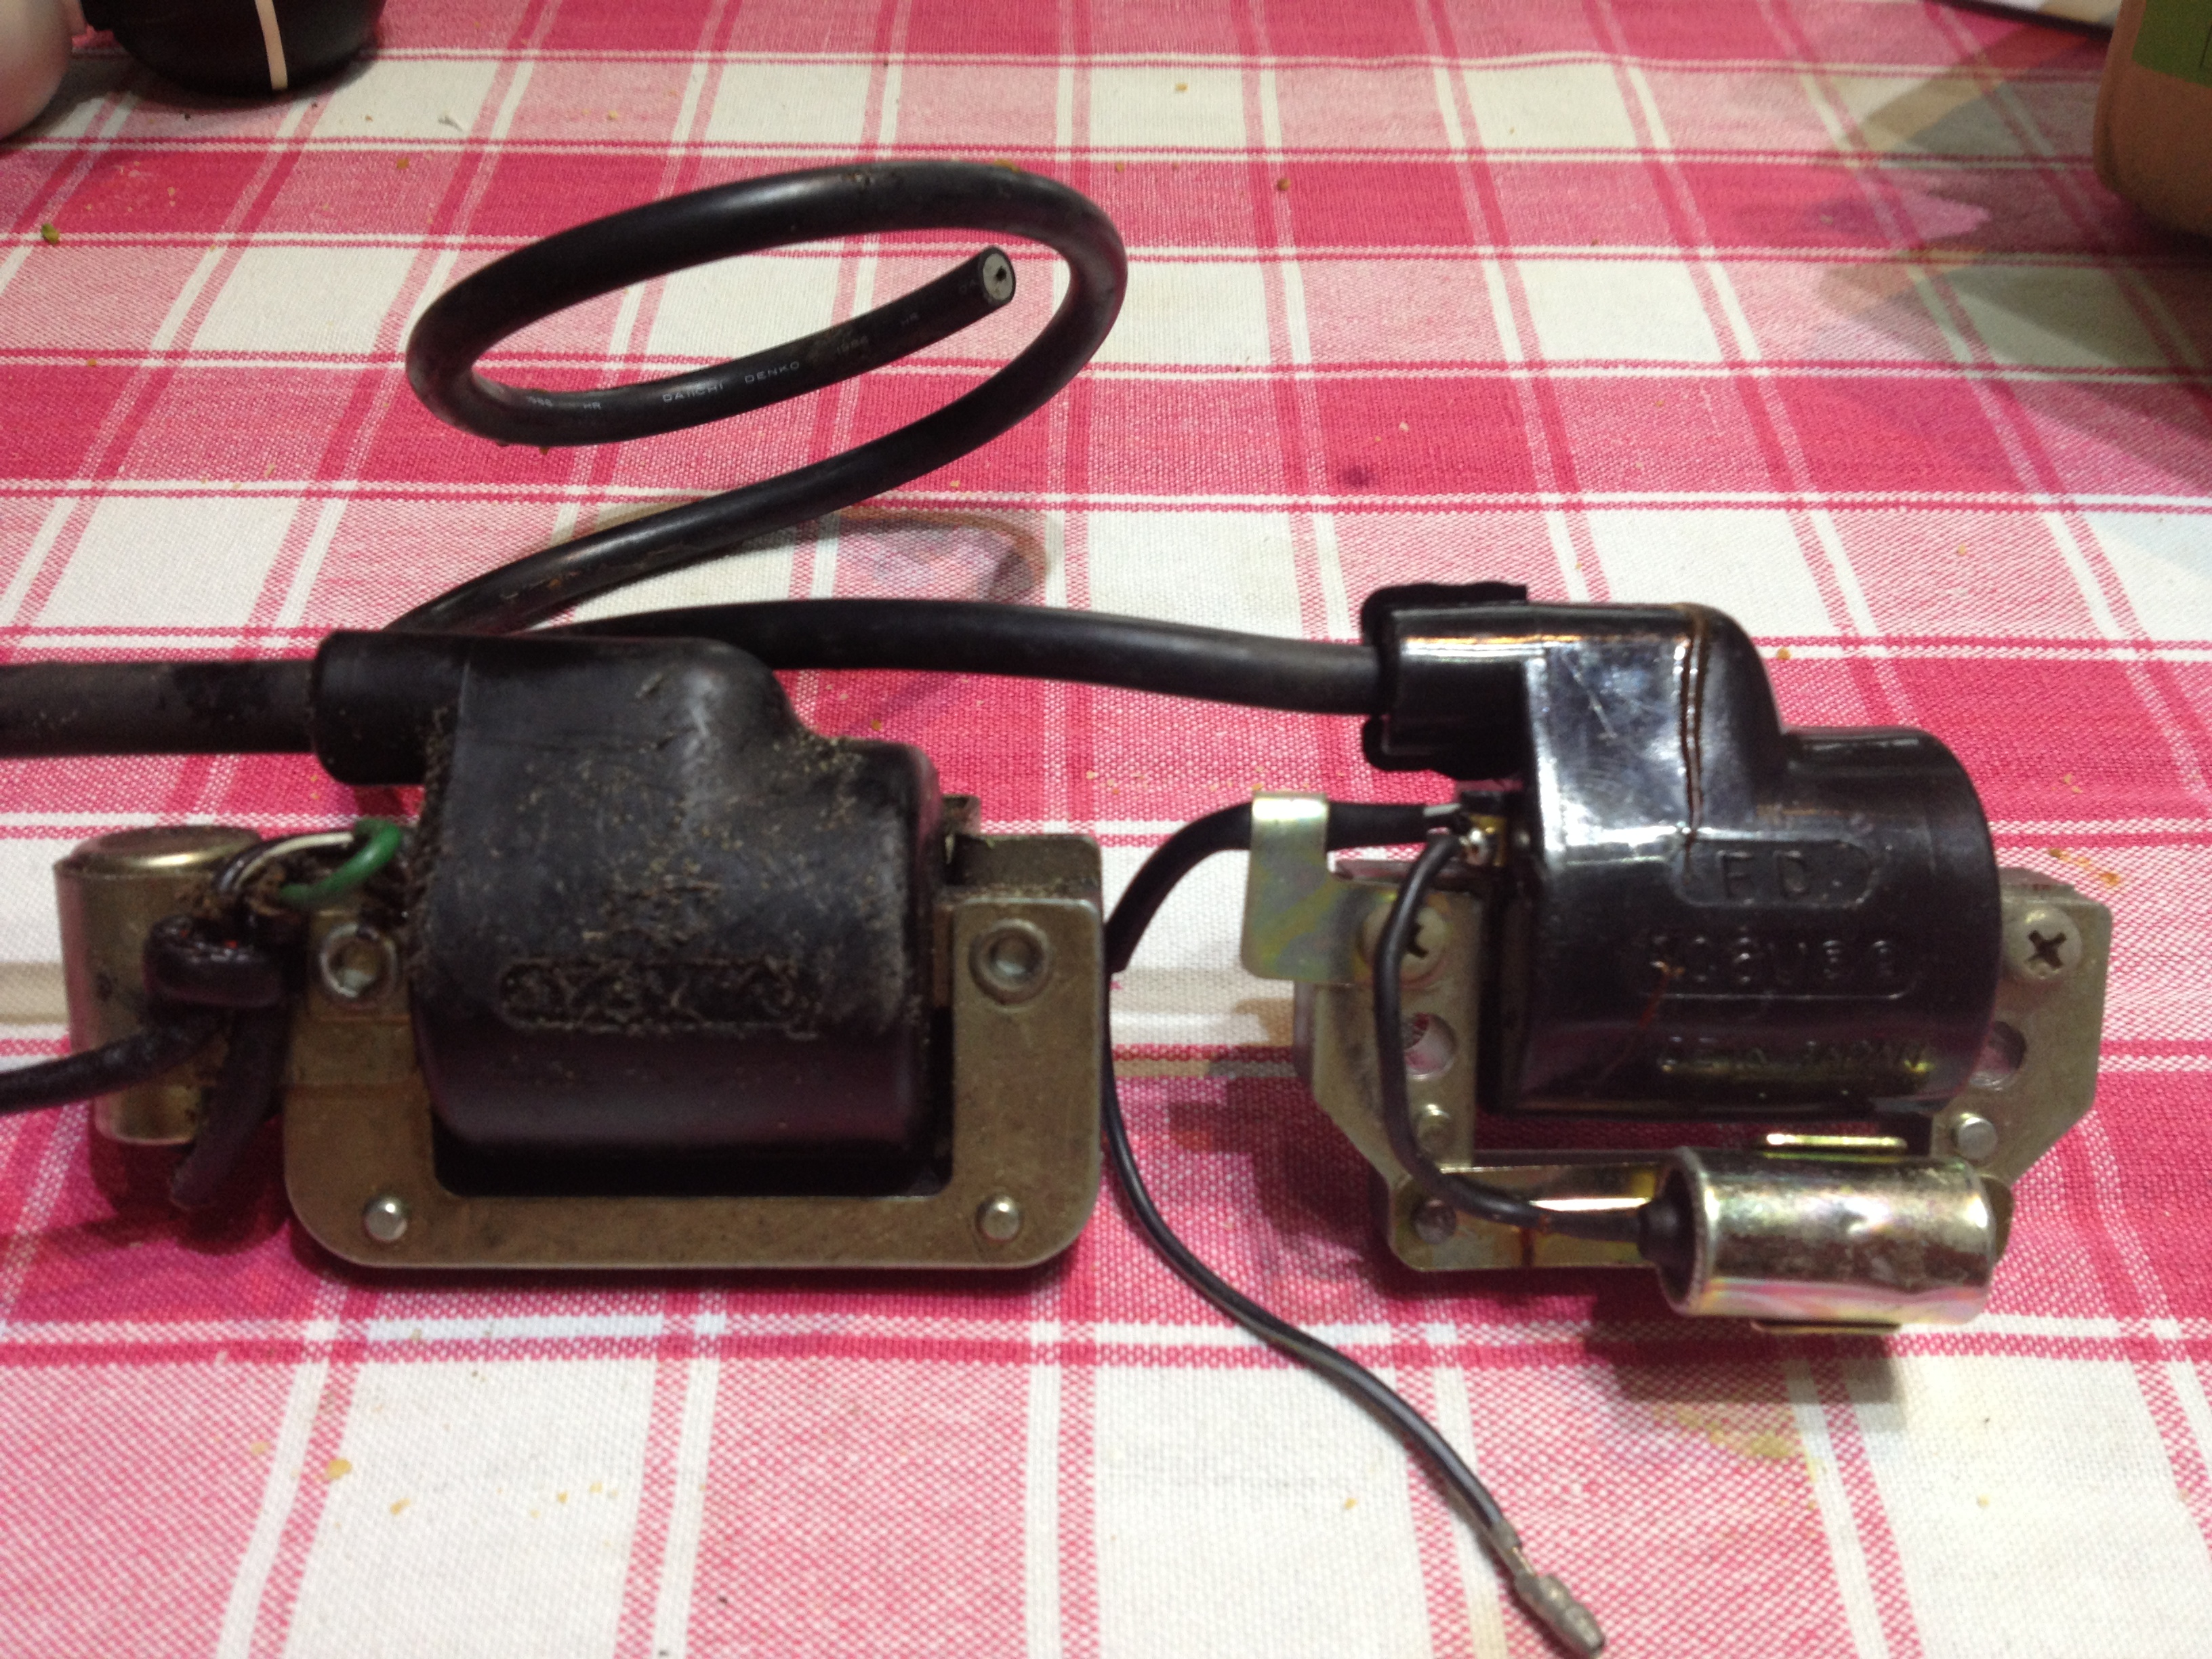
First job was to remove the 2 largest rivets in my cosmetically good but 'weak spark' coil. The coils then just prises out.
Then moving to the new coil, Undo the two screws that are used instead of rivets, and put aside. We will need them later.
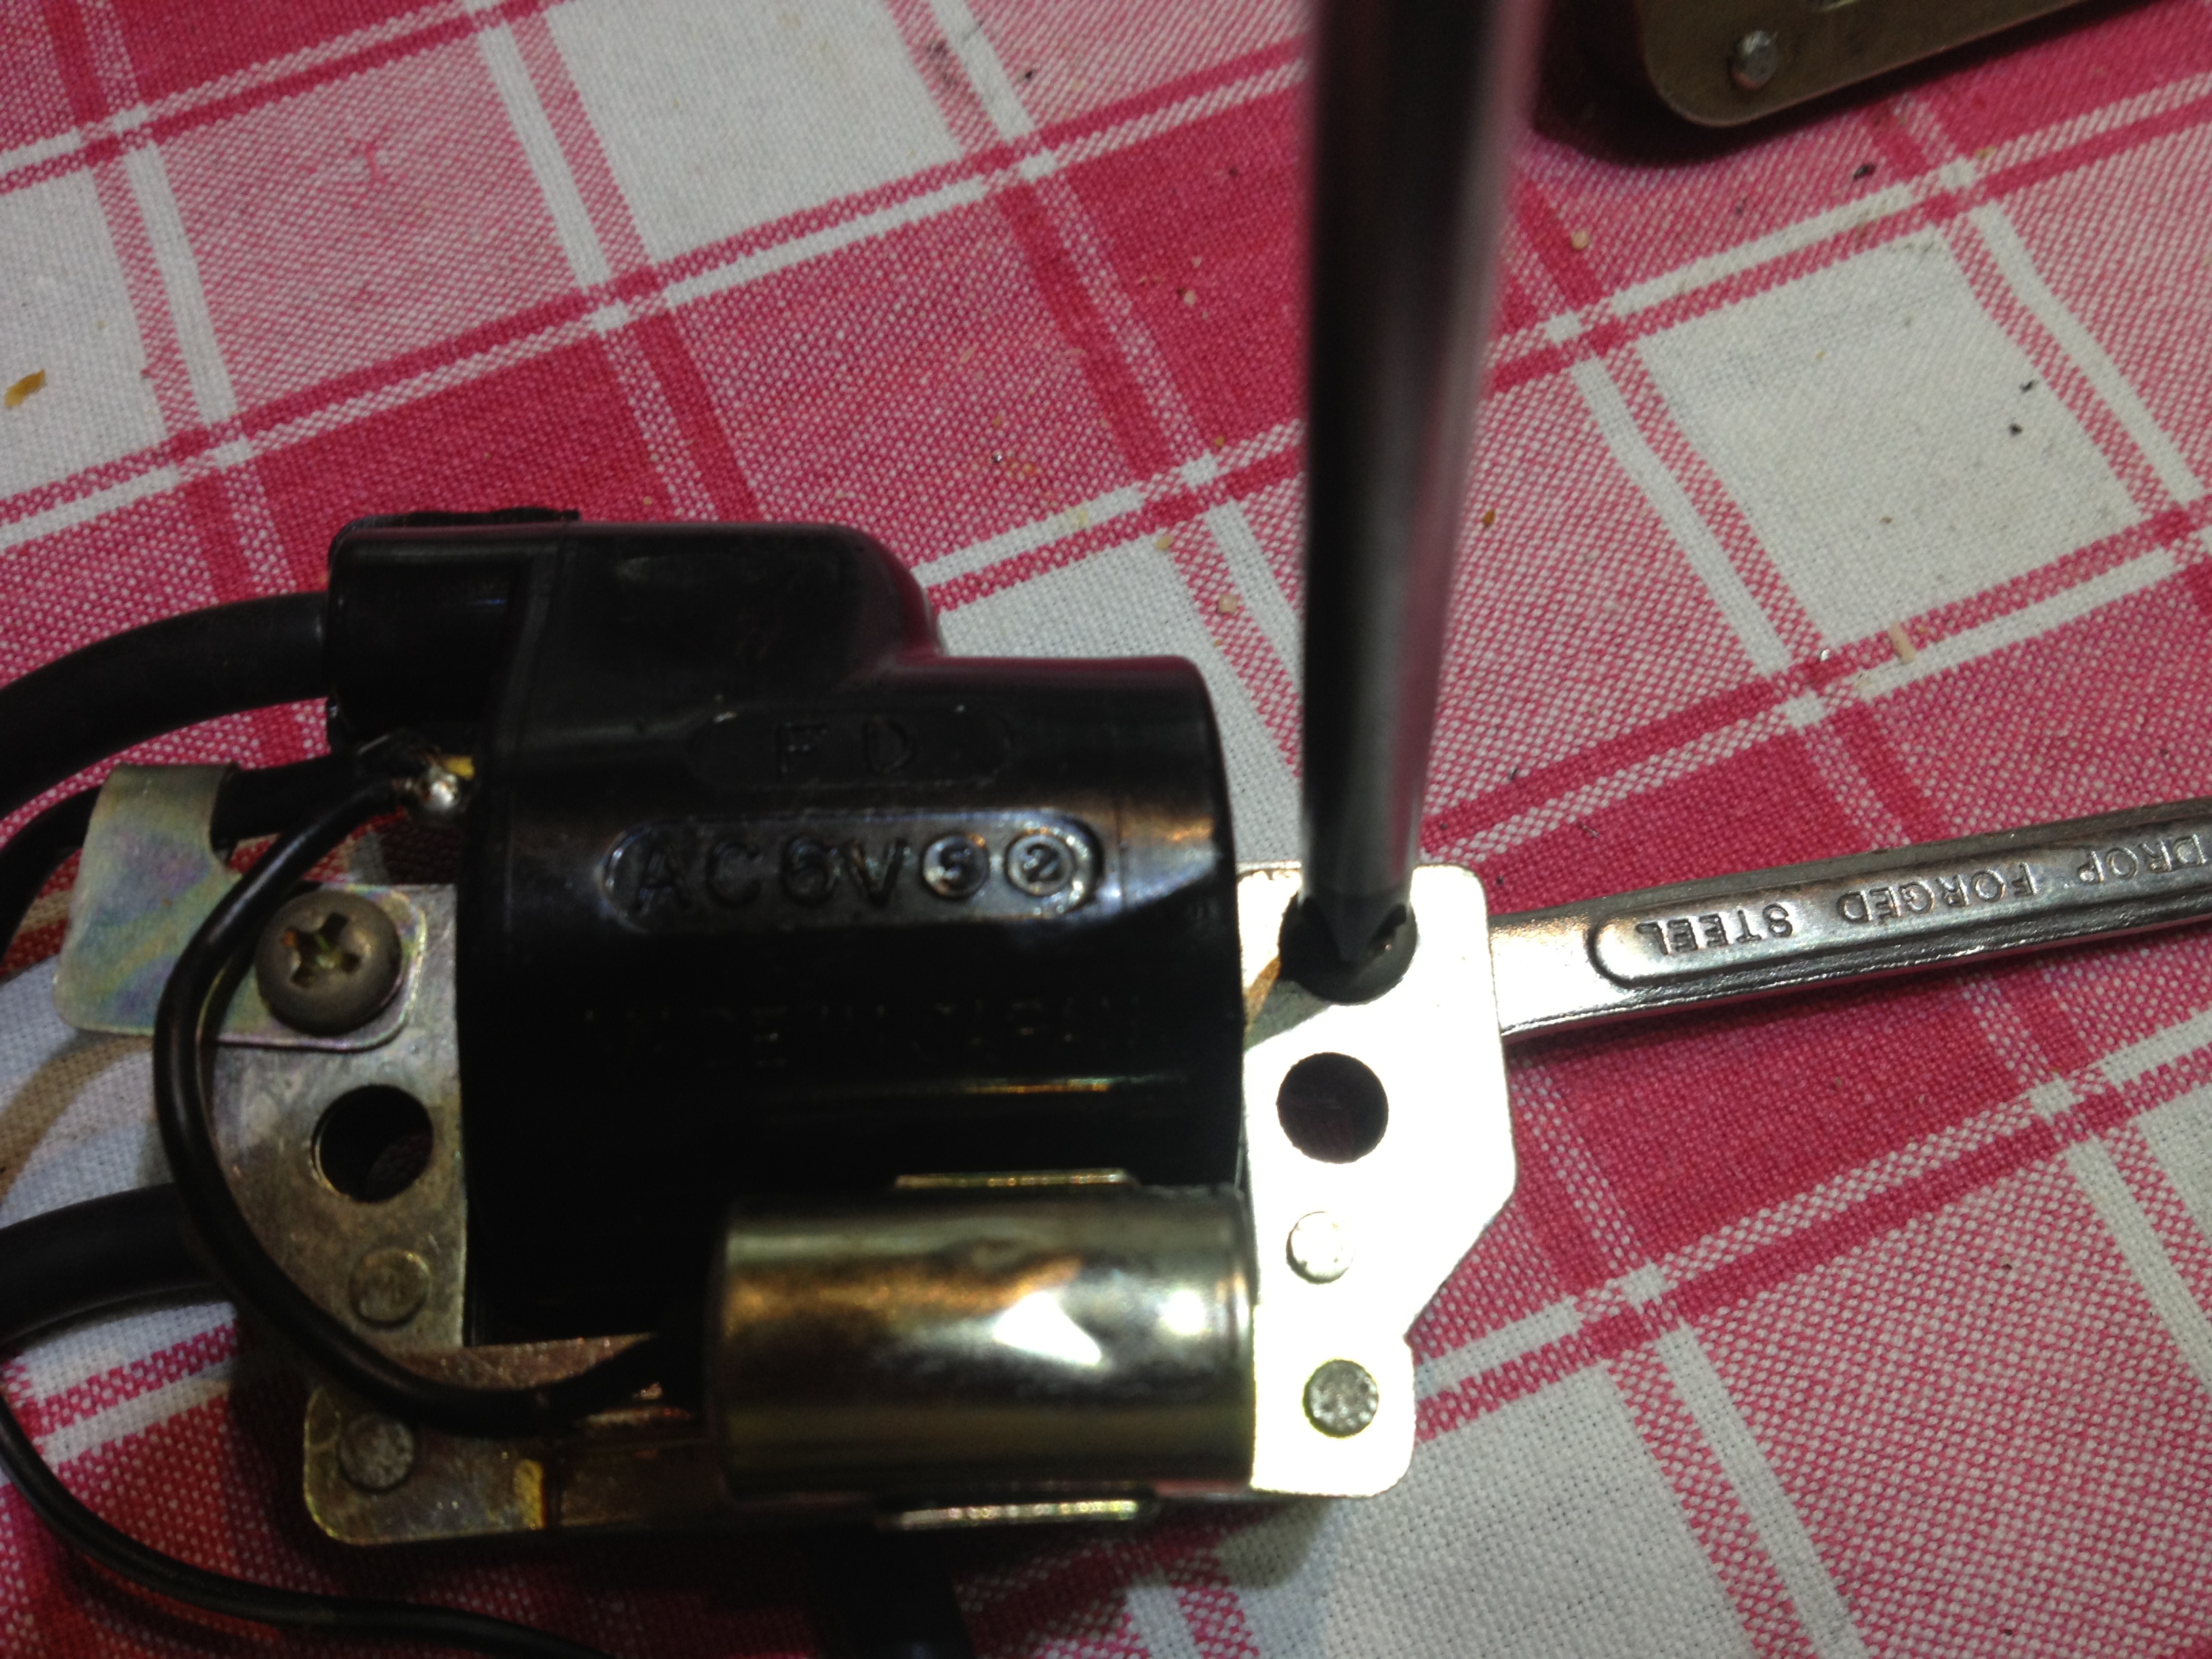
I decided to re-use the existing condenser since I have no reason to doubt it is OK. I will keep the new one in case I find I do need it.
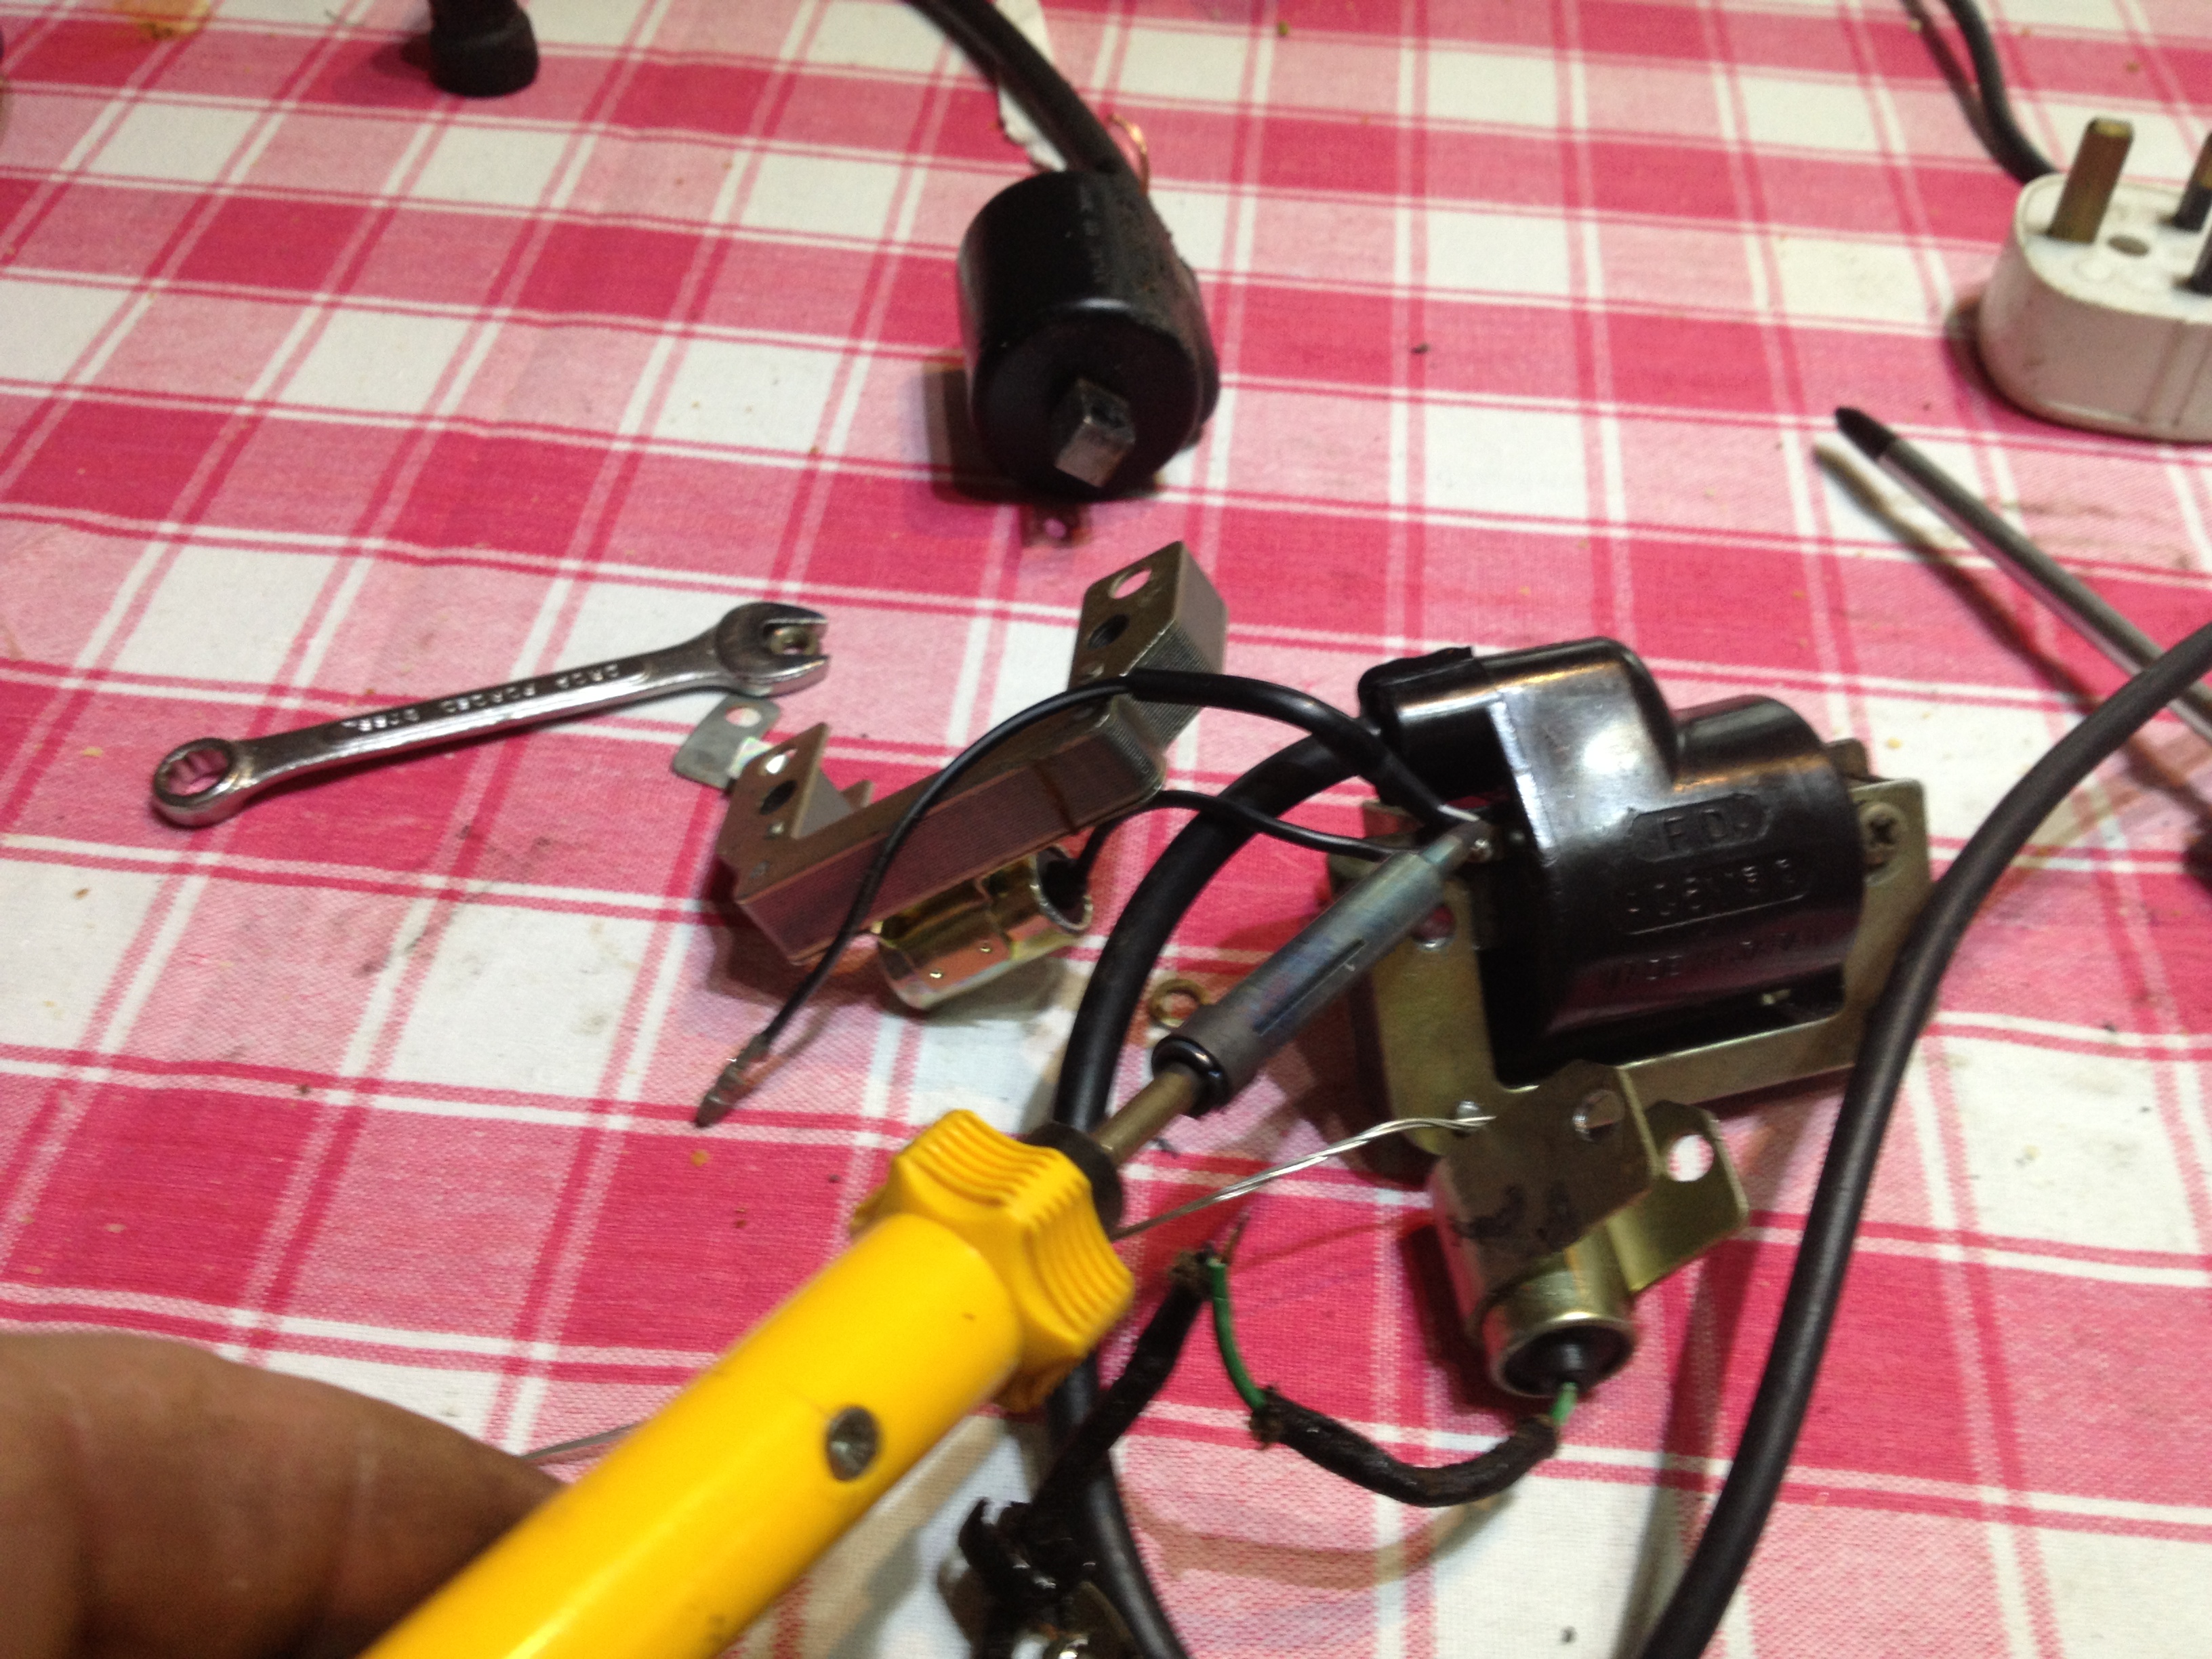
The condenser wire is soldered to the coil, so it can be unsoldered. I broke the wire drilling out the left hand rivet, but I should have unsoldered it first shouldn't I?
The new 6v coil taken from the new assembly also needs to have the same wires unsoldered if re-using the original wires. Then solder the old wire onto the new coil. (actually it is two wires joined together, the green condenser wire and the black/white wire from the points) If you have a pot of the dip used in the article on the cramper somewhere else on this site, a blob of that on the solder join will dry as a nice durable watertight insulated cover to the join, like the original has.
The new coil, cable clamp and the bolts are used to fix the coil into the original K3 frame.
I used the new HT cable (which I snipped shorter) but the old plug cap for now, I notice the original HT lead has an extra cover layer on it, so I may swop them later.
Outcome, not bad for 15mins work on the kitchen table whilst the wife was out. I have no time to try it for a few days, but I will as soon as I can.
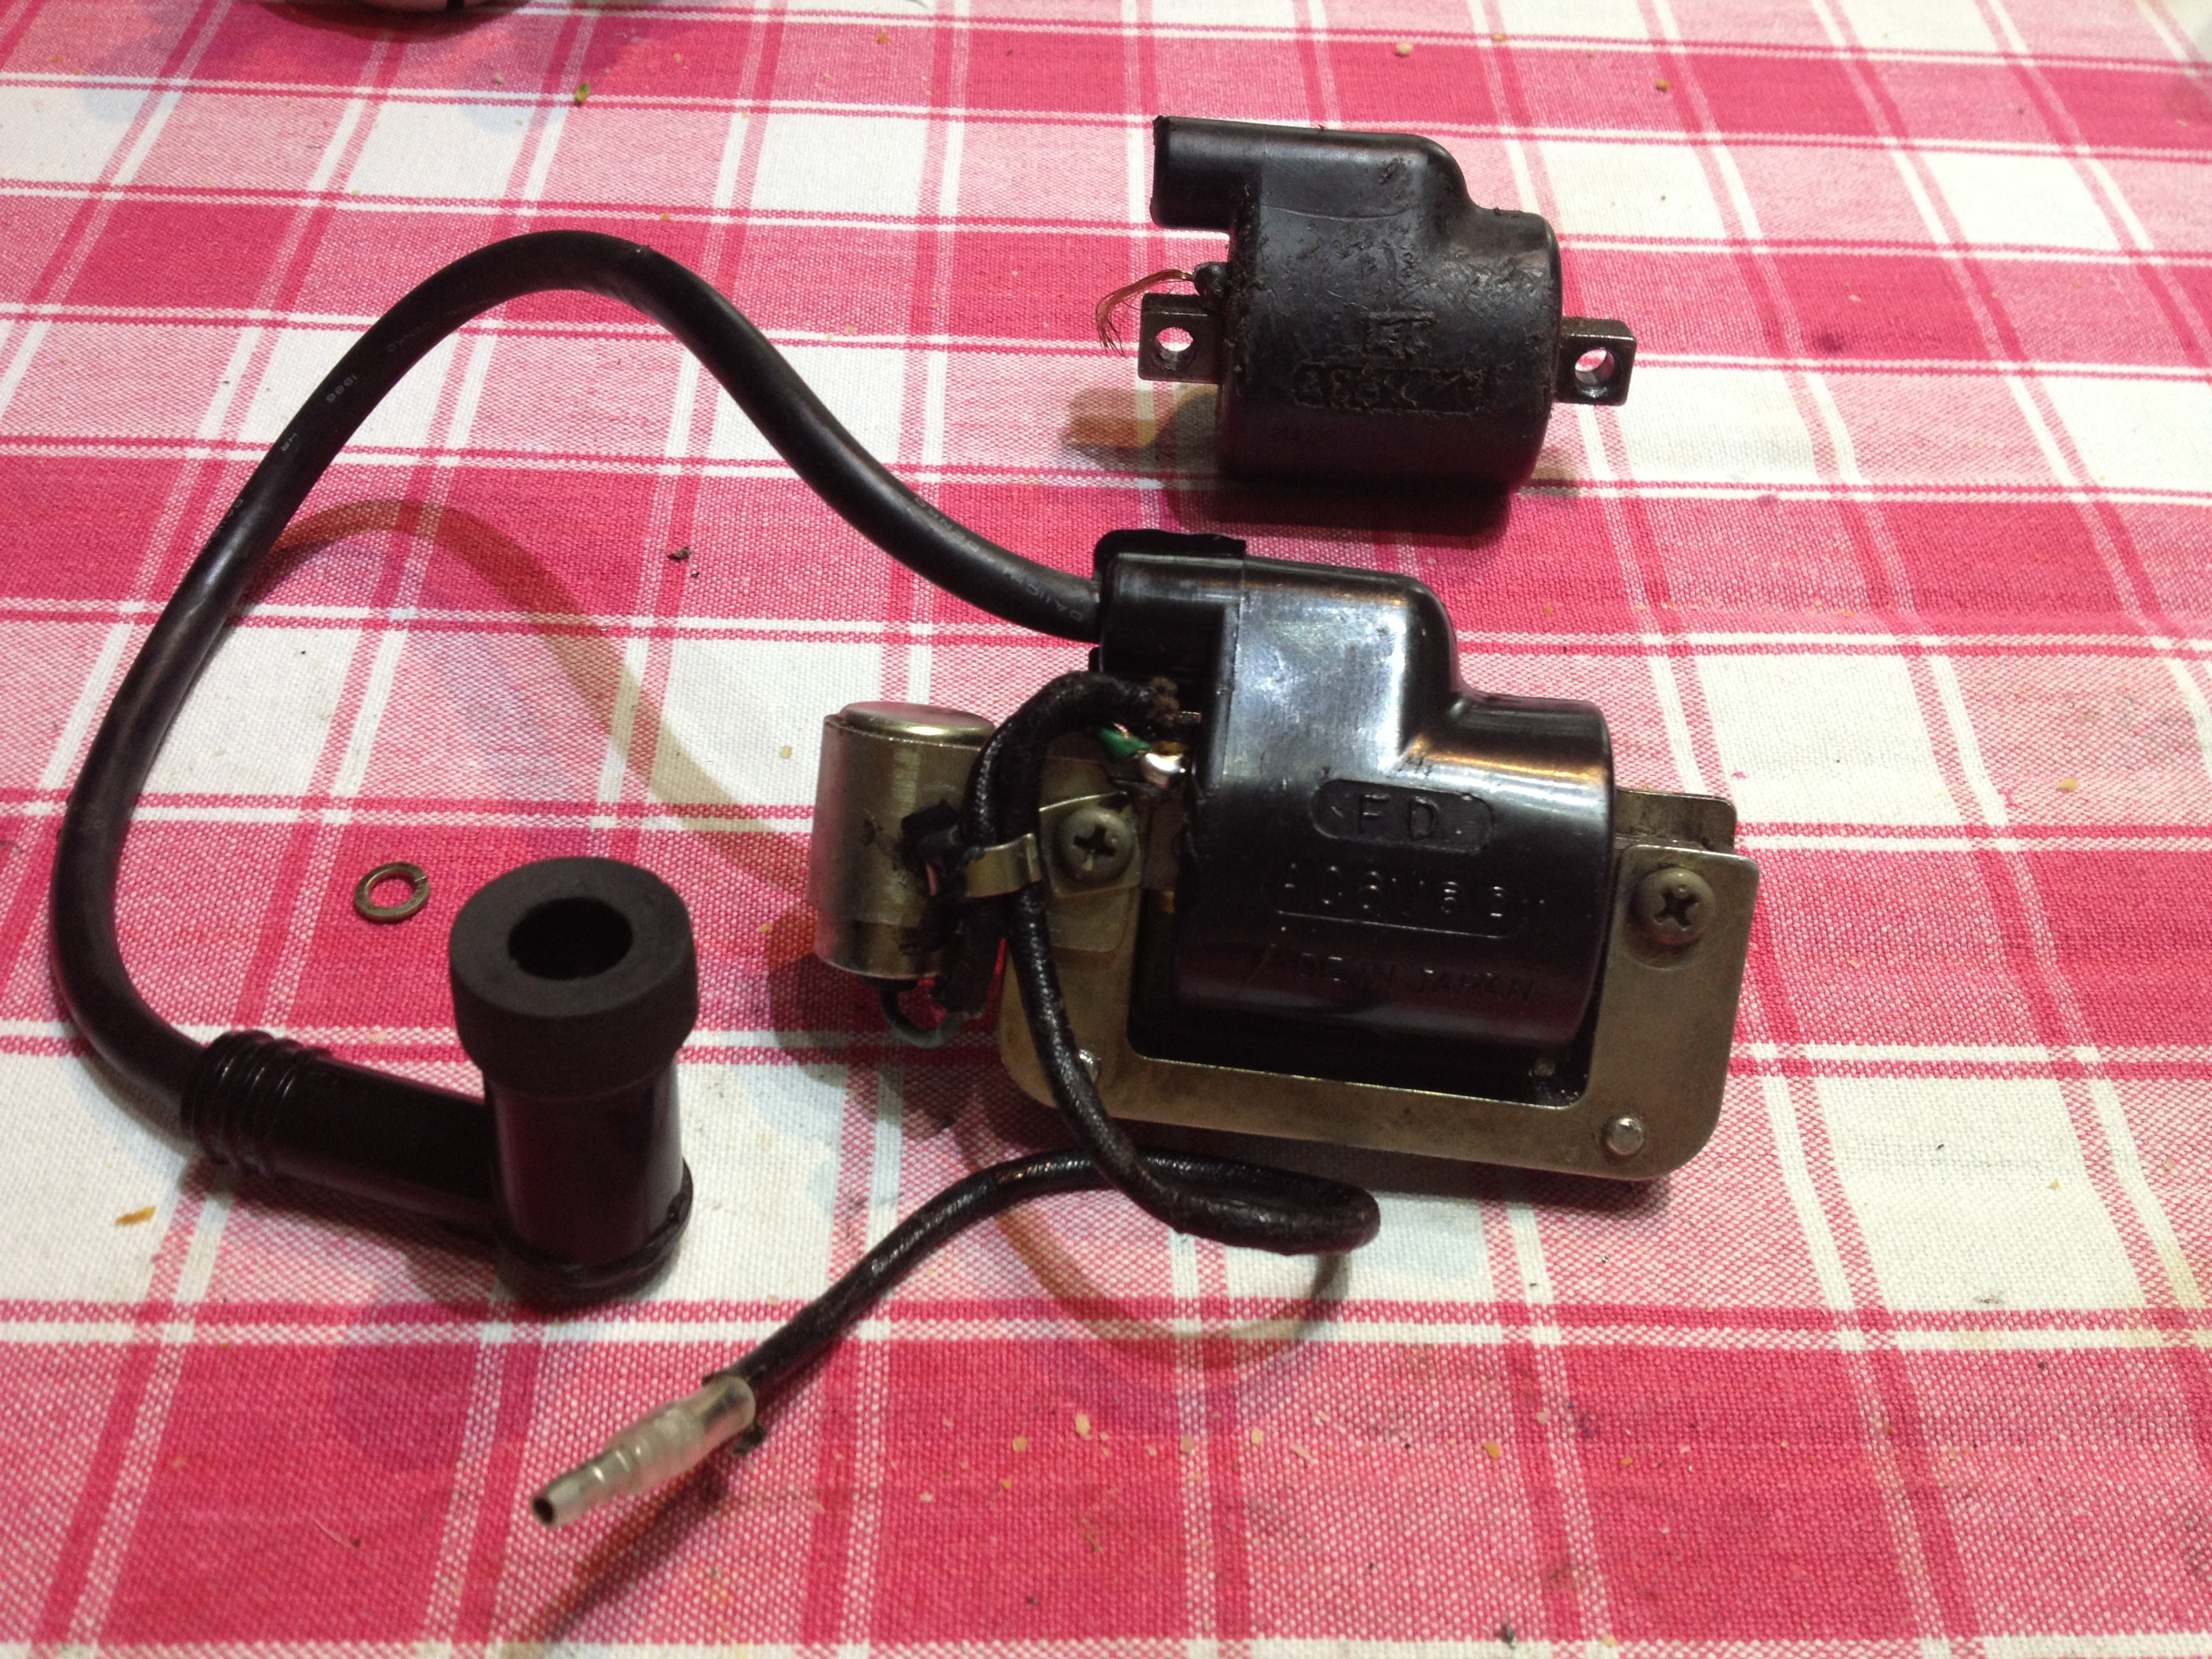
This is the finished coil ready to be fitted to my bike to test, with the discarded coil in the background. Beady eyed readers will spot an unused washer on the tablecloth, the bolt was just too short to use it on the condenser mount bolt, so I left it off.
Update a week or two later.
As the bike refused to start last night (luckily I was home) I put the 'new' coil above on today and it started straight away. So, I have another of these coils from Thailand already, and will do the same with the one I took off, ready for the other bike. We have hit upon a good thing here. I am no doubt far from the first person to do this mod, but I haven't read about it anywhere so I thought we should share the idea.
I have now done the same for the XL350 project bike, also on this website 'somewhere'.