I Would Like It If This 1978 Honda XL350 Engine Would Run Properly or 'The Saga Continues'
So I now have a lovely blue/white spark bright in daylight, a clean carb, a new vacuum sealing 'O' ring, a new plug condenser and new points. I only had half an hour on it today. Did it start? No, it did not. So I took the carb off took it completely to pieces, and checked it all again. Then I put it back together again.
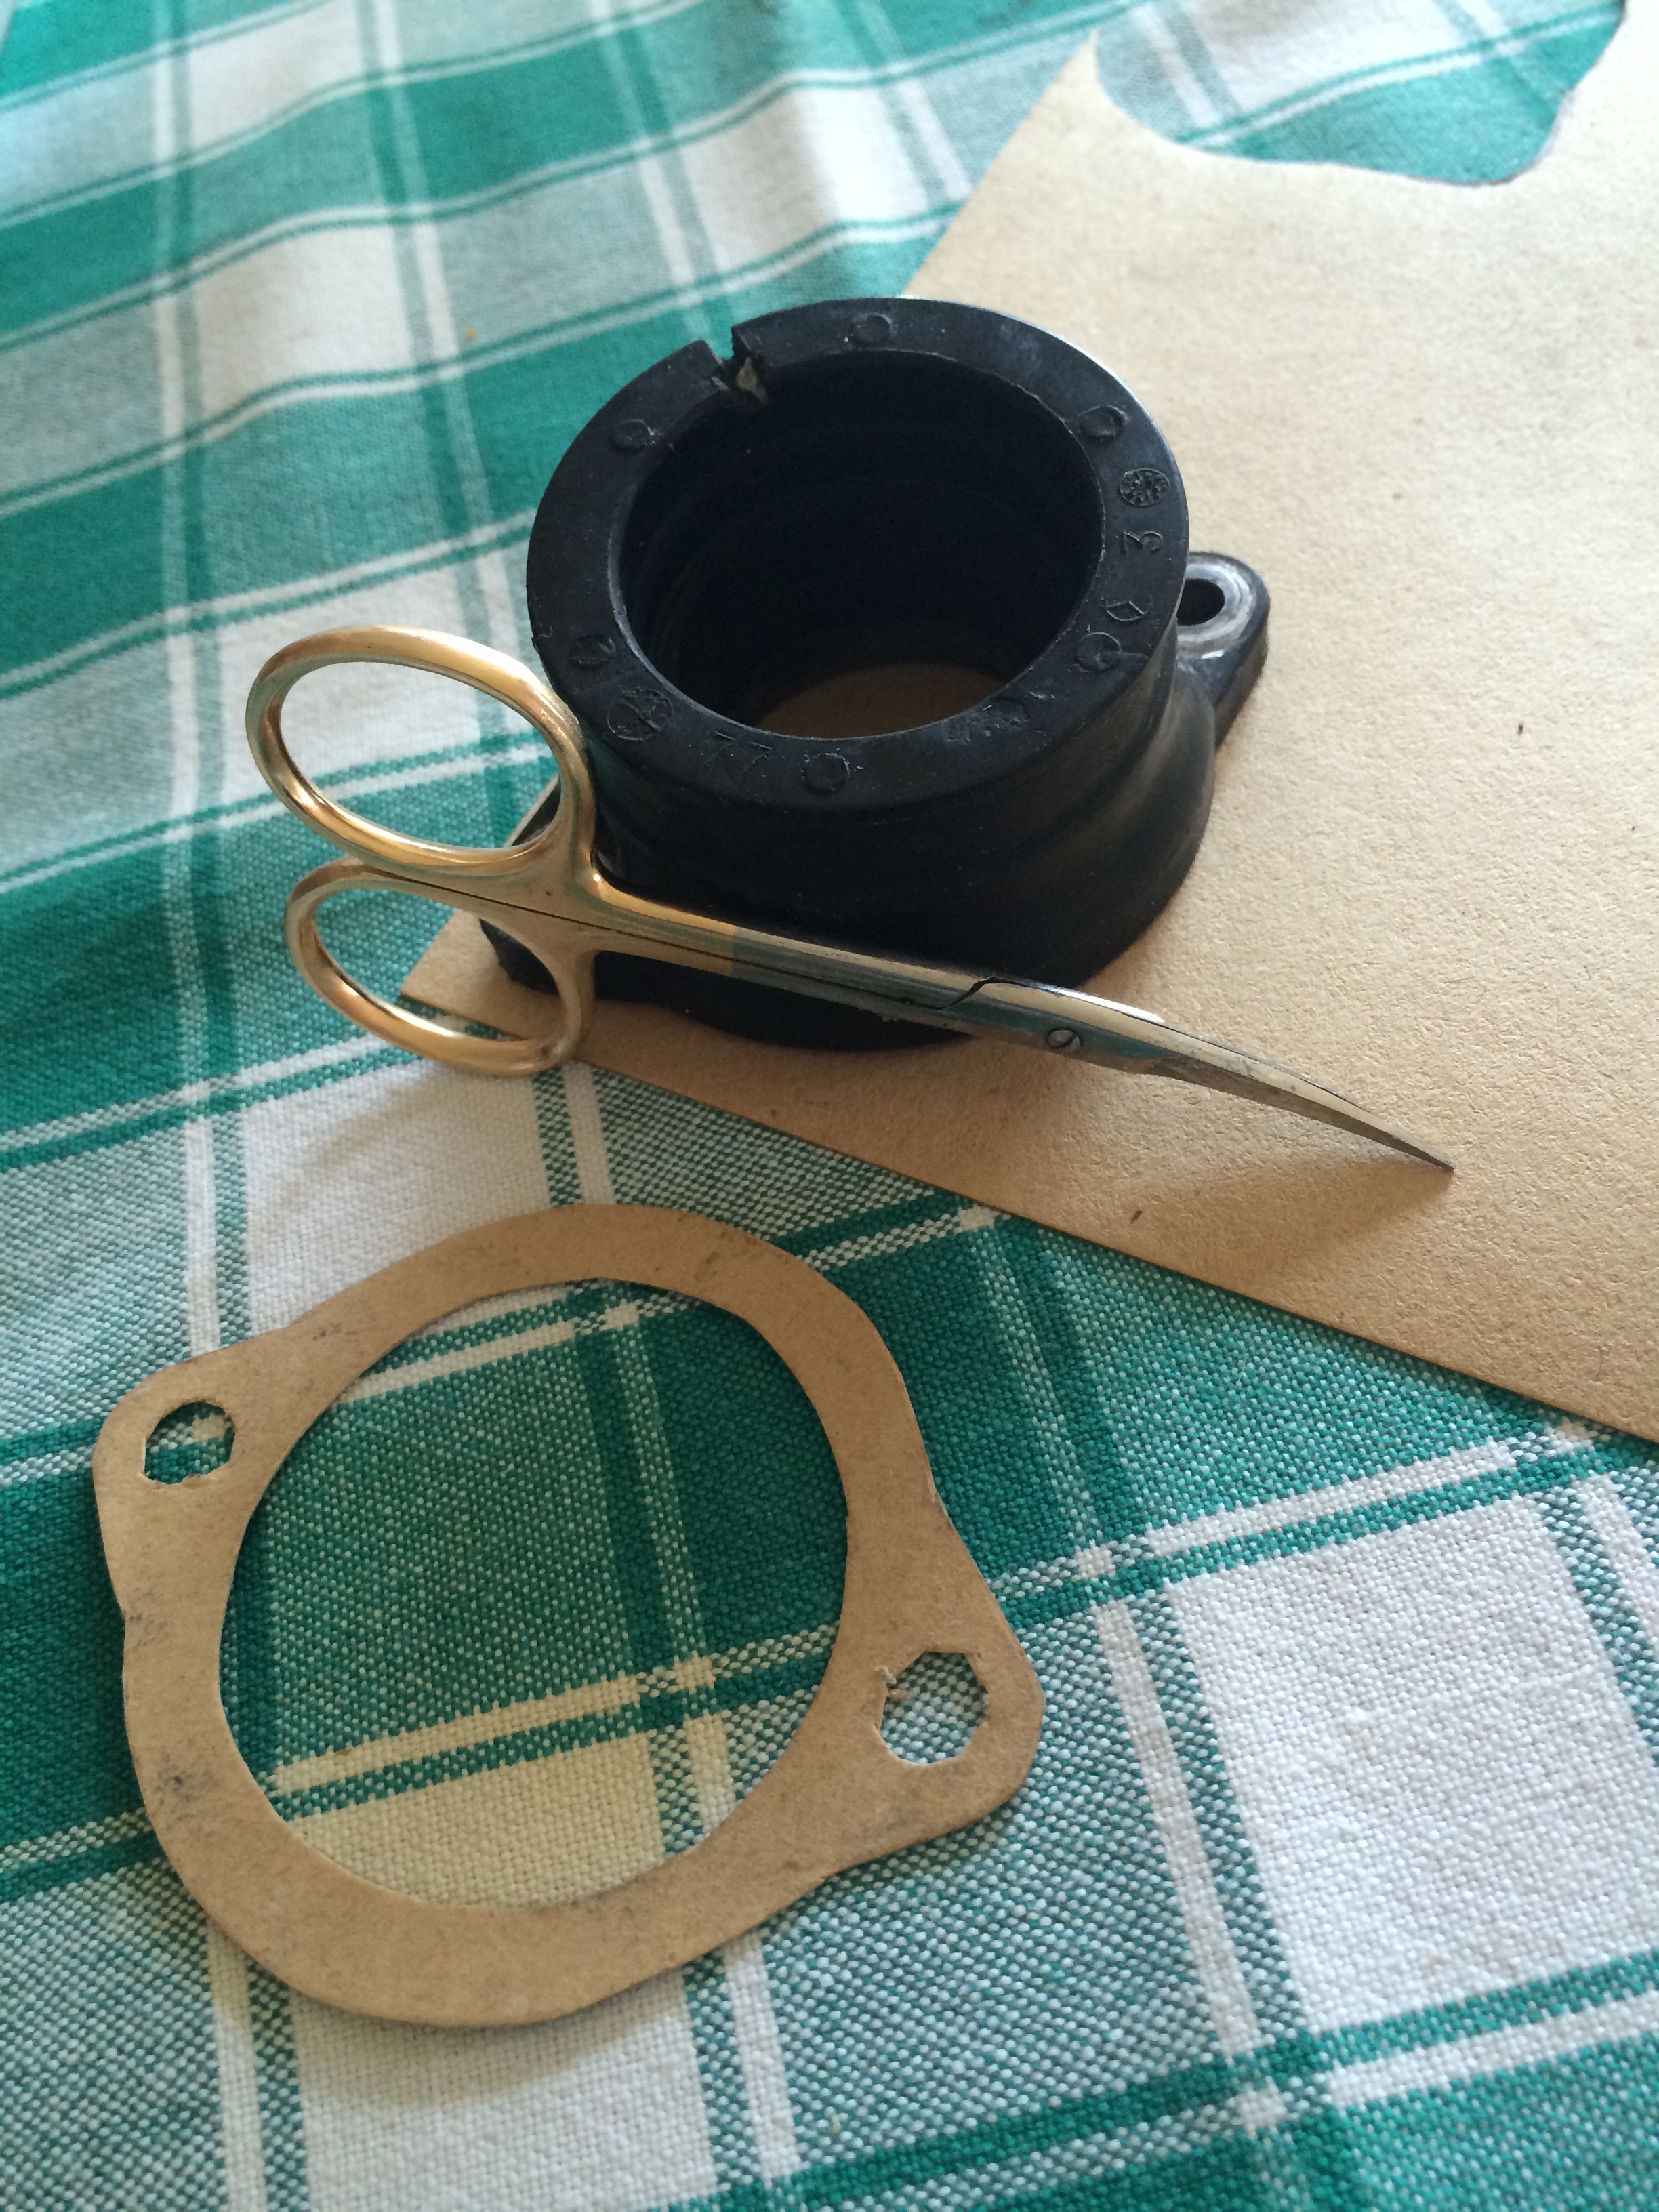
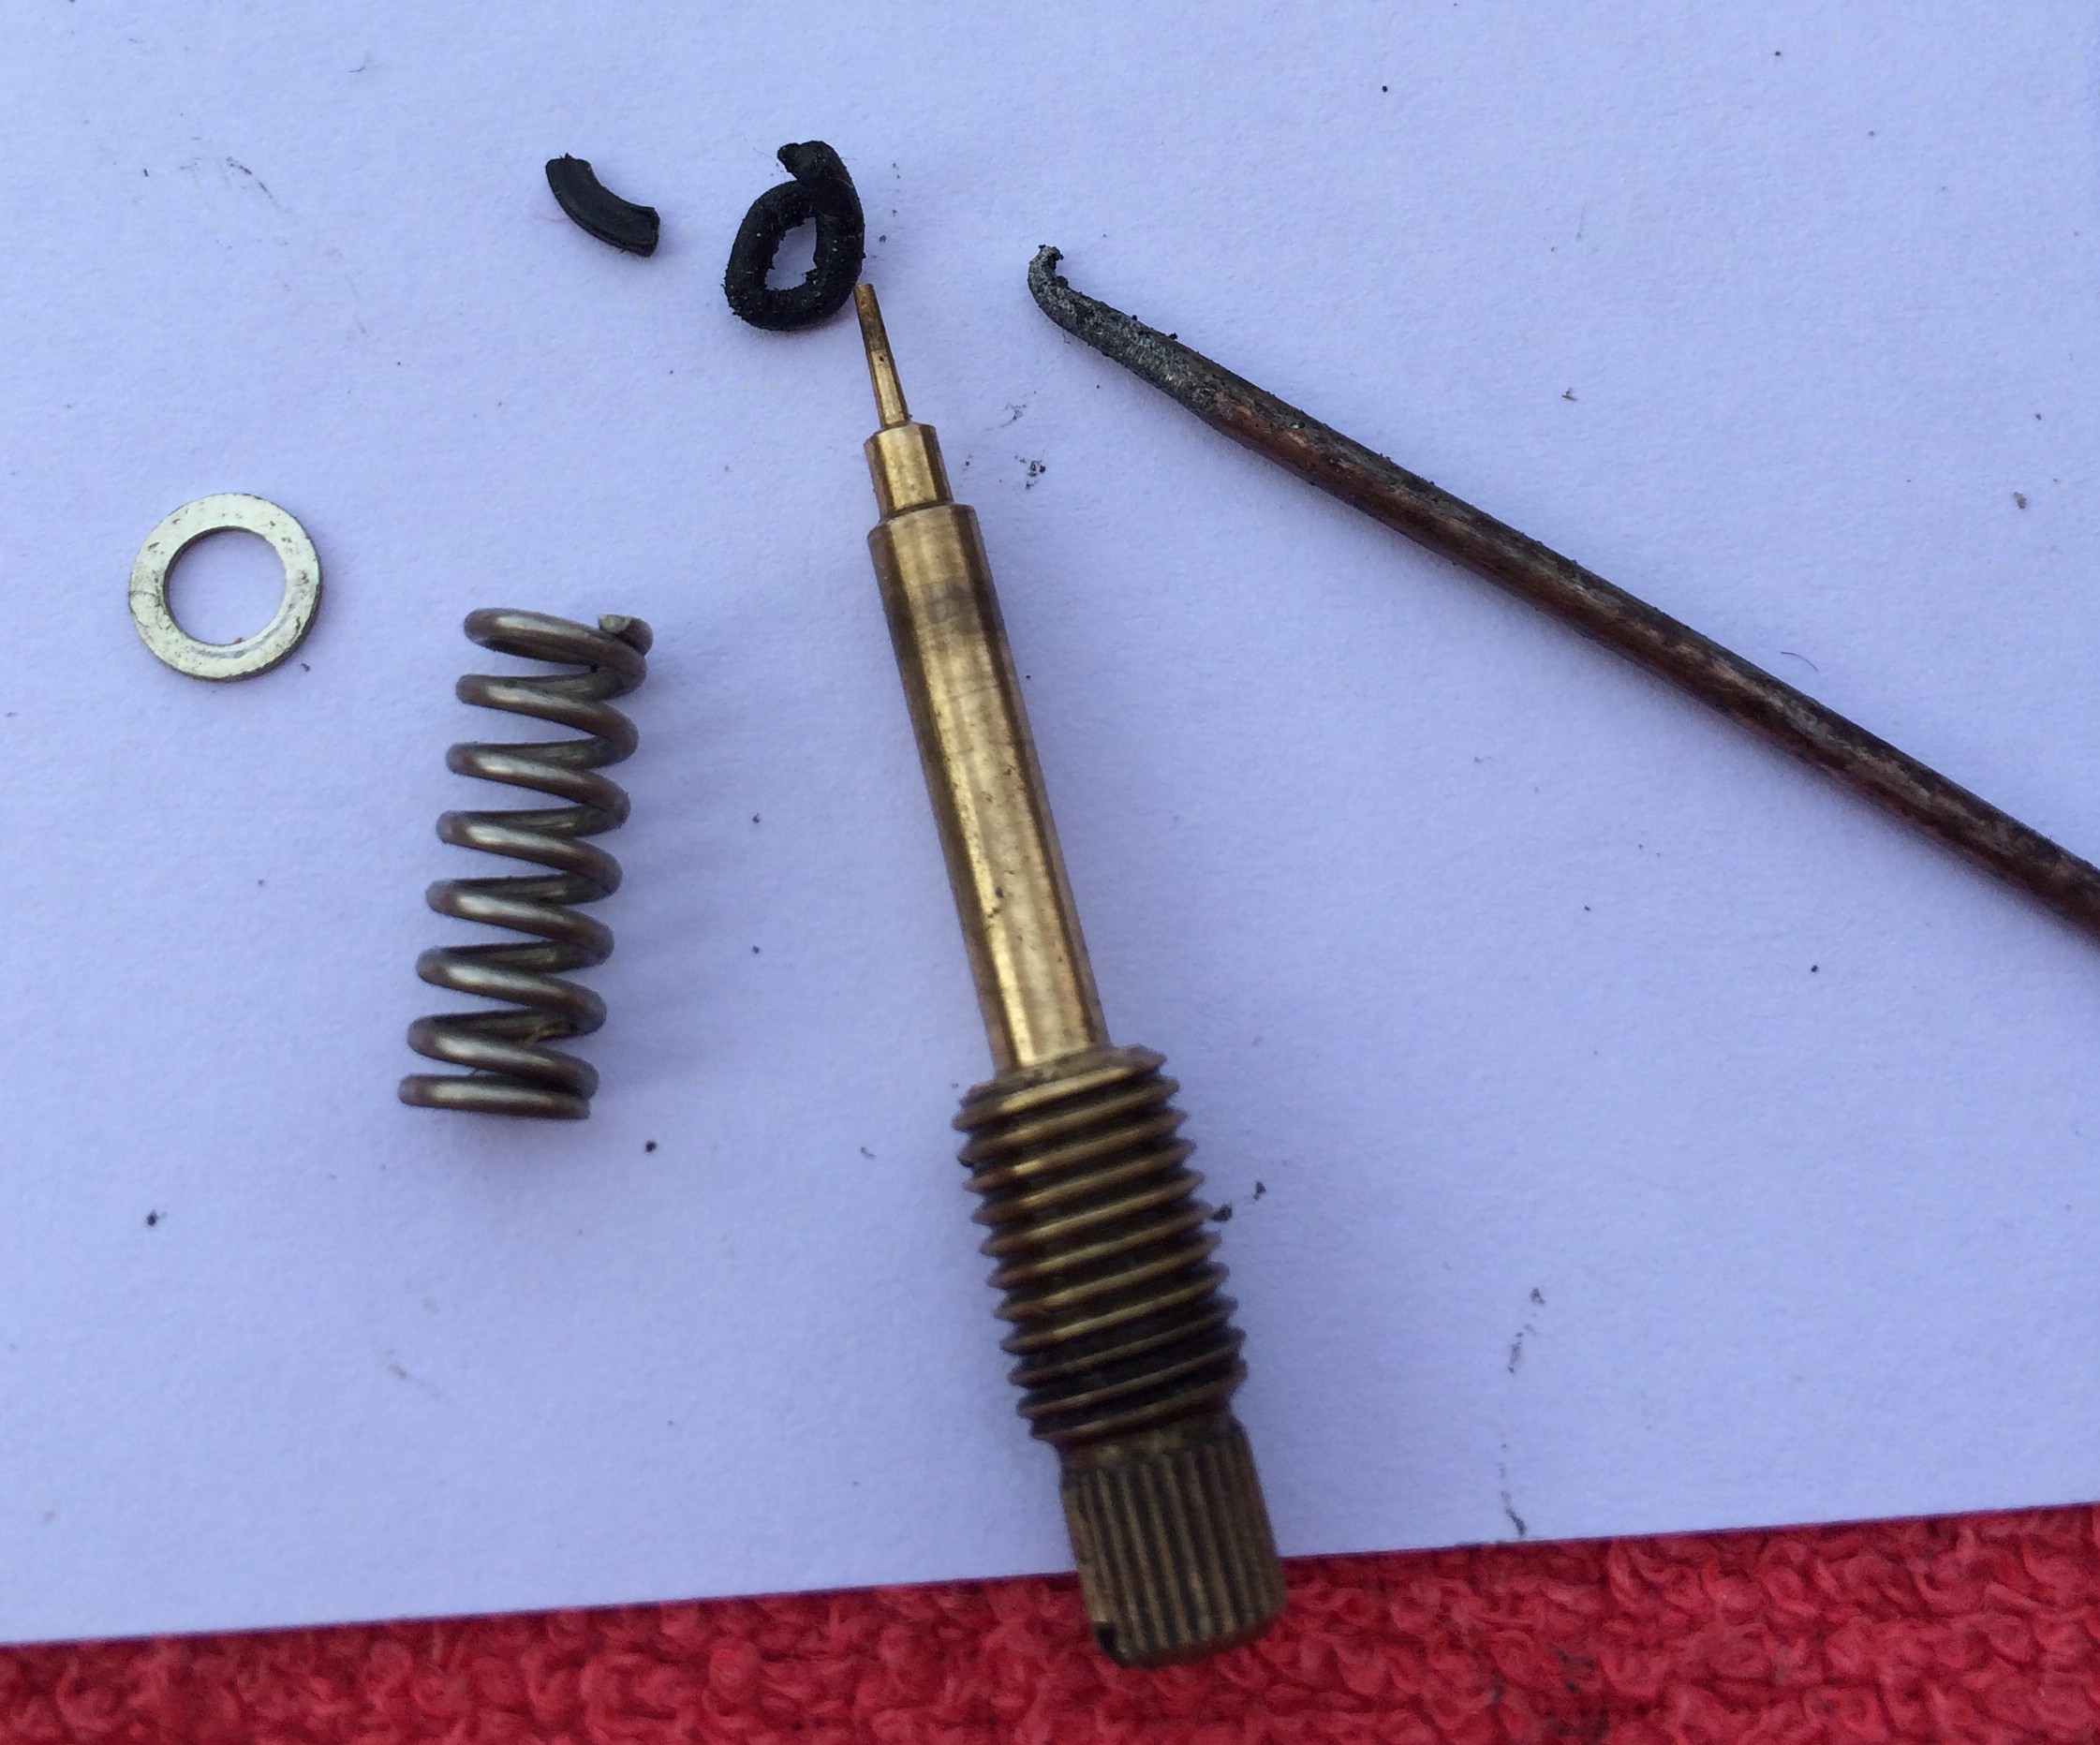
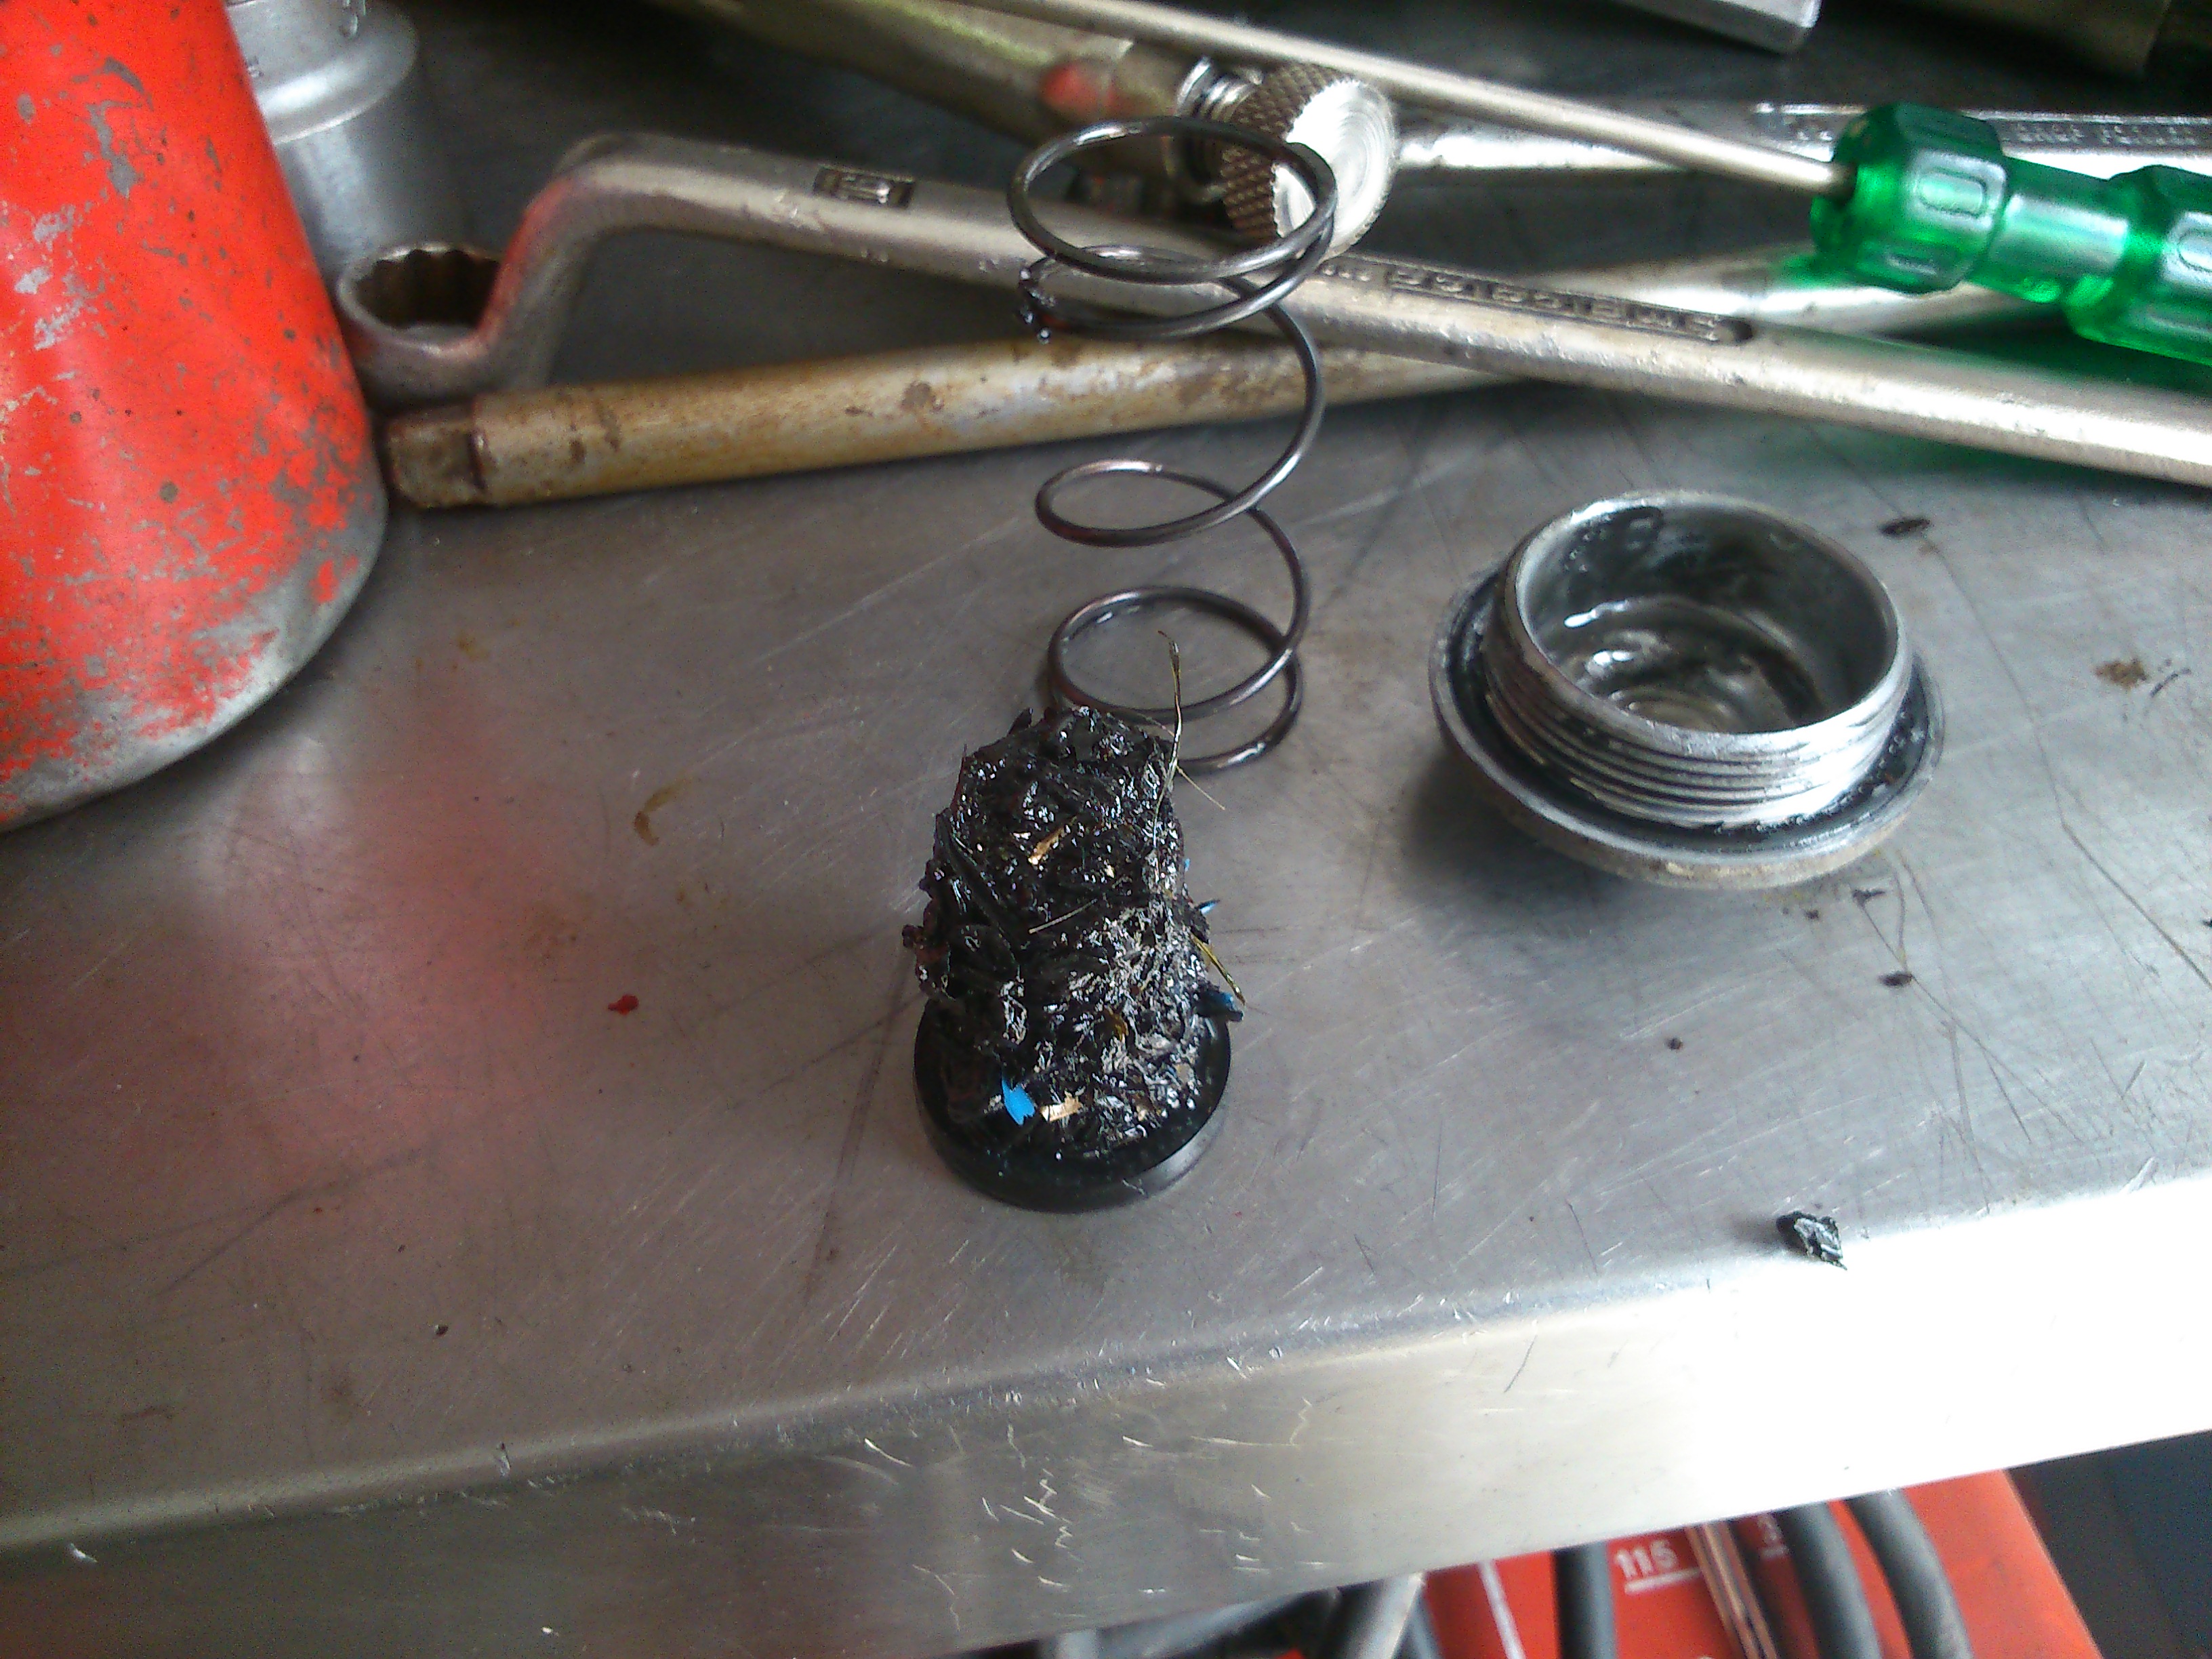
The only issue I could find is that the tiny 'O' ring at the top of the idle speed air screw was in bits, it has obviously got hard and broken up, and the washer that should be under it is missing, so I have ordered a seal set. Whilst I wait for that to come from CMSL, I found this site where they sell lots of small carburettor 'O' rings, so I have ordered some. Cost £1.50 each for the N133037 ones, and they were nice on the phone.
I will try putting the carb back on tomorrow anyway. I also checked and re-adjusted the float level to 18mm, (hindsight note: this was a mistake - see later) just to be sure. I really really really hate kicking over bikes that won't start. I know I said 'really' three times.
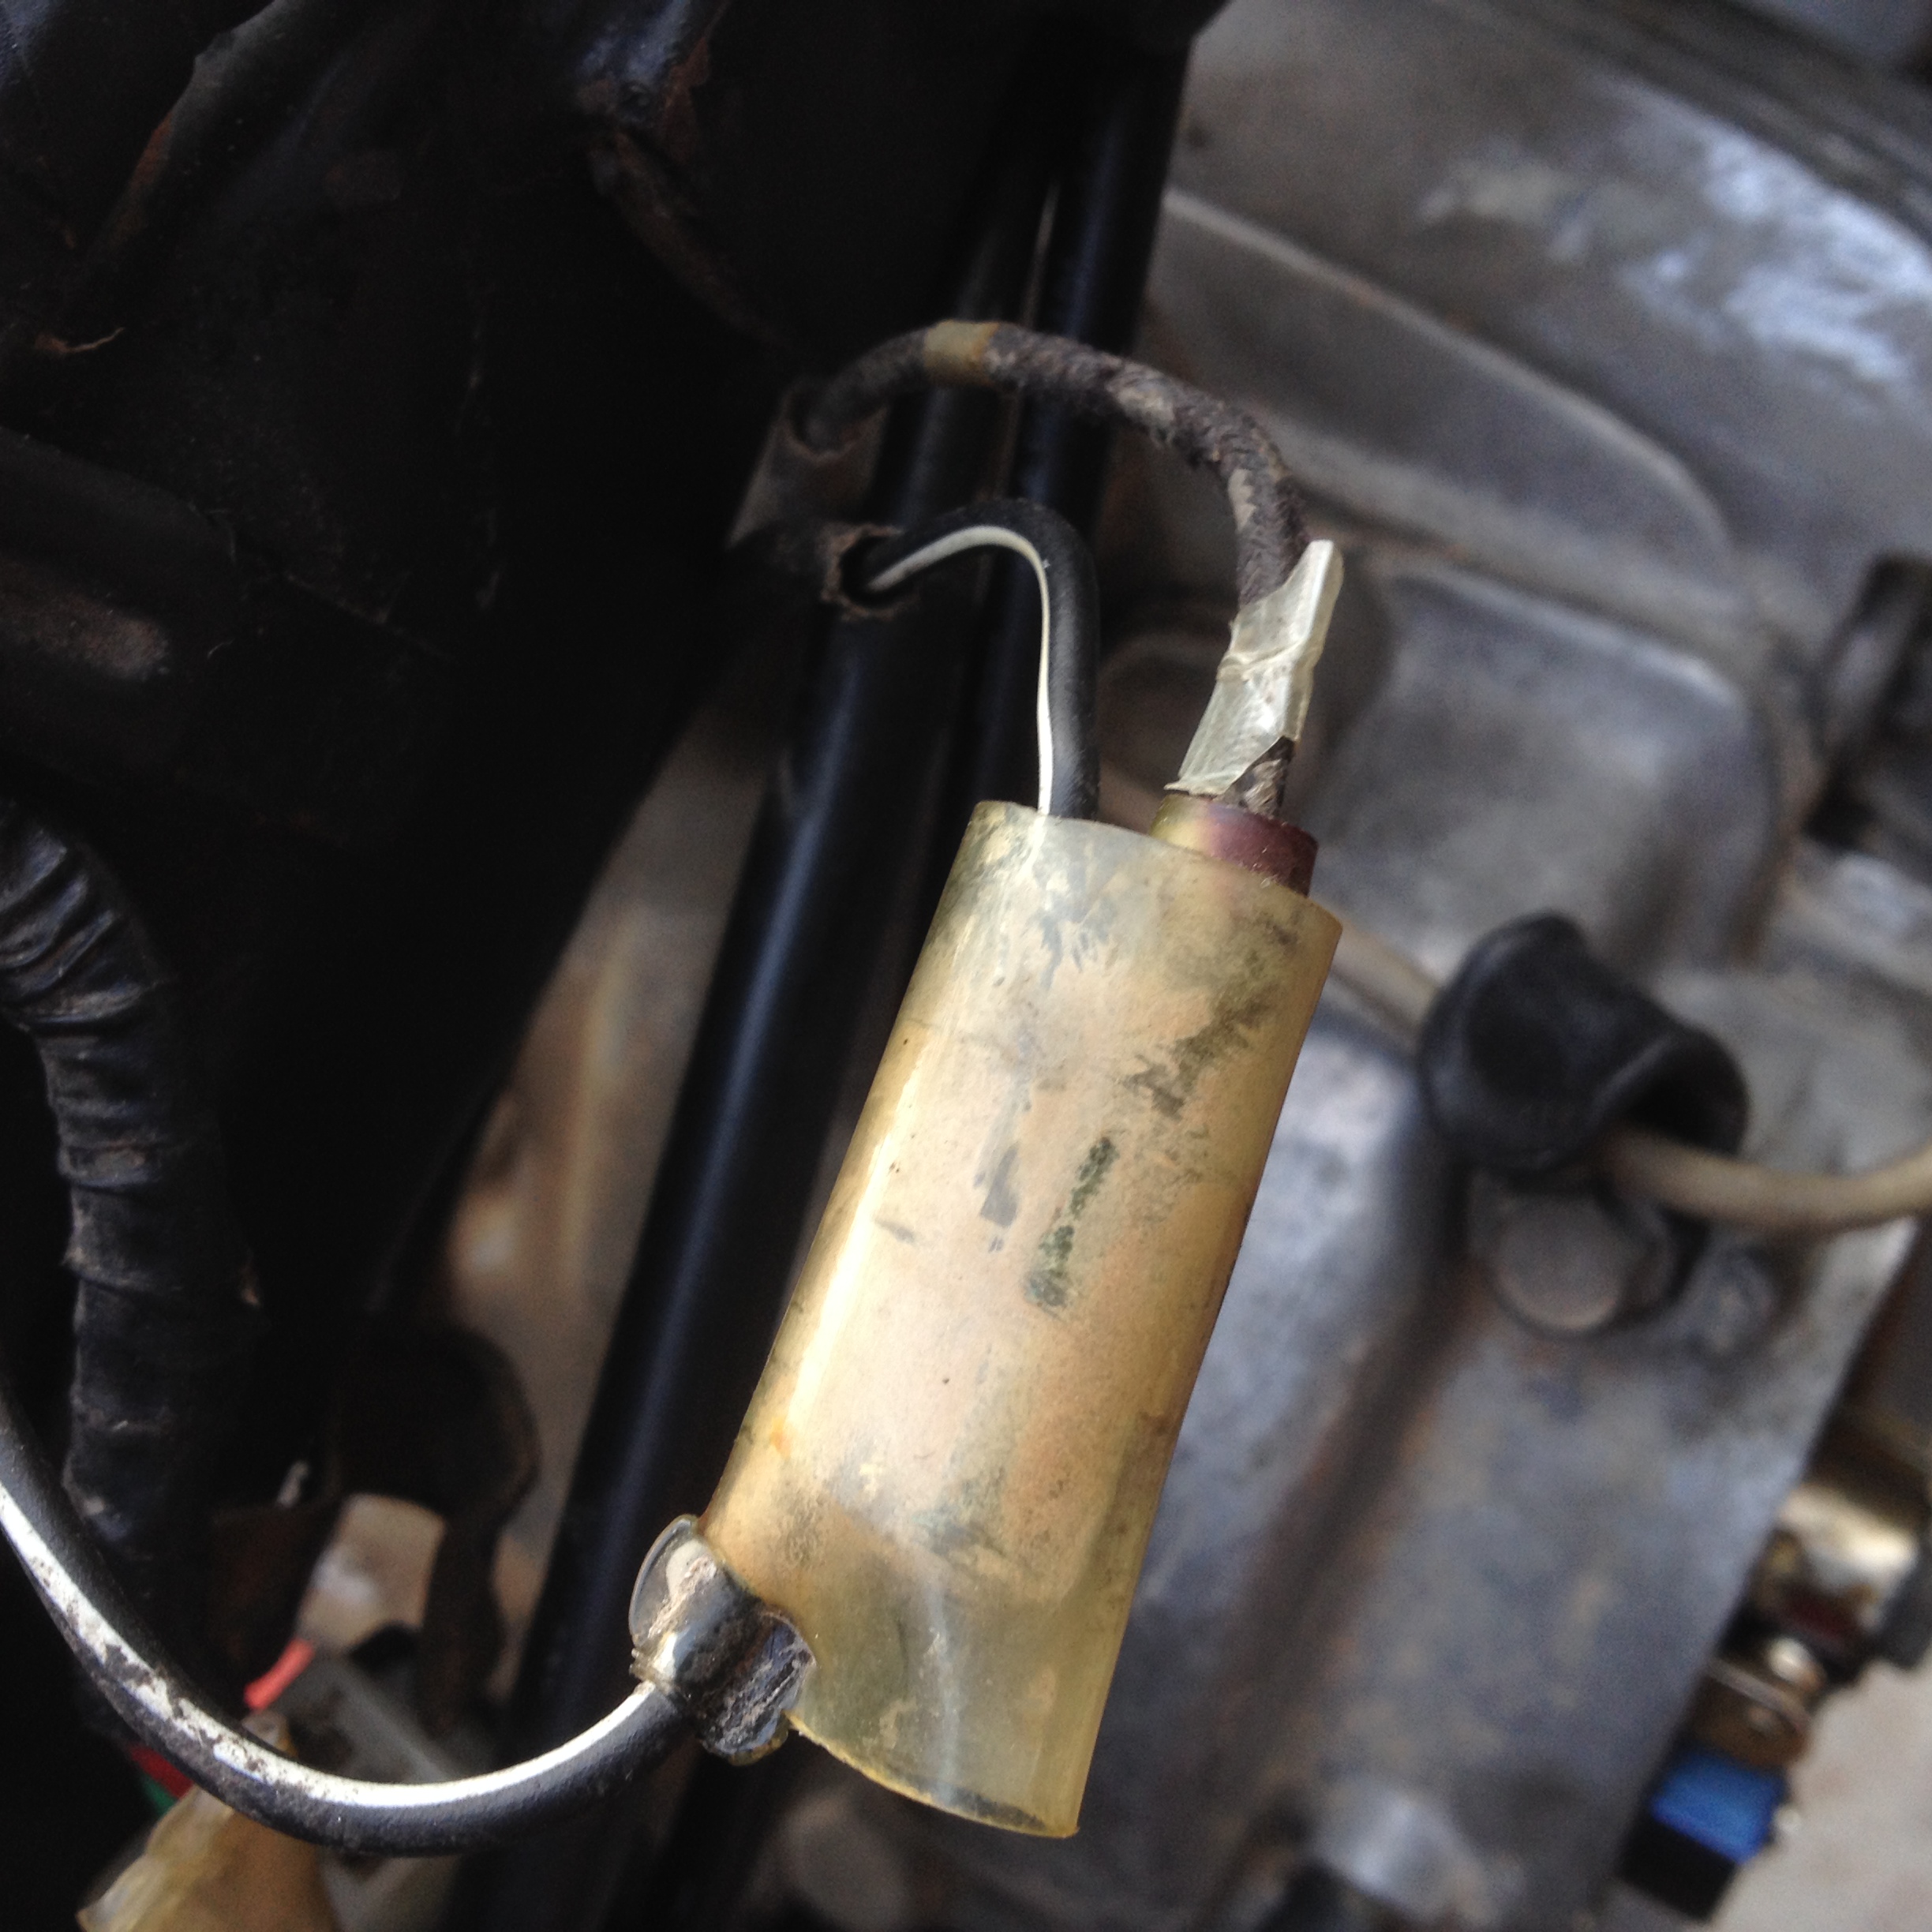
So now the carb is back on. Kick kick kick. No spark!!!! So I check the wiring, and there was no continuity from the alternator coil output to ground/earth when the points are closed. Hmm, the original Honda connection to the points and coil from the alternator by the head was like this:
Water has been getting in, so that dried up muddy water inside the cover is a little tiny piece of the USA. The connections were dirty and corroded, so I crimped a new 3 way one on using of course the correct Japanese 3.9mm parts. Kawasaki apparently use 4mm ones I have been told by the man I buy mine from. I am not sure that this caused the lack of spark, but when chasing faults, I like to eliminate each potential problem as I find it, one at a time. Sometimes the fault isn't one single problem but the culmination of several all conspiring together.
note: It's important that female bullet parts are crimped (including spade connectors) because the heat of soldering (melting point of standard 60/40 solder is 186 degrees celsius or for you colonials, 368 degrees fahrenheit) changes the temper in the brass and they lose their spring quality, so spades will fall off and male bullet connectors fall out due to lack of grip. I bought a Japanese connector crimp tool a while back and it been a Good Thing.
Then it started straight away.
It still runs rough, and is smoking somewhat (grey not black), but it is running, however It used nearly two pints of petrol in 15 mins. I'm guessing that it is still rich. The points gap was 0.13 so I left it alone, but the engine sounded a little retarded, so I advanced it 2 degrees or so.
Next day I pulled the plug, yes it was black with soot, so off came the carb (again) and I dropped the needle to ring two in order to lean the mixture. The rings are counted from the top. The factory setting is ring 4, but modern fuel is different to that used 38 years ago, and the engine will run too rich on this setting.
The plug was hard to replace as it has been cross threaded at some time, so that may need a re-thread or helicoil. I don't use a ratchet on plugs, I have a 'T' bar with a spring on it that I like, ratchets strip aluminium threads in the wrong hands.
I checked the choke action as mine has no cover on the plastic end where the cable is attached and where there is a fine spring.
The choke wasn't always going off as the spring (I don't even know why it's there, it provides a sort of indirect action from the pull of the choke cable to the twisting of the choke butterfly valve) had become innefective because it had slipped off and that took half an hour to sort, what a fiddle, then I refitted the carb; would it start? NO, no it would not.
I'm happy the carb is right, new points are set right, there's fuel and a good spark, new plug, new coil, new condenser and a good seal from carb to head, but it wouldn't fire. It's a bit frustrating and puzzling.
Then time ran out, so I had another look today, started by checking the spark (still got one), set the points to 14 thou, then static timed the engine. A few points to mention about doing this:
1. Don't worry when you open the stator round cover with the three screws that a little oil comes out, it's only a large tablespoonful.
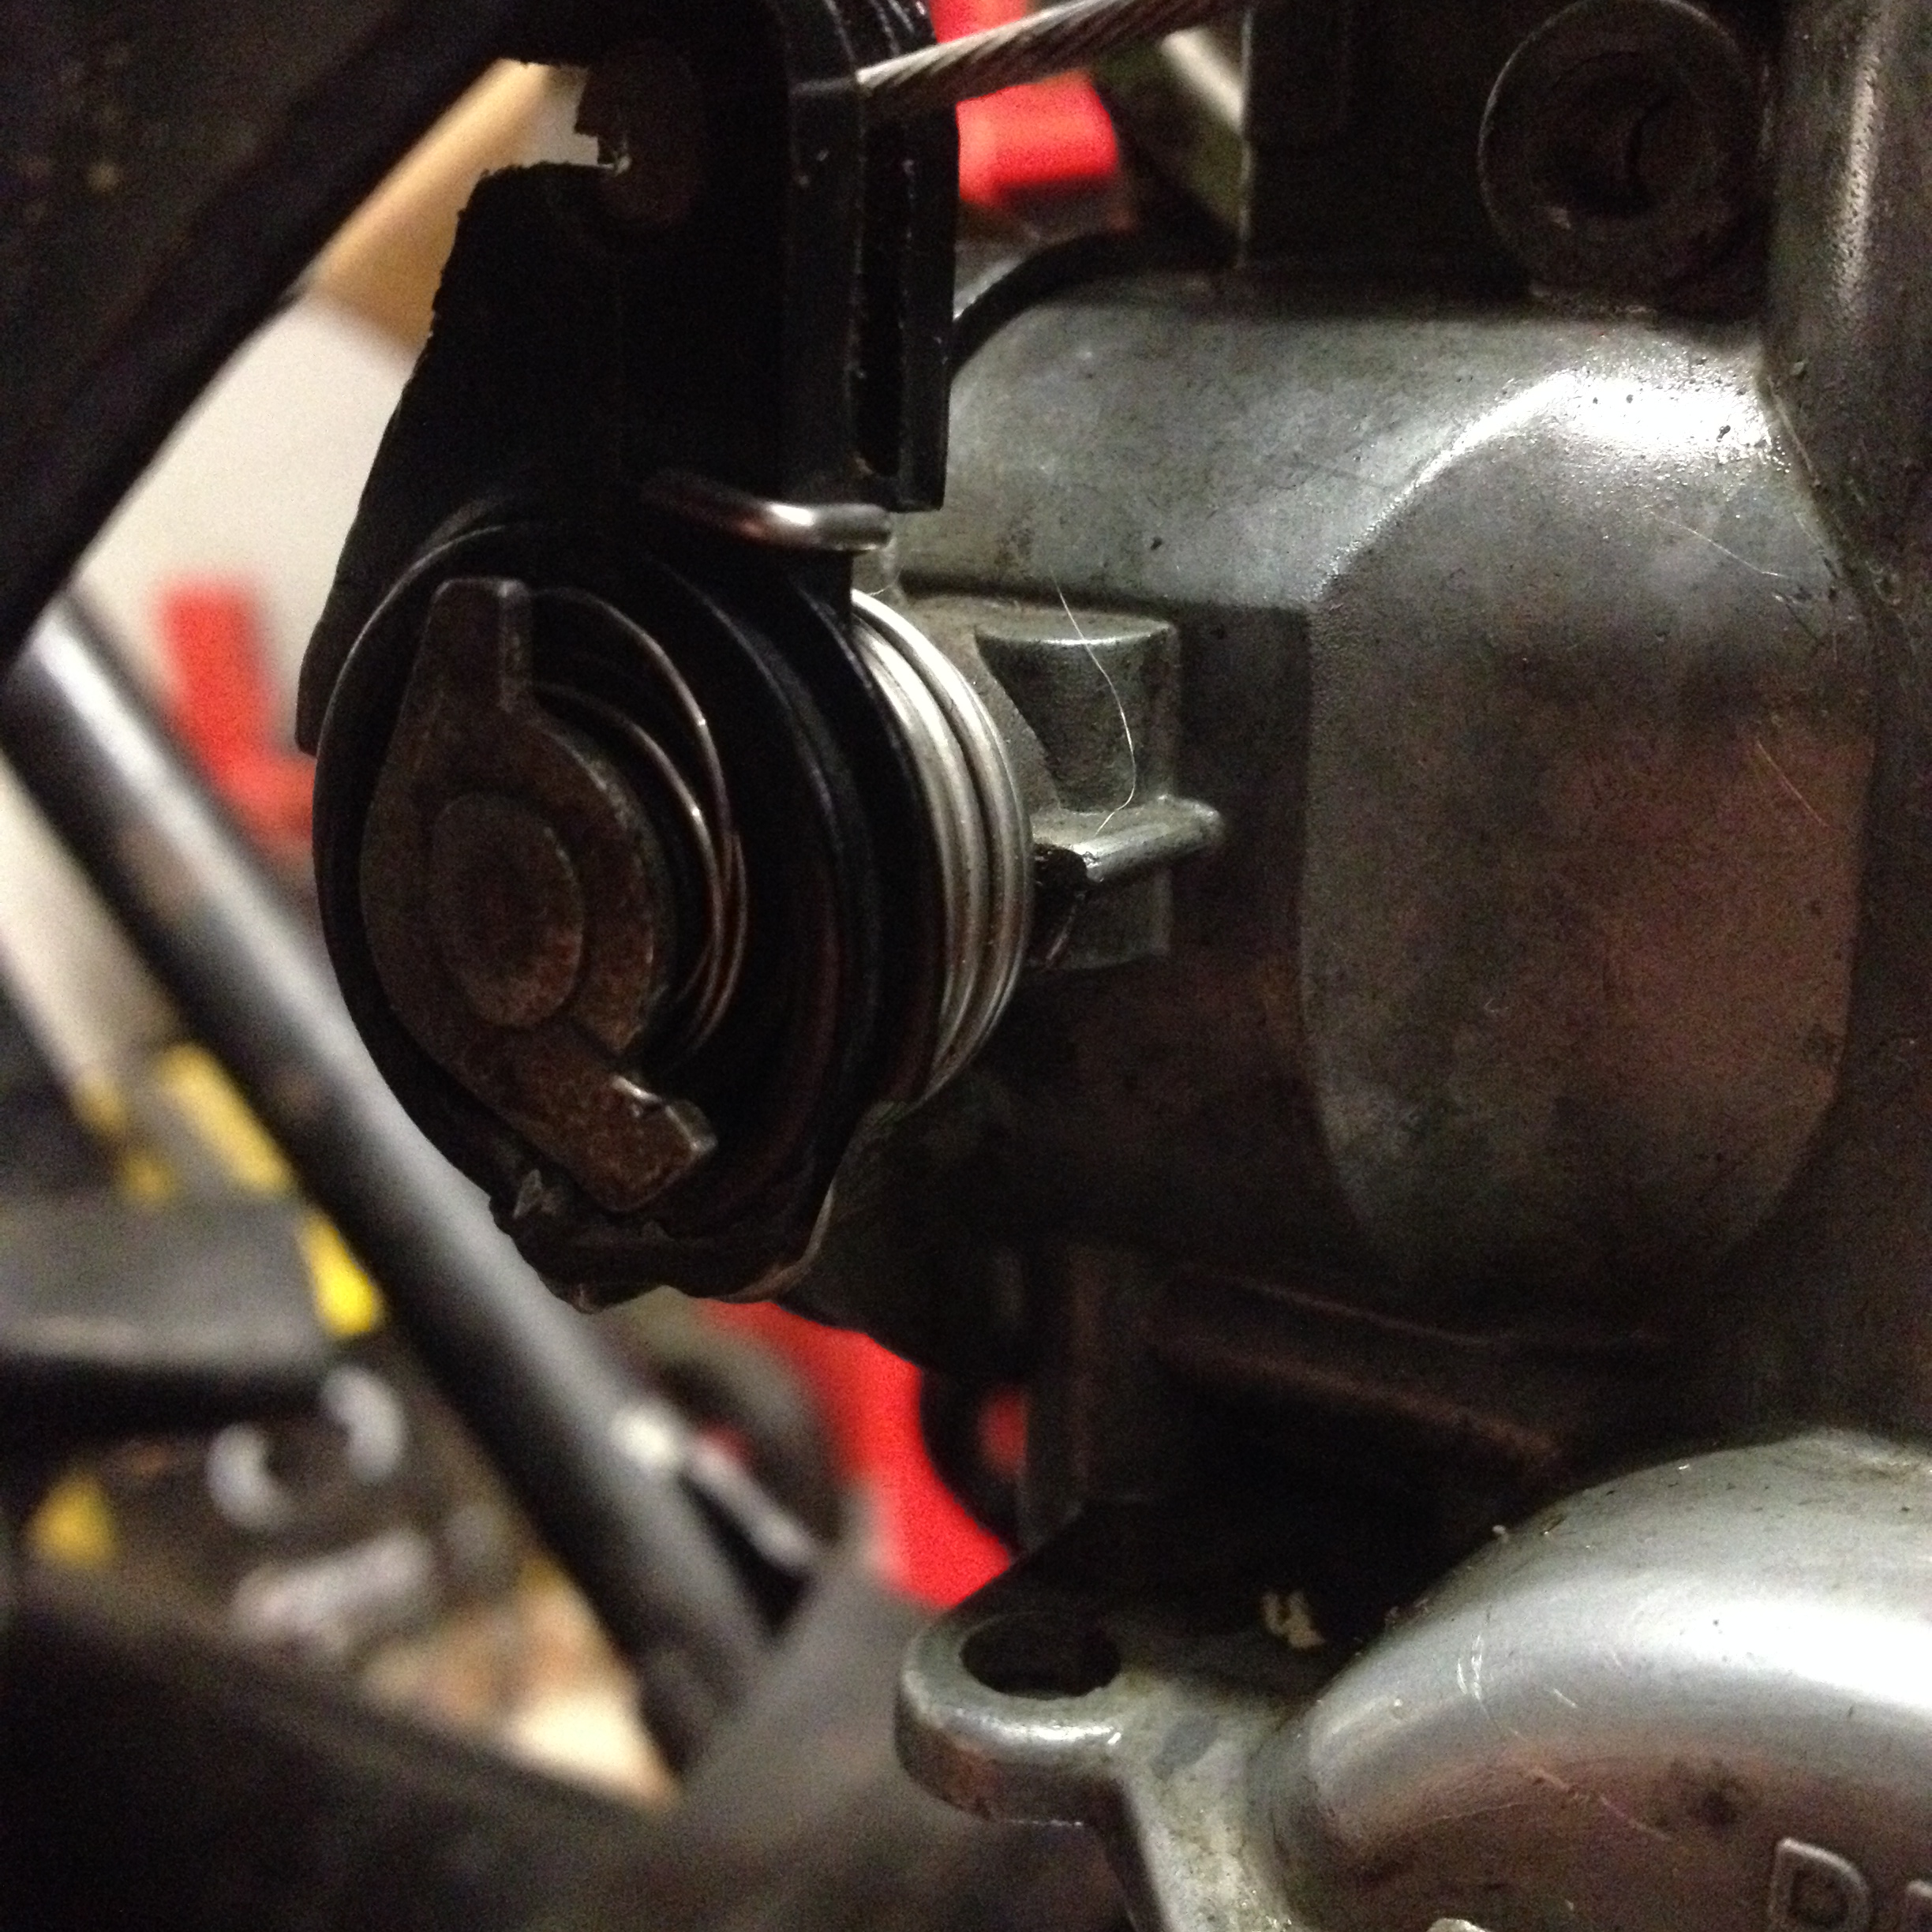
2. The crankcase/stator cover timing mark isn't really obvious, it is at the 9 o'clock position, here is a view of it from inside the cover where the stator coils are mounted, which may make it easier to locate. It's the bit in the middle.
The stator flywheel will be oily so you will need to clean the oil off with a rag to see the timing marks better. A torch (flashlight) is handy too.

3. The top mark is 'T' for top dead centre, 'F' is the firing point that we static time to and the two lower marks indicate the position the engine should fire at when the spring advance unit behind the points plate is spining fast. There is a very useful article by Dan in the USA on timing these engines HERE plus a load of other good stuff. Thanks Dan!
Well, now the timing is spot on, and guess what? It still wouldn't start, or even fire once. Then it started to rain and I gave up for today. The only thing I have not looked at is whether the auto adjuster behind the points cover is working properly but that wouldn't stop it firing. Surely it has to be fuel? I wonder if somehow bits of that knackered 'O' ring that came out of the pilot screw hole in pieces have blocked a jet or something? Hmmm. I may try 100 psi from my compressor up every orifice of the carb and see what happens.
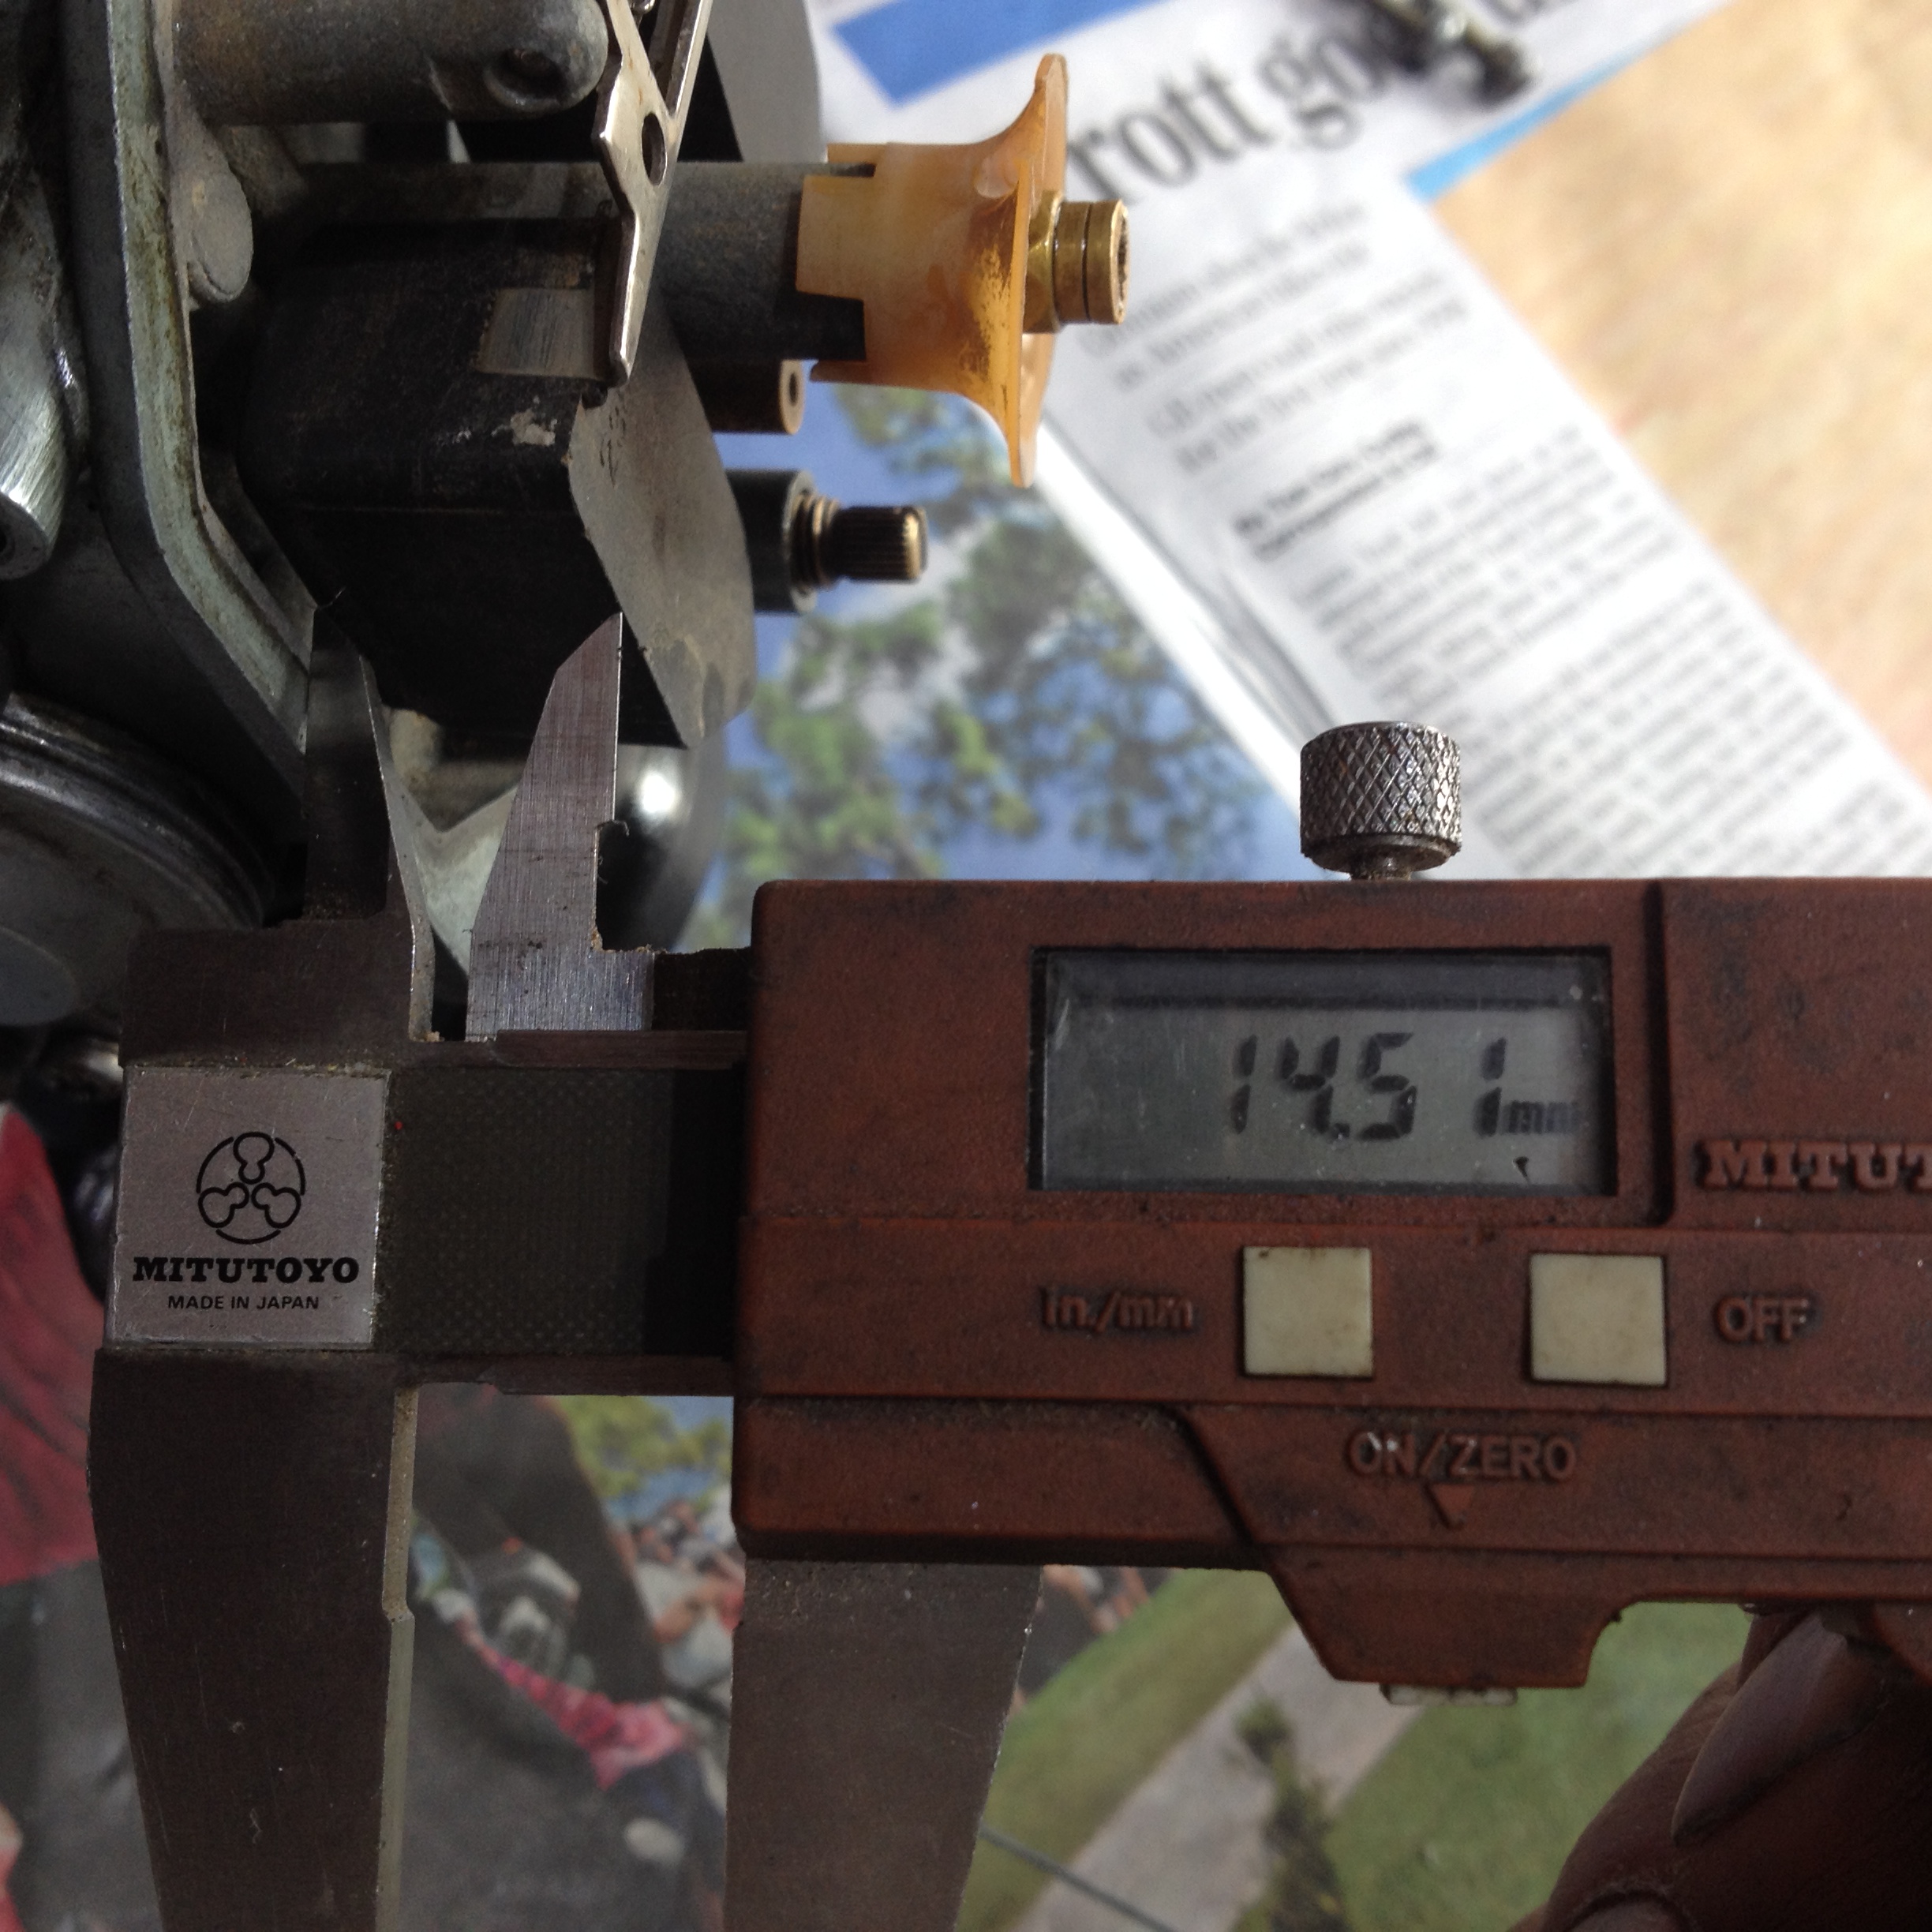
Looking at the problem again, I see I set the float level to 18mm. According to Oldrice this is correct up to 1976, but 77/78 it should be 14.5mm. I can at least correct this and see if it makes any difference.
near enough!
This morning, I had another look at the bike, briefly. It didn't start, so I pulled the plug to see if it was wet with fuel, and on a whim put an old plug in, and it started straight away, first kick. It ticked over quite well, (still with grey smoke) ran for a few minutes with me blipping the throttle, so then I revved it higher and it went crazy, revving really high so I had to kill it with the kill switch. I realise now it had used all the half pint of petrol in the temporary tank, so had run out of fuel.... which would have the same effect. So I pulled the carb off and reset the float level, another job for the digital calipers.
Although I have fitted a new carb insulator 'O' ring. I think I will go old school and cut a gasket from gasket paper and fit it with old school gasket cement.
I wouldn't have thought it was letting air in from where the carb goes into the manifold/insulator, as the clamp is the original one, and there is no sign of any perishing or cracking of the rubber. However maybe when I next fit the carb I will put some sealant in there too, just to be sure.
With regard to the worrysome grey smoke (a lot of) a couple of things come to mind:
1. As there was no speedo on the bike, I don't know how many miles it has done.
2. As there was no air filter of any kind on the carb, there may have been sand dust grit etc sucked in causing wear on the valves, guides, valve stem oil seals and bores and rings.
3. I don't know how long it may have stood. Months? Years? Who knows.
4. Without taking it apart I don't know if it has ever been re-bored. Unlike other engine makers who stamp piston crowns, Honda put sizes on the side near the gudgeon/wrist pin hole so you have to take the barrel off to look.
5. Grey smoke could be simply unburned fuel, which is possible if the engine is miss firing, rather than oil which is a bluer haze. Or not.
I have also noticed it could do with a pair of new fork seals. With hindsight I should have checked the fork legs at the start when I swopped them back the right way round, but they looked OK at the time. See below..
I have dropped the needle again to top ring (no.1) ready for re-fitting the carb. If I get the piston, and rings, Charlie's will do the rebore. If it needs one. I bet it will.
The valve stem oil seals are quite cheap for non-Honda ones see WEMOTO at £2.49 each plus £3 postage, so I have ordered a set.
The exhaust valves (14721-356-000) are unobtainable unless some NOS ones pop up, but you can buy the guides and inlet valves at the moment from CMSL.
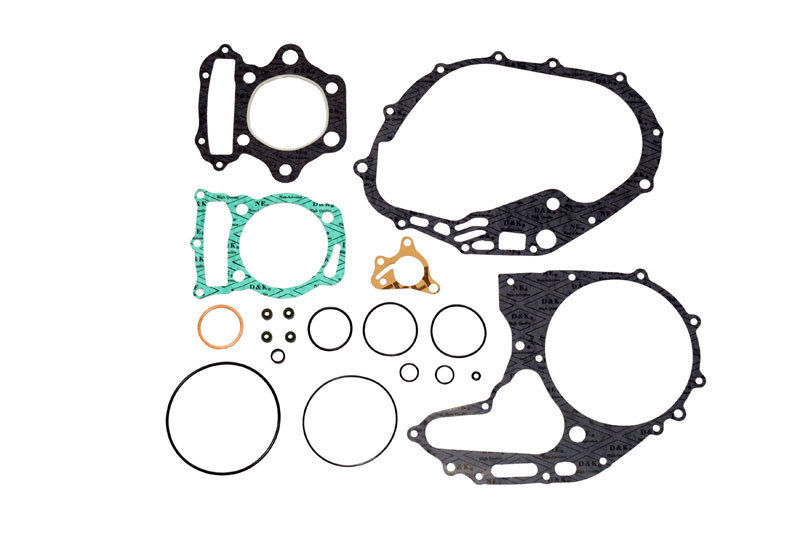
Facing what I believe will be the inevitable, I have ordered an aftermarket gasket set from ebay (from Japan) for $30 US (this has now arrived - only 5 days from Japan).
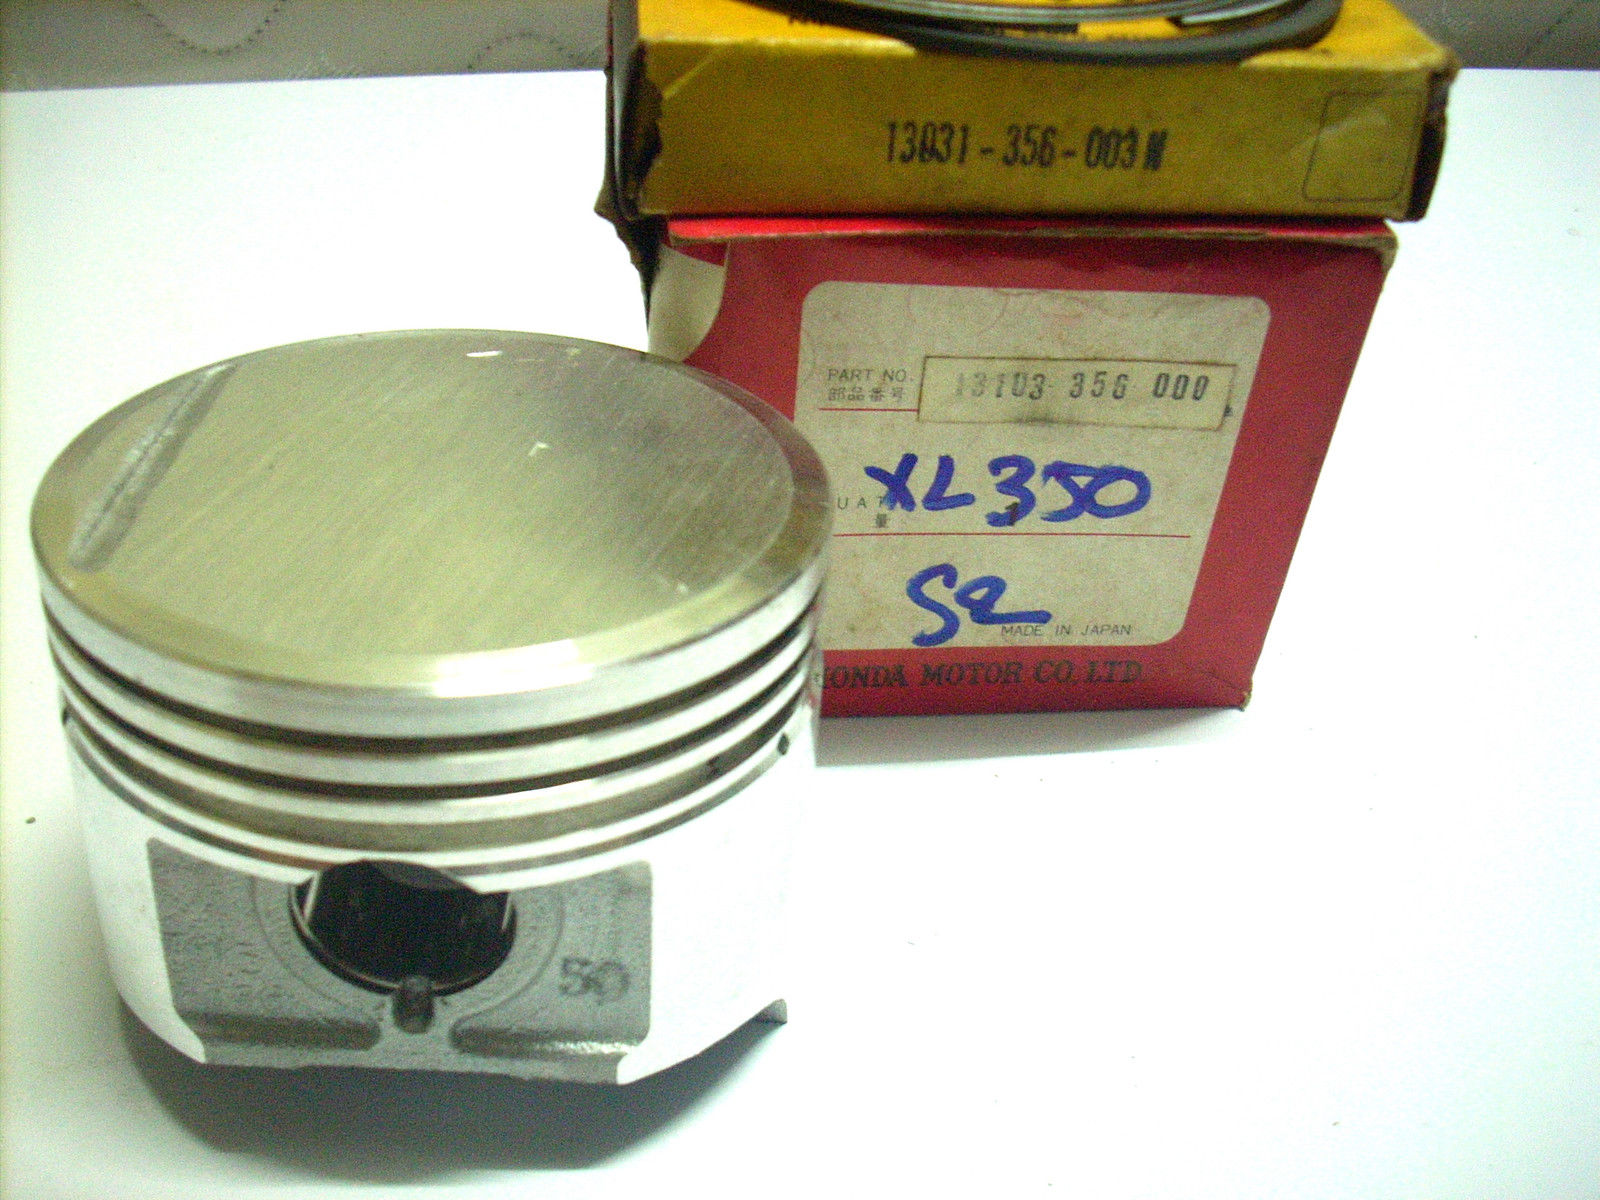
and a NOS piston and ring set .5mm oversize (from Thailand) for $170 US.
Once again I play the waiting game with the postman. The piston and rings are likely to be two or three weeks wait.
Whilst waiting, I drilled out the defunct steering stem lock for which there was no key, and fitted a new one today. It might be useful to be able to lock it up one day. The carb from the USA came today, so I fitted it. The bike started and ran but was a bit rough spitting back out of the carb.

Adjusting the slow air is tricky as unlike the XL250 the '78 XL350 has the screw under the carb, so I ground a small screwdriver down as there isn't much room under the carb, and adjusted the slow running, which was better. I wish I had made this tool earlier, it makes it much easier! It may not look it but it was a good quality one from RS Components, and it will now live in the top drawer of the toolbox.
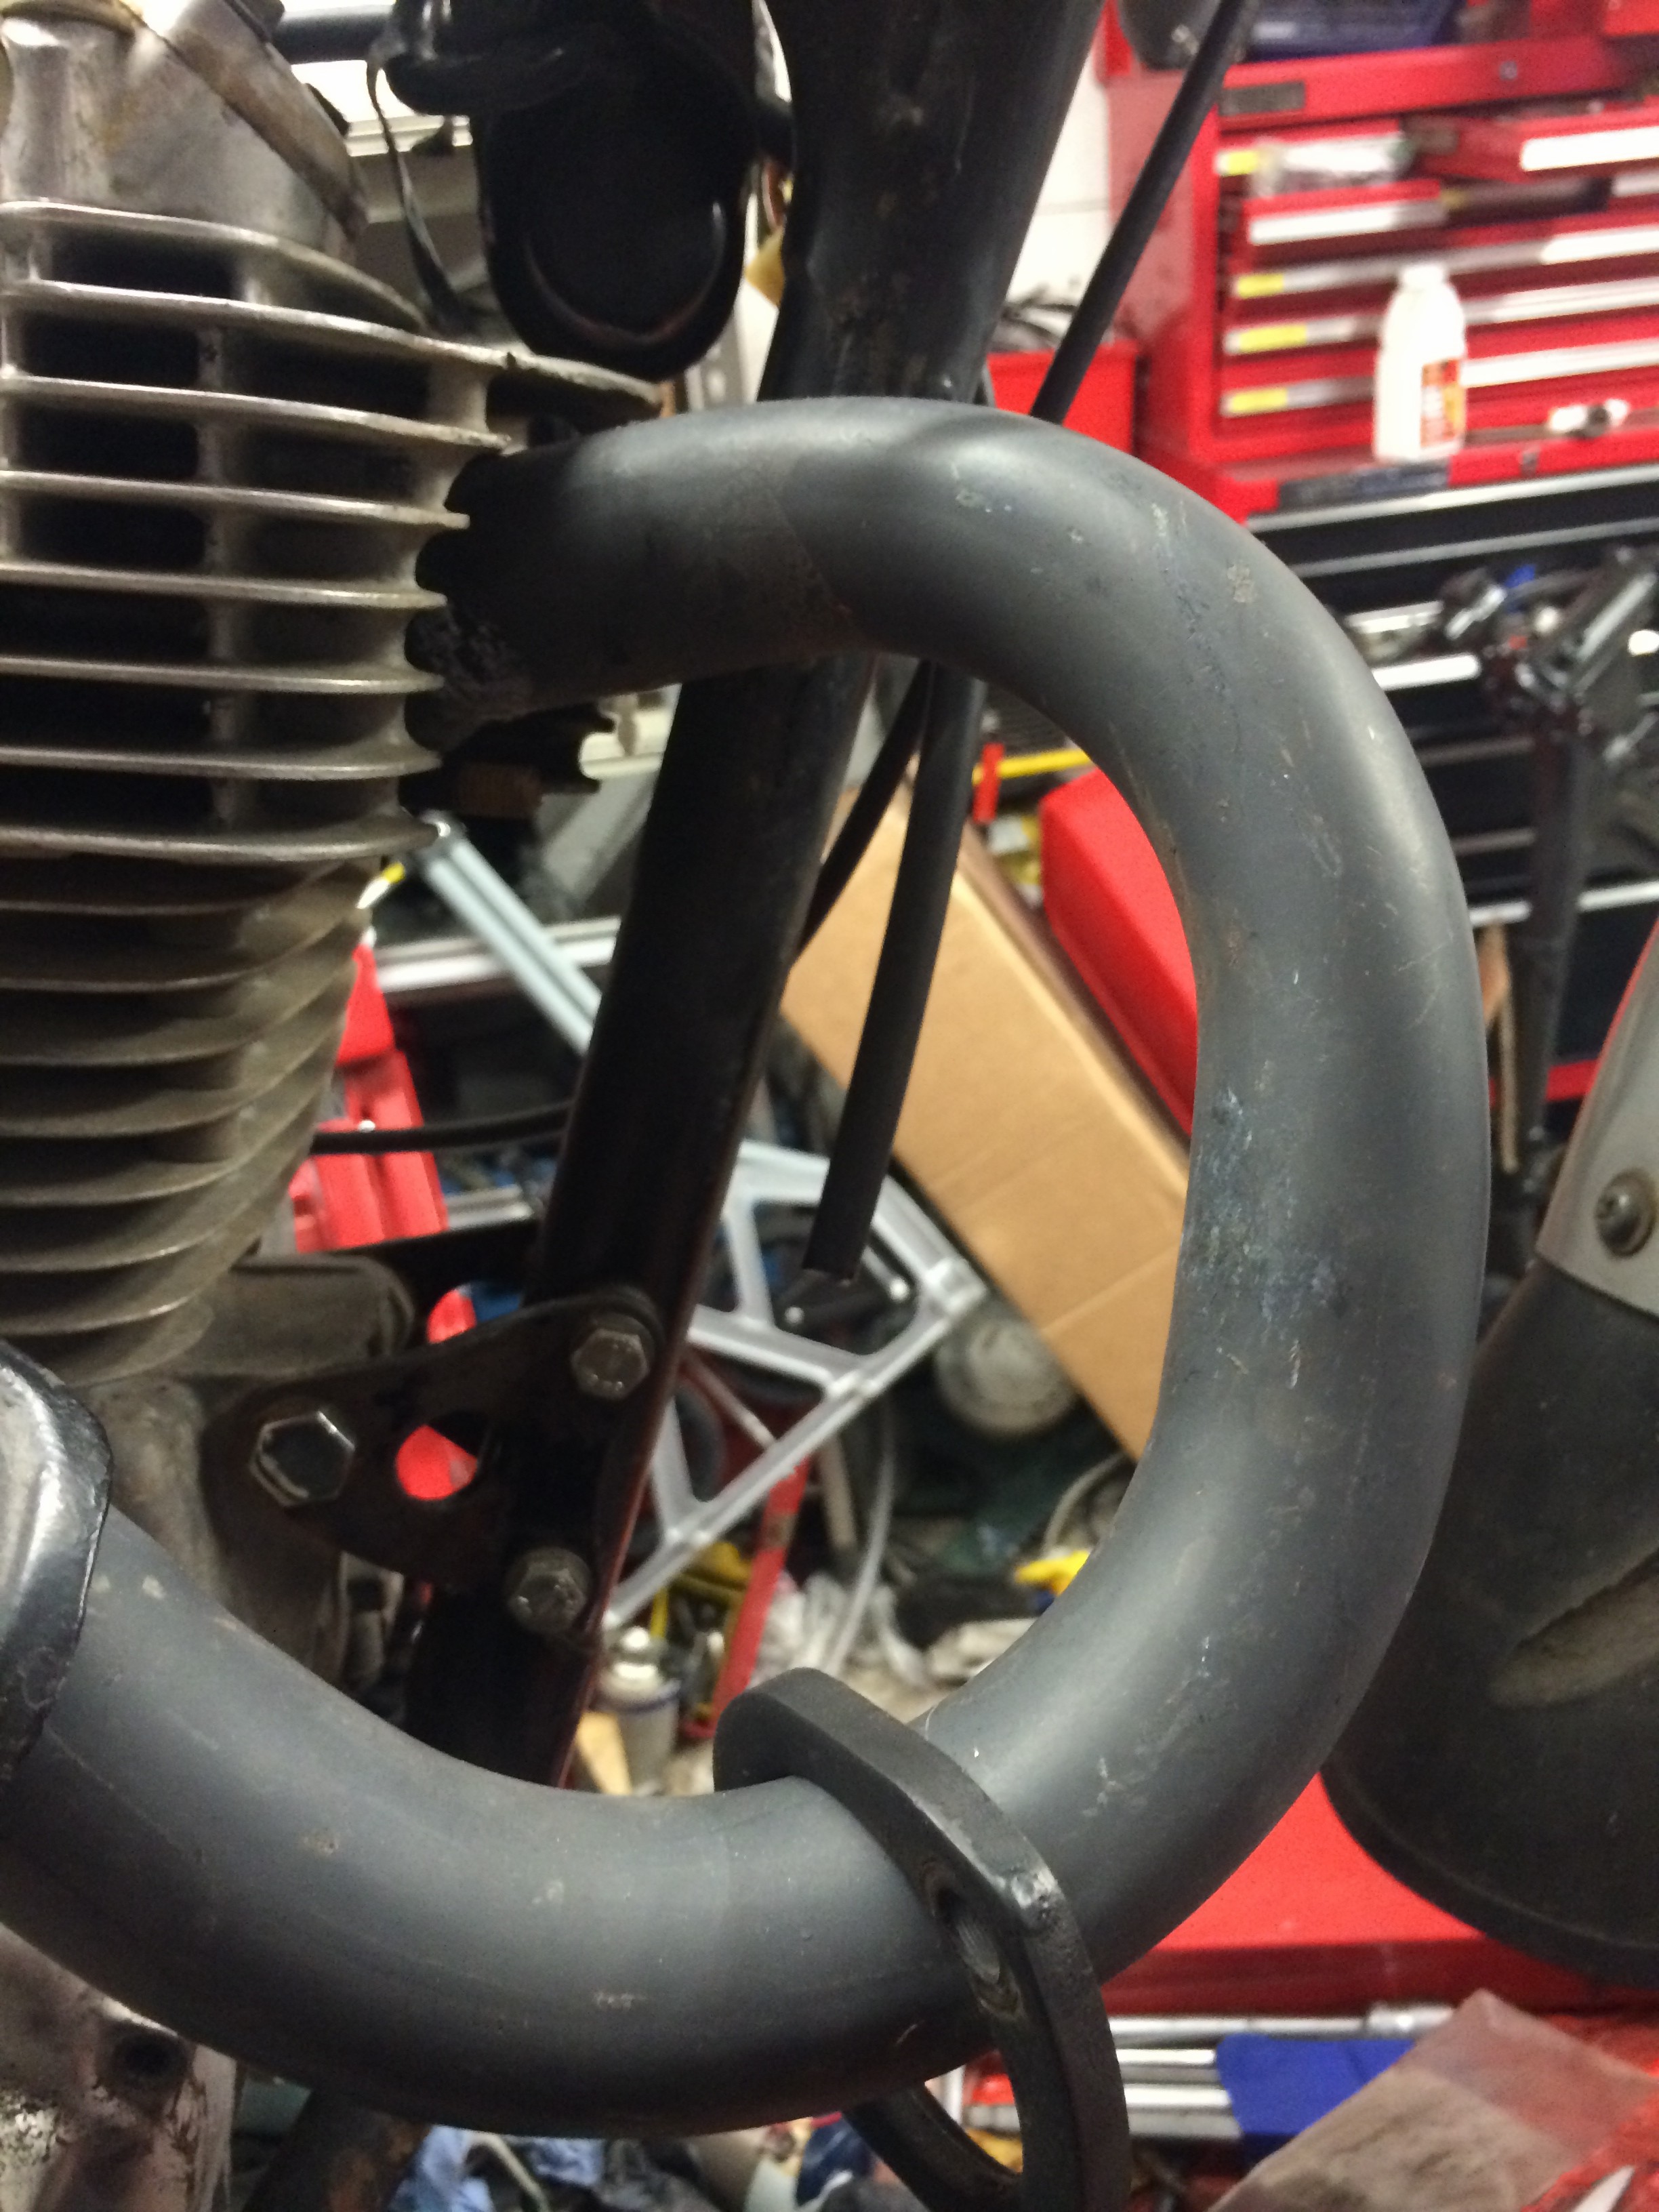
The leak on the exhaust needs doing but the exhaust was too hot, so I put it away after a quick ride round the back garden.
I did a small video with my iphone of it ticking over, with much less smoke, in fact the smoke mostly came from off the exhaust where the previous owner of the exhaust has used an inappropriate black paint on it. Tickover is a bit lumpy but so far so good. Interestingly it gobbled a LOT less fuel than the original carb.
I haven't tried this before, it is on youtube!
Only job I have done since this is to pull the 'new' carb off and just check it over to get to the bottom of the lumpy tickover. It has stock main jet, stock needle in groove four, float hight is about right and the choke works fine. The air cutoff valve is in good order and the diaphragm is not perished or holed. That leaves insufficient advance of timing (doubtful) or air into exhaust as it is banging in the silencer/muffler (it is sealed) or intake air leak (will reseal when refitting).
The carb mount band (part no. 17255-385-680) tightens all the way up so it can't tighten any more, because the flanges meet, but doesn't seem tight enough to me as the carb still wobbles a bit.
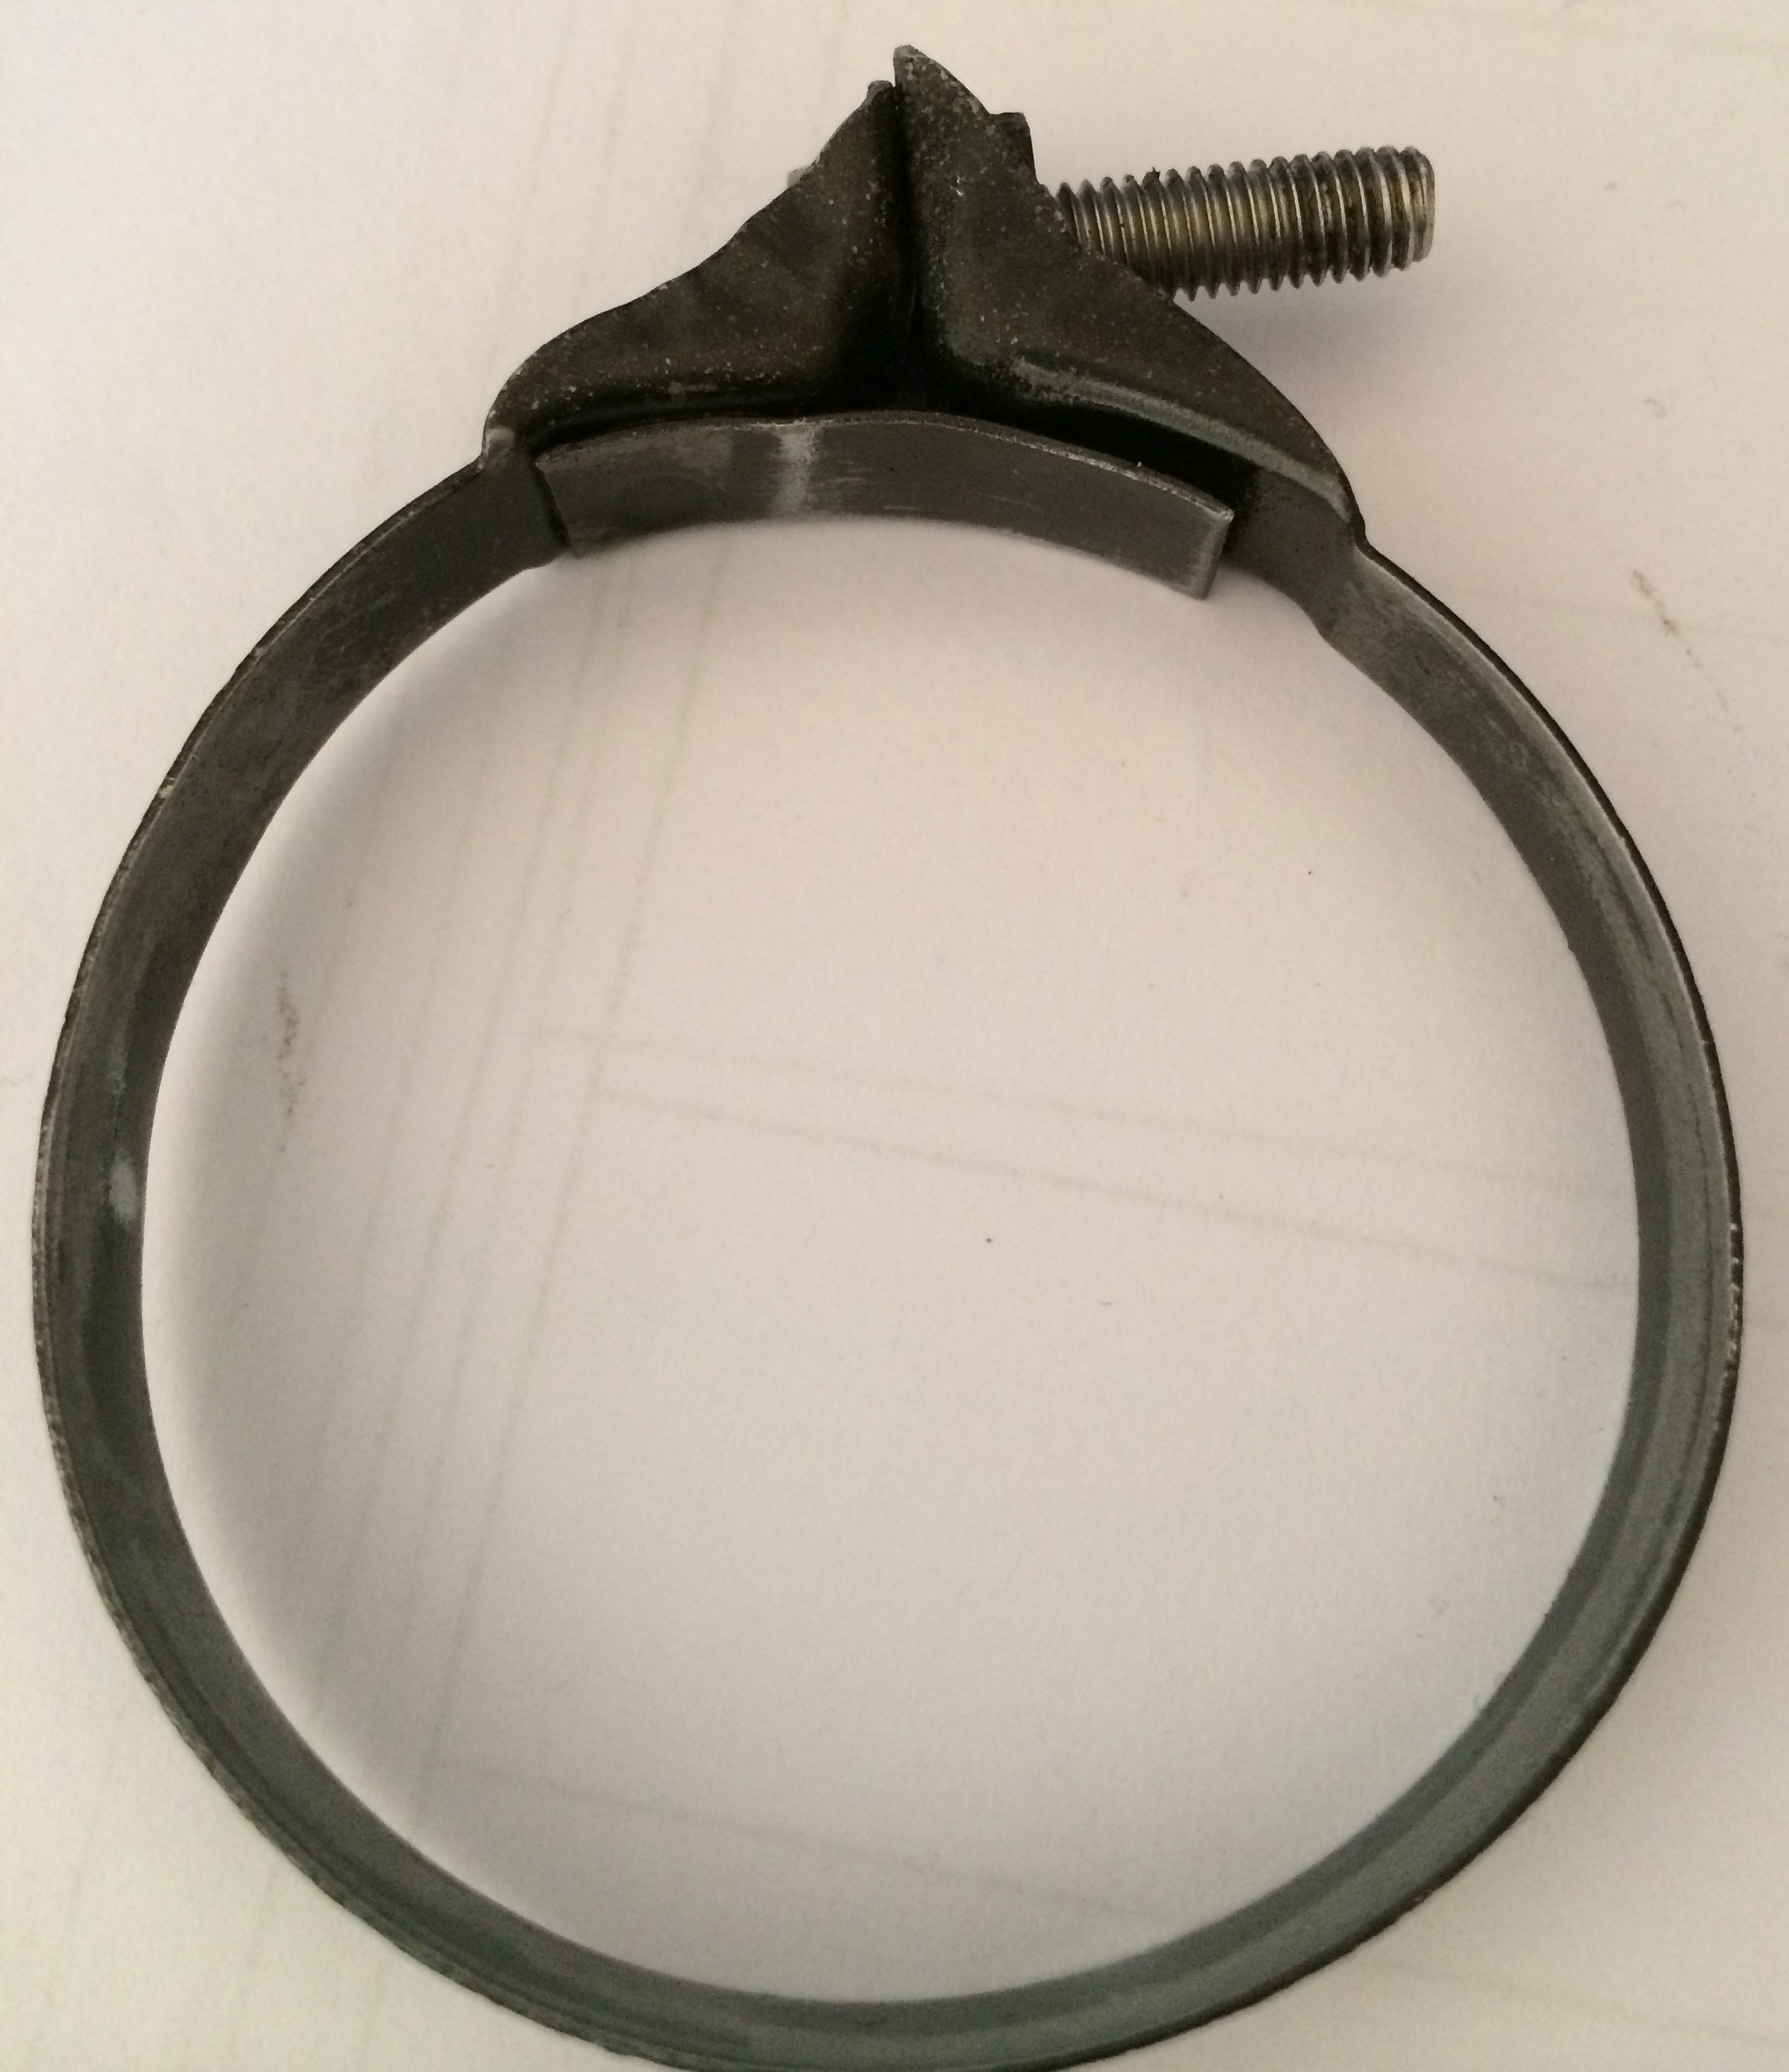
I may have to try a stainless jubilee clip.
This is how making an old-school gasket went today (or 'I will fix these leaks whatever it takes'): this stuff may be obvious to old timers but there are a lot of younger riders out there who have never made a gasket.
The first thing I did was to clean all the old cement and silicone from the carb insulator. I used some silicone remover to make it easier. I also removed the recently fitted new 'O' ring.
I cleaned the engine mounting flange, then the next step was to flatten the engine side face of the insulator by using a new sheet of 600 grade wet and dry paper held against a flat surface; if you can't find one, window glass is pretty flat. When the whole face is shiny it should be flat. When flat I re-fitted the 'O' ring.
I then traced the gasket shape with a pencil onto the 0.8mm thick gasket paper (it is oil resistant paper, I remember how when I was at school we used to use breakfast cereal packet cardboard!) and cut it out using a pair of nail scissors that are curved at the end, making it easier.
I decided to keep the new 'O' ring and allow the gasket to be on the outside of the 'O' ring.


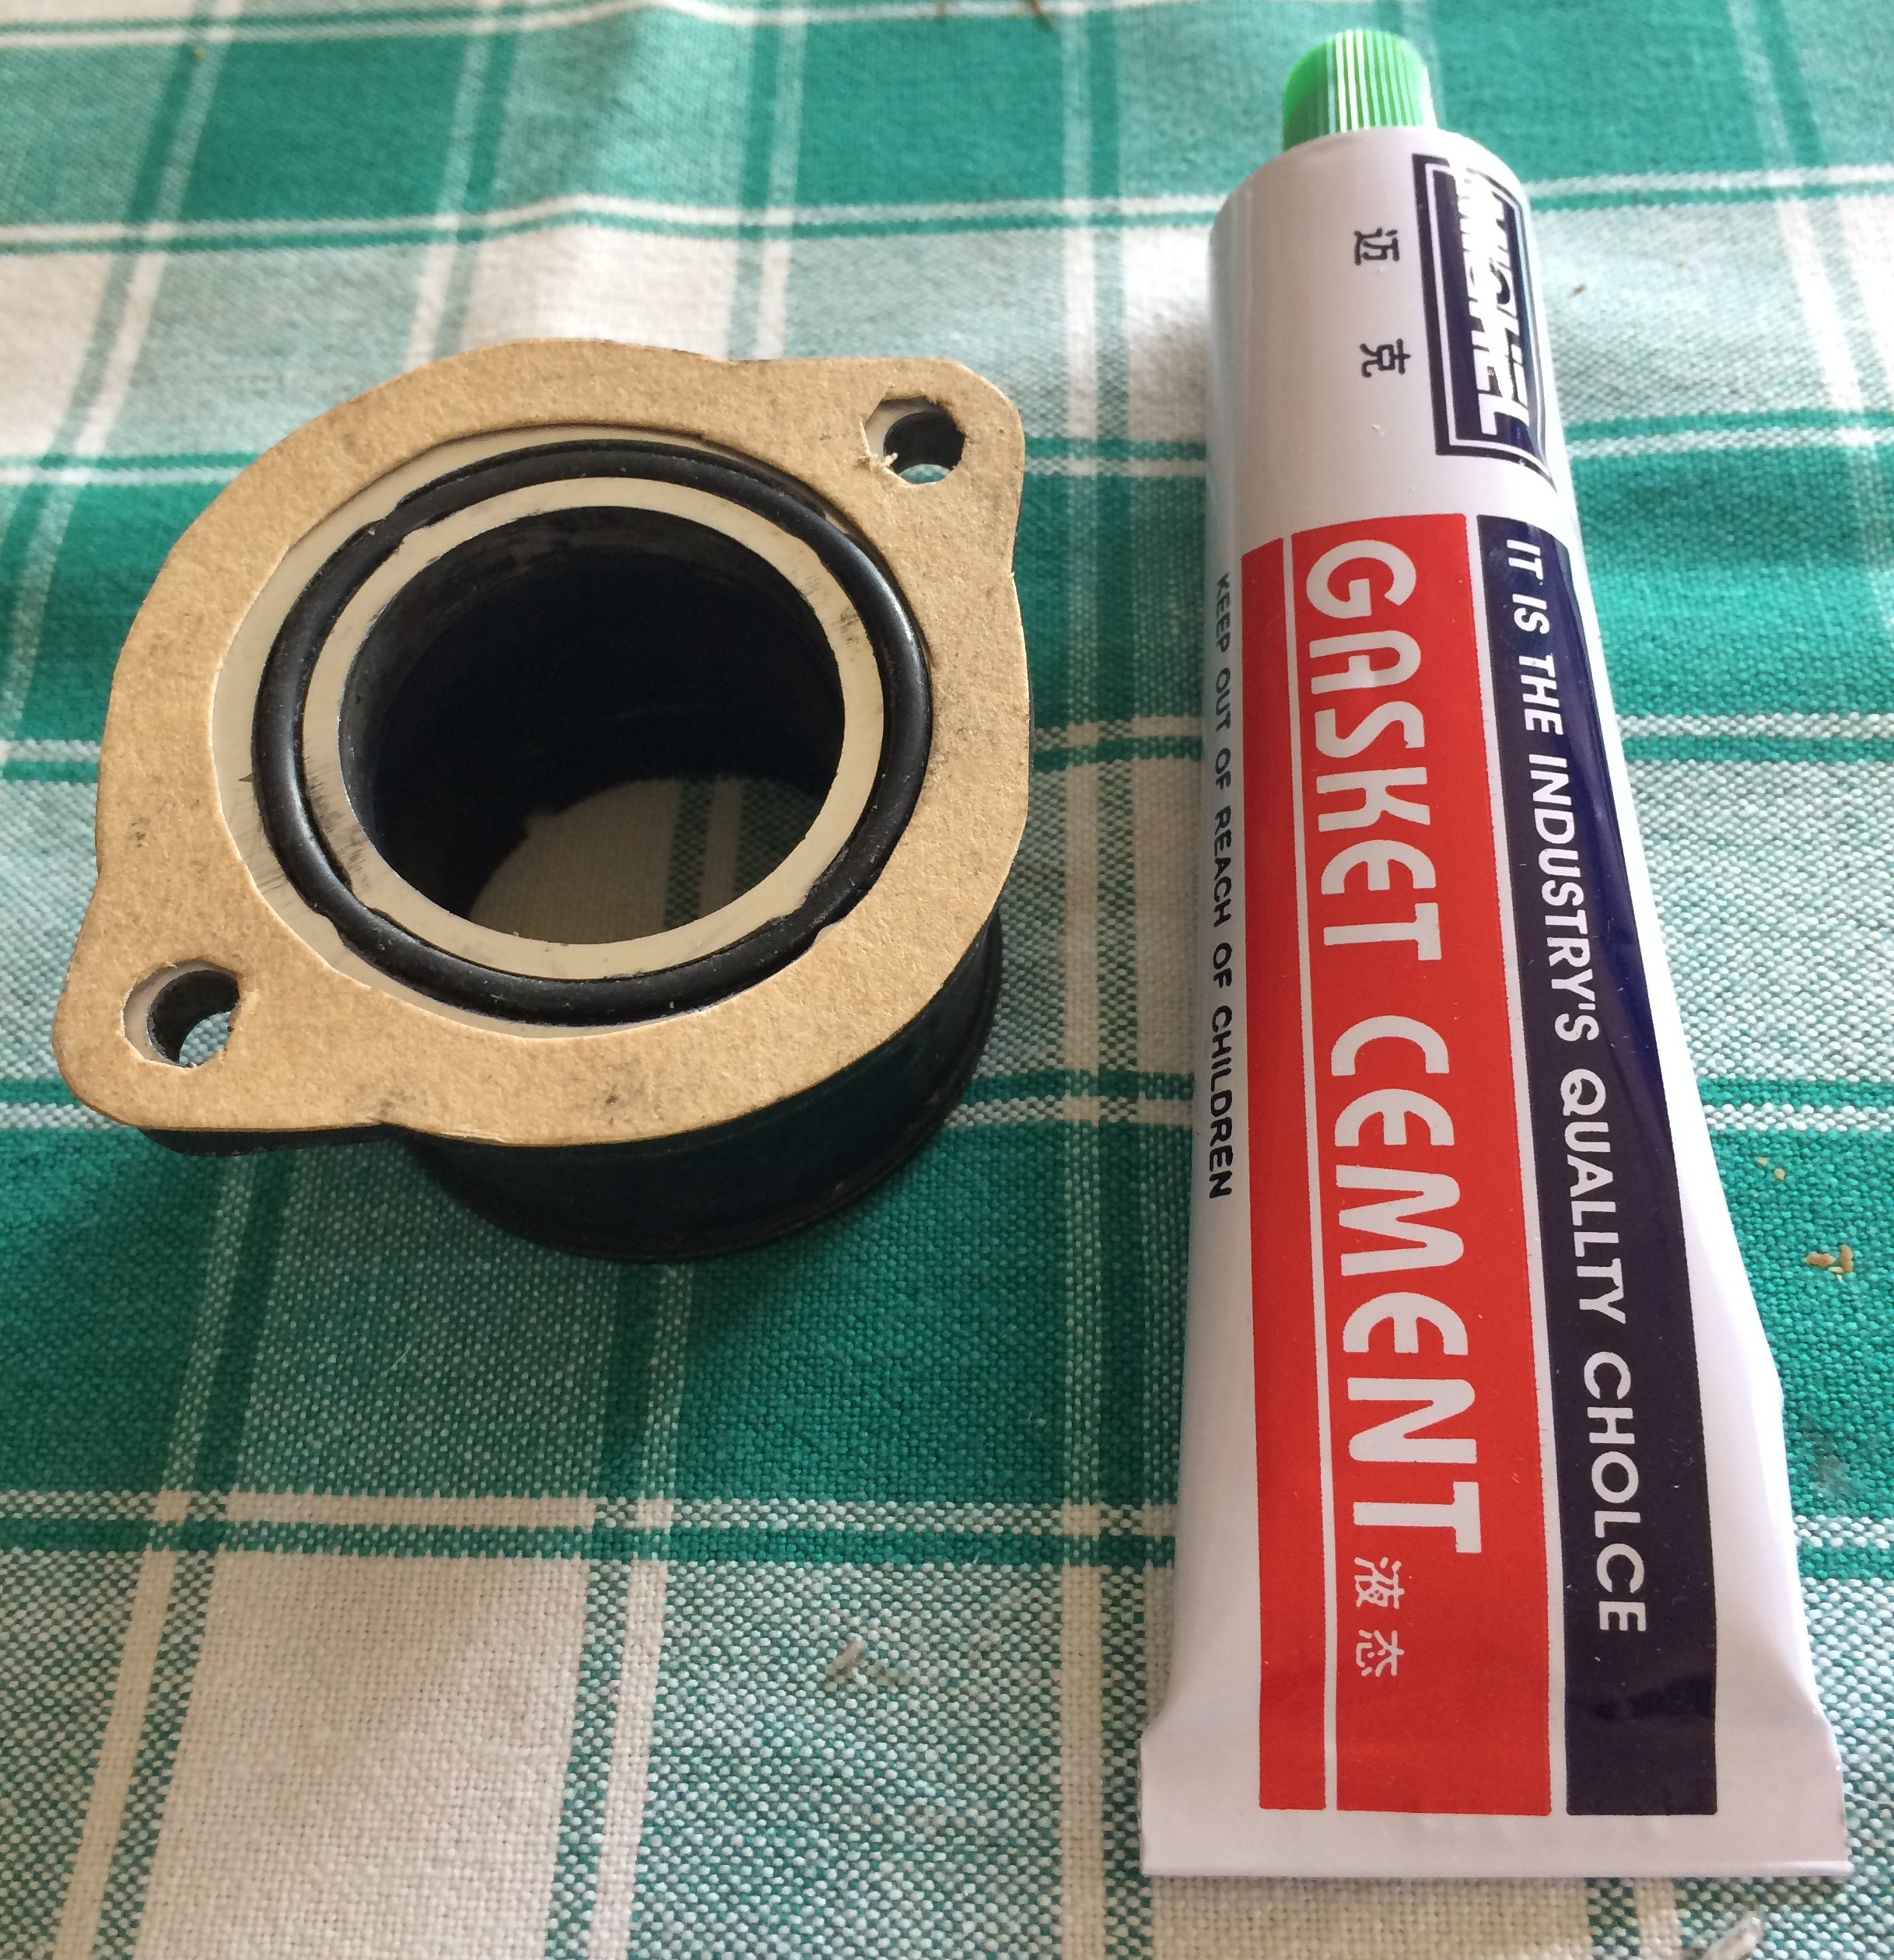
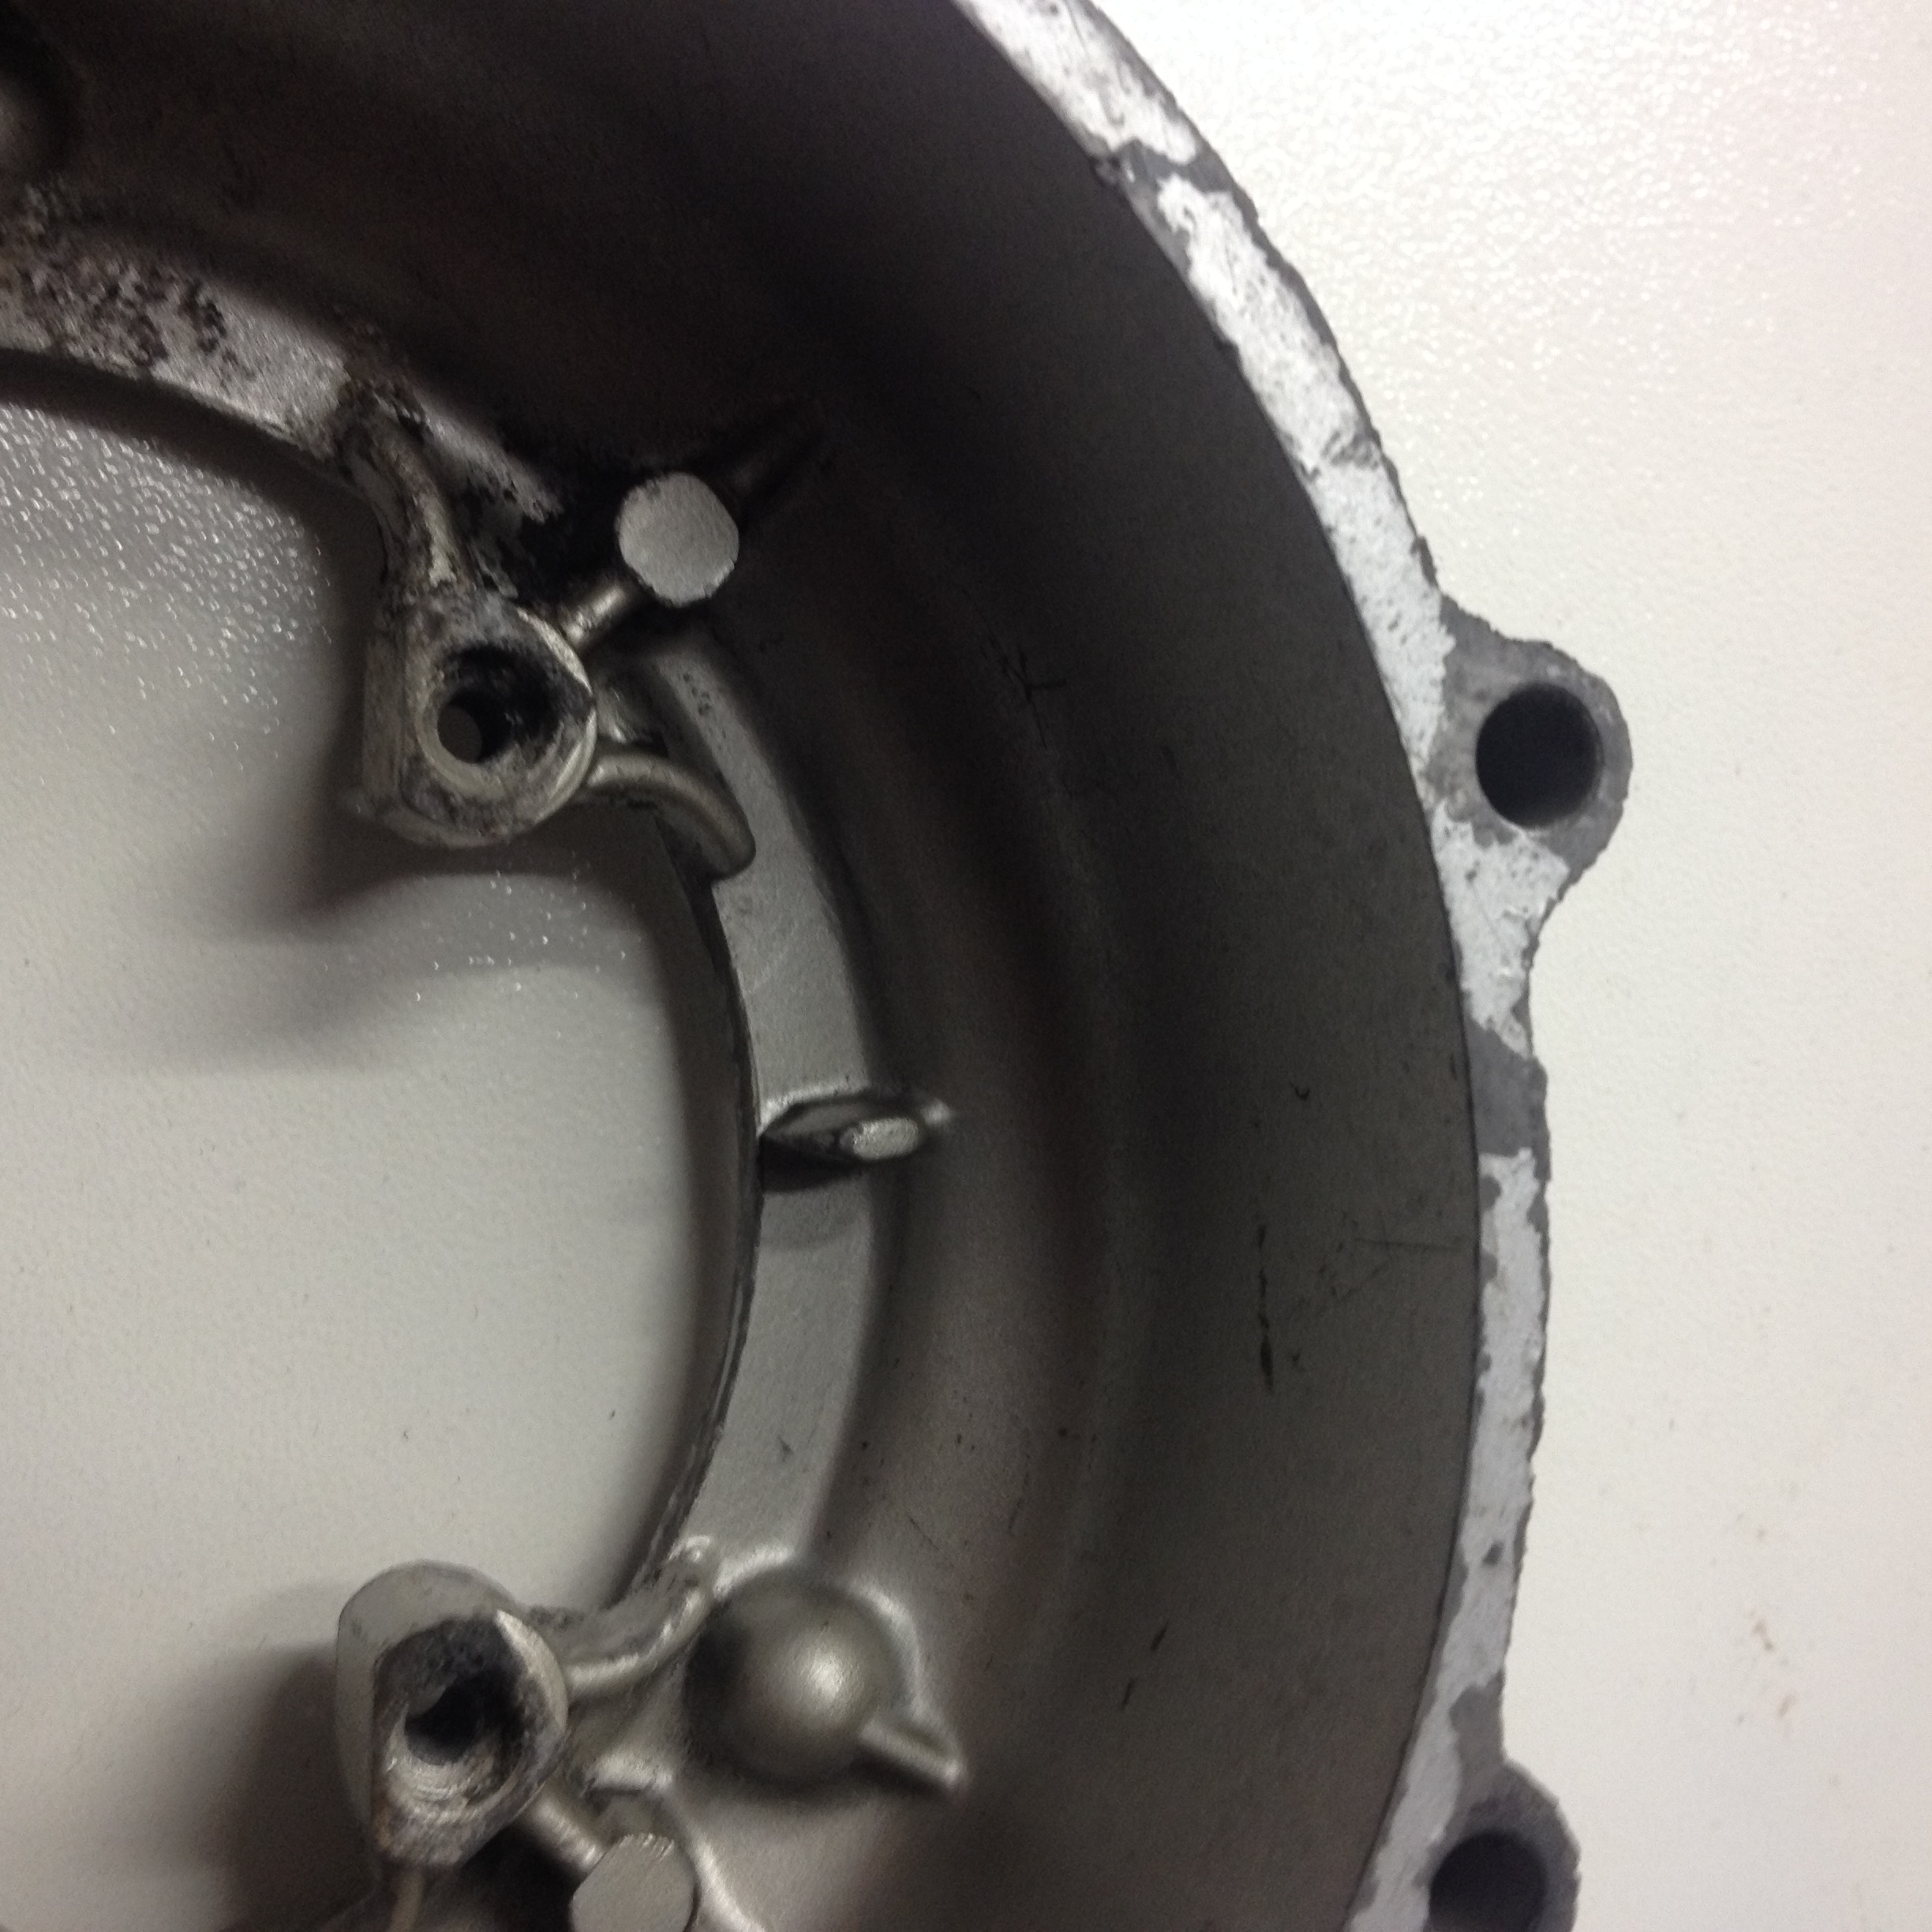
Finally I replaced the insulator on the head using a silver coloured Japanese gasket cement made by Michel, bought from Ebay. A word of warning when replacing the two mounting bolts; I have had to helicoil these threads on XL250 engines twice before (not stripped by me), so don't get carried away with the tightening, you risk stripping the thread in the head and it is a sod to repair in situ, requiring a helicoil set, right angled drill, stubby drillbit and some cursing.
Later....
So, today I started the bike again and it ran for half and hour, and when it was hot I adjusted the slow running so it only spat back every now and again through the carb, and all seemed good. However it was still popping in the silencer/muffler, with no air leaks visible, so I followed normal practice and advanced the ignition a couple of degrees, (this is to give the fuel a little more time to burn in the engine and not in the exhaust/muffler), and I checked the points gap which needed a small adjustment as it was wider than a 0.15 feeler guage.
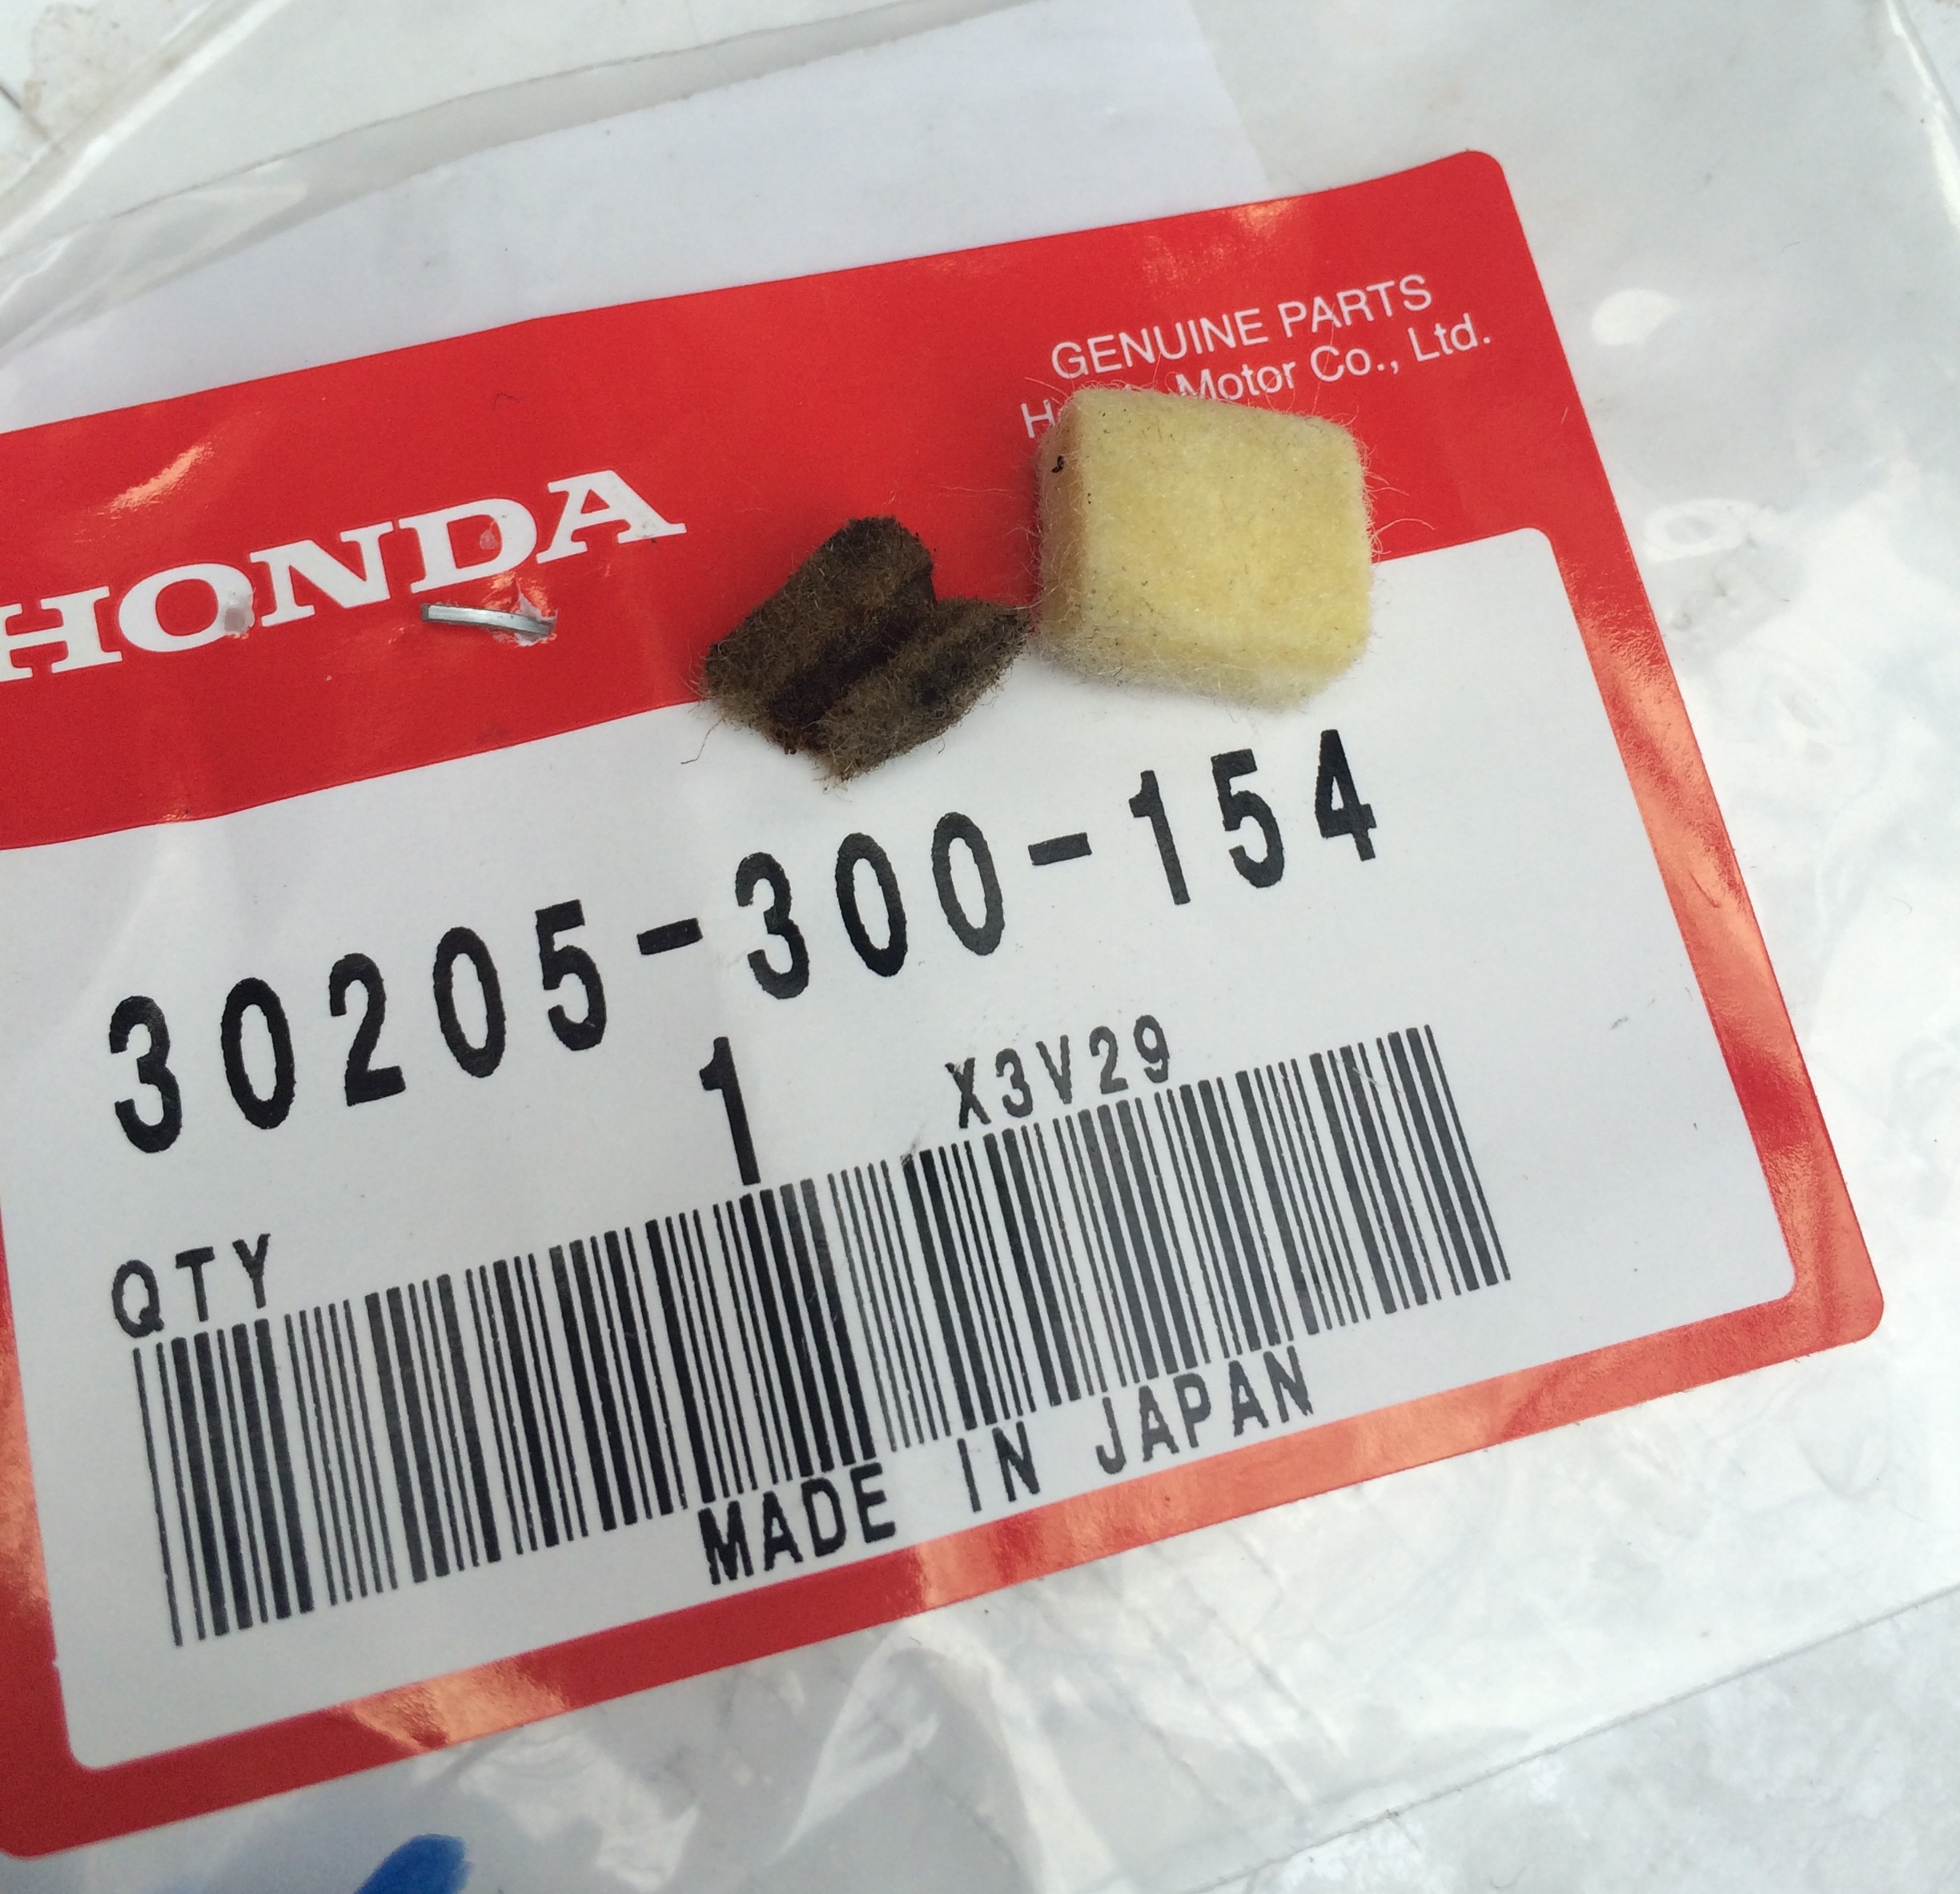
I also fitted the new oil felt for the points cam, and oiled it. Here is the old and new - spot the difference!
As soon as I turned the fuel back on it pissed out of the carb overflow, so that made things inconvenient. Would it start? 'No, it would not'. I have pulled the carb and will fit a new float valve tomorrow.
Sometimes these silly things can make a person tetchy, (irritable, irascible, peevish, crotchety, cantankerous, cross, fractious, disagreeable, pettish, crabbed, crabby, waspish, prickly, testy, peppery, impatient, grumpy, bad-tempered, ill-tempered, ill-natured, ill-humoured, touchy, scratchy, volatile, crusty, dyspeptic, splenetic, short-tempered, hot-tempered, quick-tempered) but not me, no sir.
I have changed the float valve for a new one and fitted the new 115 main jet I got for the other carb, I'll put the old 115 jet in that one. I double checked the float level is correct and yes, it is. I may refit the carb tonight.
I fitted the carb today. Overnight I dipped the clamp ring with 2 coats of plasti-coat to narrow it and make it a snugger fit. I also fitted a new m5 screw to it as the original was chewed somewhat.
When last kicking the bike over, the kickstart slipped twice, which hurts, so I have ordered a new kickstart pawl, wear on this part (28252-356-000) being the most likely culprit.
When it arrives I will fit it when I get a minute or two and tell you how it goes.
Later that week...
Meanwhile today I had another quick look at the bike. First thing was to fit a cheap inline filter on the fuel supply from the remote workshop tank. I'd noticed that the fuel left in the line for a day or two was discoloured, and looked like piss. Straight away the filter picked up many tiny bits of black rubber where the fuel is eating away the inside of the fuel hose (which is 7ft long) I clearly need to replace it, so have ordered some clear reinforced PVC tube.
 but after overnight in the pipe
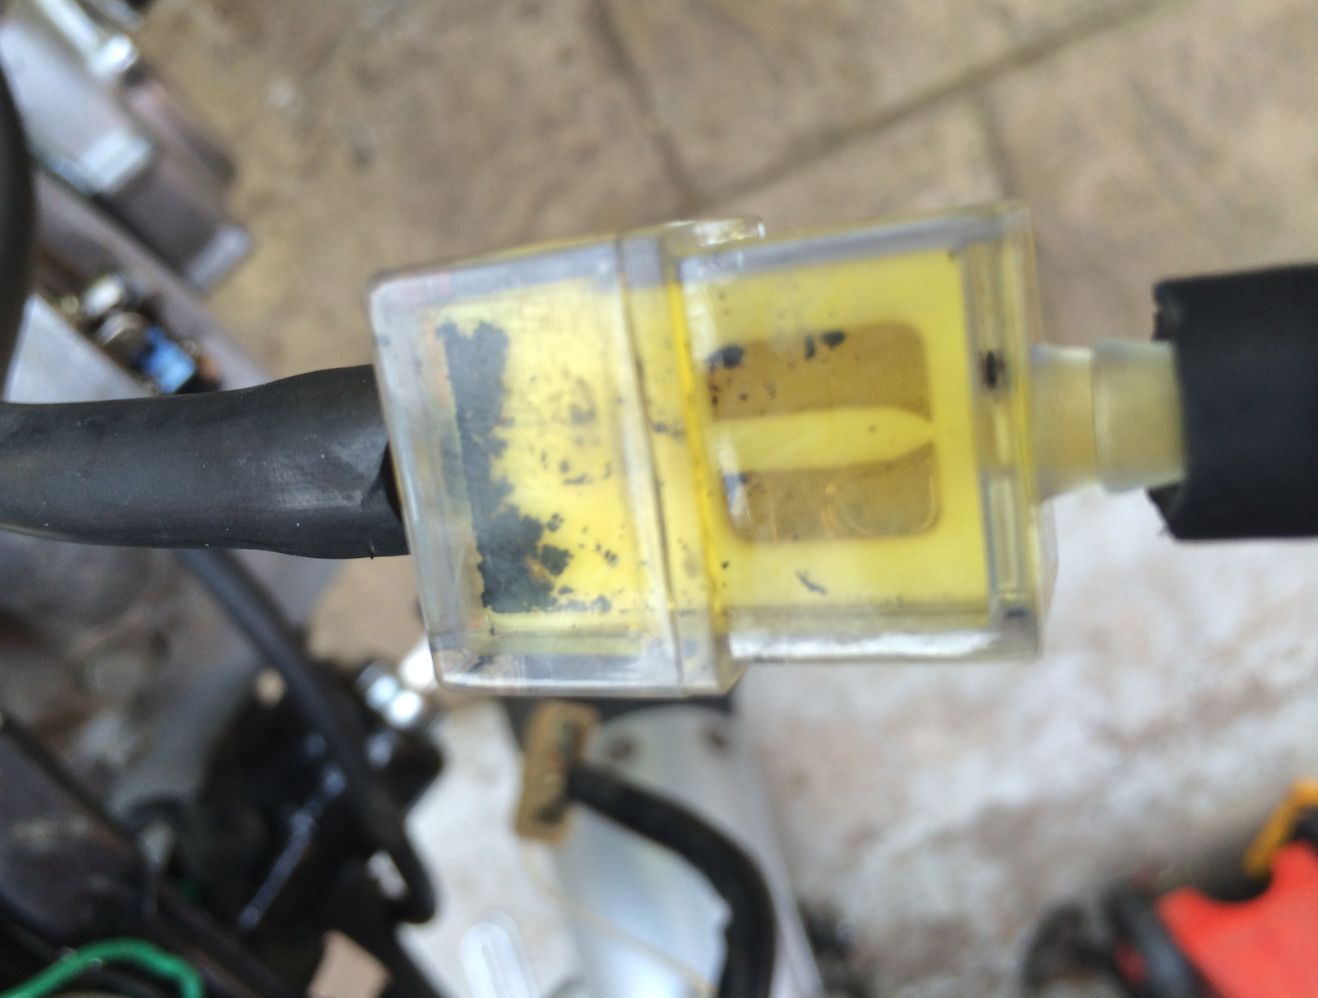
Next I started the engine, and it ran quite well, no spitting etc, (and the kickstart ratchet didn't slip) so I was pleased until I realised that the choke was still half on. When I pushed it off, we went back to spitting in the carb and banging in the silencer/muffler. This indicates the mix is too lean. I partially taped up the air filter with PVC tape to reduce the open area, that was a bit better then fuel started to piss out of the carb overflow in spite of a brand new float valve. I wonder if it is to do with the perishing fuel hose and some of those bits possibly stopping the valve from seating?? I may also drop the needle. It is getting a little wearying!
Next day I had a bit more time... I ran the bike and it was all over the place. I played around for a bit then by chance noticed that the Honda supressor cap was arcing half way down it's length to the head with a bright white spark jumping to ground. I only saw this by looking straight down the plug, bearing in mind I have not got the tank on but am using a remote tank. I put a new NGK one that came with a coil from Thailand on, and the engine misfire with much banging in the silencer box, and the white exhaust smoke disappeared.
Fired up with this small success, I took the carb off (again) and stripped it, and retrieved a broken very stuck 'O' ring from the pilot screw with a sharpened and bent piece of welding wire. This took a while.
I fitted a new 'screw set A' (part no 16016-385-680) with new spring washer and tiny 'O' ring.

I reset the float valve by bending the tab after doing the old test of blowing down a short piece of fuel pipe connected to the fuel in whilst manually moving the floats up and down to confirm that the valve does indeed seal when the floats are up.
I pulled the slow running jet and it was clogged somewhere along the main hole through the middle, so spent some time with a fine wire until it was indeed clear. The best wire to use is an electric guitar string, a 2nd or 3rd are good. The same went for the left hand bleed hole at the intake side which was also blocked. This needed a fine needle drill between my finger and thumb to clear it but presto! it did clear! I checked the main jet was clean and clear. Needle is still at position 4. The slow jet (middle one in the picture) size #45 below has to be pulled out with pliars. Don't run a drill up it, it has holes wider both ends but has a smaller hole down the centre! Main jet is #115
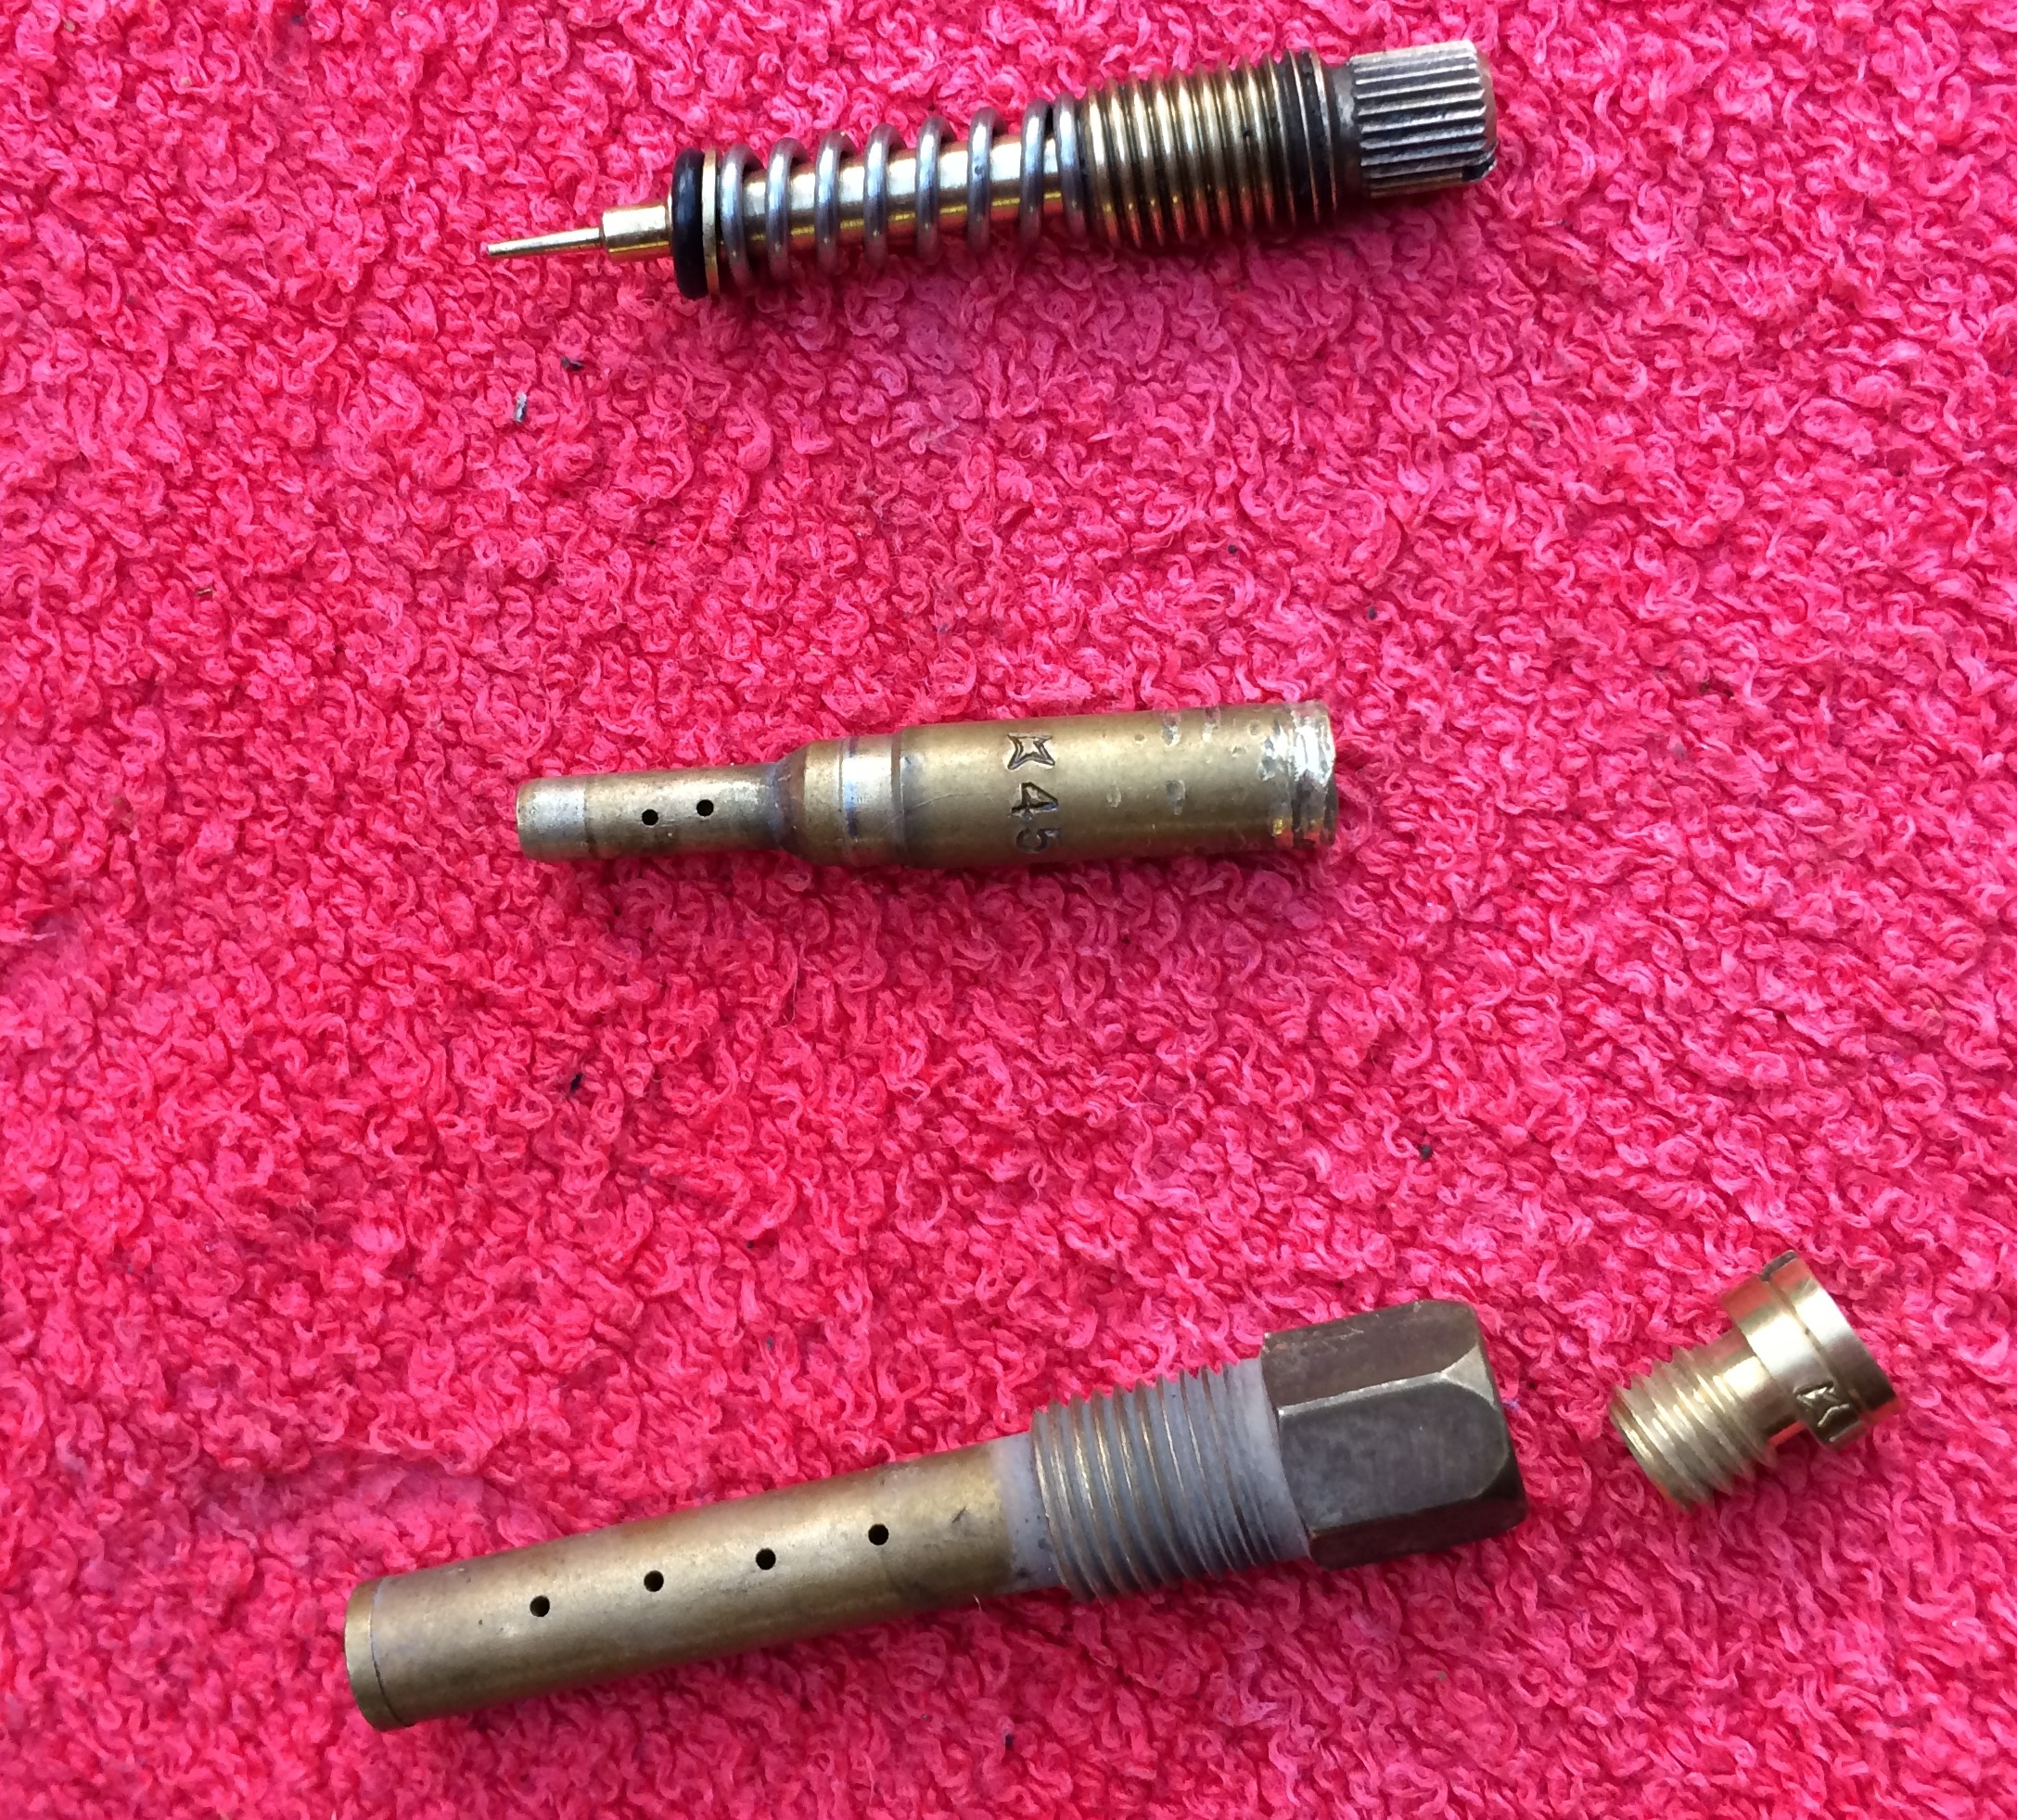
the left one of the air bleed holes in this picture below was blocked too.

So far so good. I put it back together and it started easily.....and ticked over much better....but would NOT rev.
Hmm. Just to be sure, I re-timed the engine to the 'F' (for fire) mark, making sure to take up the slack in the timing chain, by rotating backwards then forwards. Timing is spot on. So is the points gap. It still starts...ticks over nicely ...but won't rev. Not at all. So I gave up for now. I need a bath and I smell of petrol/gas and disappointment.
Next day:
I had another go today. Started with the carb, stripped every part, cleaned, checked, blew it out with the airline. I checked the float level again. It might as well be a new carb. Refitted it and started the bike. Made no difference; it ticked over but didn't rev.
Next came the turn of the tappets, and found one inlet with next to no clearance... I remember my Dad saying 'a noisy tappet is a happy tappet' so I gave it a gap, by feel not feeler guage.
Next I checked the spark and it wasn't there not even with the door shut and the lights all off (my bike garage has no window) so I checked all the coil wiring , and points again. I found they were gapped wrongly, by me yesterday. The feeler guages I used yesterday are marked in both millimeters and inches, and I had read the wrong one so set the gap right and now we have a nice blue fat spark once again.
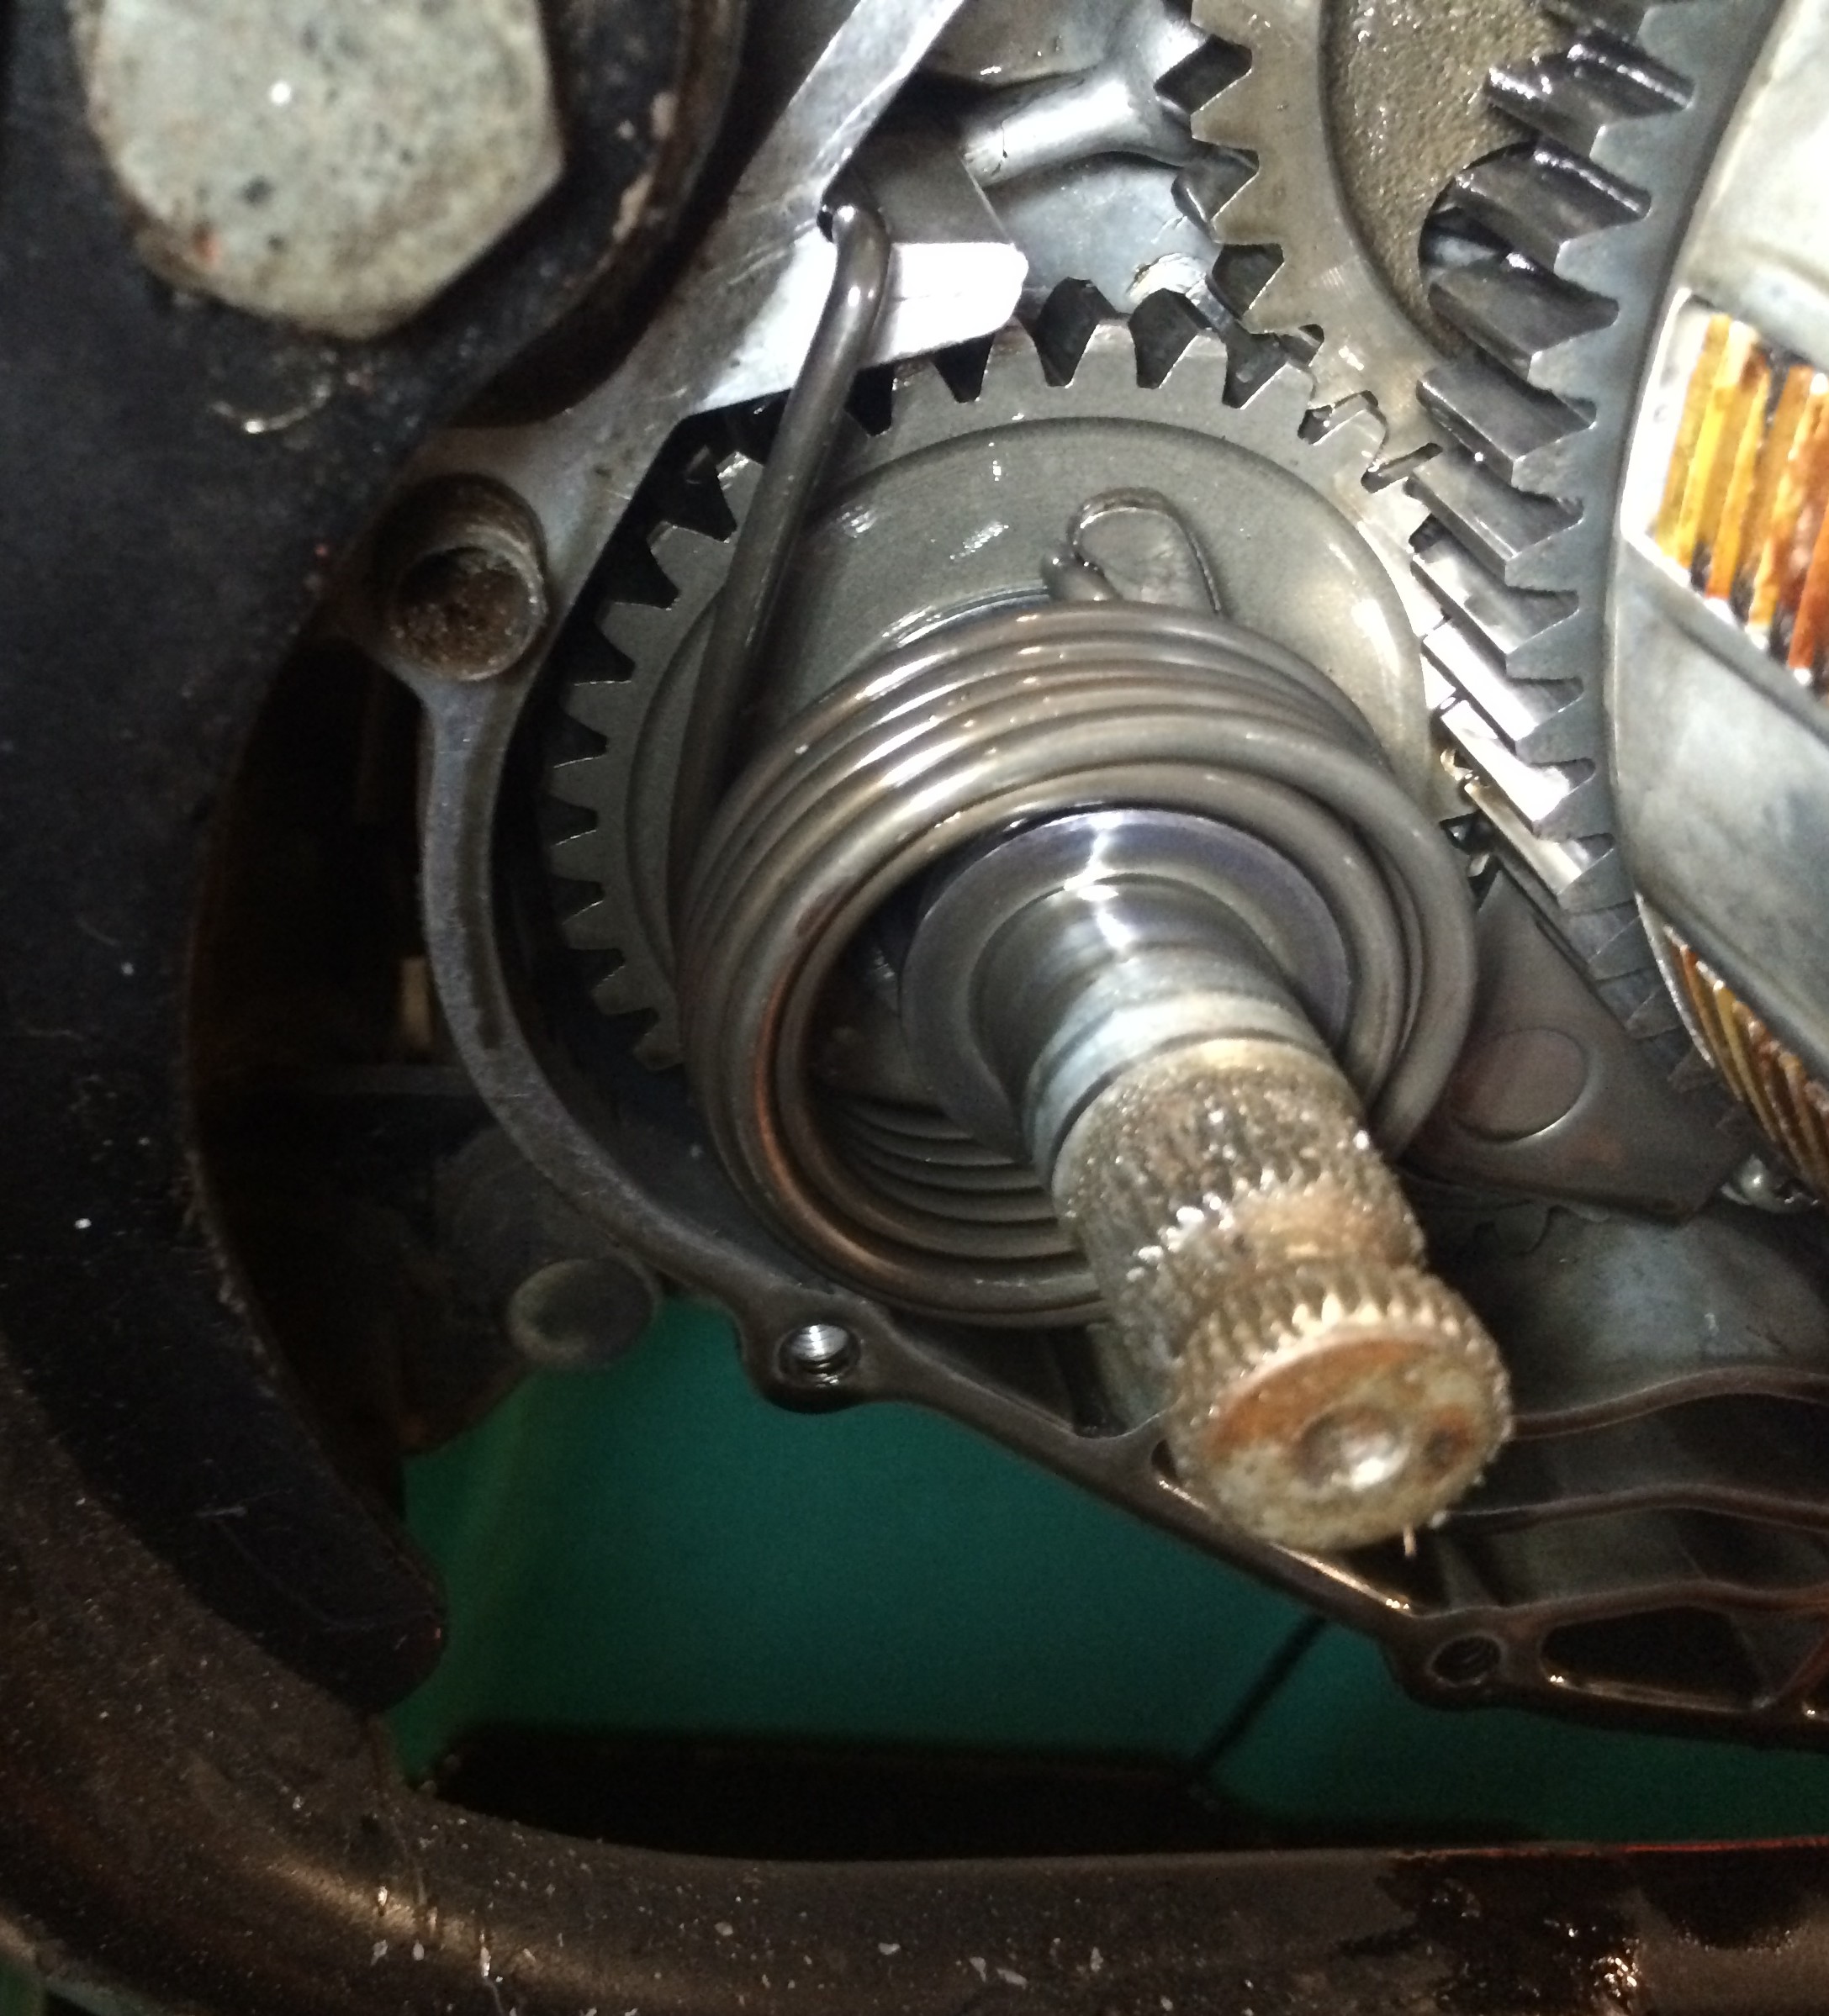
Then I reset the timing again. (note: disconnect the thin wire (low tension) to the coil when doing this or else the light bulb will give a false reading and be on all the time). I also removed the points plate and checked the free movement of the auto advance mechanism and light oiled it, 'for the elimination of doubt'.
Then I started it and it ticked over and revved!!!
I warmed it up and then set the slow running by turning it fully in then out until I got the fastest tickover speed, then dropped the tickover down with the tickover screw. This was about 1+3/4 turns out. The tickover is supposed to be 1200 rpm, but this bike has no tachometer so I guessed it.
Deeper and deeper.....
This was what I found on the filter when I opened it up!! It seems it has been doing it's job very well for some considerable time. Remember this is only as big as half a finger, and it's the only oil filter on the bike. In spite of the manual, I think I'd drain the oil first.
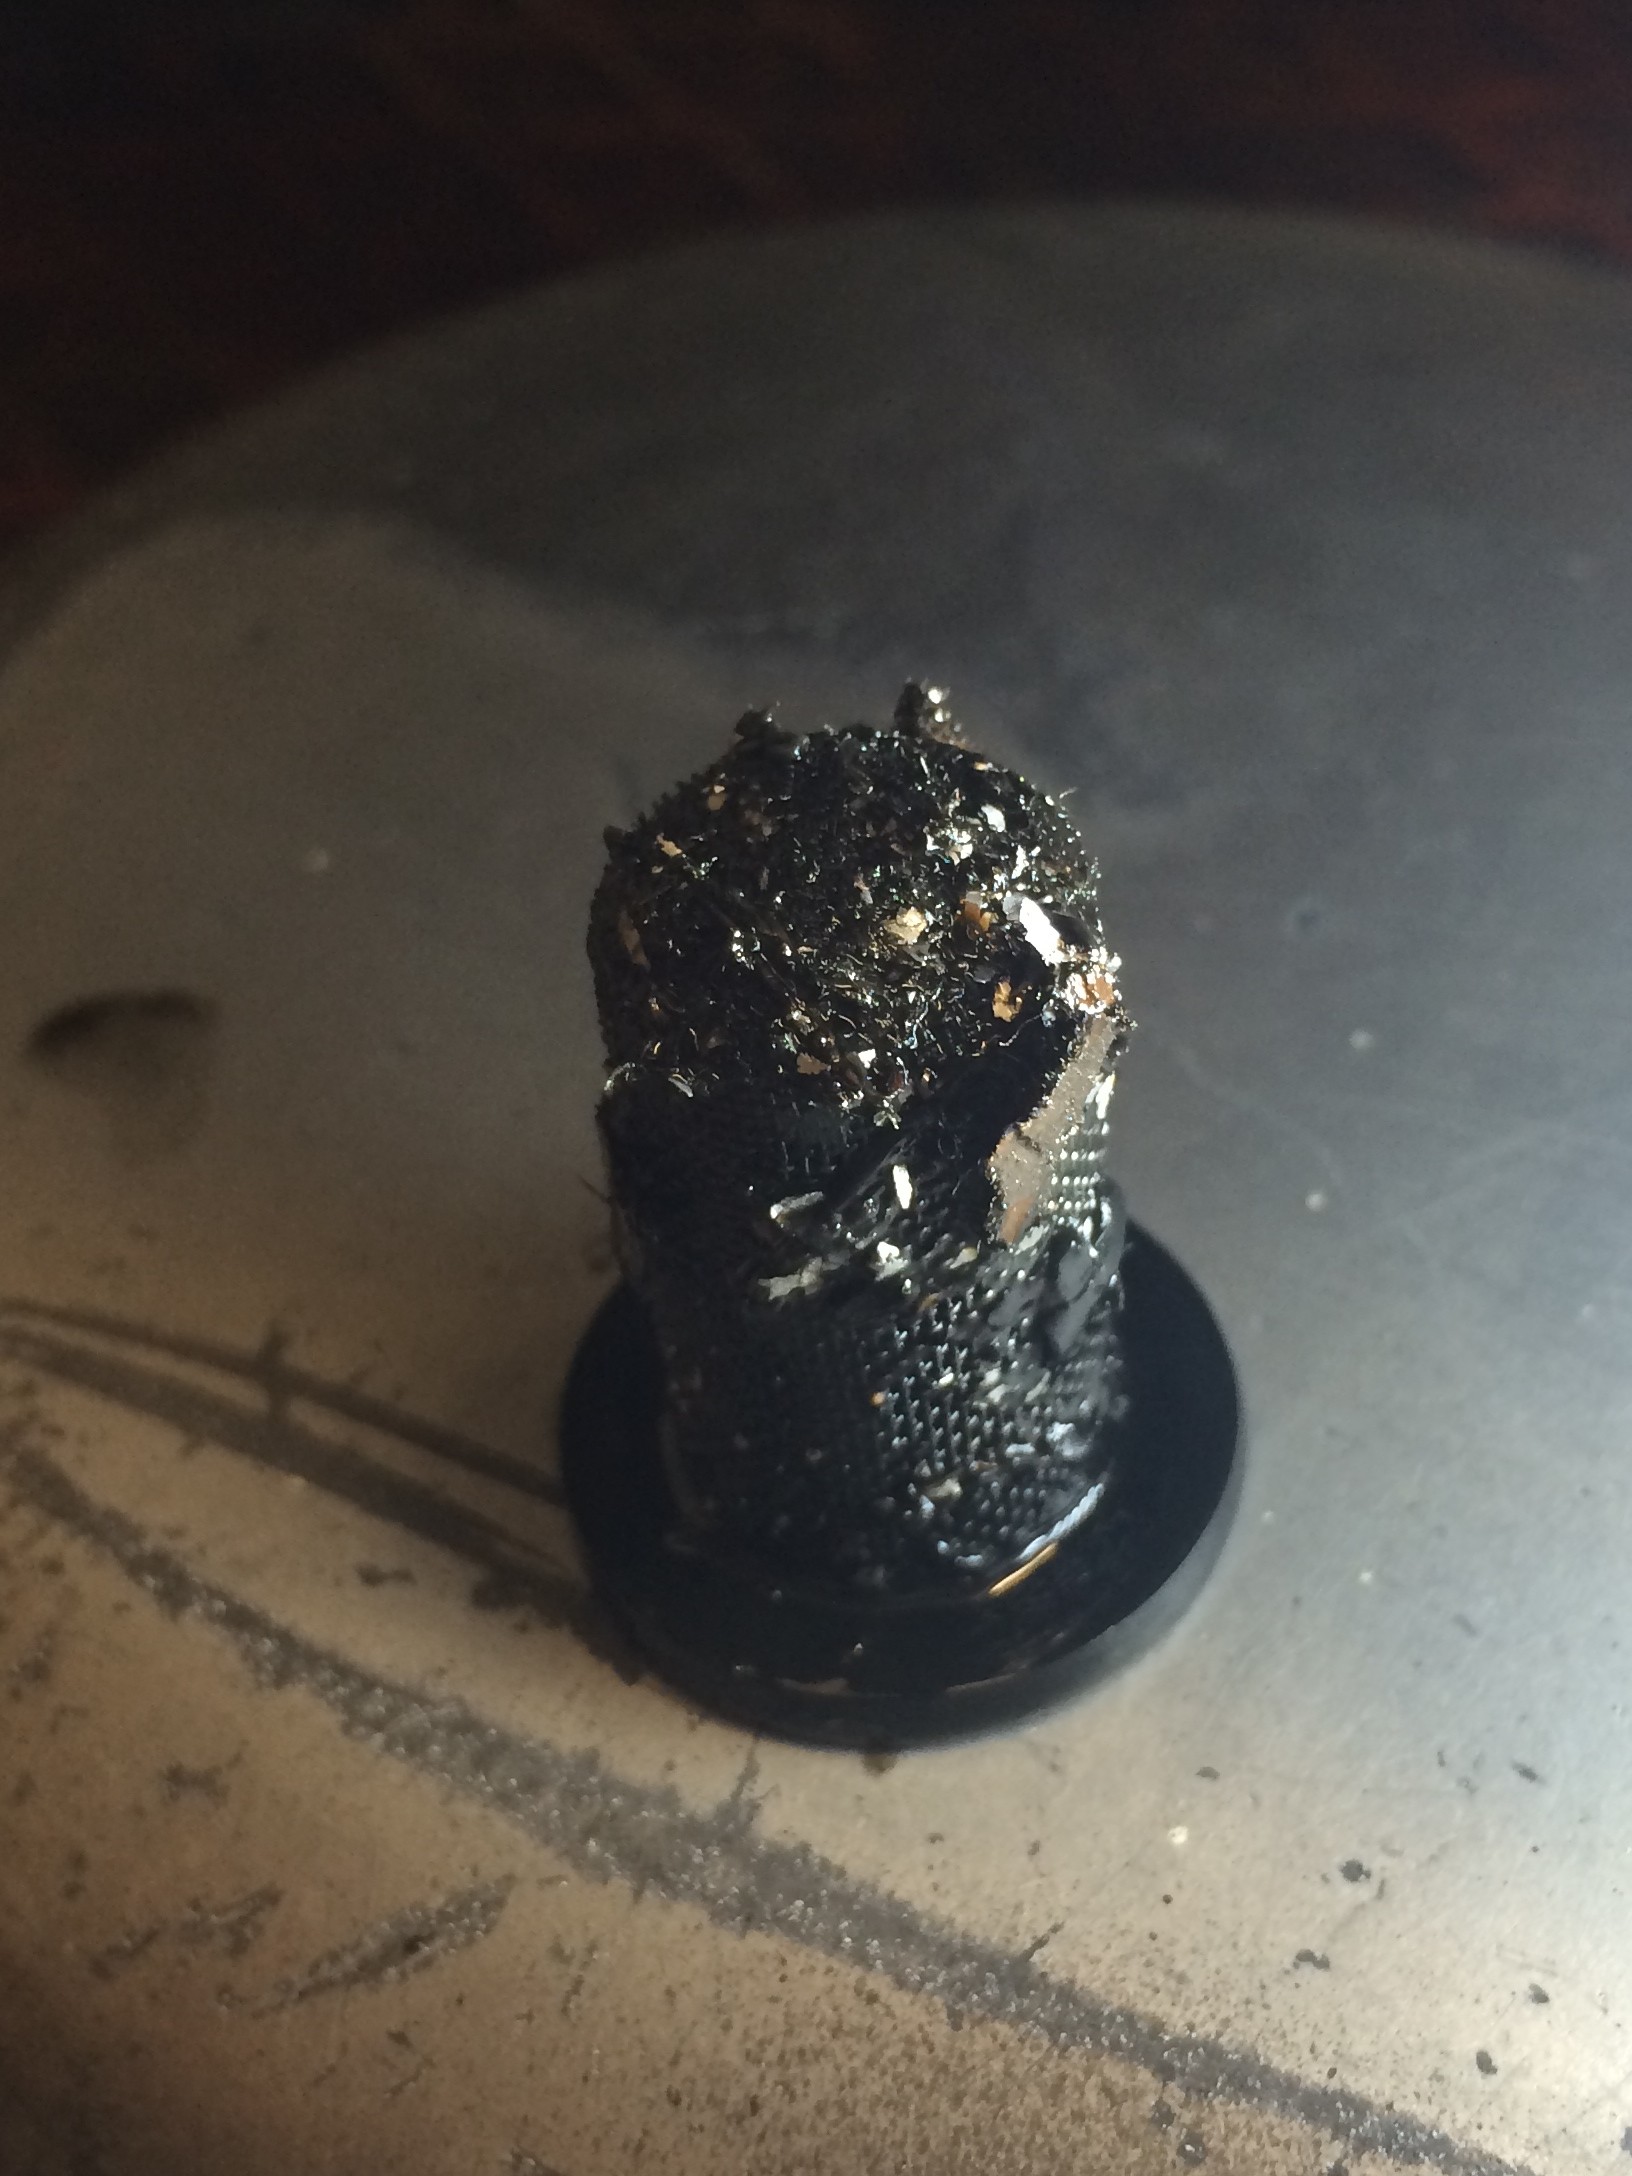

Oil change is 1.9 litres of 10-40w or 10-30w engine oil, according to Honda, although it says 10-30W on the top of the dipstick. Engine oil is cheap. After finding this crap, I also fitted a magnetic drain plug!
This next picture of a 'similar but worse' one sent to me by a correspondent in Ireland.....
Changing the XL350 Kickstart Pawl
I stripped the kickstart mechanism out today, because the kickstart slipped once today when I started it up; the existing pawl and gear were in fact in very nice condition. However since I was that deep in, I put a brand new pawl in anyway and saved the old one. I had to go out to the local motor store and get some engine oil, since the old oil was like thin black paint. In the meantime I tidied up the worn cover with some alloy wheel silver and a coat of laquer. I will also fit a new kickstart oil seal when the paint is dry.
The order of work when changing the kickstart pawl was to first drain the engine oil, then slacken off the rear brake cable so the pedal can be pushed down. The next step was to remove the exhaust flange bolts, slacken off the pipe to silencer clamp and remove the pipe which otherwise blocked access to one of the side cover screws.
Next off came the kickstart arm complete. You have to remove the pinch bolt completely.

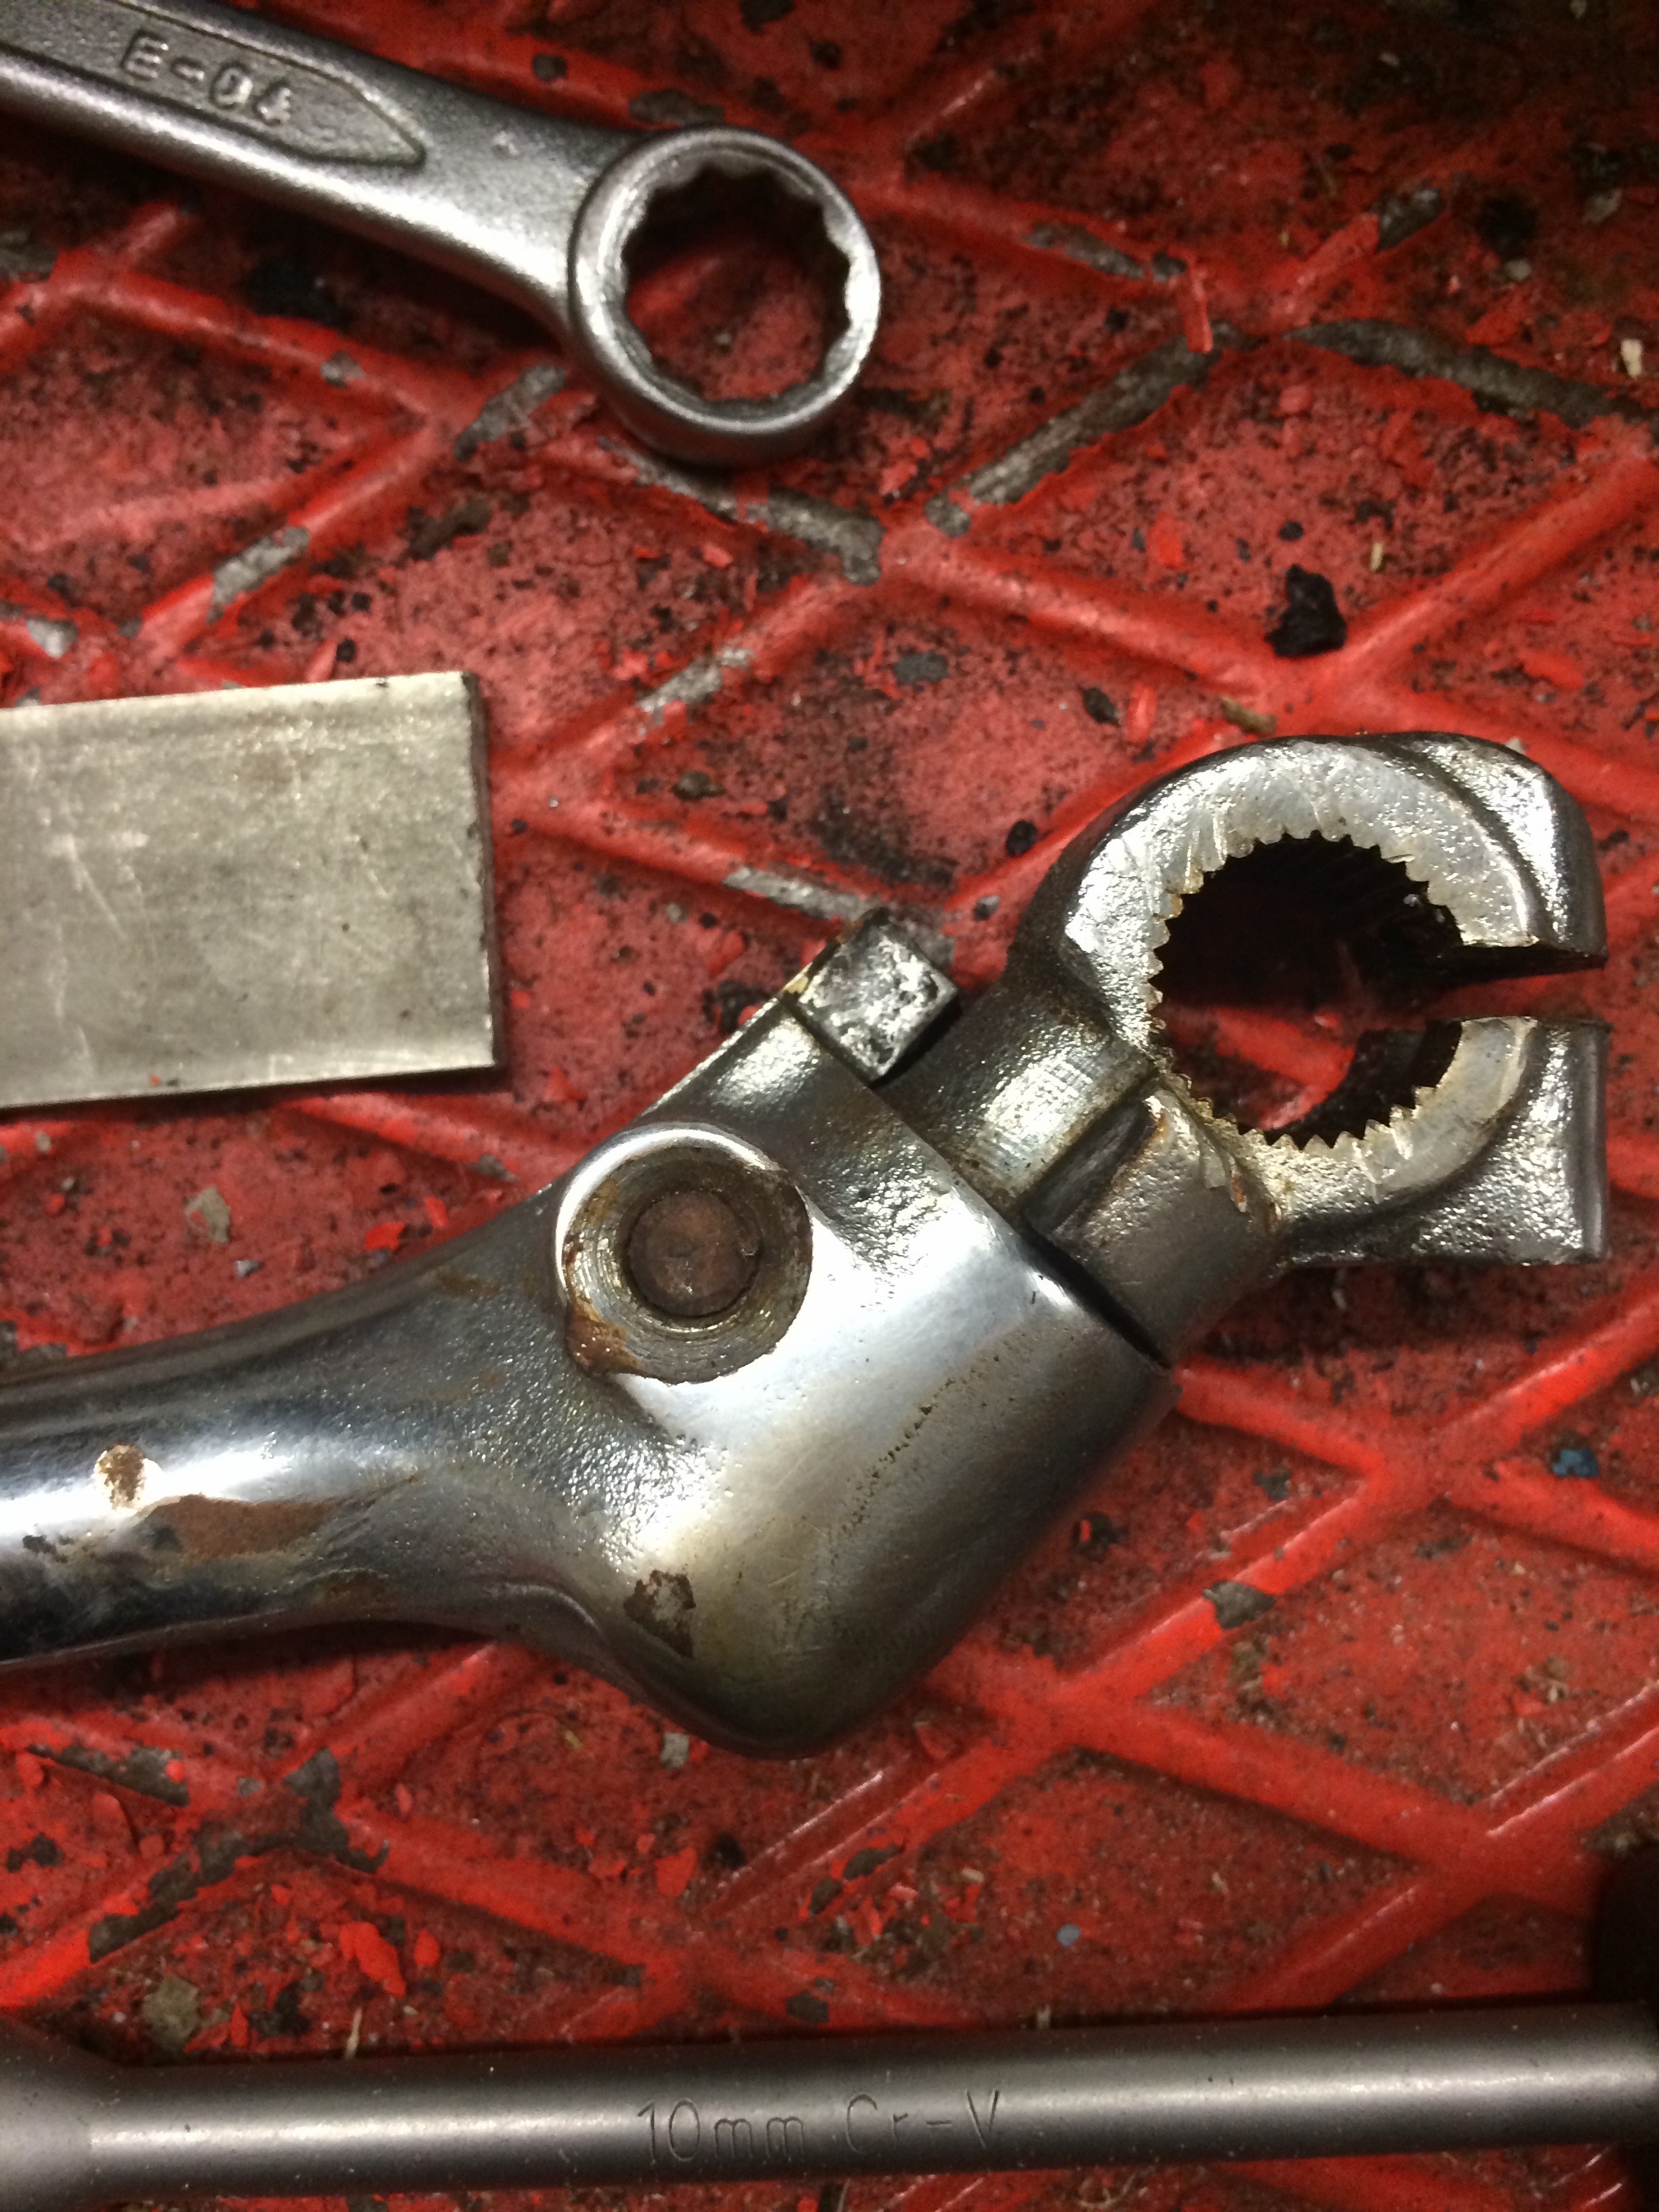
To help prise it off I put an open ended spanner/wrench behind it and levered it off with a big flat bladed screwdriver between the spanner and the arm. The spanner is to protect the seal if it is to be re-used, and to protect the brittle magnesium engine side case. As the gap got bigger, I added another spanner to take up the slack. Next, you slacken off the right hand footrest and drop it down, it doesn't need to come all the way off unless you want it to..
Make sure all the screws are out of the side panel, (there are twelve of them) it is easy to miss one, and then remove it over the splined kickstart shaft.
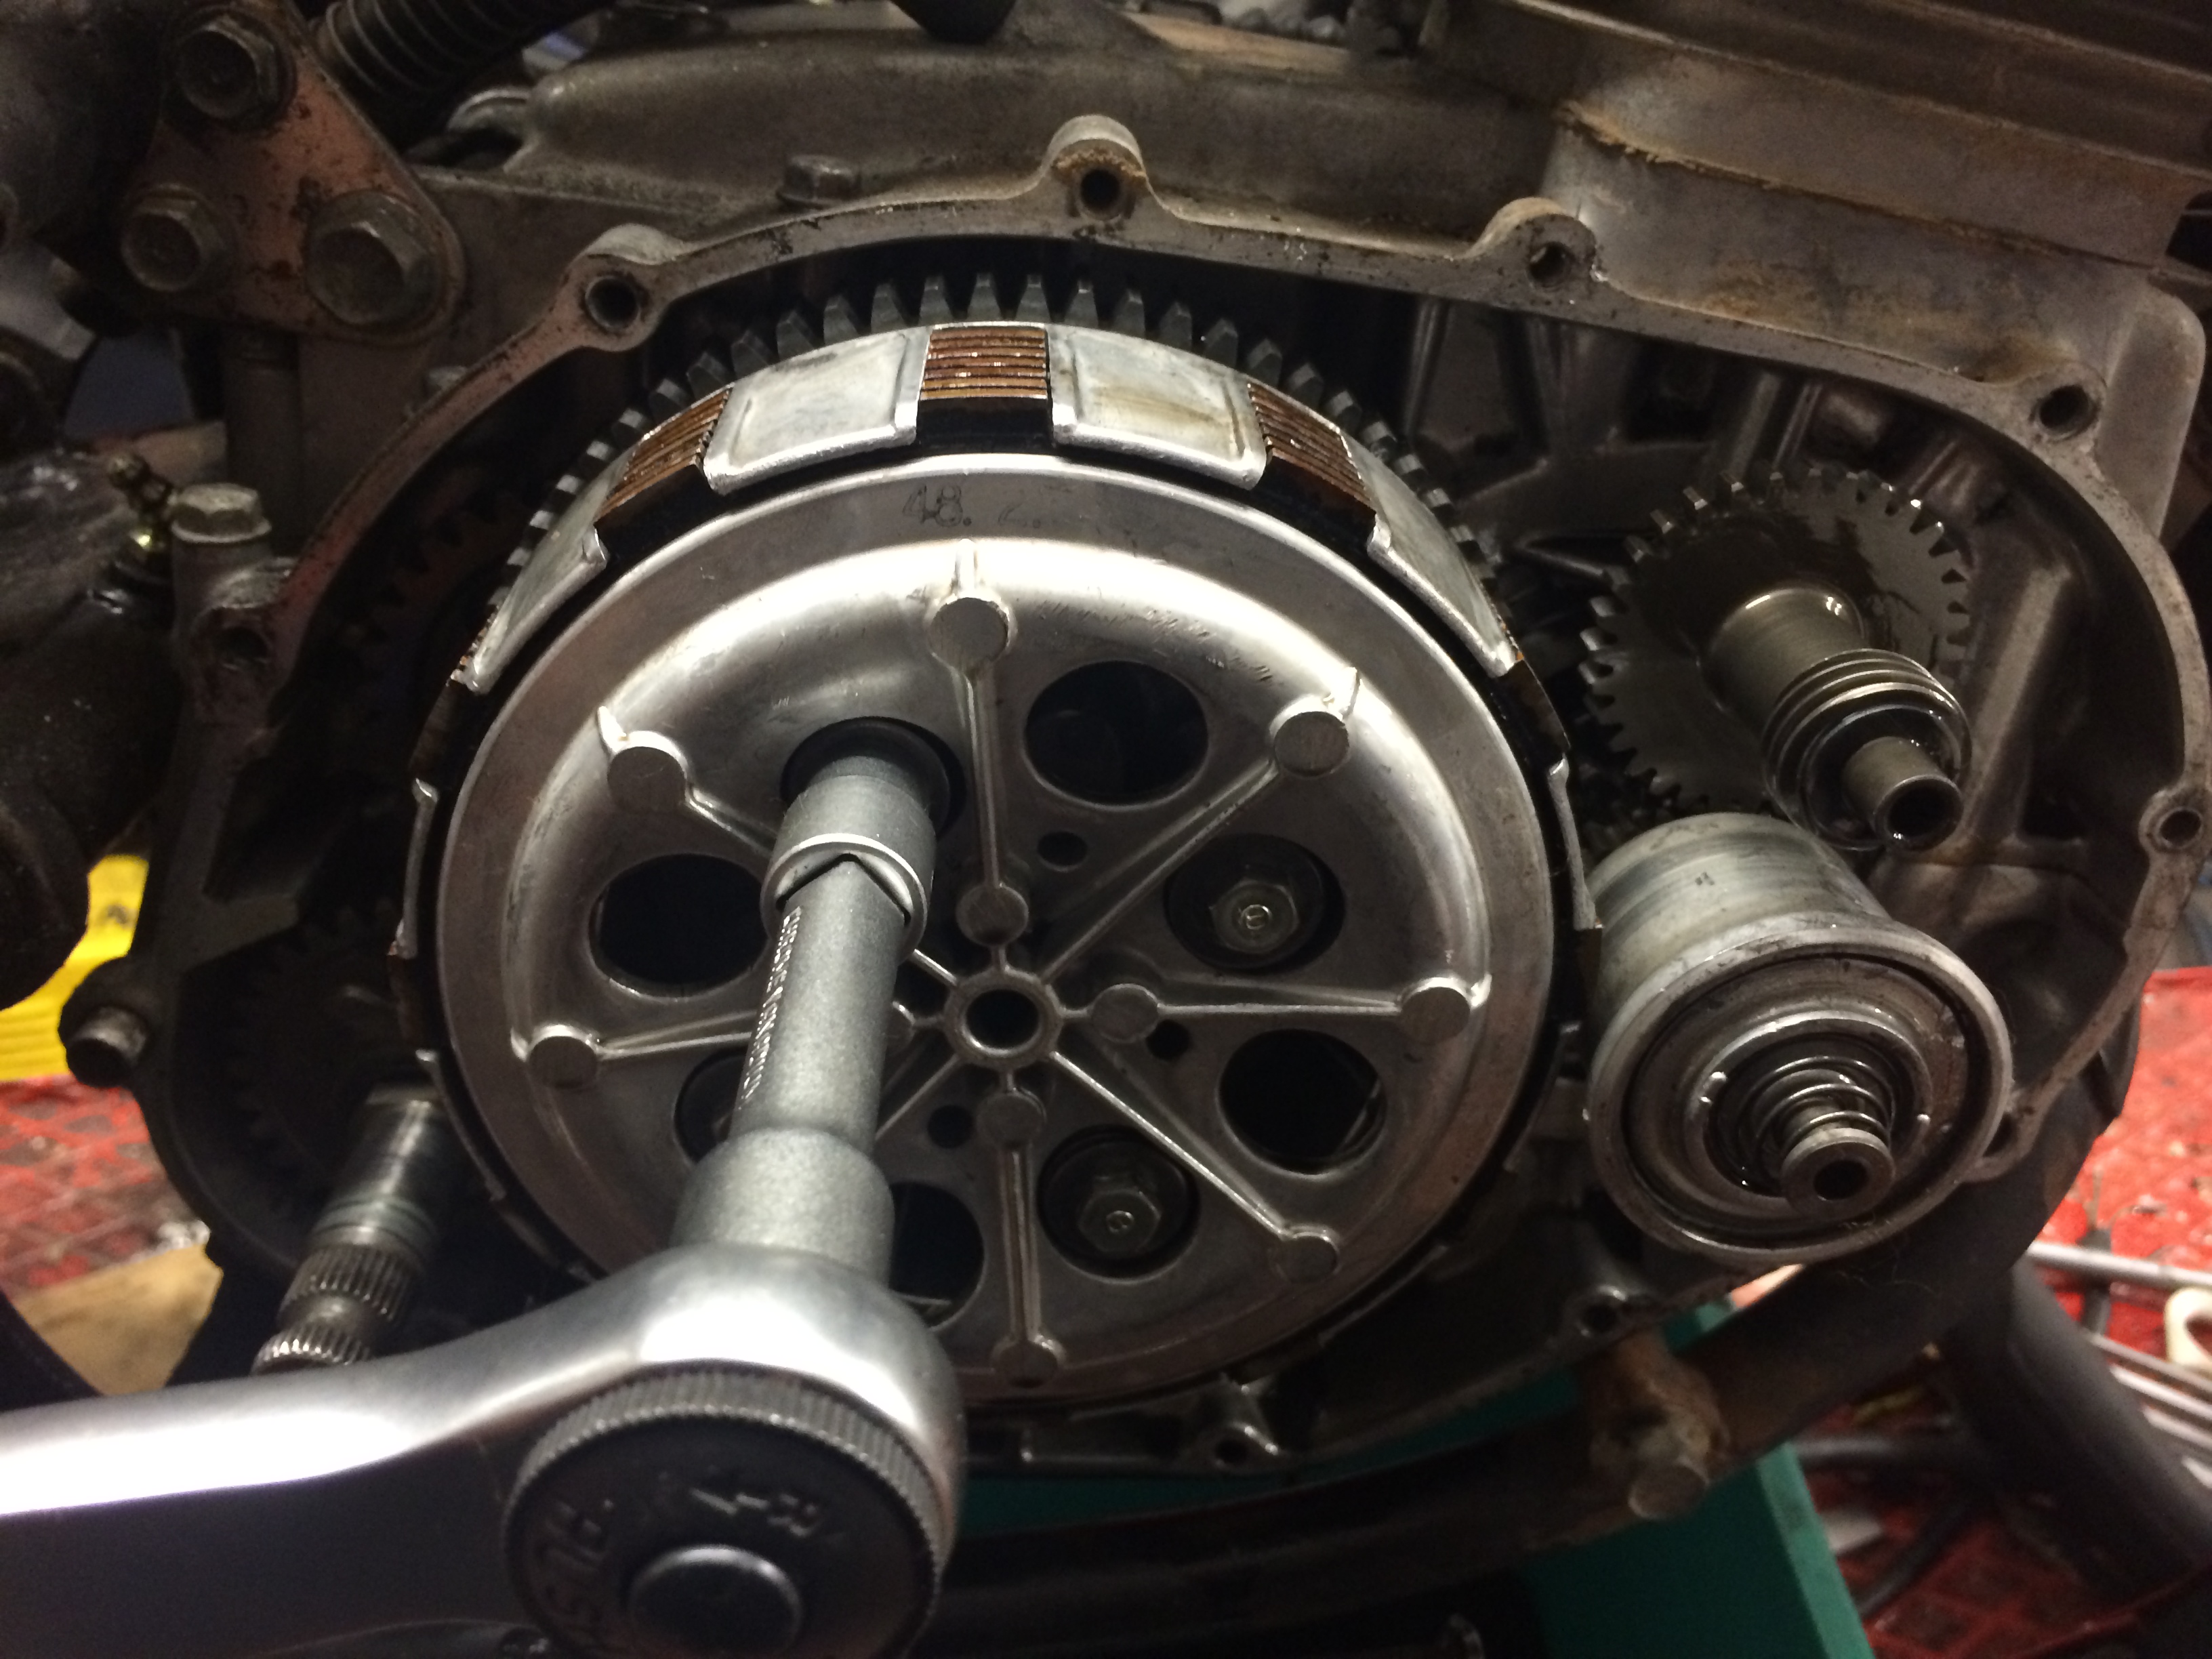
This will reveal the kick start mechanism, and the clutch.
I have not done this particular pawl change job on an XL engine before, and before I did I looked online to see if the clutch had indeed to be removed but I couldn't find any information about it.
The kicker mechanism didn't pull out easily without removing the clutch, and the manual isn't clear, so I removed the four M6 bolts washers and clutch springs, then the clutch outer cover and the inner circlip, and the clutch plates (remembering the order). This gave me the opportunity to examine the friction plates which looked fine. Don't lose the 'mushroom' that goes behind the cover.
Beady eyed readers may spot that the big circlip is missing from the oil pump thrower, as I removed it and cleaned it out and hadn't put it back when I took the above photo.
The clutch basket then pulled off forward, I didn't need to remove it completely, just pull and tip it away from the kickstarter mechanism.
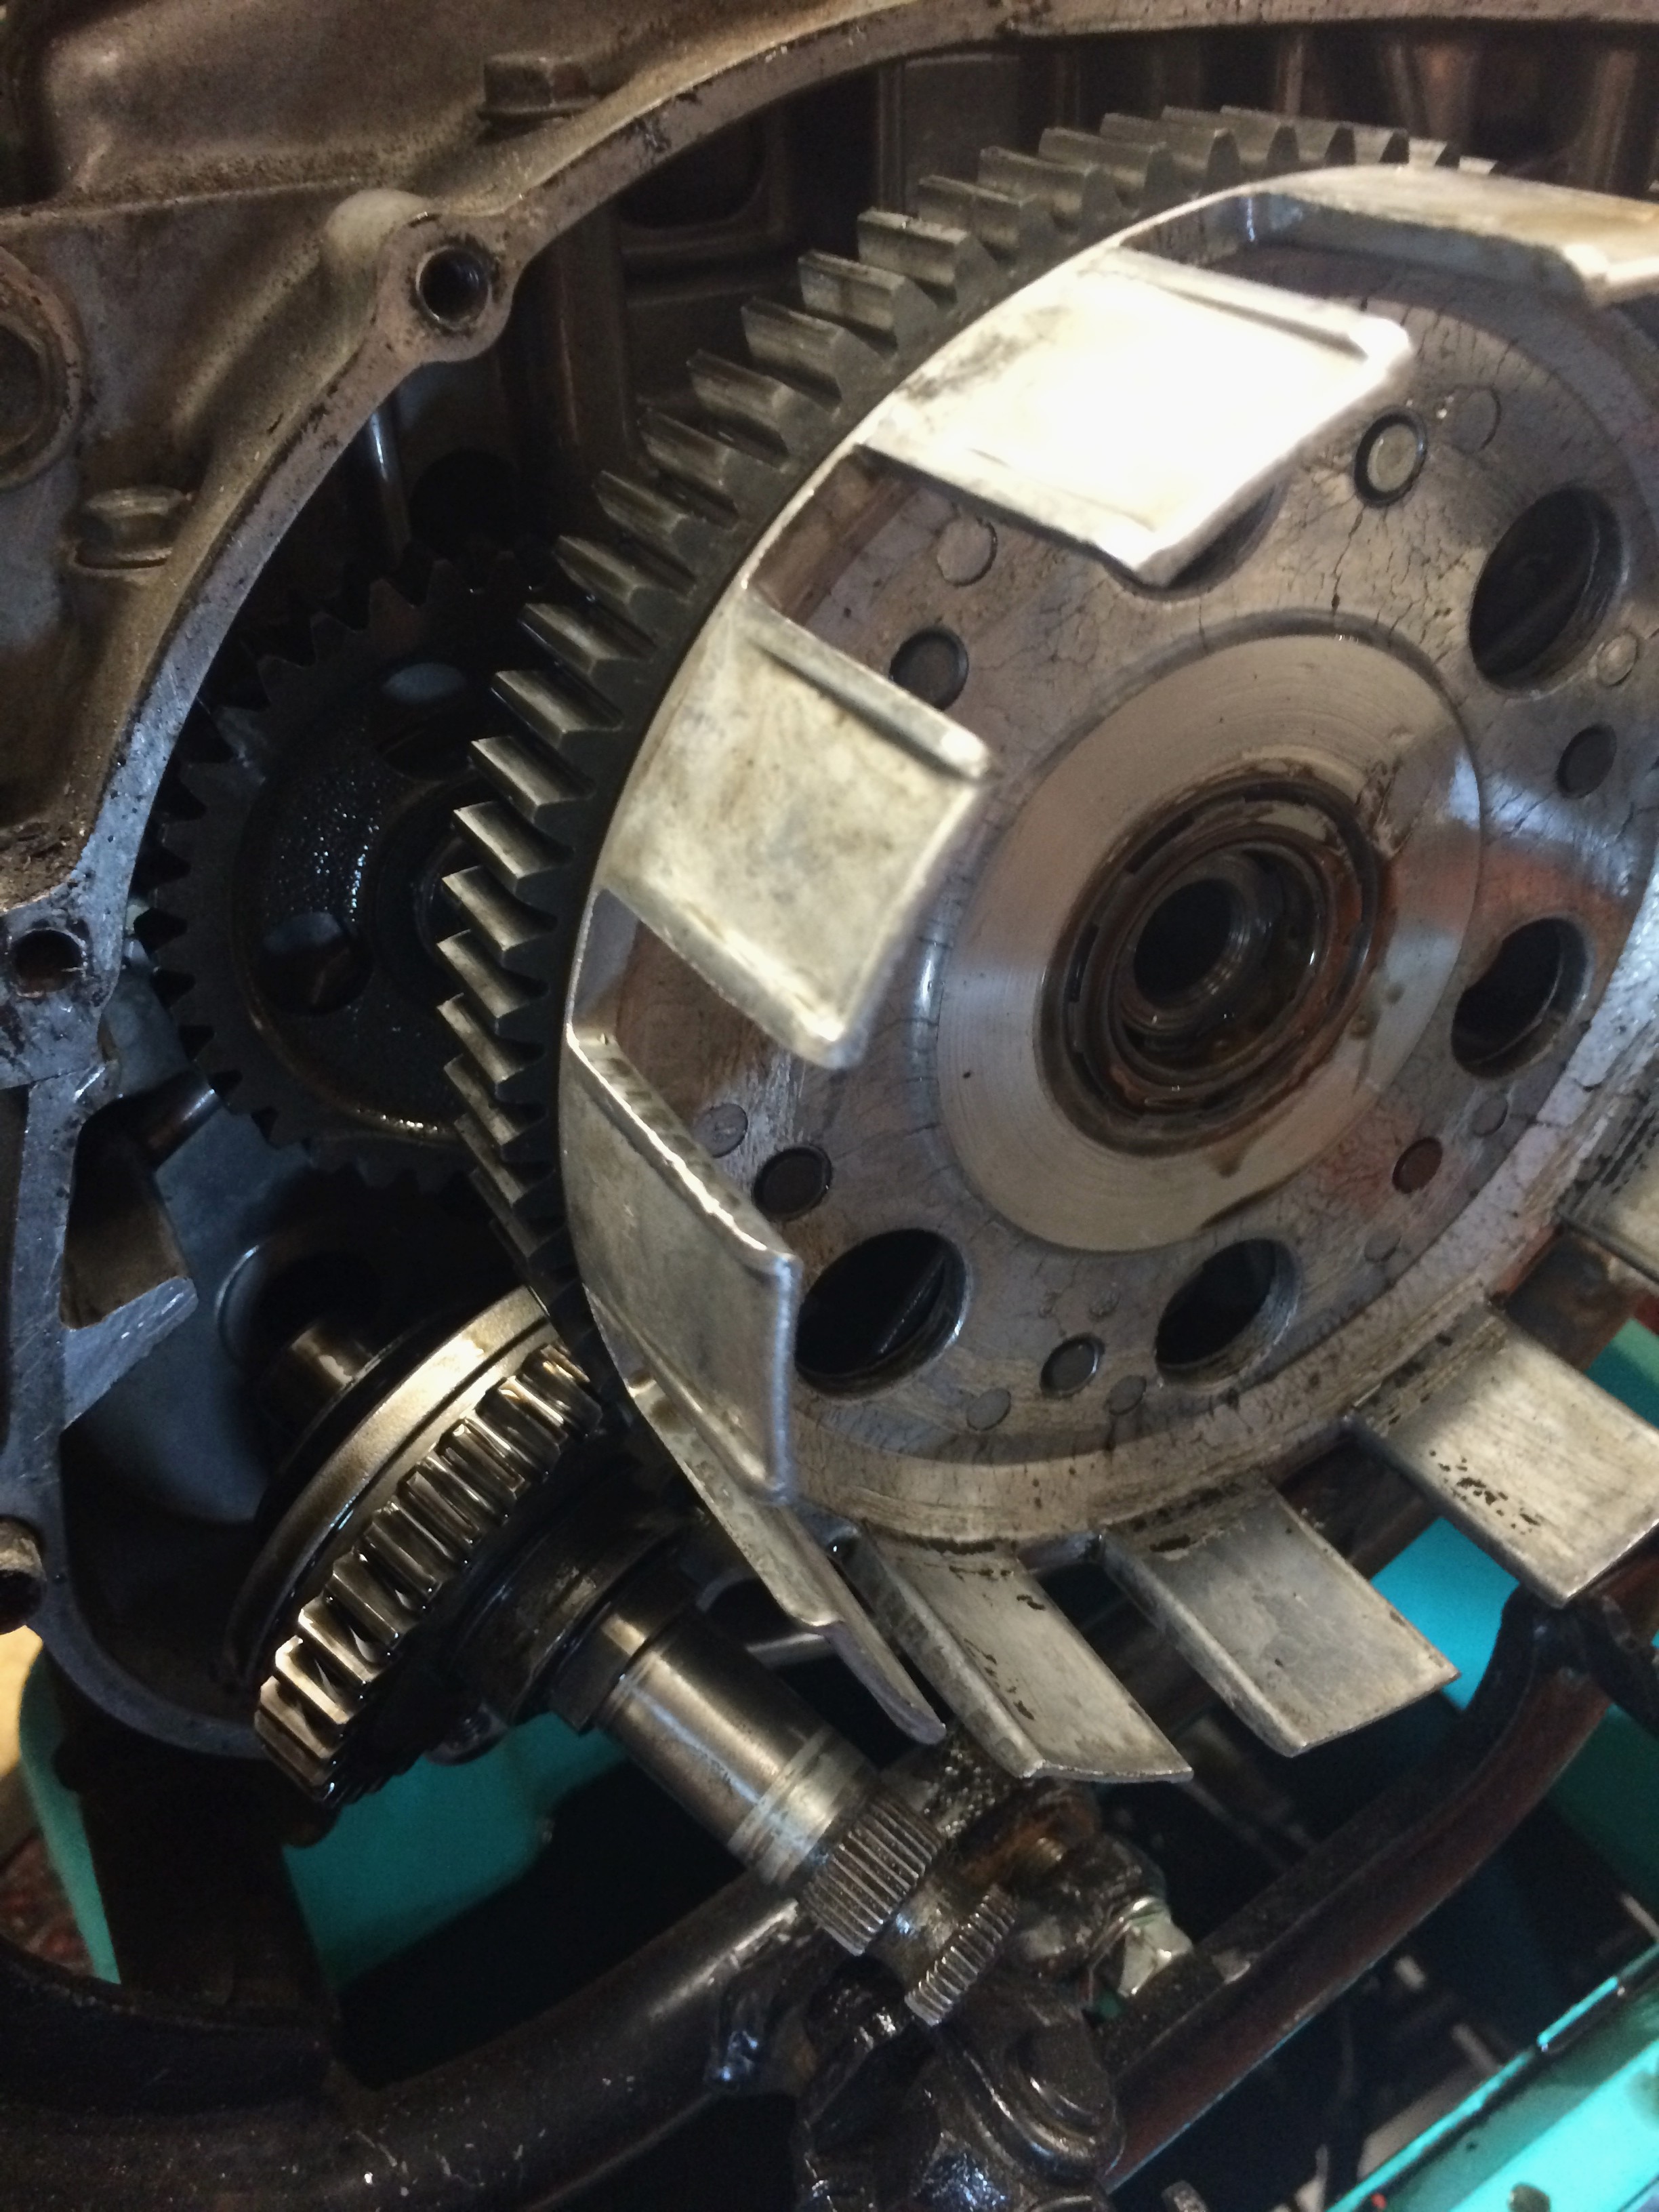
With the mechanism removed, I set aside the return spring, and removed the shaft circlip. This allowed access to the pawl from the rear.

I then flicked the wire clip out of it's hole and groove and swopped the old pawl even though it appeared un-worn for the new one,. I also checked the inner part of the pawl cog for wear or damage but there was none.
Re-assembly is the reverse of the above.
I have not fitted the old kickstart arm I took off as it has the head of the screw (part no. 90101-329-000) sheared off with the threaded part still in it. That is a repair for another day. I have a spare one so I will use that.
I found some nice new JIS head screws the right length in my stock so I treated the case to all new screws with a smear of red grease on the threads to prevent them seizing. Just need to refit the exhaust pipe/header, using the new split flanges that came in from David Silver a few weeks ago.
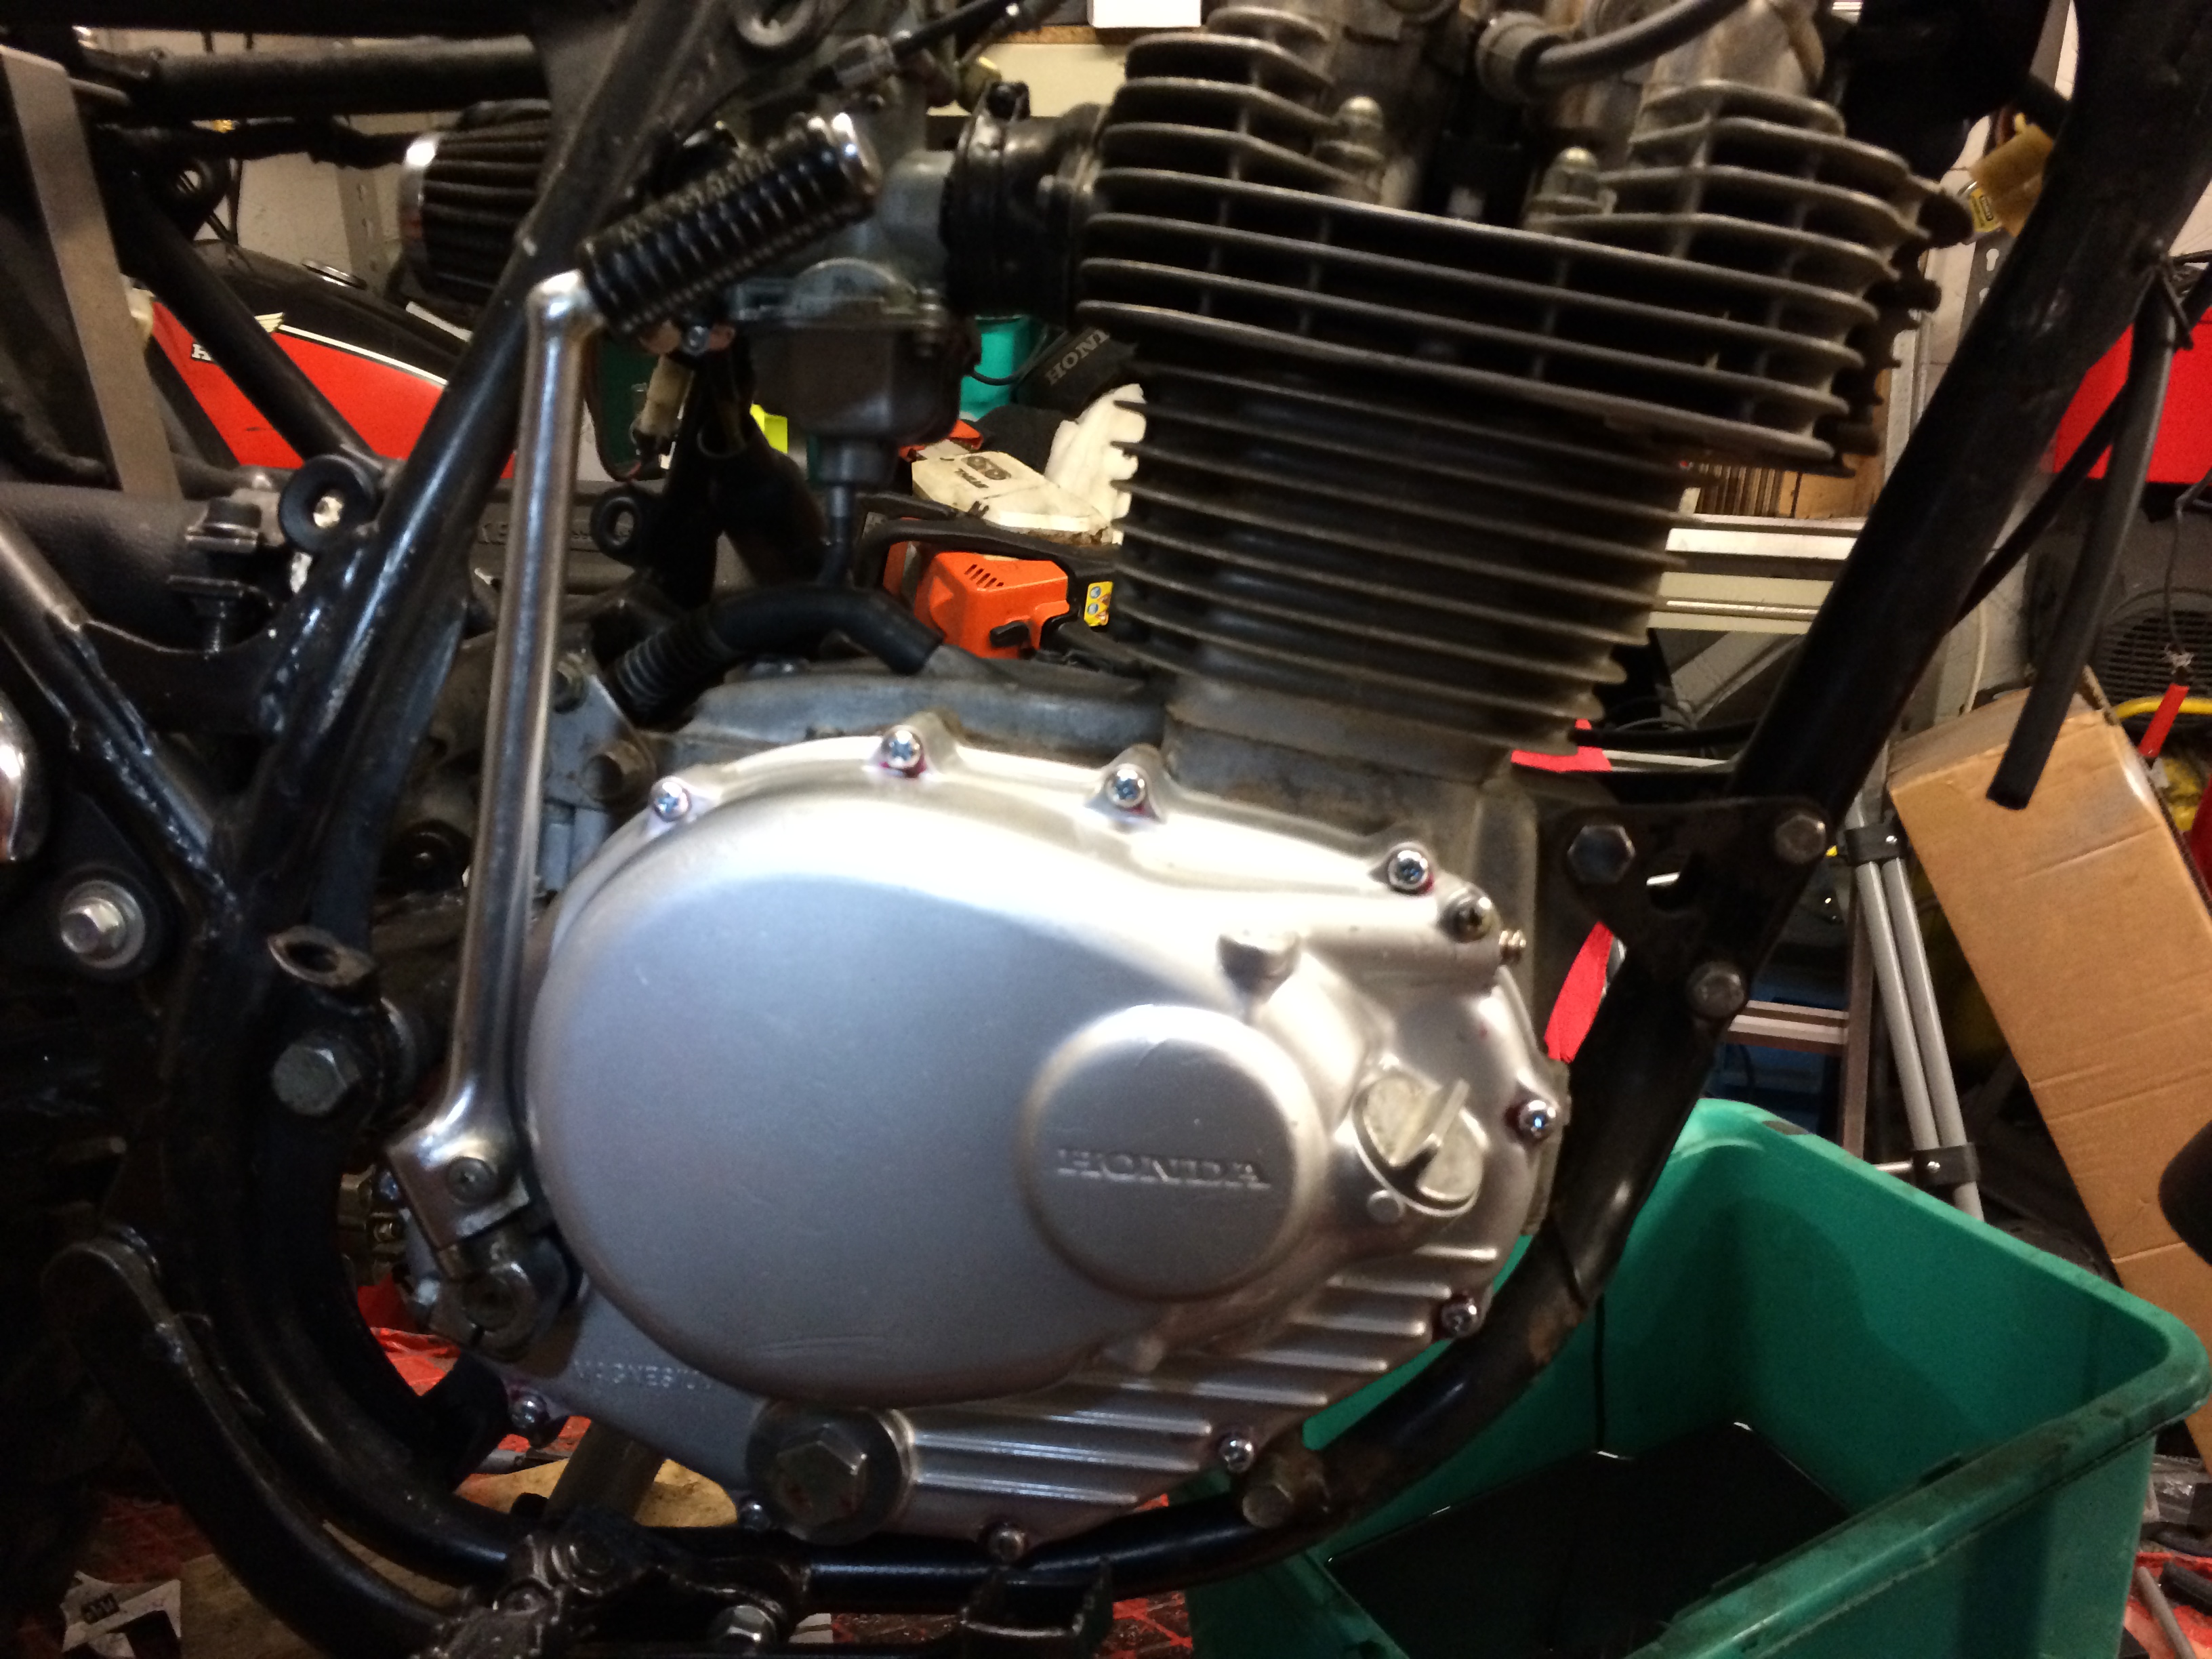
I have been otherwise occupied this weekend, but the exhaust is back on, and the new clear fuel line for the workshop tank fitted, so next week should see some progress towards the MOT test.
I was going to try to get to the autojumble in NEWARK today, but there were 2 problems; firstly the weather forecast was for wind and heavy rain, and secondly in my humble opinion and many of my friends and acquaintances, the £6 (£10 for early admission) entrance fee is really too high for the event. I had hoped that when the new organisers took over they would have improved the event in some way other than introducing newer box offices to take the money faster. It's obviously just a cash cow. End of moan.
I put the tank and side panels on today, and ran it round my garden a few times. It starts and ticks over beautifully, but it's missing again when I try and rev it. I has me a little puzzled......it ran like it did before when the spark plug cap was arcing to the frame; then it started to rain so I put it back away.

When the rain stopped, I went and bought another couple of gallons of fueI, then topped up the temporary tank and had another look.
I removed the seat and the black tank; again, it started and ticked over but wouldn't run.
So I checked the points gap, still OK. I put a new plug in; it wouldn't start at all. So I pulled the plug and blacked out the workshop so it is easier to see the spark. When I kicked the bike there was one spark, then none. No matter how I kicked it no spark.
I tried another plug because I confess I had dropped the first one on the floor, and this can sometimes crack the insulator. Same result, no spark. I disconnected the ignition switch and engine kill switches to simplify matters, and this didn't make any difference, so I will have a check round with a meter later.
Bearing in mind the long list of new parts already fitted, there can't be much left to go wrong. I may however change the generator coils for my spare set in case the problem lies in an intermittent winding providing irregular primary volts to the coil, (though I think that is unlikely), but it would eliminate it from the possible causes.
later....
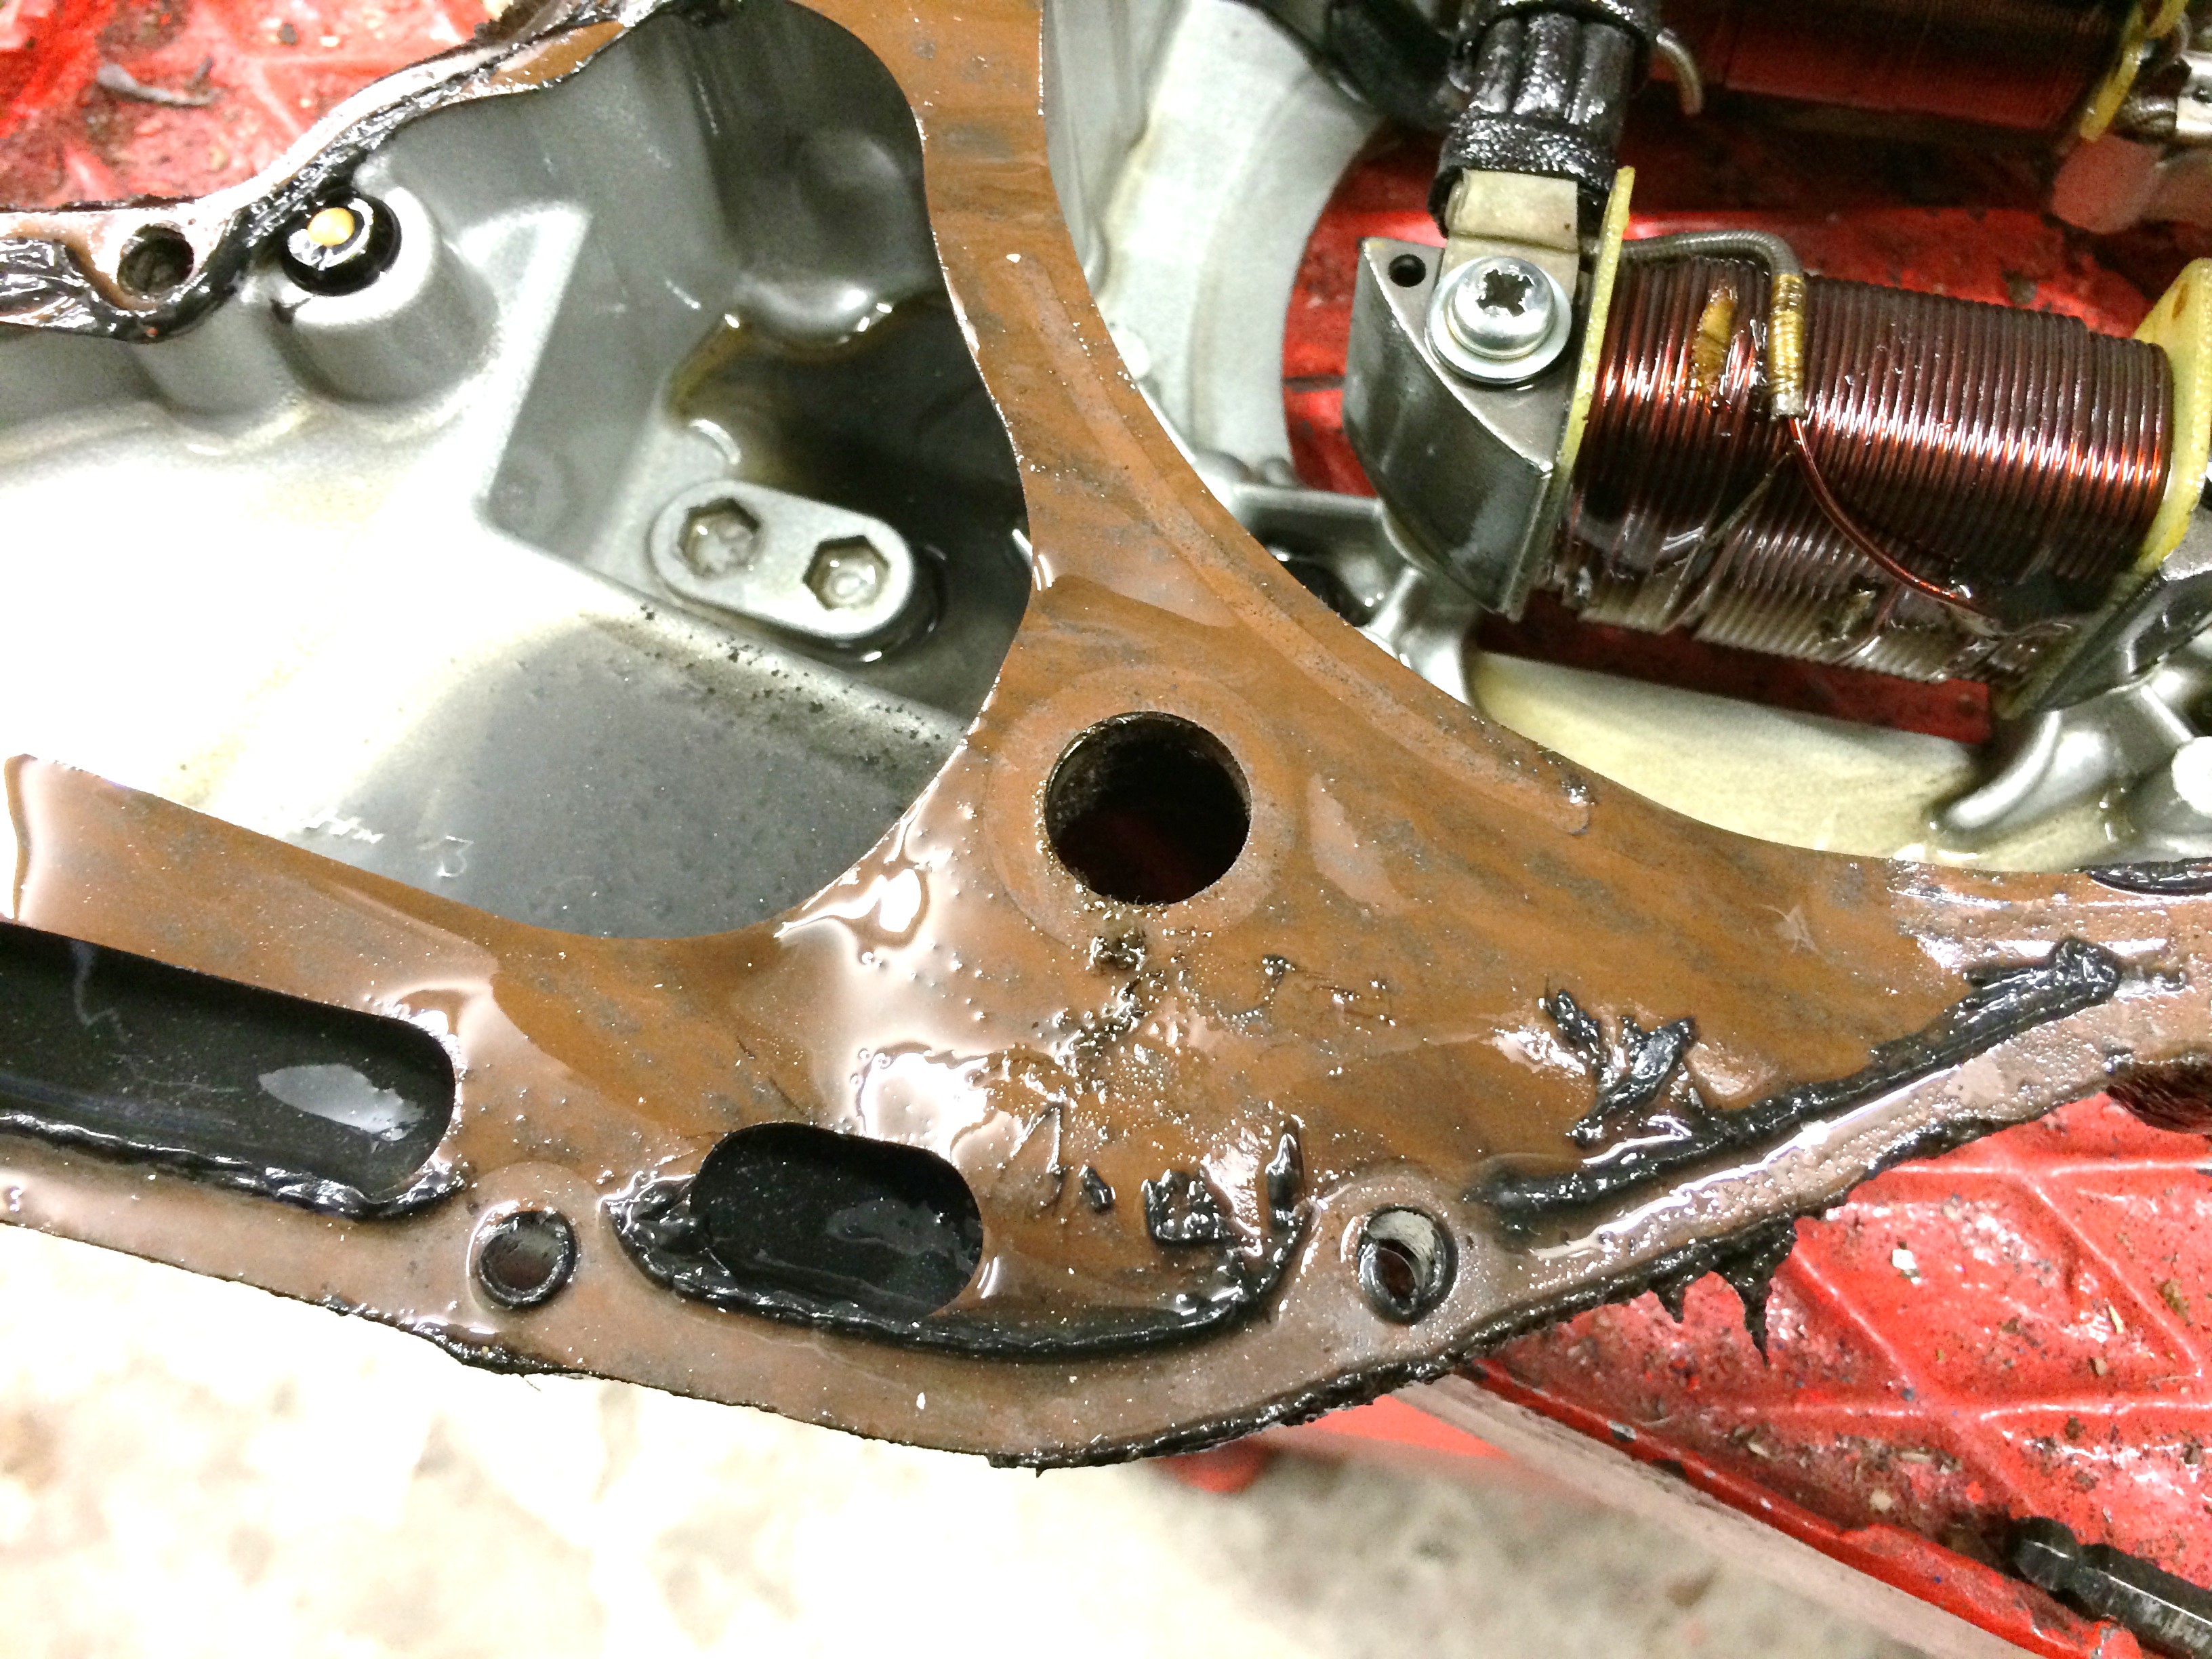
I removed the points, inspected them (found nothing wrong), checked the wiring with a meter, and re-timed the engine, but again, only one spark then none?? I am puzzled. I also pulled off the generator side cover this evening, and found nothing amis, but I am going to fit a new set of generator coils anyway. I might as well fit the stator cover I put the bearing in, with new oilseals, paint, greased up clutch actuator etc whilst I am at it. The clutch will need re-adjusting.
There was some metallic grubbyness in the bottom of the cover with the residue of the new oil I put in a couple of days ago and which I had to drain tonight, and rather than reuse it, I think I will treat it as flushing oil and refill with more fresh new oil.
However I did discover where that black silicon that was all over the oil filter came from.
Tip of the day: If you want to use silicon, what you are supposed to do is very lightly fasten the cover down and leave it overnight for the silicon to set in the gap. The next day you tighten it down, with a nice silicon sandwich in the gap. If you tighten it down first, without waiting for it to set you just squeeze all the silicon out, as shown above.
Engine cover and sprocket covers are now back on with new screws, and new oil in the engine. The 'new' coils appear to be making electricity OK, but I am off on a little holiday to Taipei in Taiwan today 10th April, so nothing new here for a week.
A week or so later....
I am back from Taipei, saw 100,000 scooters a few small proper bikes but no Honda XL's. I did however have to buy a few more JIS Japanese screwdrivers with magnetic tips, because it is apparently the law. This lot cost £7 ($11.75).
So, today I did a few checks and tidied up the wiring at the stator end because the replacement stator had the neutral light wire (not being used as there is no tacho and so no neutral light) broken from the multi connector, so I crimped a new Lucar spade connector on, and the extra wire from the ignition supply was cut off short so though it isn't really needed I put a new one on. This was just being tidy.
I checked that everything was clean and tight and there was a consistant spark, and lo and behold it starts and ticks over and now kinda runs, still missing a lot between tickover and open throttle and still spitting a bit but I have ridden it round the garden several times, and a couple of miles on private land and it's just not even close to being right. It pulls like a train and then misses like crazy at 30mph. (At least I know the speedo works ok....) I am beginning to run out of possible ideas, maybe the exhaust is blocked inside? I can swop that over for another I have and see what happens I suppose.
These engines are soo simple, why won't this one run right? Grrrrr! To recap I have put in new sparkplug, HT lead, plug cap, coil, points and condenser. Changed stator. Engine is timed correctly. The carb is spotless, and all ways are clear all jets unblocked, running all stock jets and stock needle position, and needle. Fuel filter is clear. Float valve is set correctly. New throttle cables (push and pull) new choke cable. Choke operation is correct. New seals round carb to head face, clamp is tight to carb body and sealed. New exhaust seals at the head and pipe to silencer/muffler. Fuel is fresh. It feels like there is good compression. Whatever am I missing?
My friend Ray works at a local bike dealer and he is going to pop round on his day off Wednesday for a look see, maybe a new pair of eyes will spot the what the issue is!
So we had a morning looking at the bike. Ray decided to drop the needle two rings from the stock position in case the engine was overfueling. We checked and re-set valve tappet clearances. We adjusted the cam chain, and then re-timed the engine. Ray thinks there is some piston slap, I am not sure. We treated it to a new plug (again).
It was better but not right, so we took the automatic advance retard off and inspected it, and whilst it is free to move (not stiff or seized) it moved just a bit too freely, so maybe it has very weak springs, and was advancing to full advance far too quickly? We swopped it for a spare XL250K0 one I had on the shelf and it did run a bit better, still a slight hesitation but noticeably better. That is as far as we got to.
Checking part numbers the XL350 centrifugal spring advance unit has the following part numbers:
XL350 KO up to engine 1016455 = 30220-329-024
After engine 1016456 = 30220-356-004
XL350 K1 = 30220-356-004
1976 XL350 = 30220-356-004
1977 XL350 = 30220-385-006
1978 XL350K3 = 30220-385-006
So the one with the weak springs is a 30220-356-004 and should be a 30220-385-006 but the engine is now running on a 30220-329-024 (I think it is one of those anyway).
By way of a new piece on info as at the end of April 2020, I have received the following email today which is very interesting:-
So like the handlebar brace Honda San did fix issues if he had to. Thank you Mark from the Colonies!
No doubt there is a different cam profile or springs or something, but they are all similar. I will find the correct one (not available new from Honda anymore) and fit it just to eliminate it from the list of wrong parts fitted to this bike, and see what happens.
The one I removed is like this 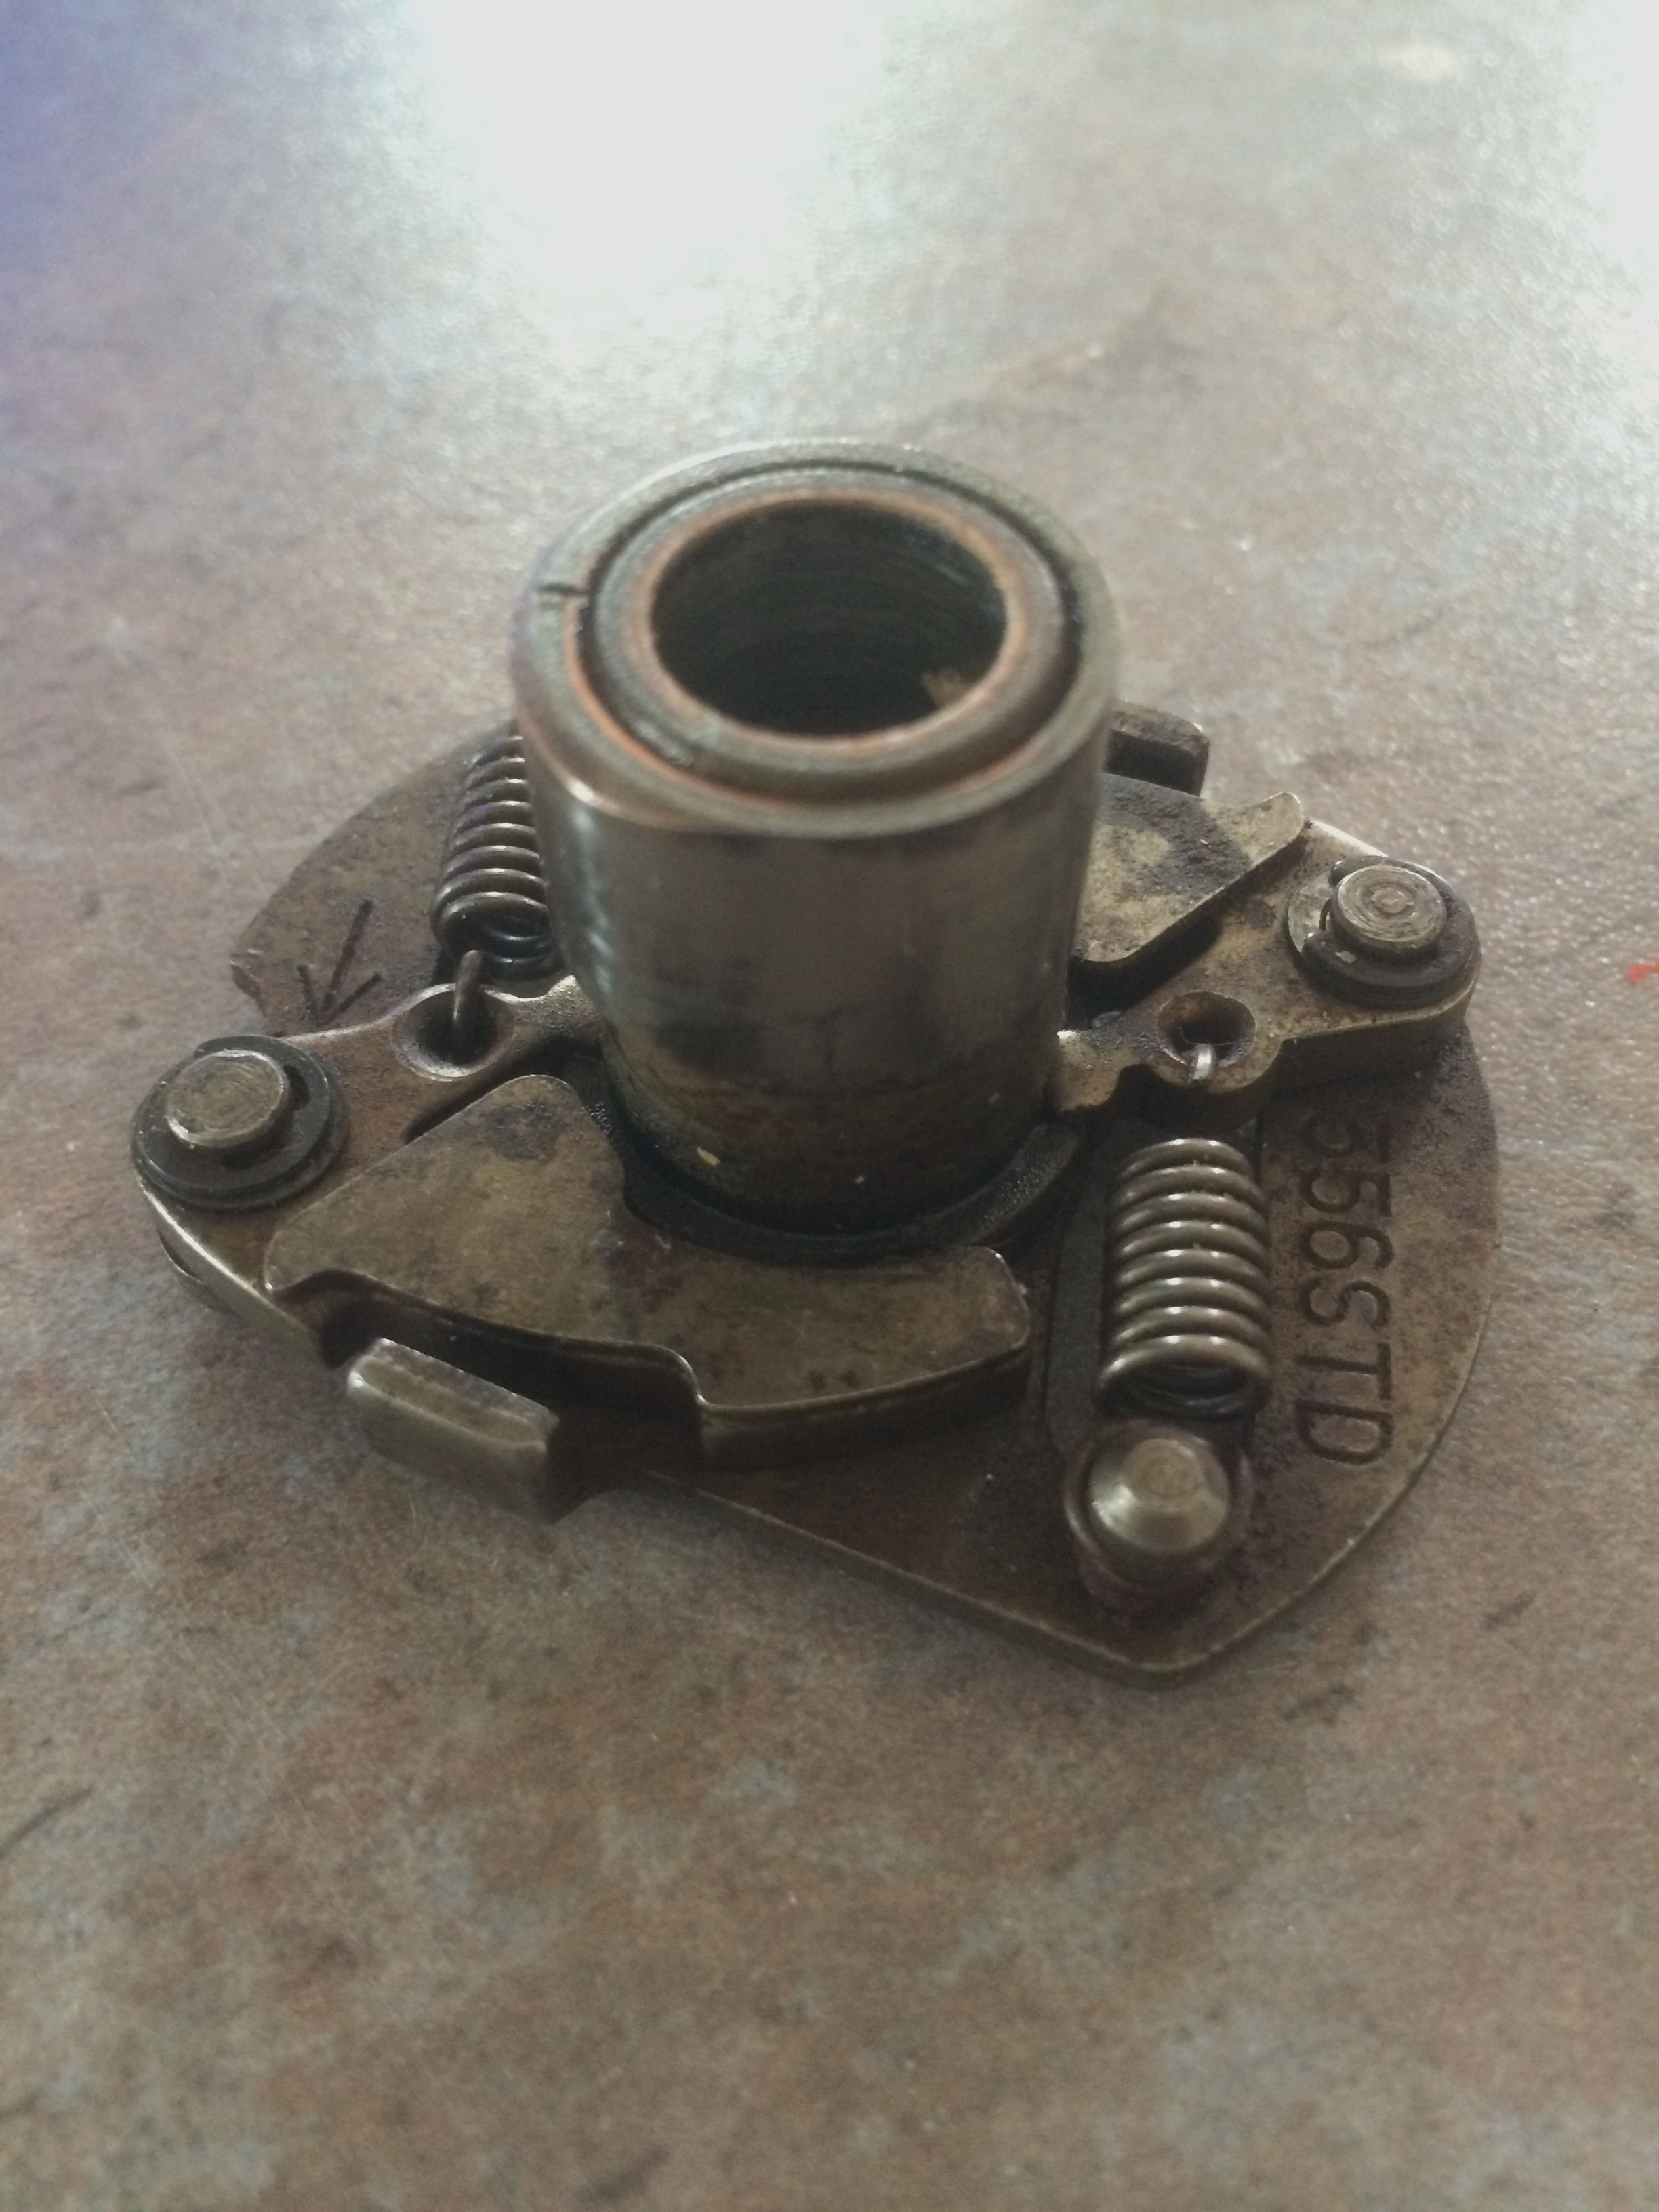 but the correct one is like this
As you can see they are not the same. How much difference the right one will make I will report back in due course.
I have now found the right one in a place called Twin Falls Iowa in The Colonies and now once again I play the waiting game with the postman.... also I have an appointment with a very cold can of Stella.
Next day I ran it round the garden a few times, seemed OK, but out on a private roadway it ran up to 40 mph for a short time on the flat then as it warmed up had no power at all, and climbing a small hill it was down to 20 mph. I think I need the head and barrel off. Oddly it still ticks over fine. Lovely wife is away this weekend so that would give me something to do; however I am going to try one more thing which is to fit the #105 main jet that came with the bike, instead of the stock #115 and see what that does. I don't have a Keihin jet kit so I will also order one (they are about £10/$16) and see how it goes.
I have now tried it with the #105 jet and it is a bit better, still got the flat spot after the first 1/4 twist, and still lost power in the same place, but not as bad.
So today (28th April 2014) I took it for the Government M.O.T. test and it passed, so I have ordered the forms needed to register it and get a tax disc. I will update as it progresses.
I have put an old spare 250K3 tank on for now because I spilled a bit of fuel on the black one and it has affected the laquer. I am not sure why, possibly the ethanol in new petrol/gas?
Fitting Studs into Engines or 'and now a small tool tip' if you are interested - if you are not, you can skip it....
When you come to fit studs such as the exhaust studs on a bike, the old method has usually been to lock two nuts together and use the front of the two nuts to wind the new stud in. This isn't very good engineering practice, (although it works) because it does strain the threads especially on smaller diameter studs like the Honda M6 exhaust studs..
Ideally the stud should be driven from its end. I use a small tool I made which is a short bit of 13mm stainless hex bar left over from some other lathe project, drilled and tapped to M6 which then is blanked with an M6 set screw and nut. you could drill/tap the body blind but the last bit of thread even with a bottoming tap would be tapered and incomplete, and cause the very end of the stud to nip up or be damaged; using a through thread and bolt or setscrew to blind it is better as the pressure is on the end of the stud, not the thread.
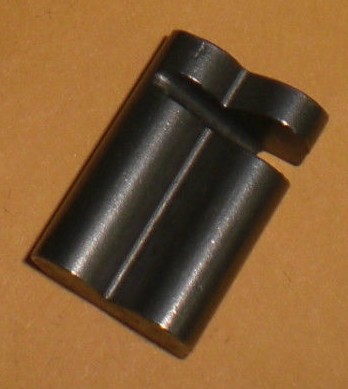
My stud tool looks like this this shown with a stainless stud ready for fitting. After fitting the stud, I have found the tool very easy to undo leaving the stud in place. When fitting stainless into aluminium, I use a small amount of copper grease to stop the metals binding over time.
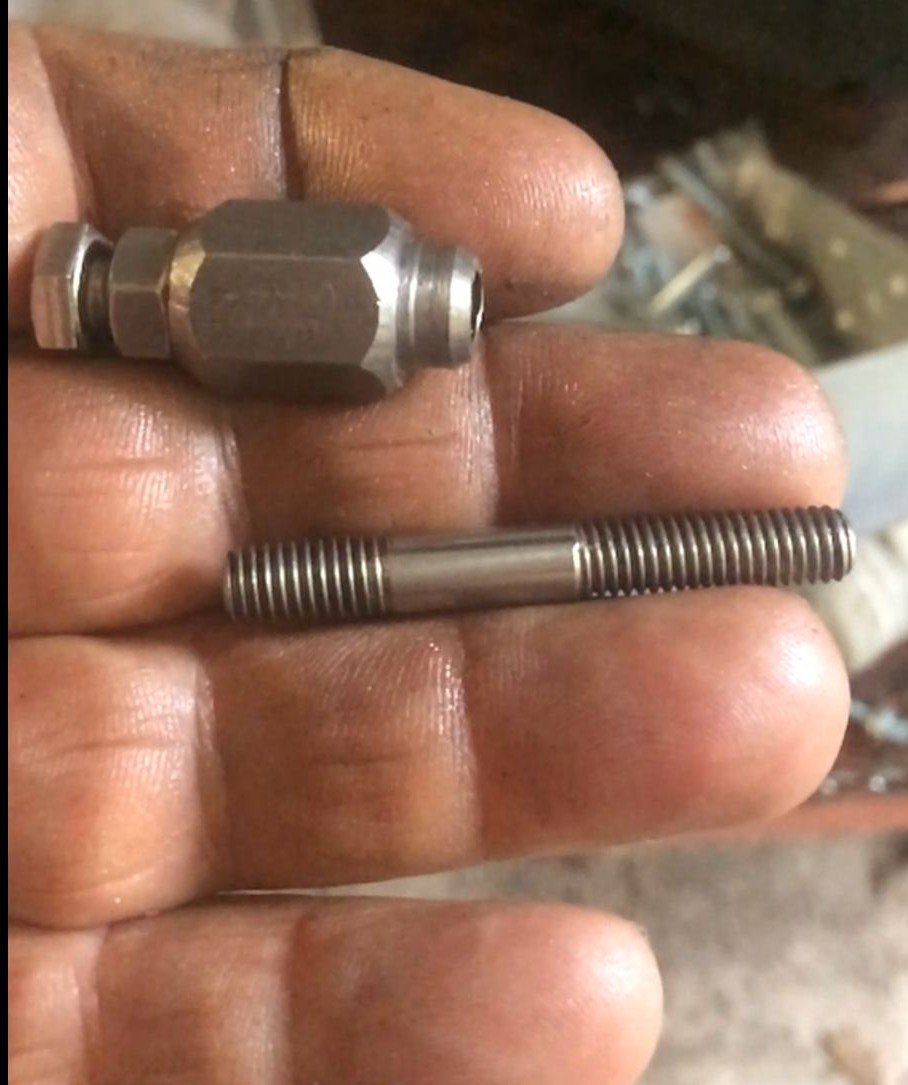 and here it is in use on my CB400f
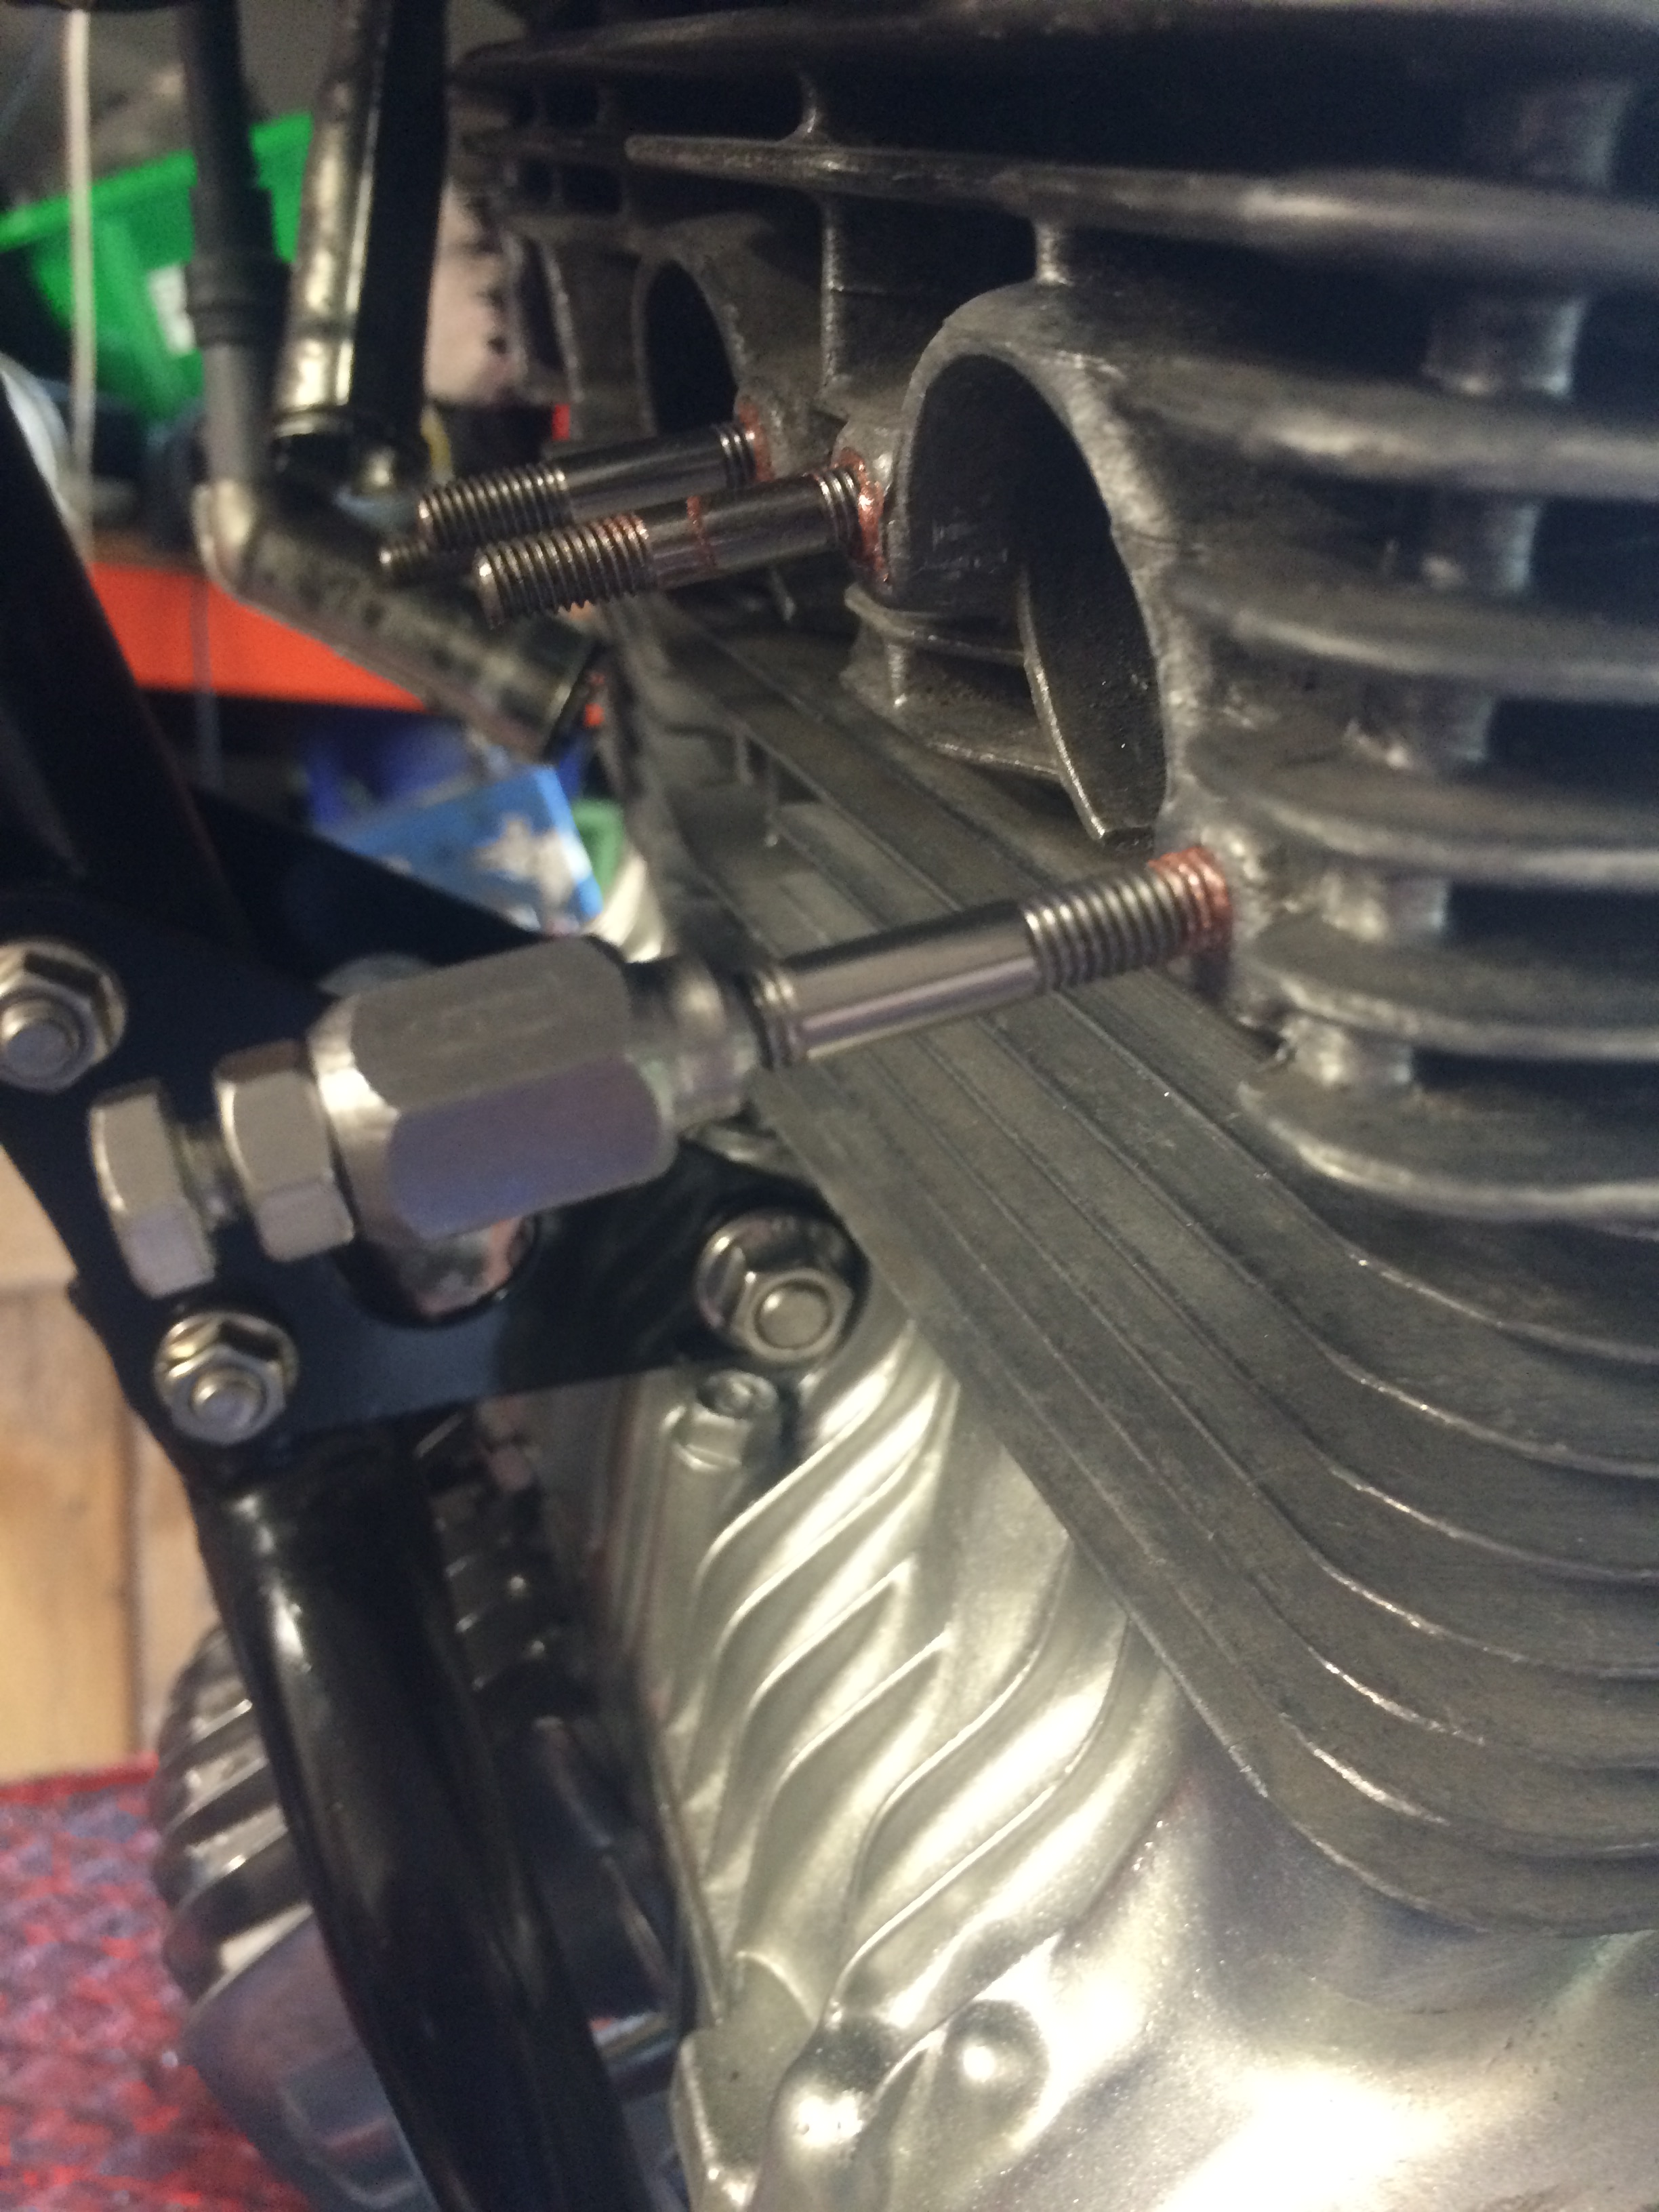
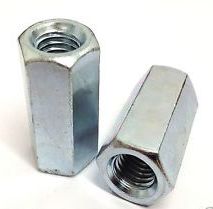
If you don't have a way of threading a bit of bar like mine, you can go on feebay and buy cheaply an M6 long nut (used to join threaded bar in ceiling installations) and that would be just as good, I simply couldn't be bothered to wait for the postman.
A police sergeant once told me 'if you never fall off you are not trying, but if you often fall off you are trying too hard'
That's enough for today, ride safely!


last updated today, of course!