LET'S PLAY WITH THE FRONT FORKS!
As usual click a photo for a bigger better one
Writing too small? Press control and + a couple of times. See? That's better.
We are going to do it with the forks removed as it is lots easier. If you have invested in a hydraulic lift, well done. If not..
to get started, lift the bike with a jack and place on a box or similar to stop it falling forward when the front wheel is removed. Always be safe you don't want to have a bike fall on you or a small child or worse still scratch the tank.
Remove the front wheel by undoing the 8 x M8 nuts below the axle leaving the axle in the hub, having disconnected the front brake cable at the hub and removed the small cable stay on the nearside fork lower leg. Be careful not to damage the speedo cable.
Remove the front mudguard. Now I just want to point out that the fork leg in the photos is not one off either of my bikes but one of a spare pair I have which are painted silver, but have as new stanchions, so are great spares.
Undo the 4 x M8 bolts on the lower fork clamps, and the 2 x M7 bolts on the top clamp. Now would be a good time to drain the oil via the M6 drain bolt at the leg lower side and note it has a copper washer, which should be replaced with a new one when re-fitting..
It drains quicker with the top big chrome nut removed…be aware when removing this that it holds the springs under compression so it can jump off when it gets to the last thread and you can hunt around on the workshop floor for it.
Remove the whole fork leg on both sides by sliding down out of the 'triple tree' or fork yoke.
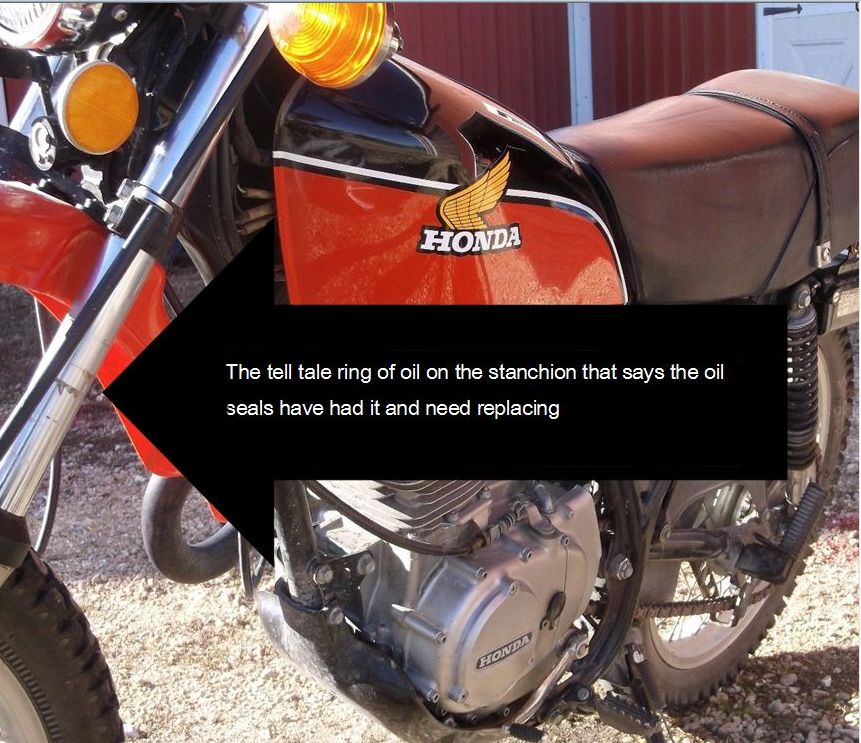
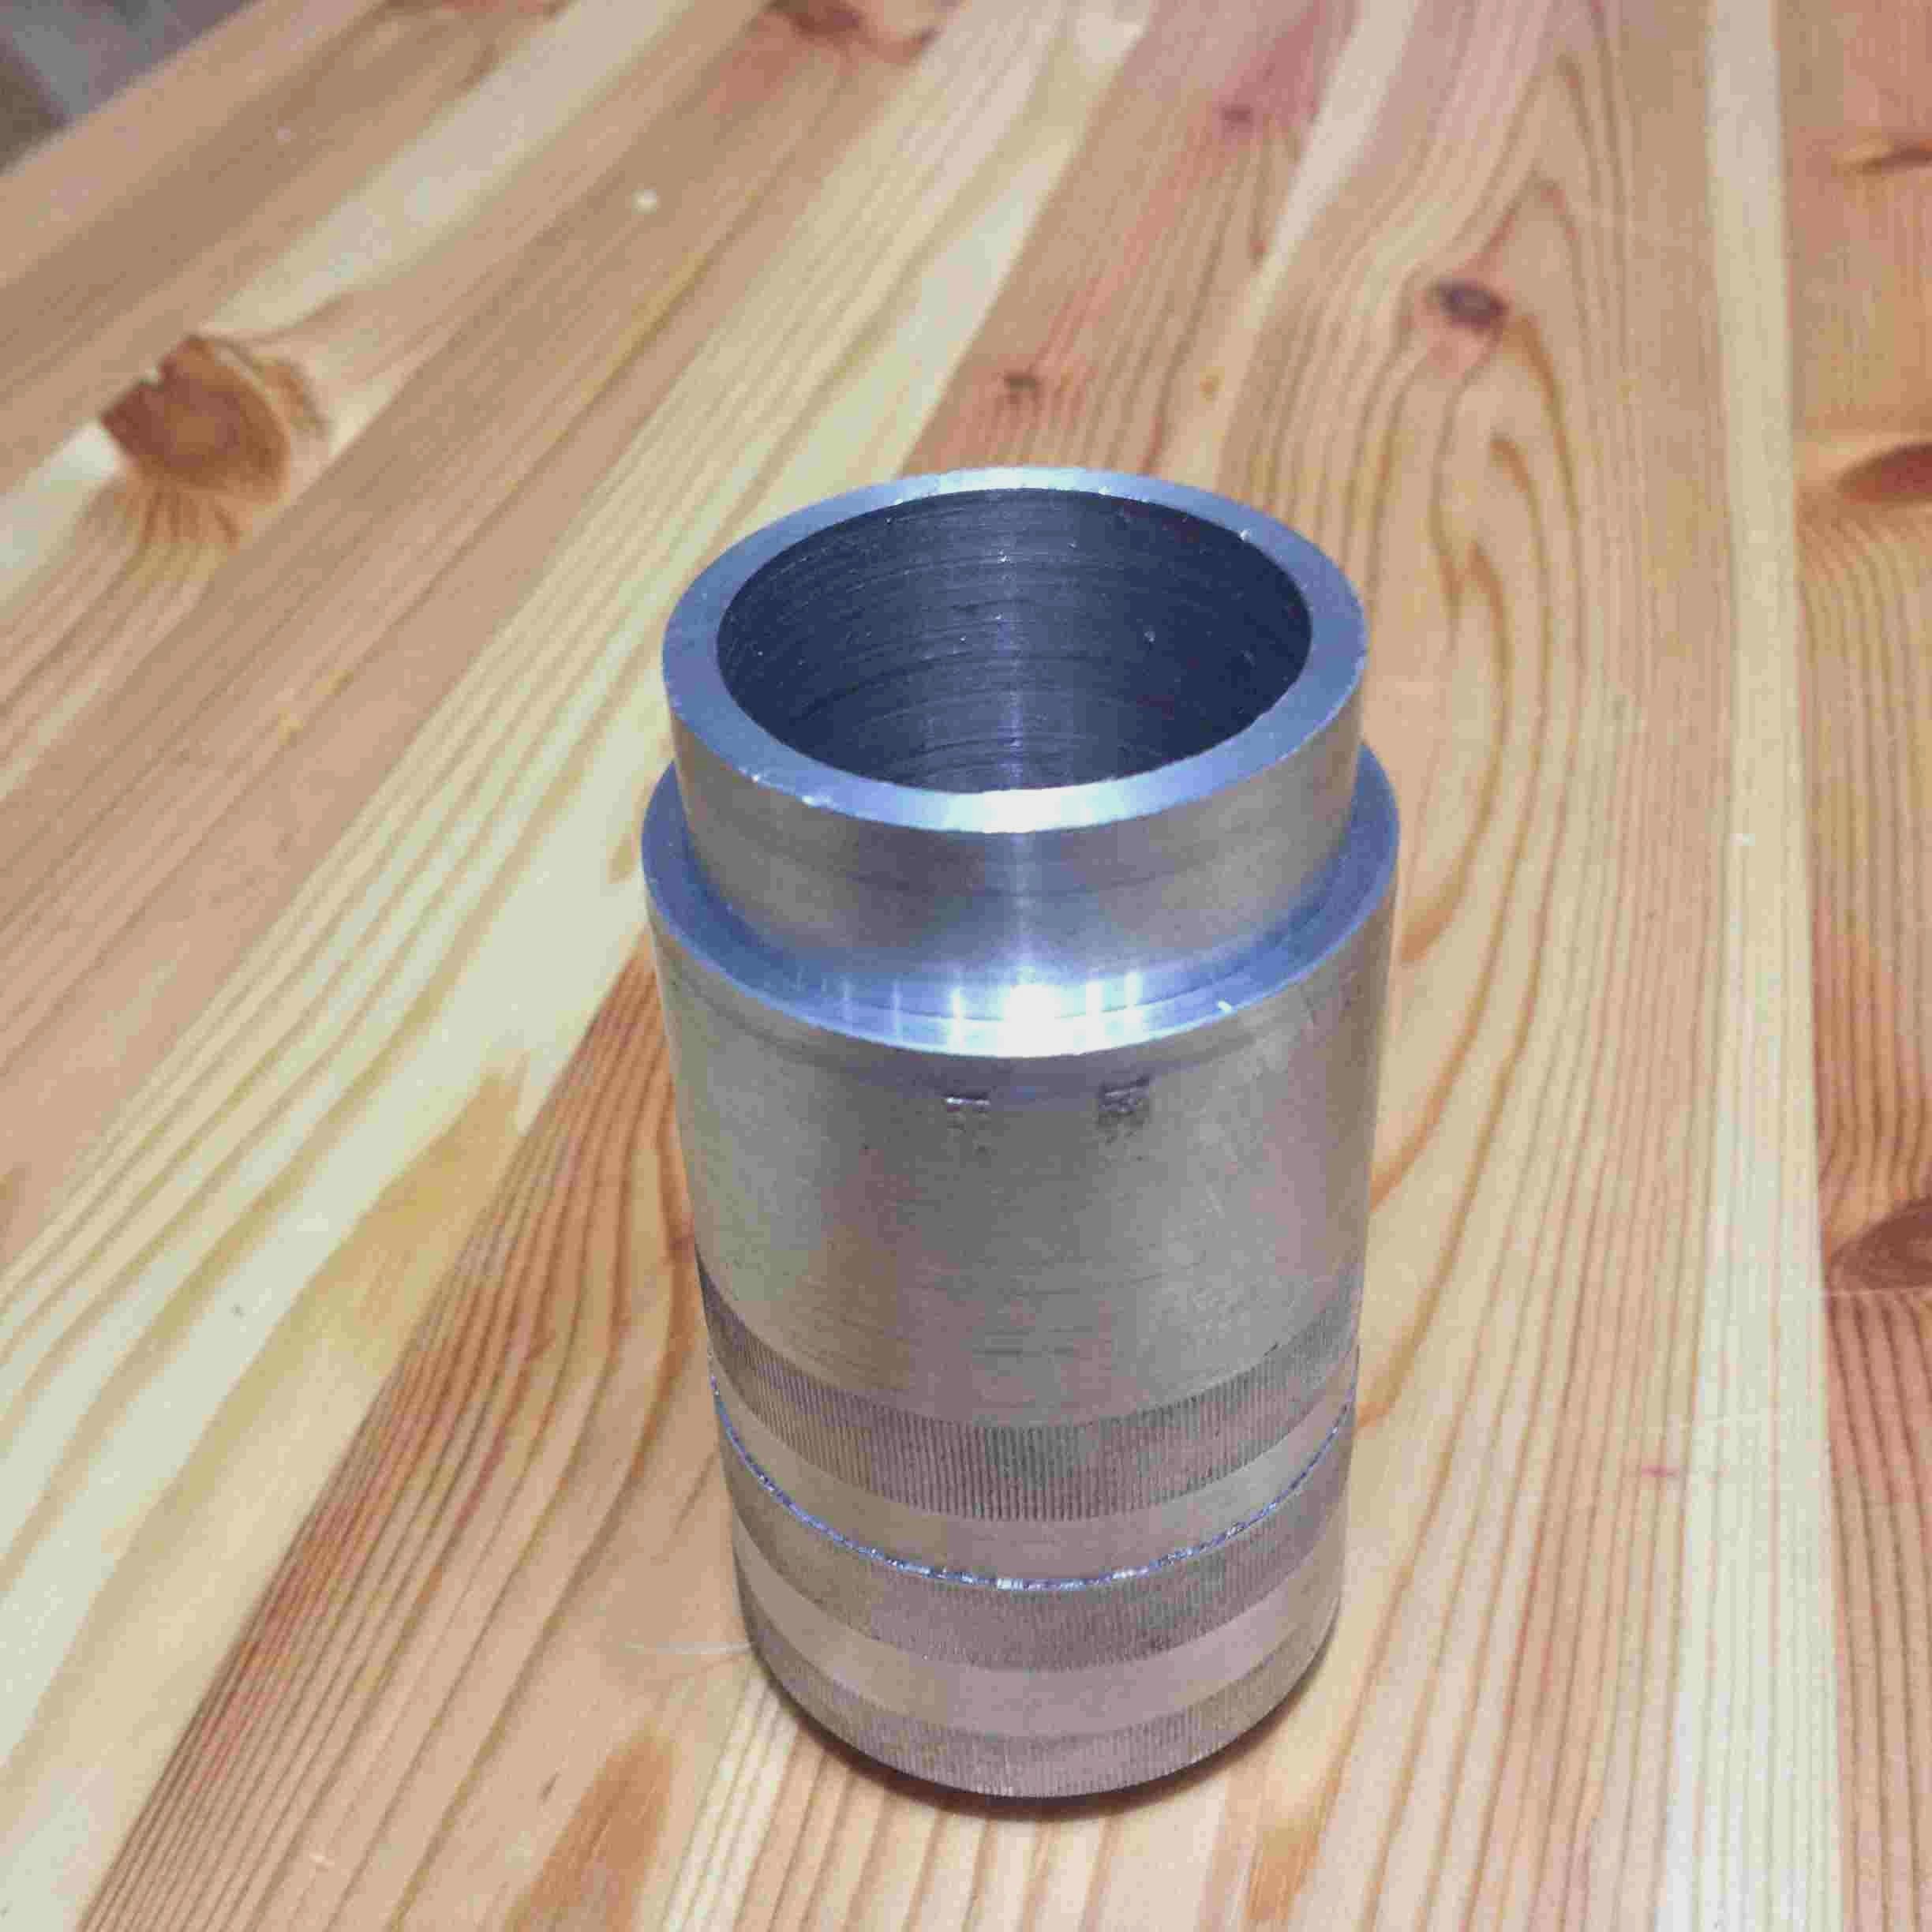
Clean the exposed part of the stanchion ( the shiny silver tube Honda call it a pipe, part 51420-356-000). If the surface is pitted (usually on the front side where stone chips have hit it) it will act like a rasp as the bottom leg holding the oil seal goes up and down and damage the top oil seal.
Don't put the stanchion in a vice!! (unless you wrap it well and protect it from damage by vice jaws).
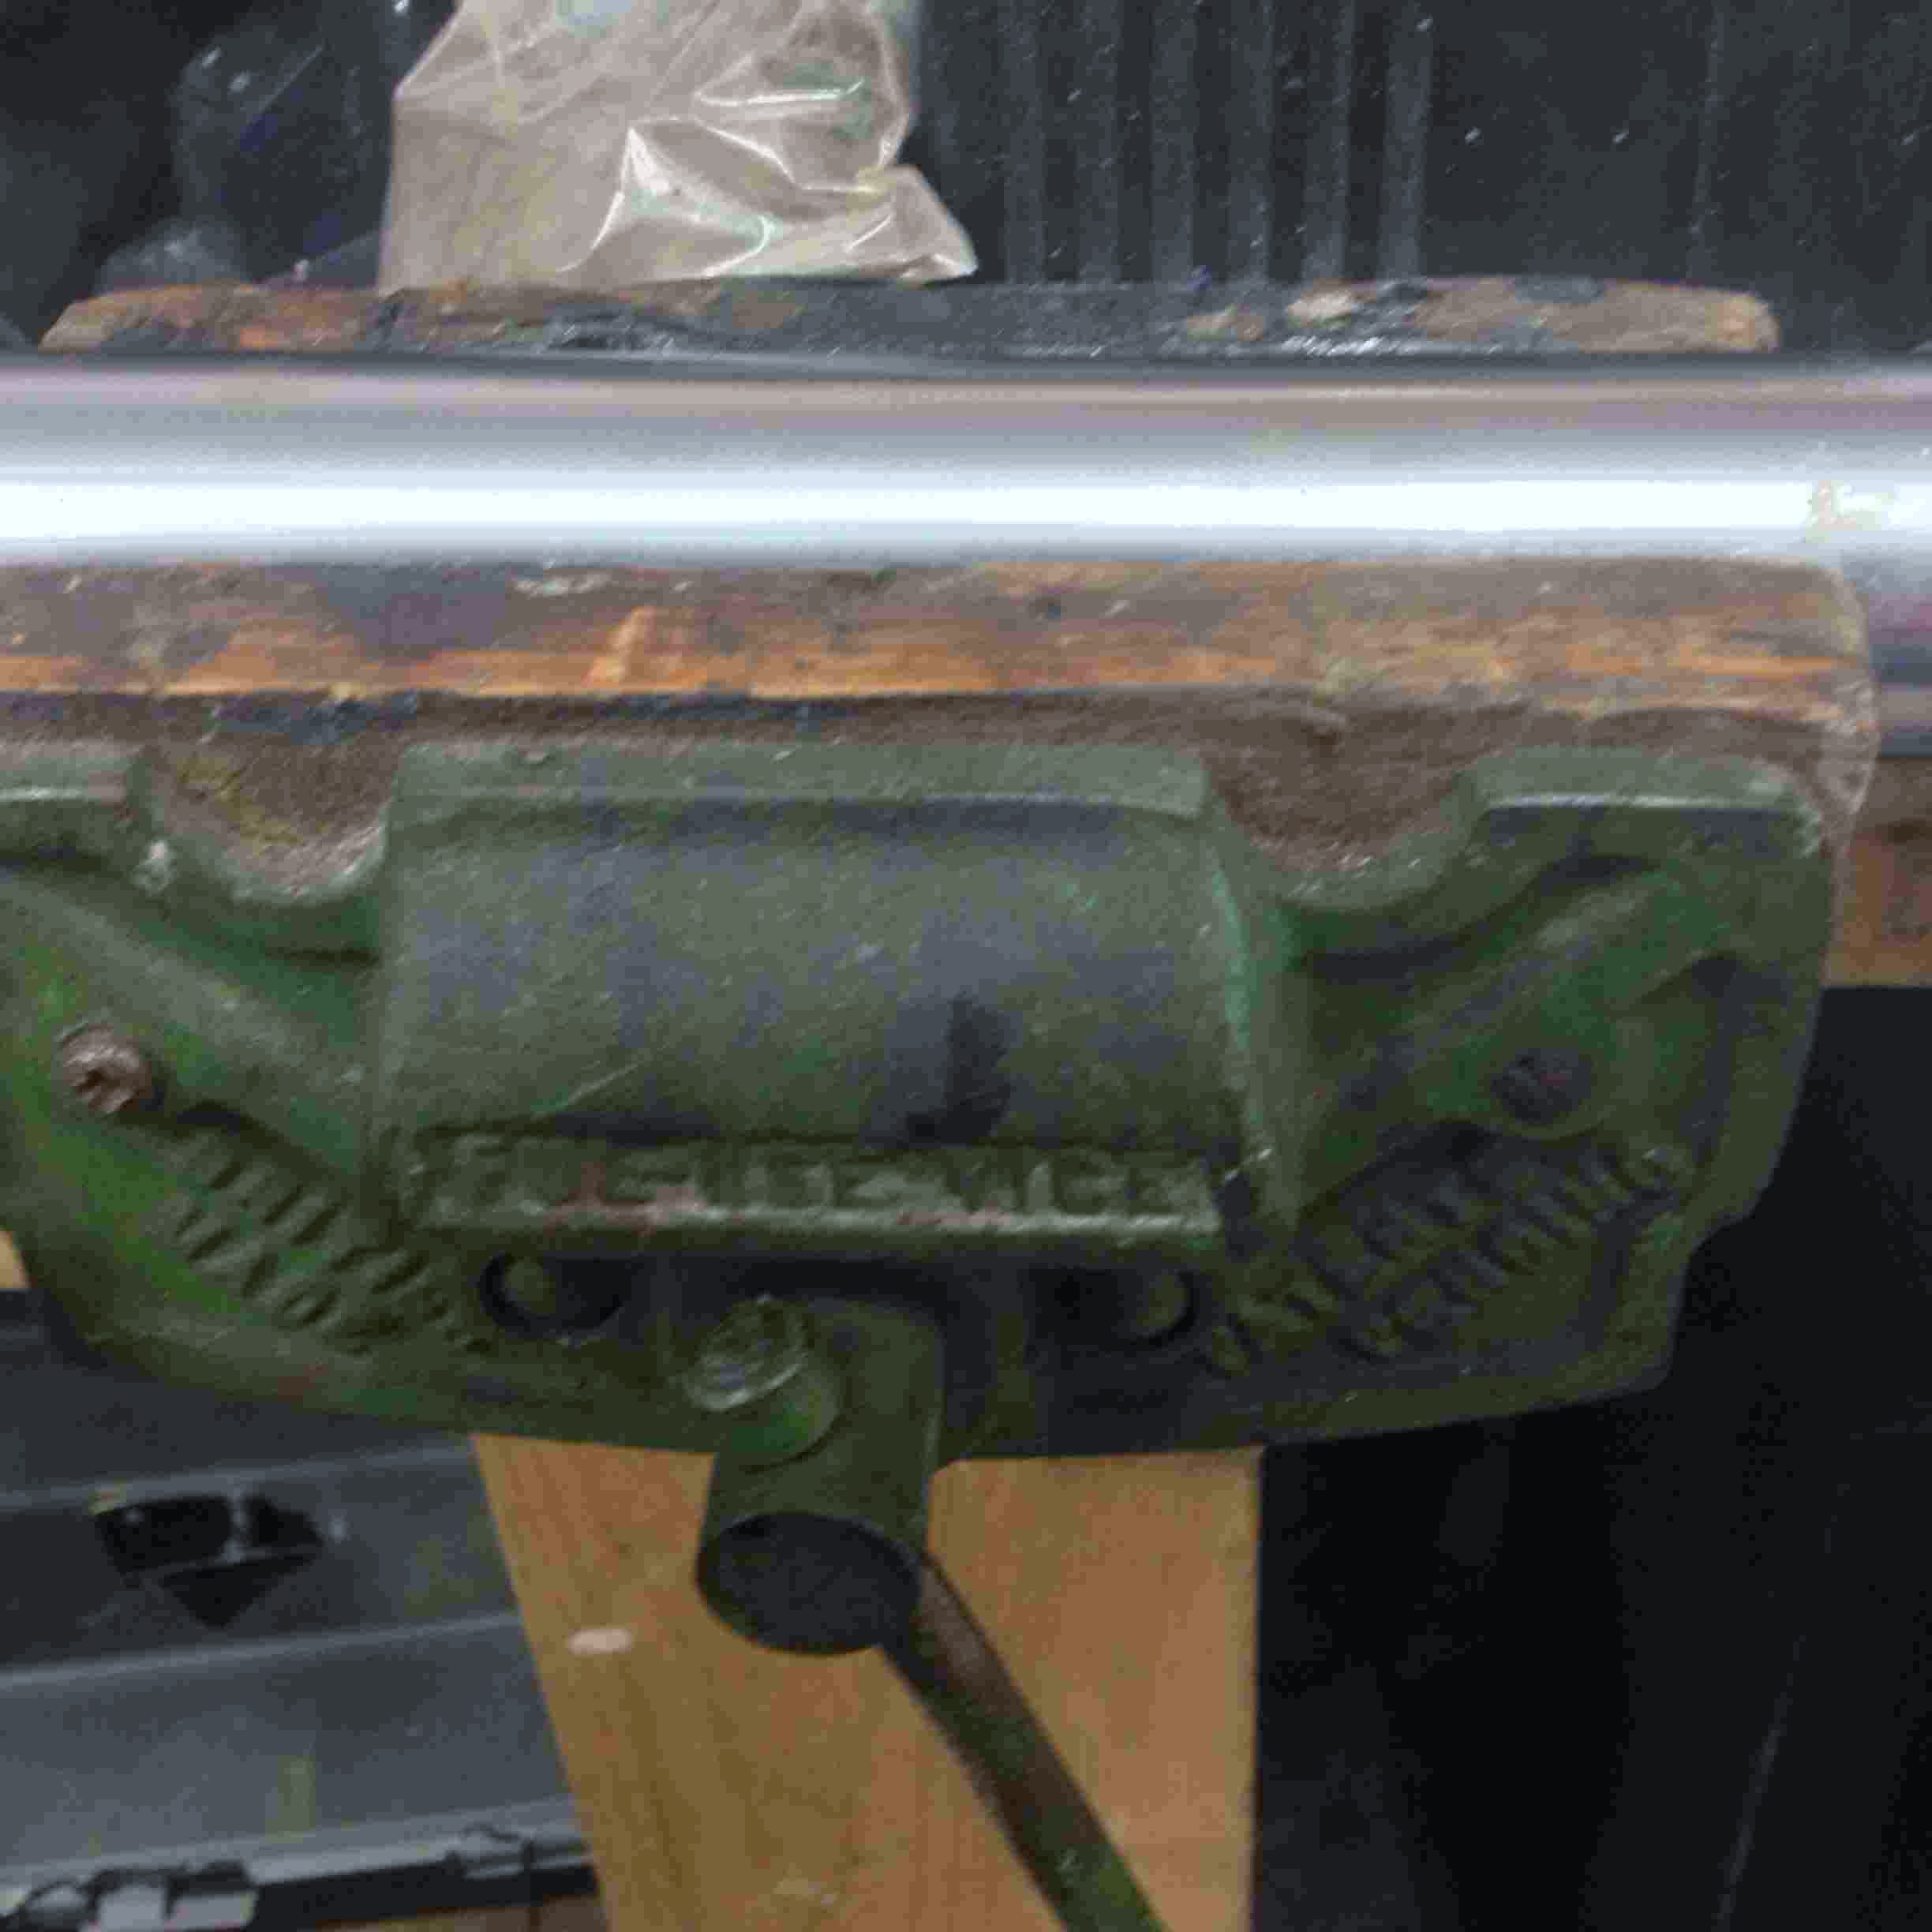
(I put mine gently in a woodwork vice with wooden jaws and I am soooo careful).
Remove the black plastic dust shield (part 51425-340-000).
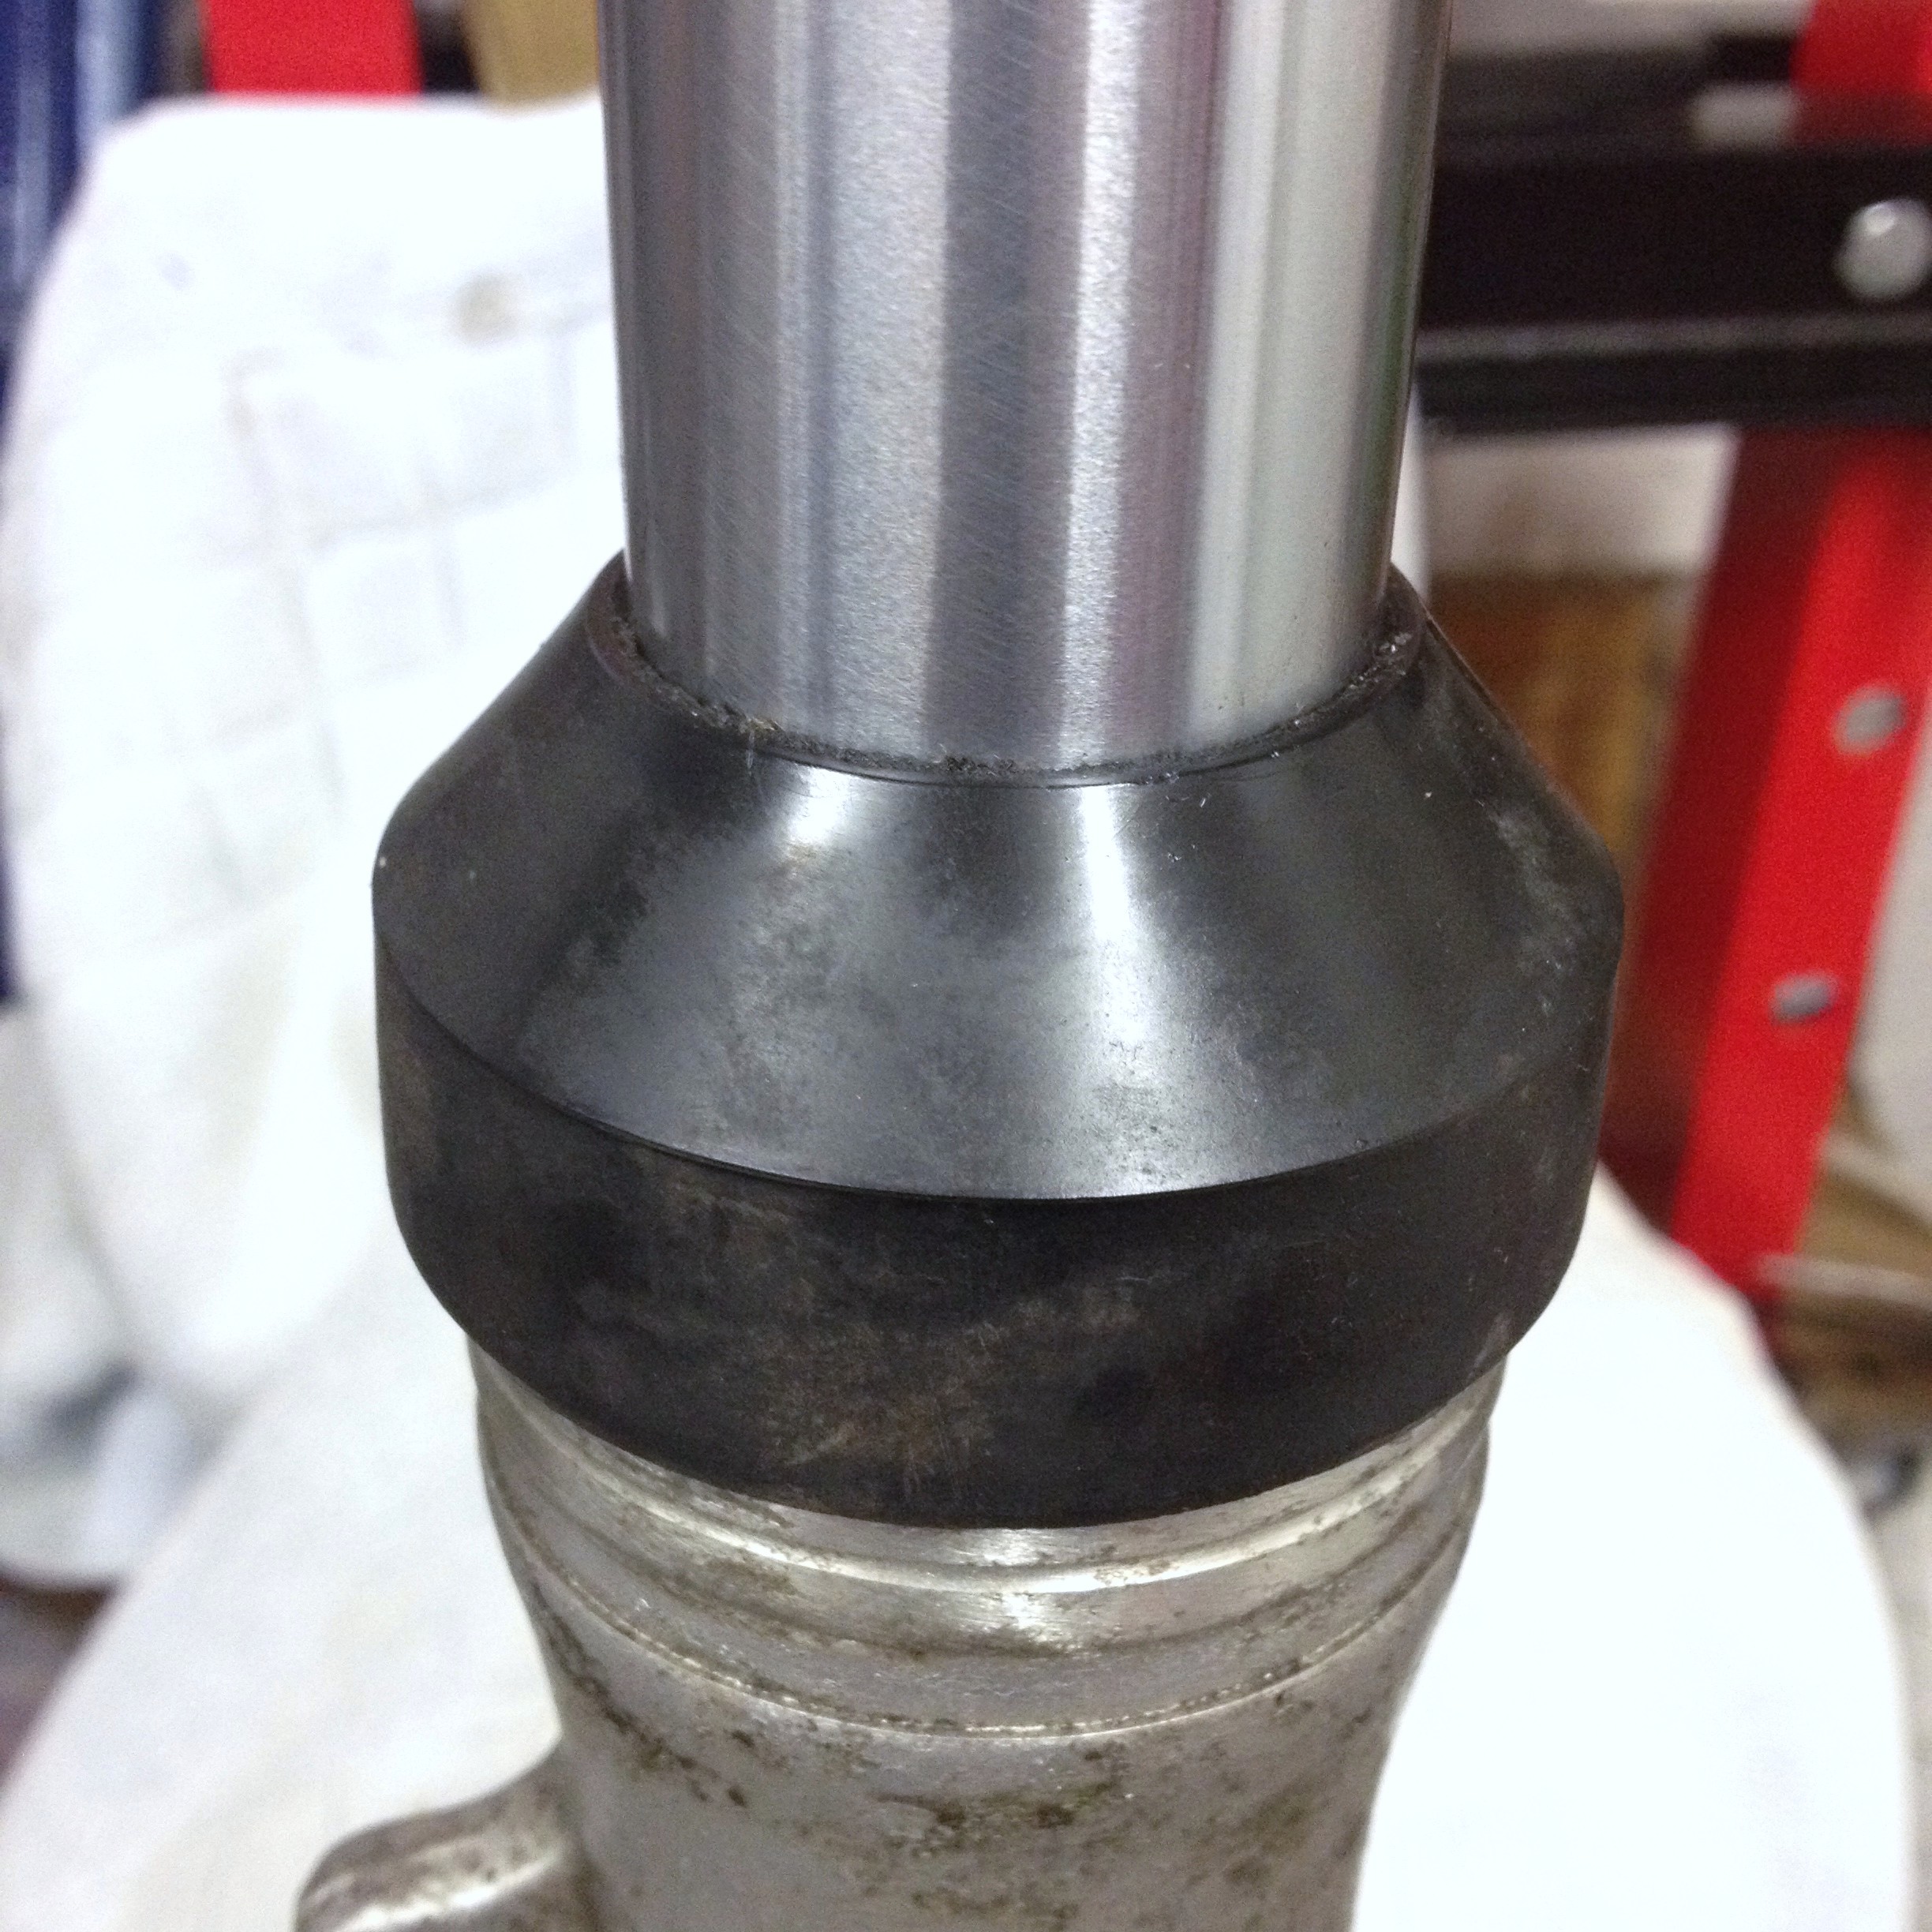
It looks OK but it is not....
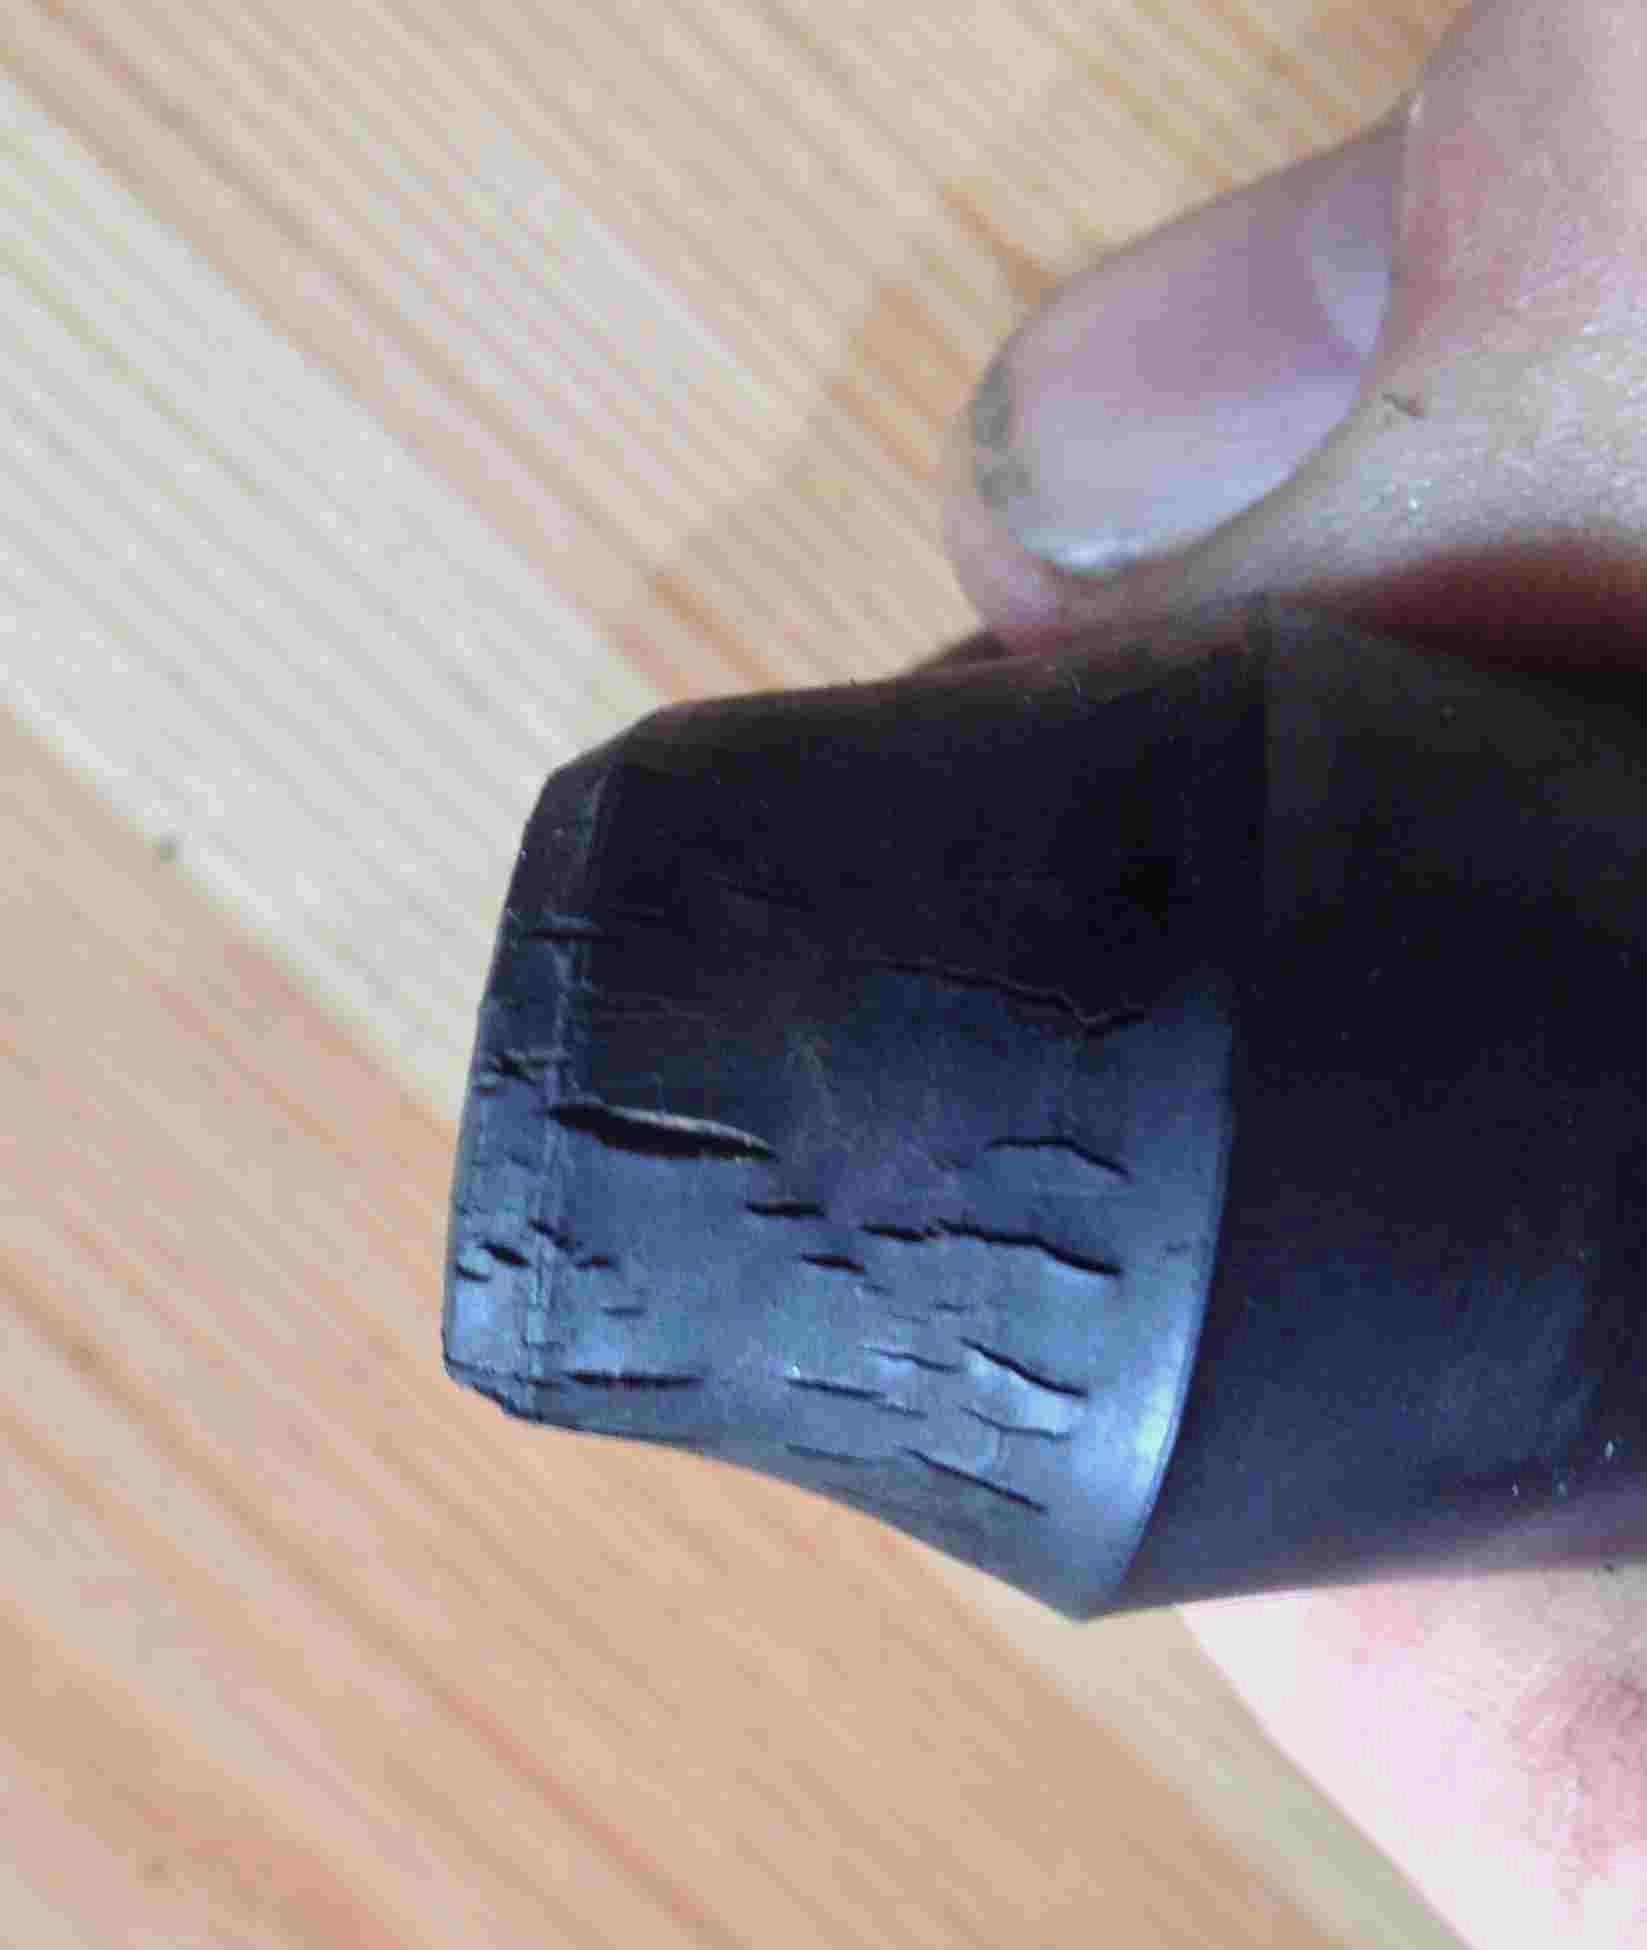
Squeeze the old one between your fingers and see if it is perished (small cracks appear) like this one, and if so discard and replace. New ones are about £10 a pair from Honda/David Silver. I wouldn't buy NOS ones because if they are old they are likely to be perished too.
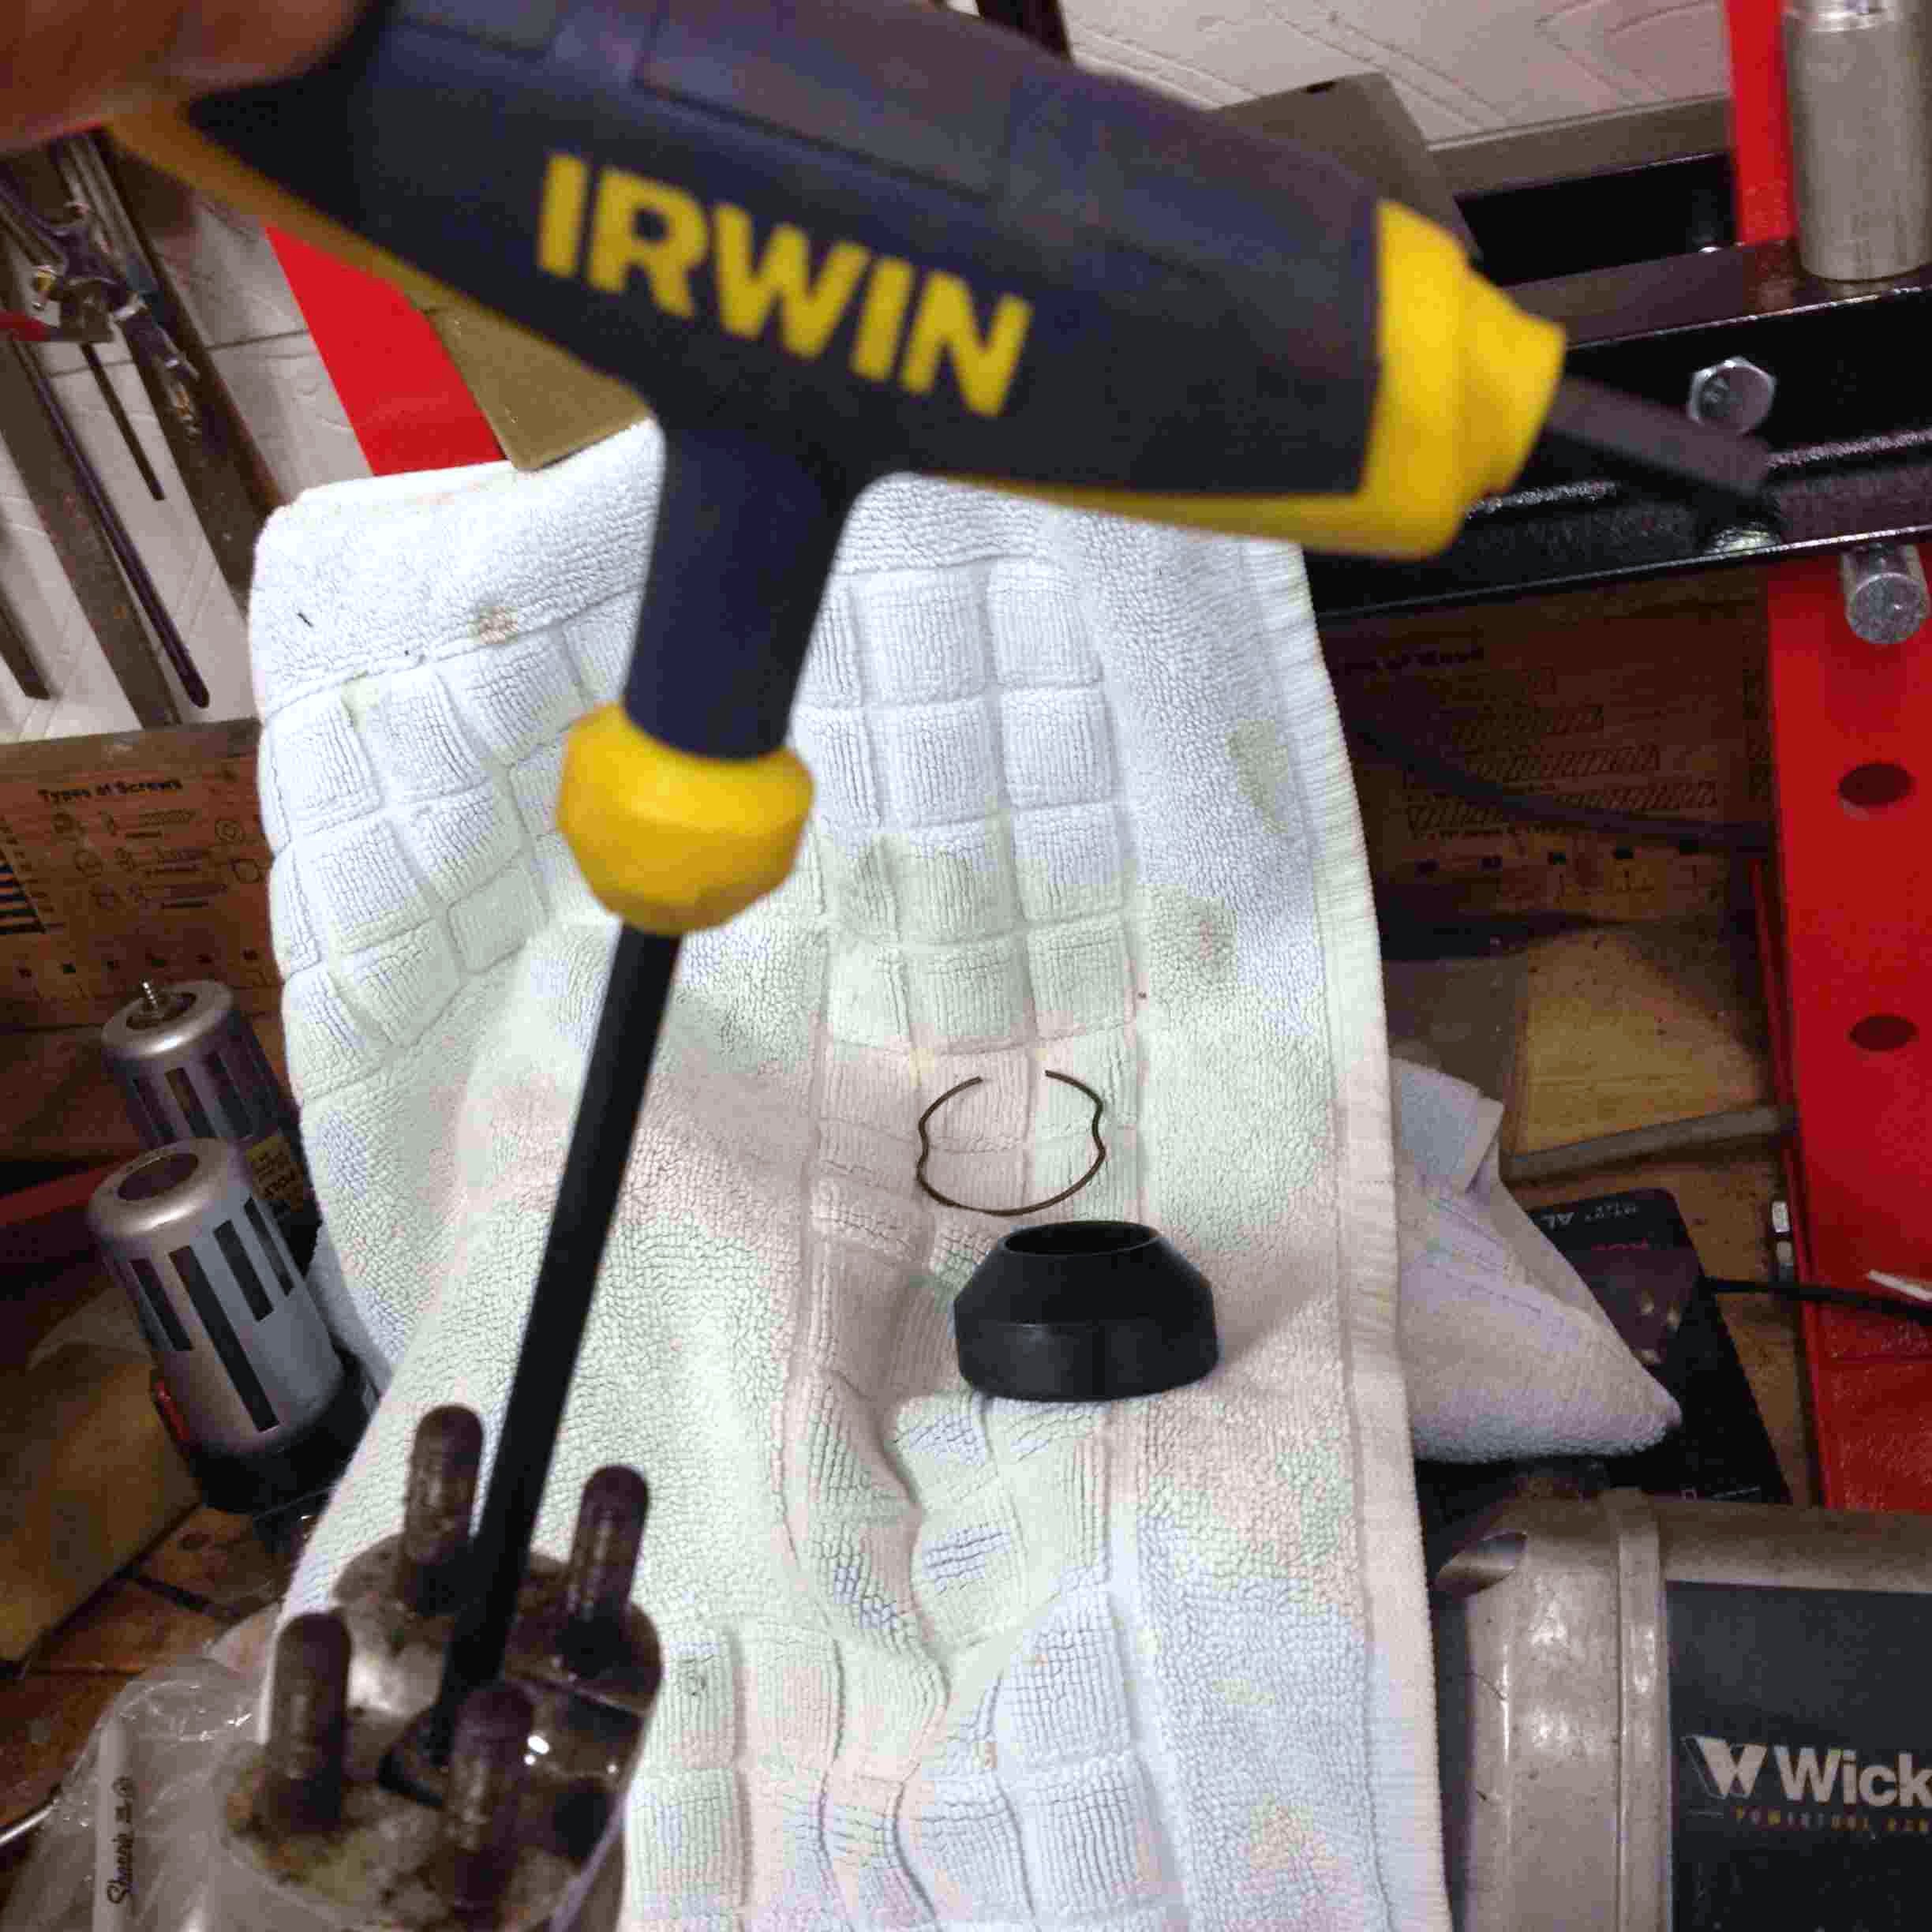
Remove the wire clip (part 51466-375-000) retaining the fork oil seal. On earlier bikes this is a circlip. The wire retaining clip is £1.50 from David Silver so I would have new ones.
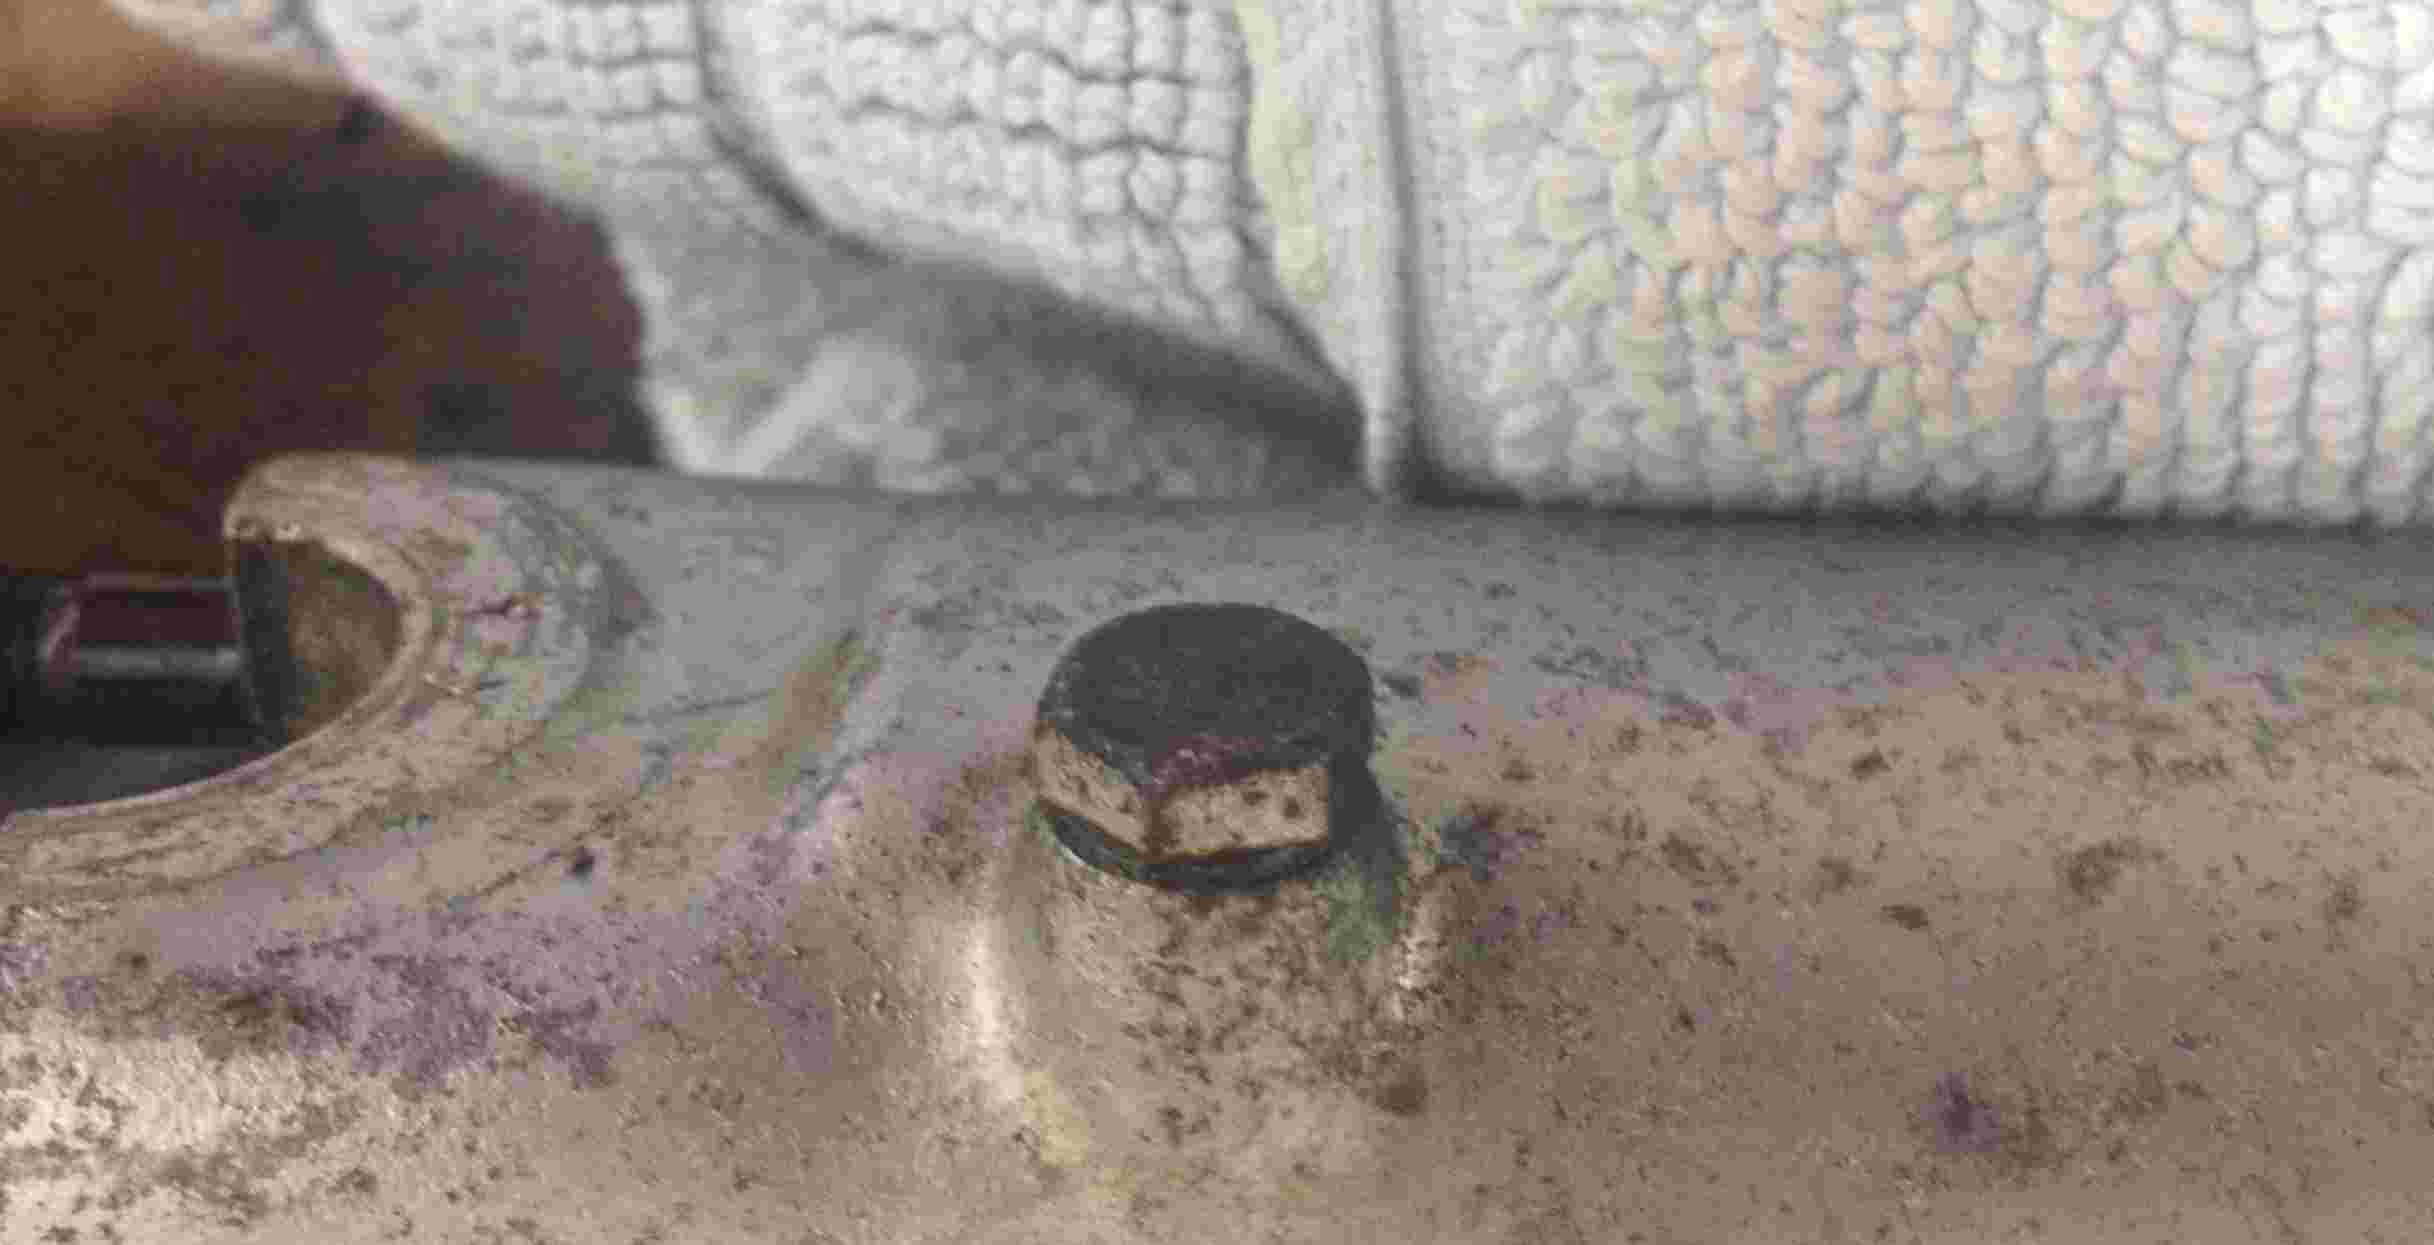
Using an allen key (6mm) undo the allen headed bolt at the bottom of the lower tube and note it has a copper washer, which should be replaced with a new one when re-fitting. This will also drain the oil only faster….
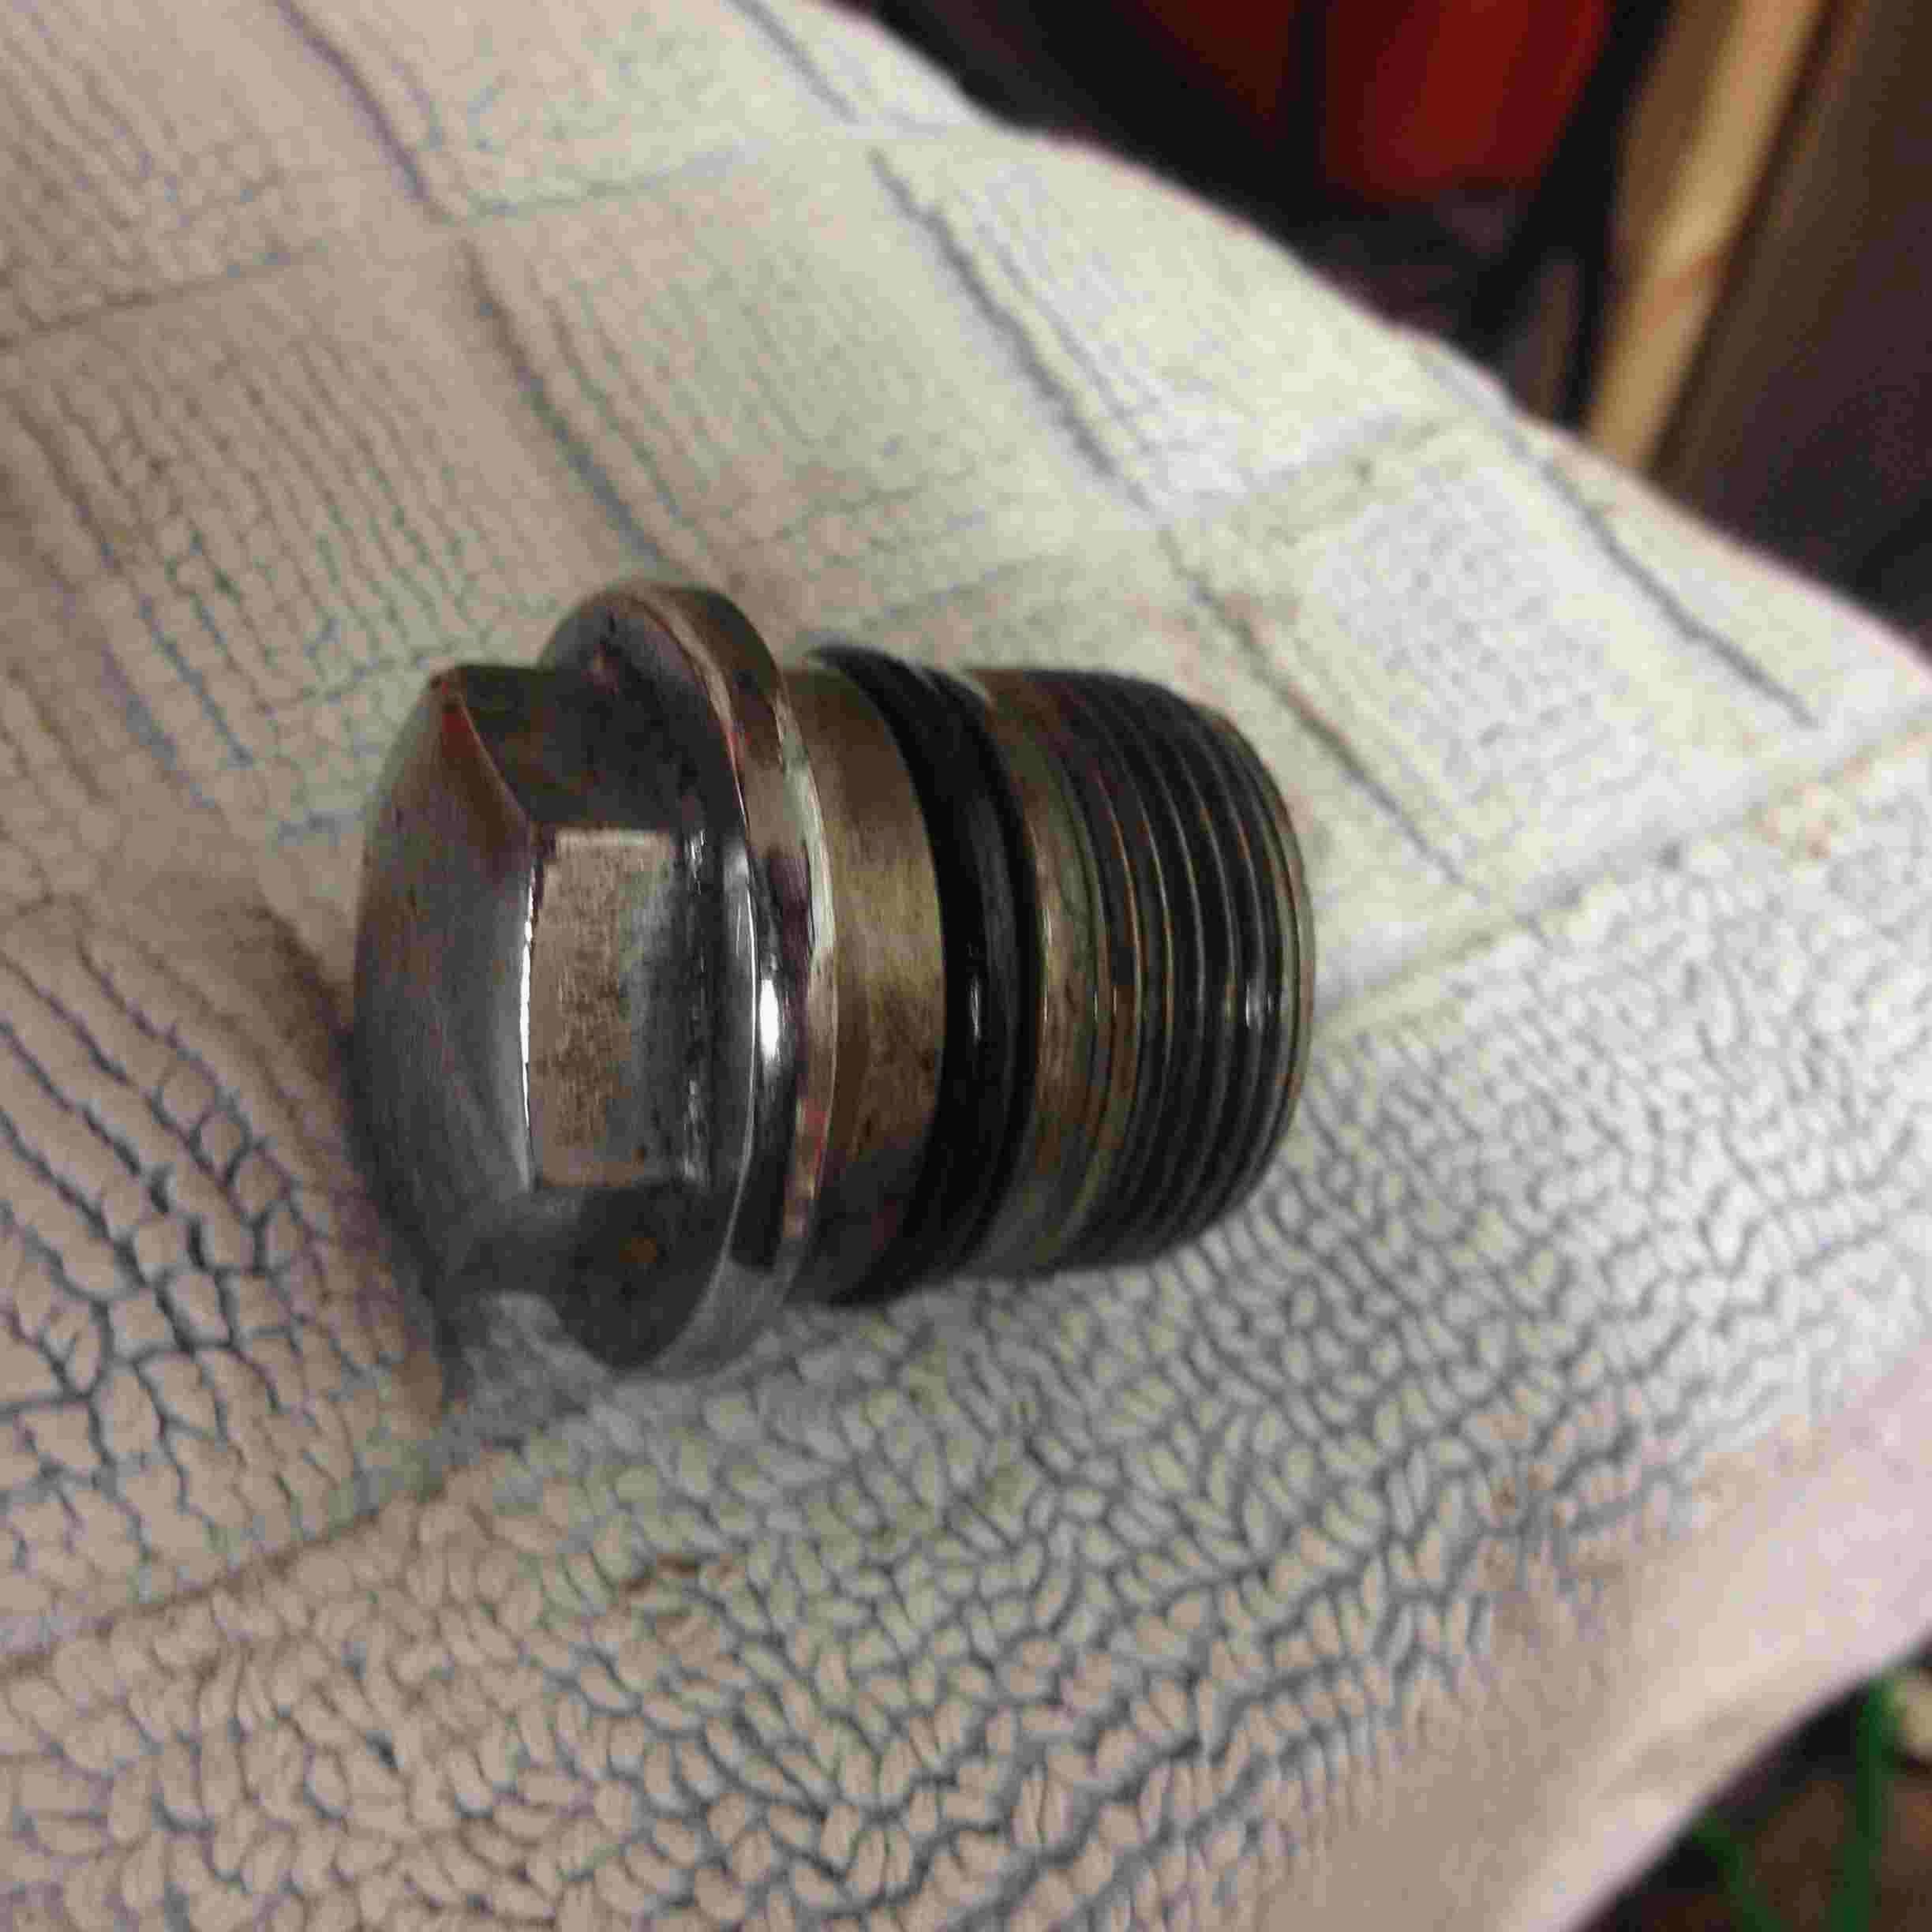
If you haven't already done so, remove the big chrome nut at the fork top noting it has an ‘O’ ring that should be inspected and replaced if worn.
The inner fork tube can now be withdrawn from the top of the lower leg.
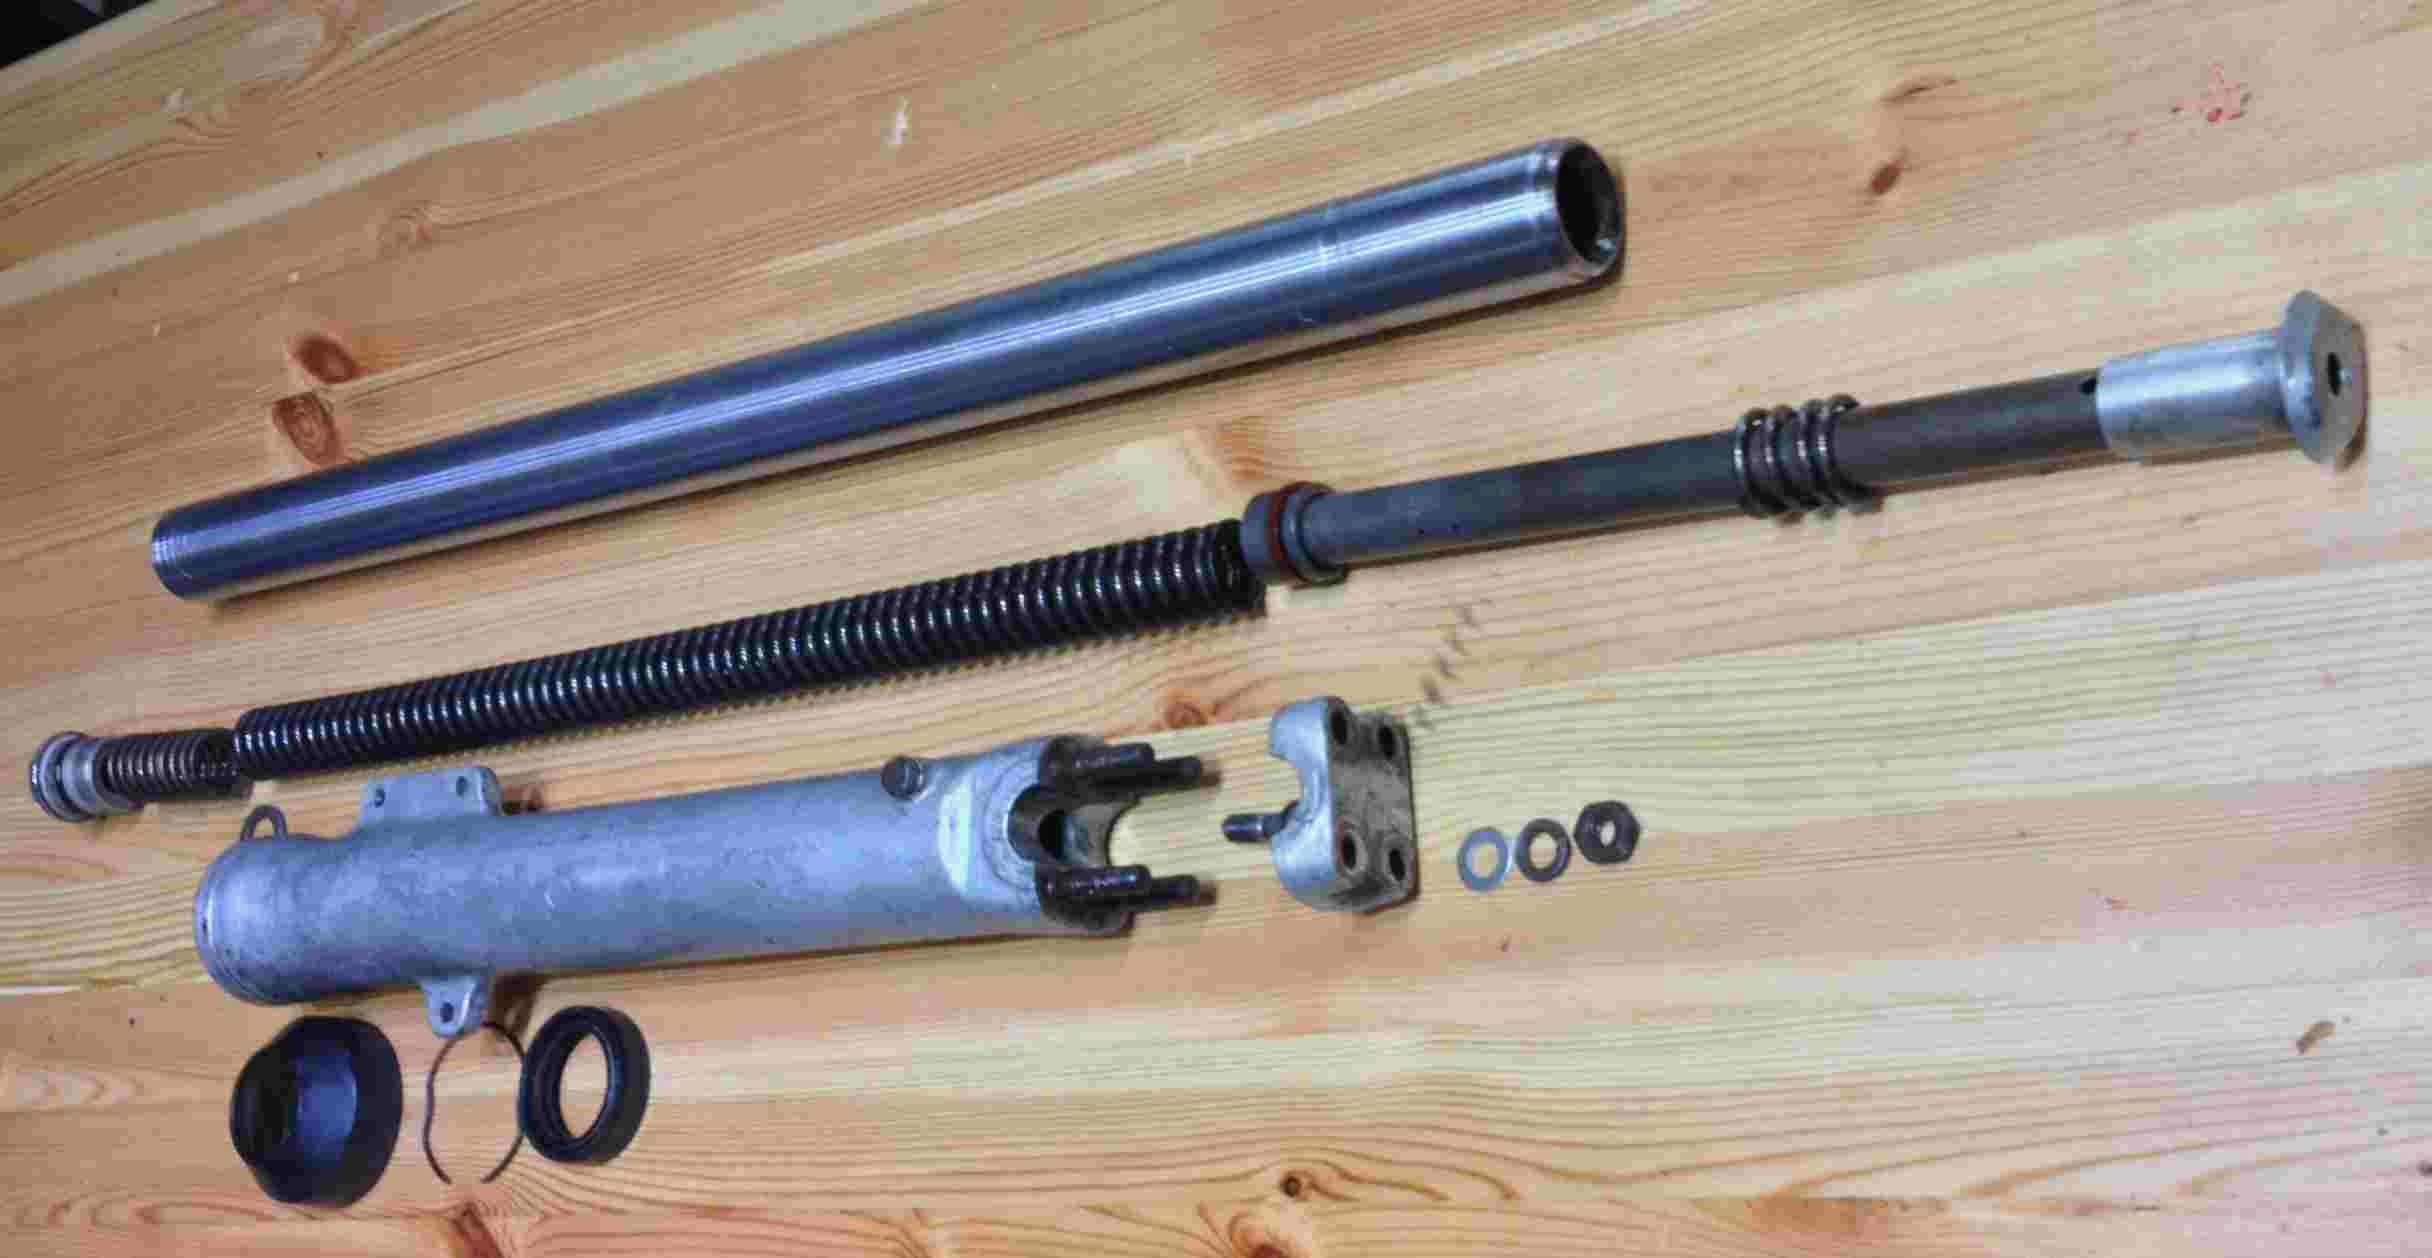
here is the top half
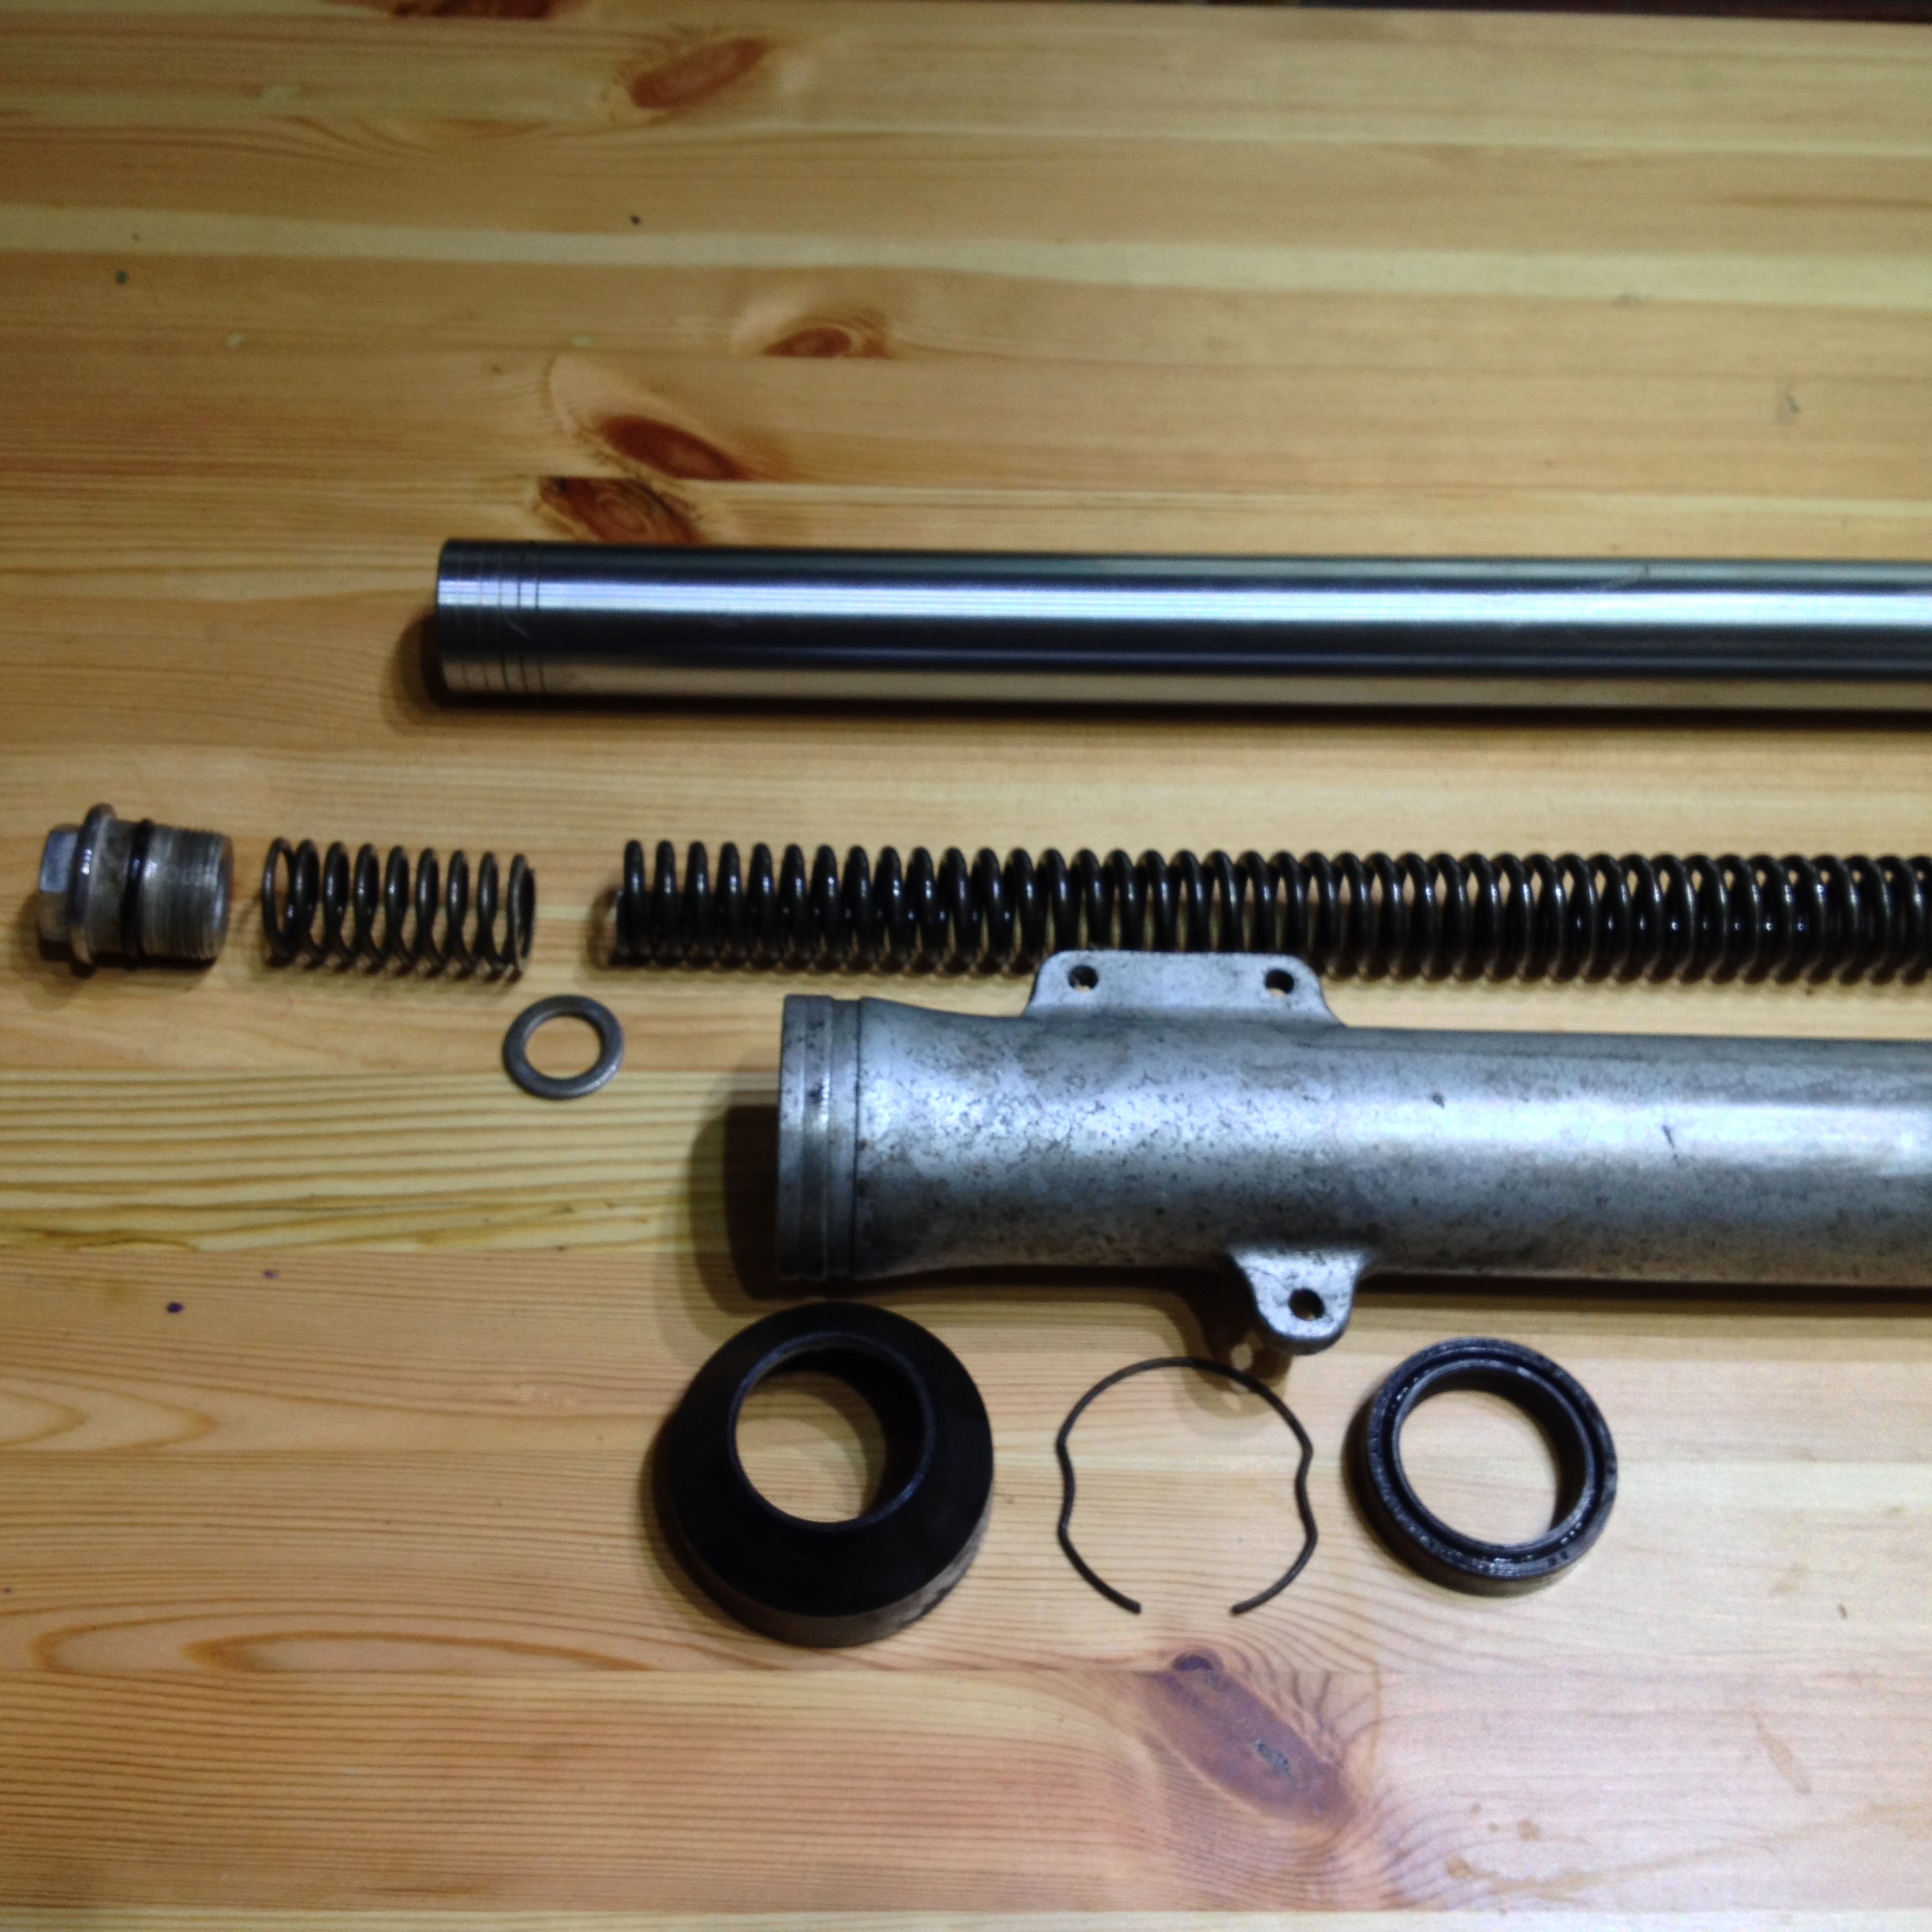
and here the lower
Note the order of the springs from the top:
-
Short spring
-
16mm washer
-
Long spring
-
Inner pipe with piston ring
-
Rebound spring
-
Aluminium piece, oil lock
 Part 11 should really go here in my opinion
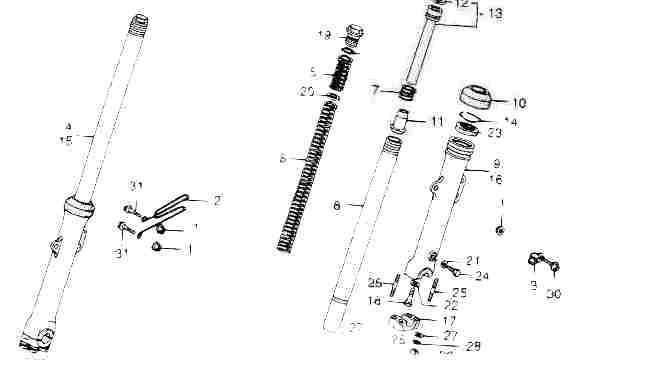
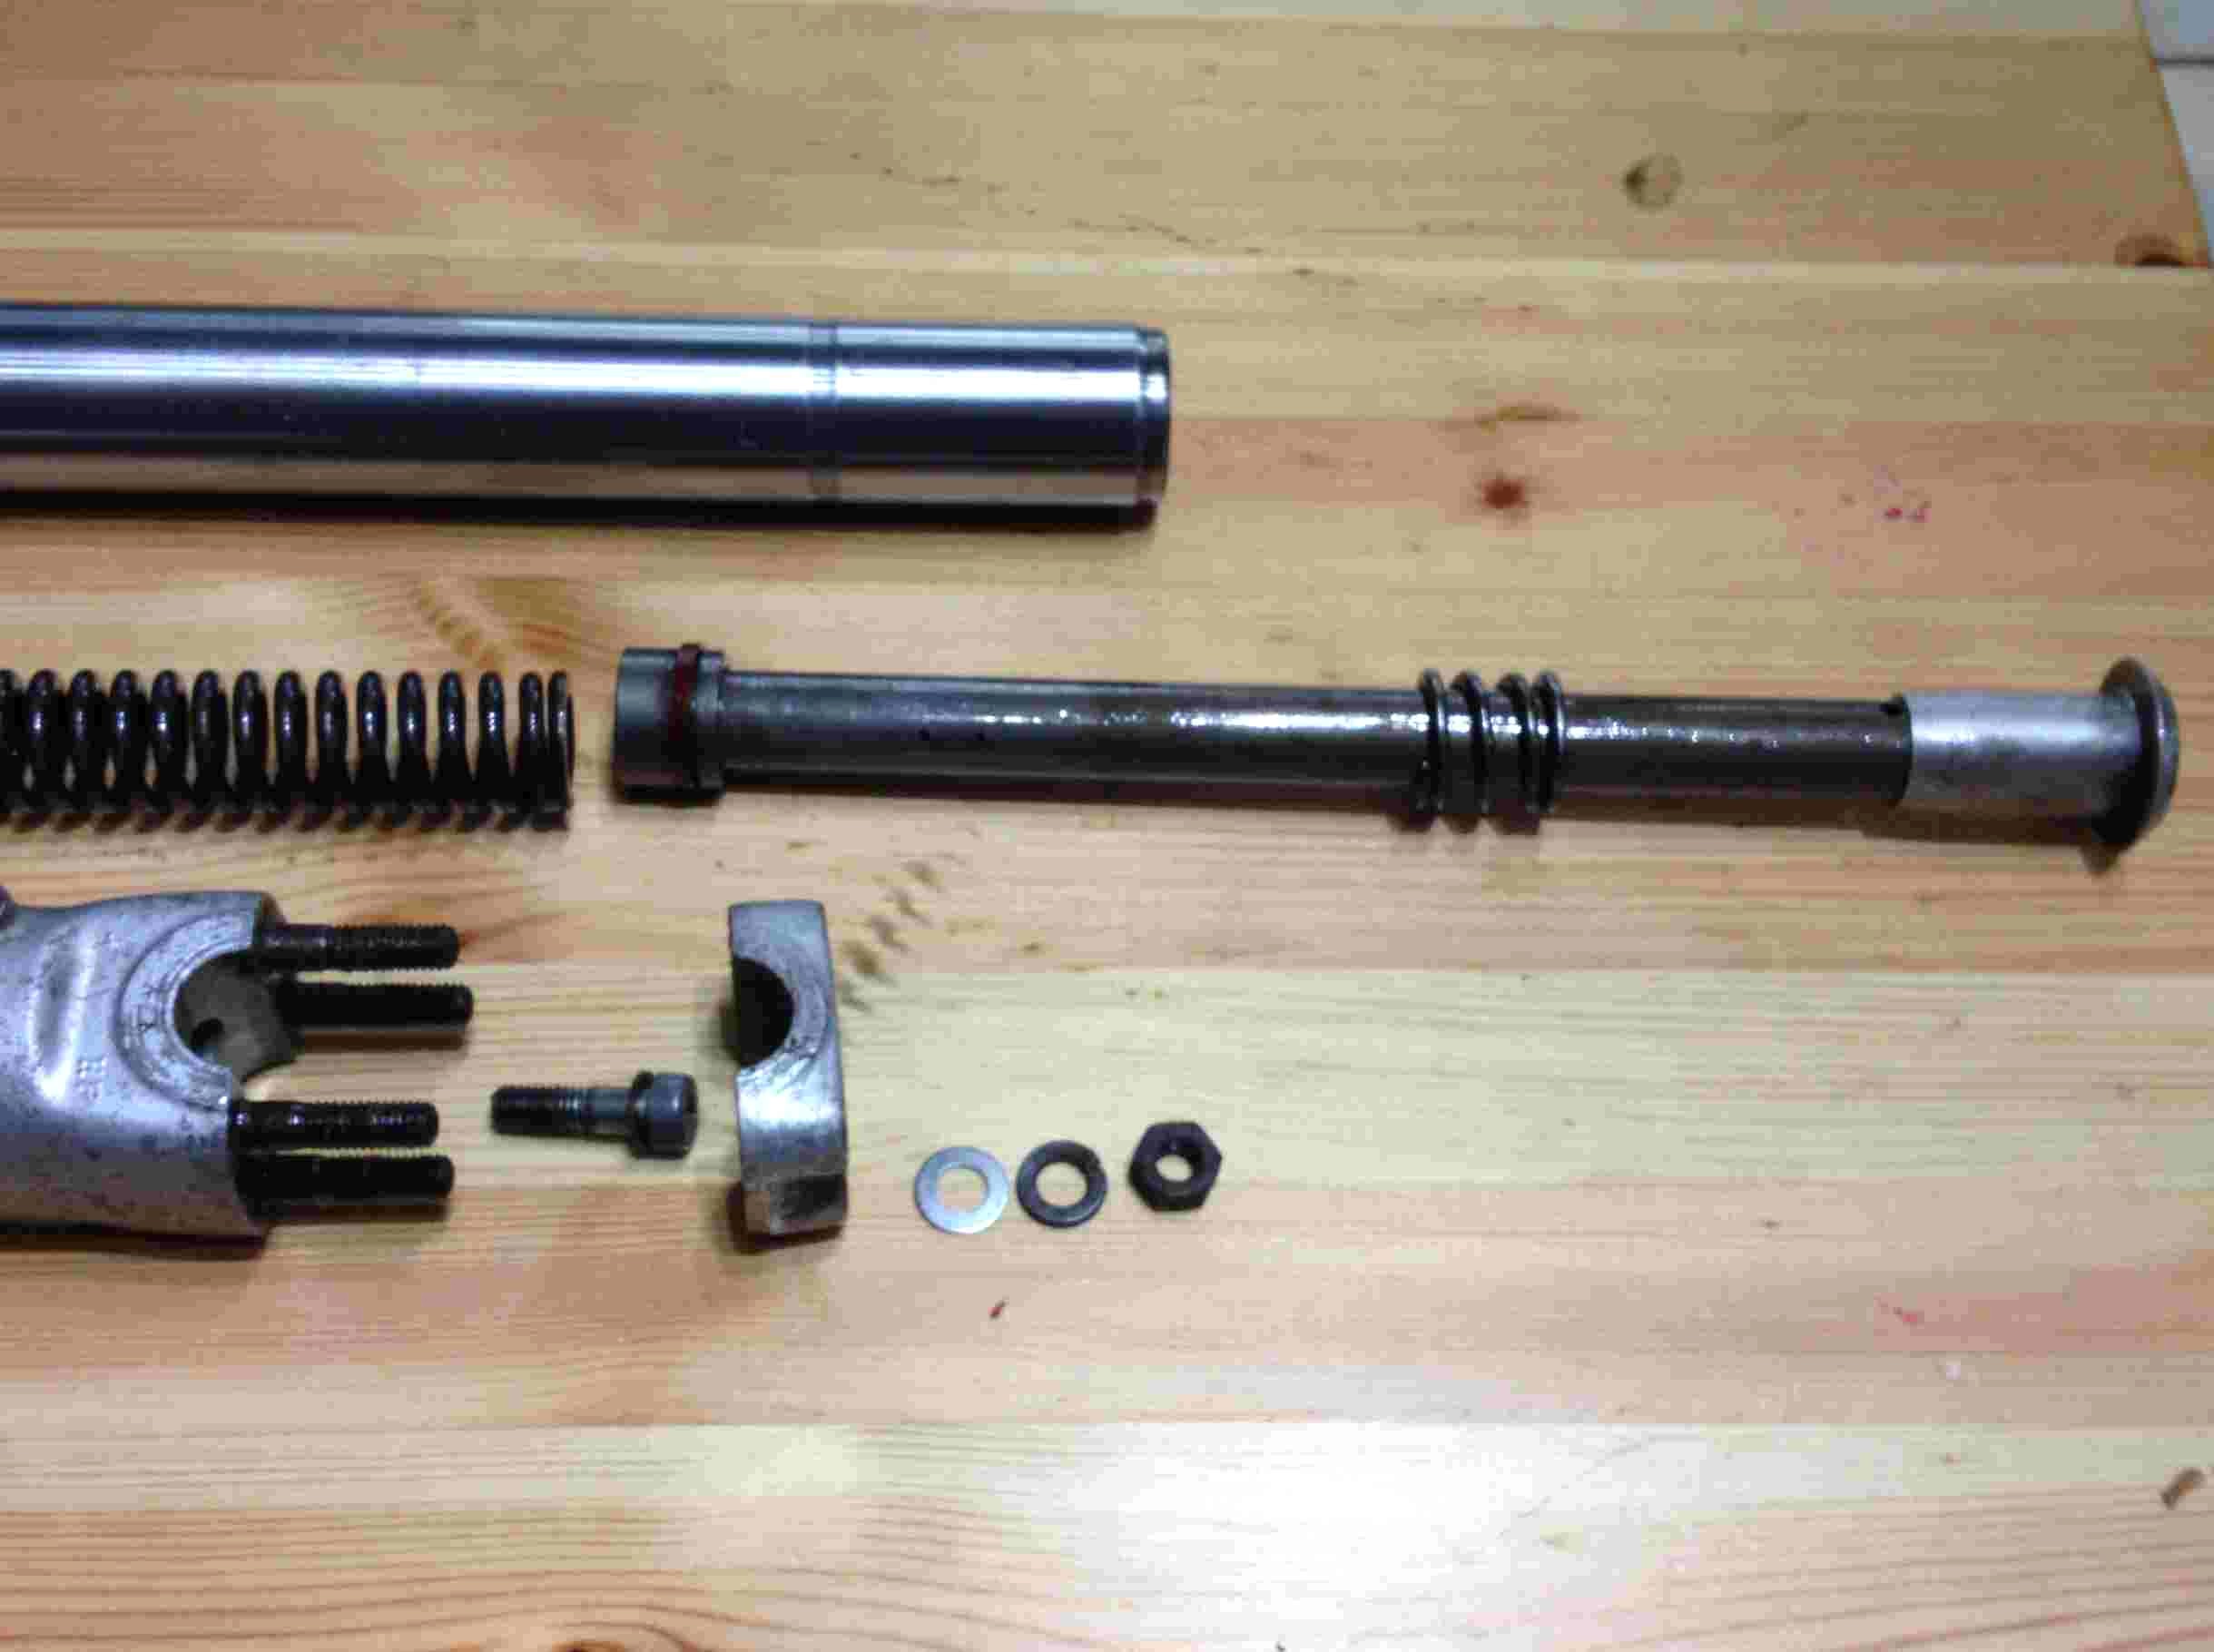
The inner pipe (Pipe, comp. bottom part 51440-385-003) has a set of fine holes
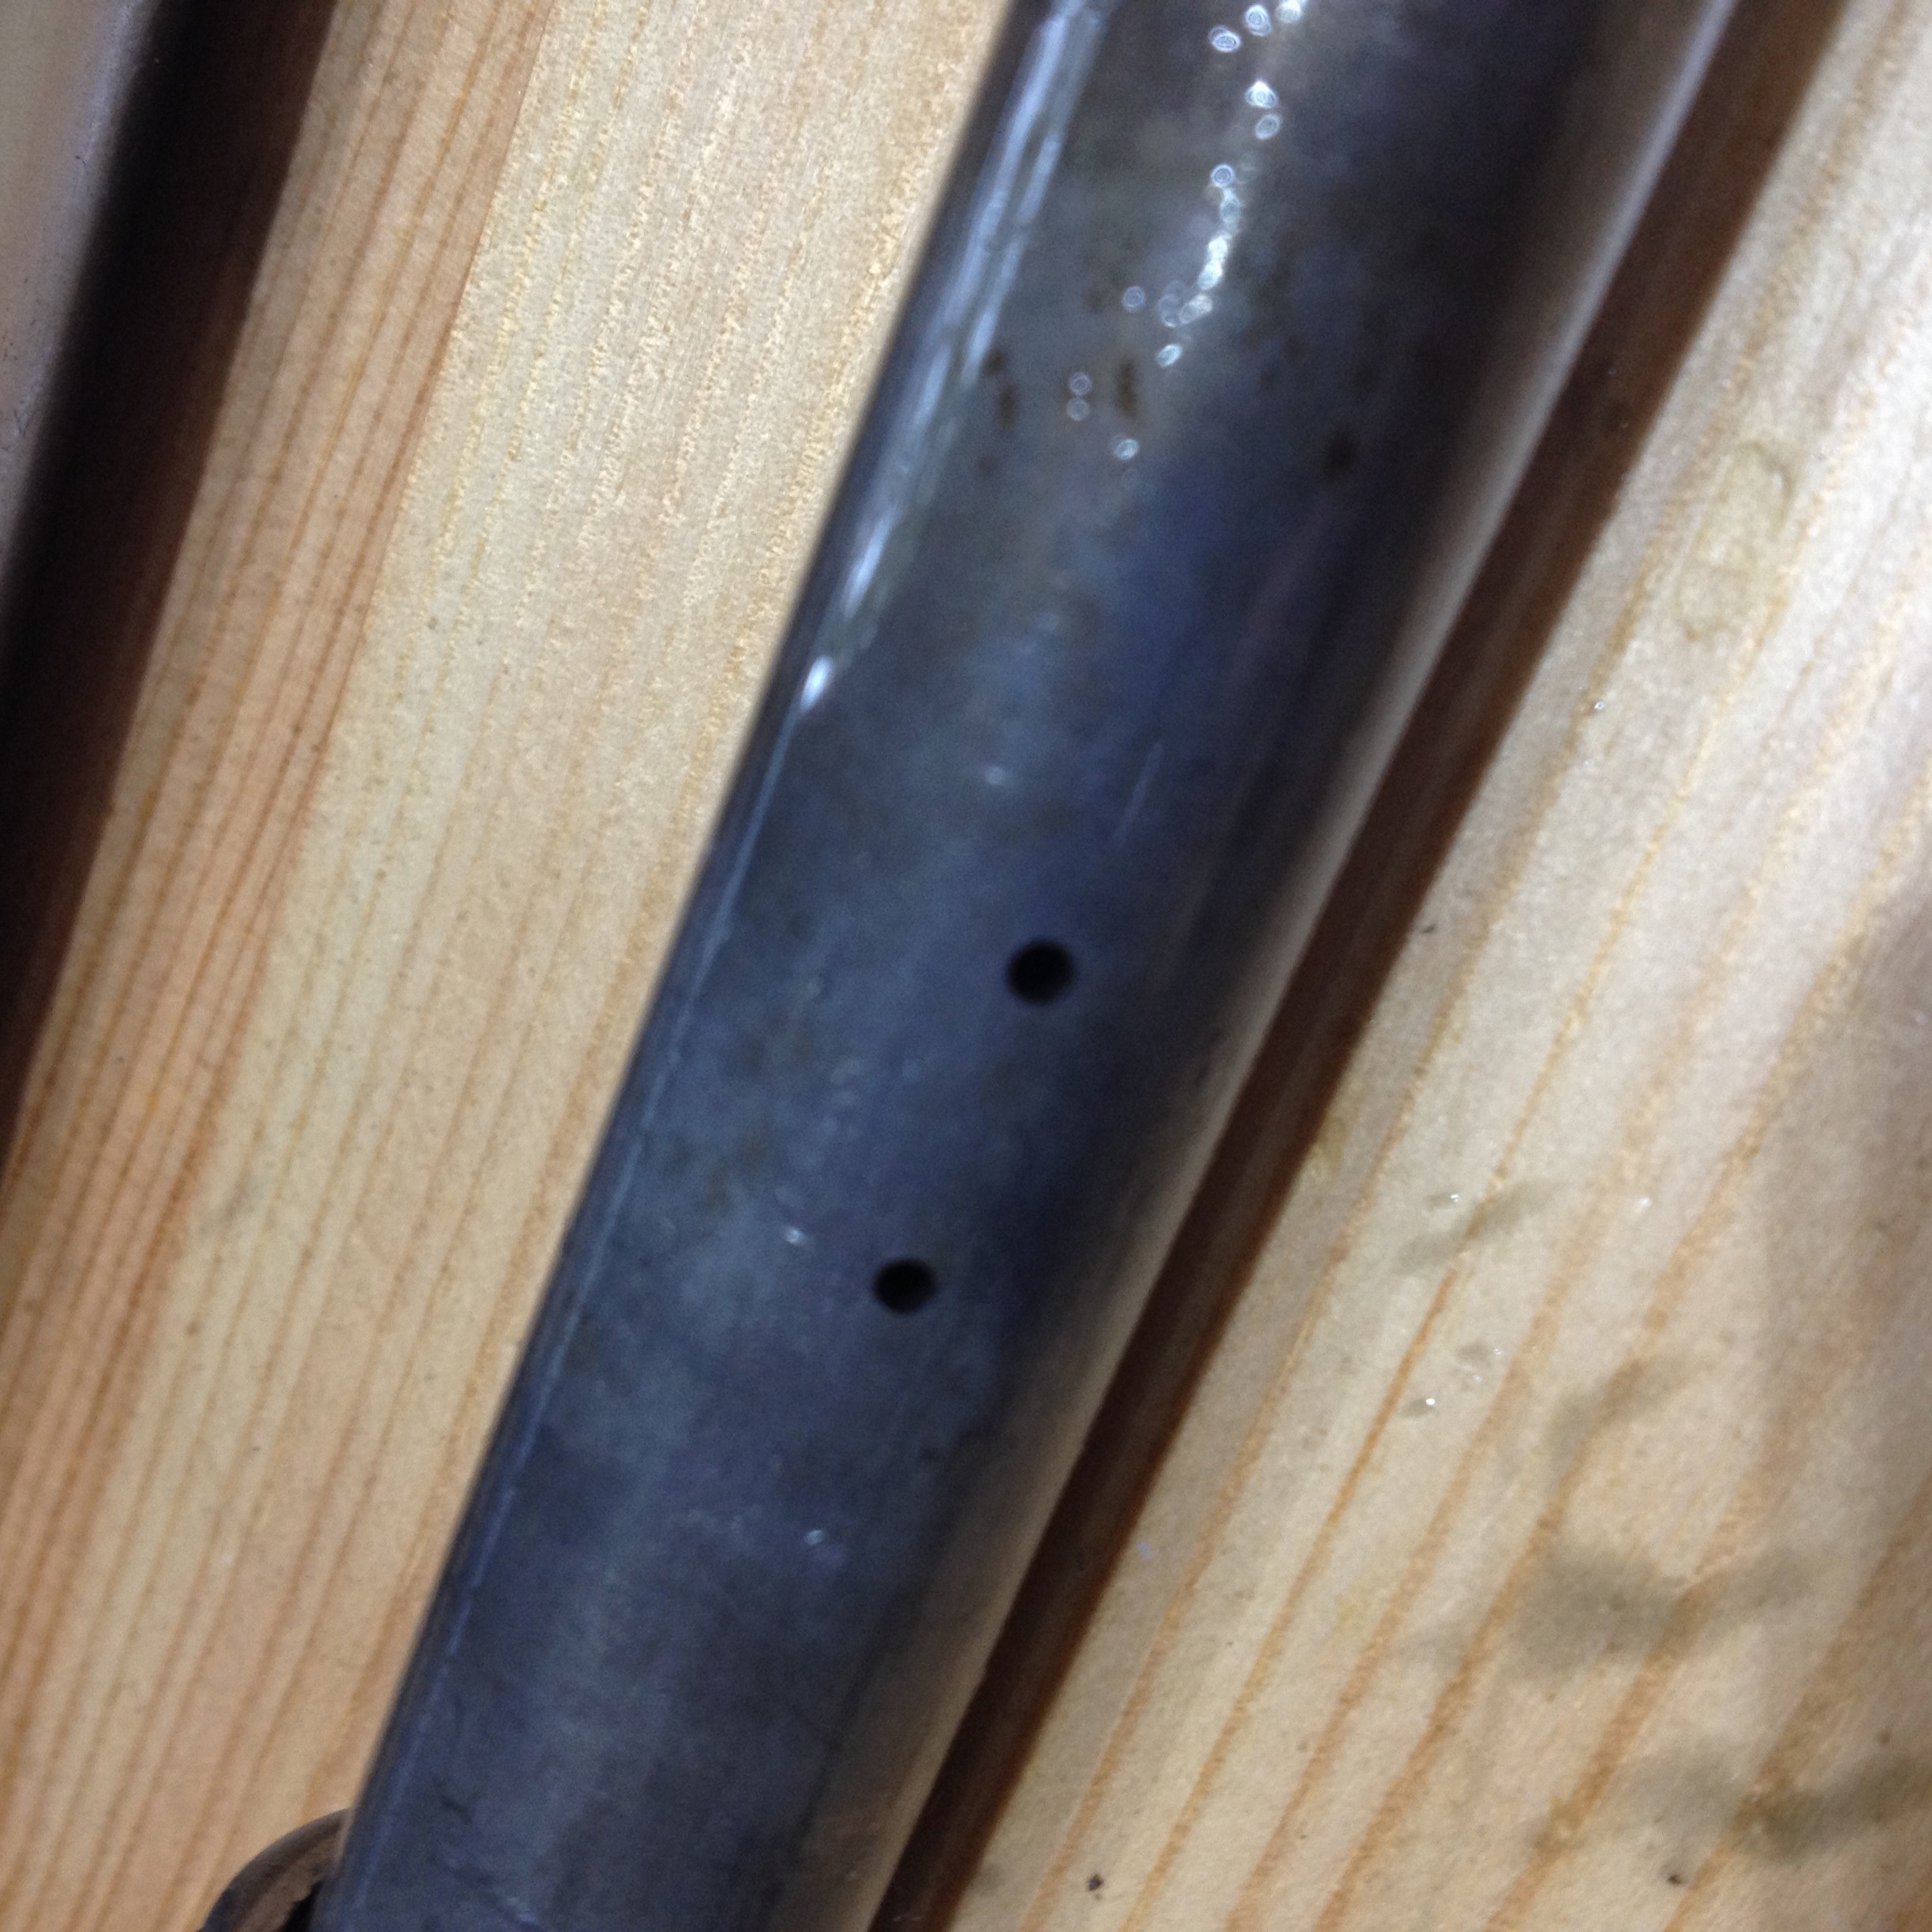
which should be clear for proper operation, and a synthetic piston ring (part 51437-329-010). If worn or scored replace the piston ring, and another short rebound spring under the head (part 51412-340-000).
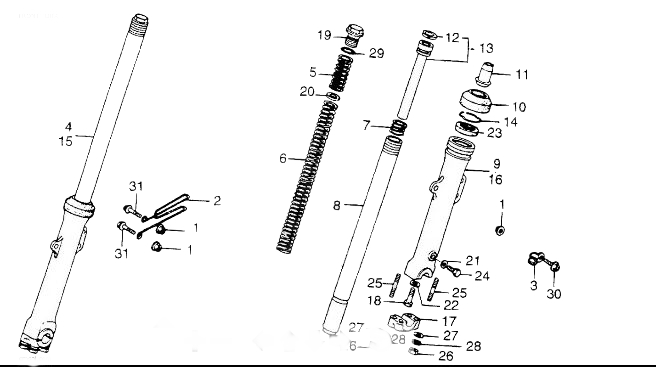
The bottom of the pipe (where we undid the allen bolt) slides into the aluminium mushroom shaped sleeve ( part 51432-357-000 ) with the wide part facing the bottom.
The Honda parts fiche is not really clear, showing this at the top but it goes at the very bottom of the fork lower tube. See my variation of the schematic above. The allen bolt removed earlier passes through the hole in this and into the inner pipe ( part 51440-385-003) which is threaded.
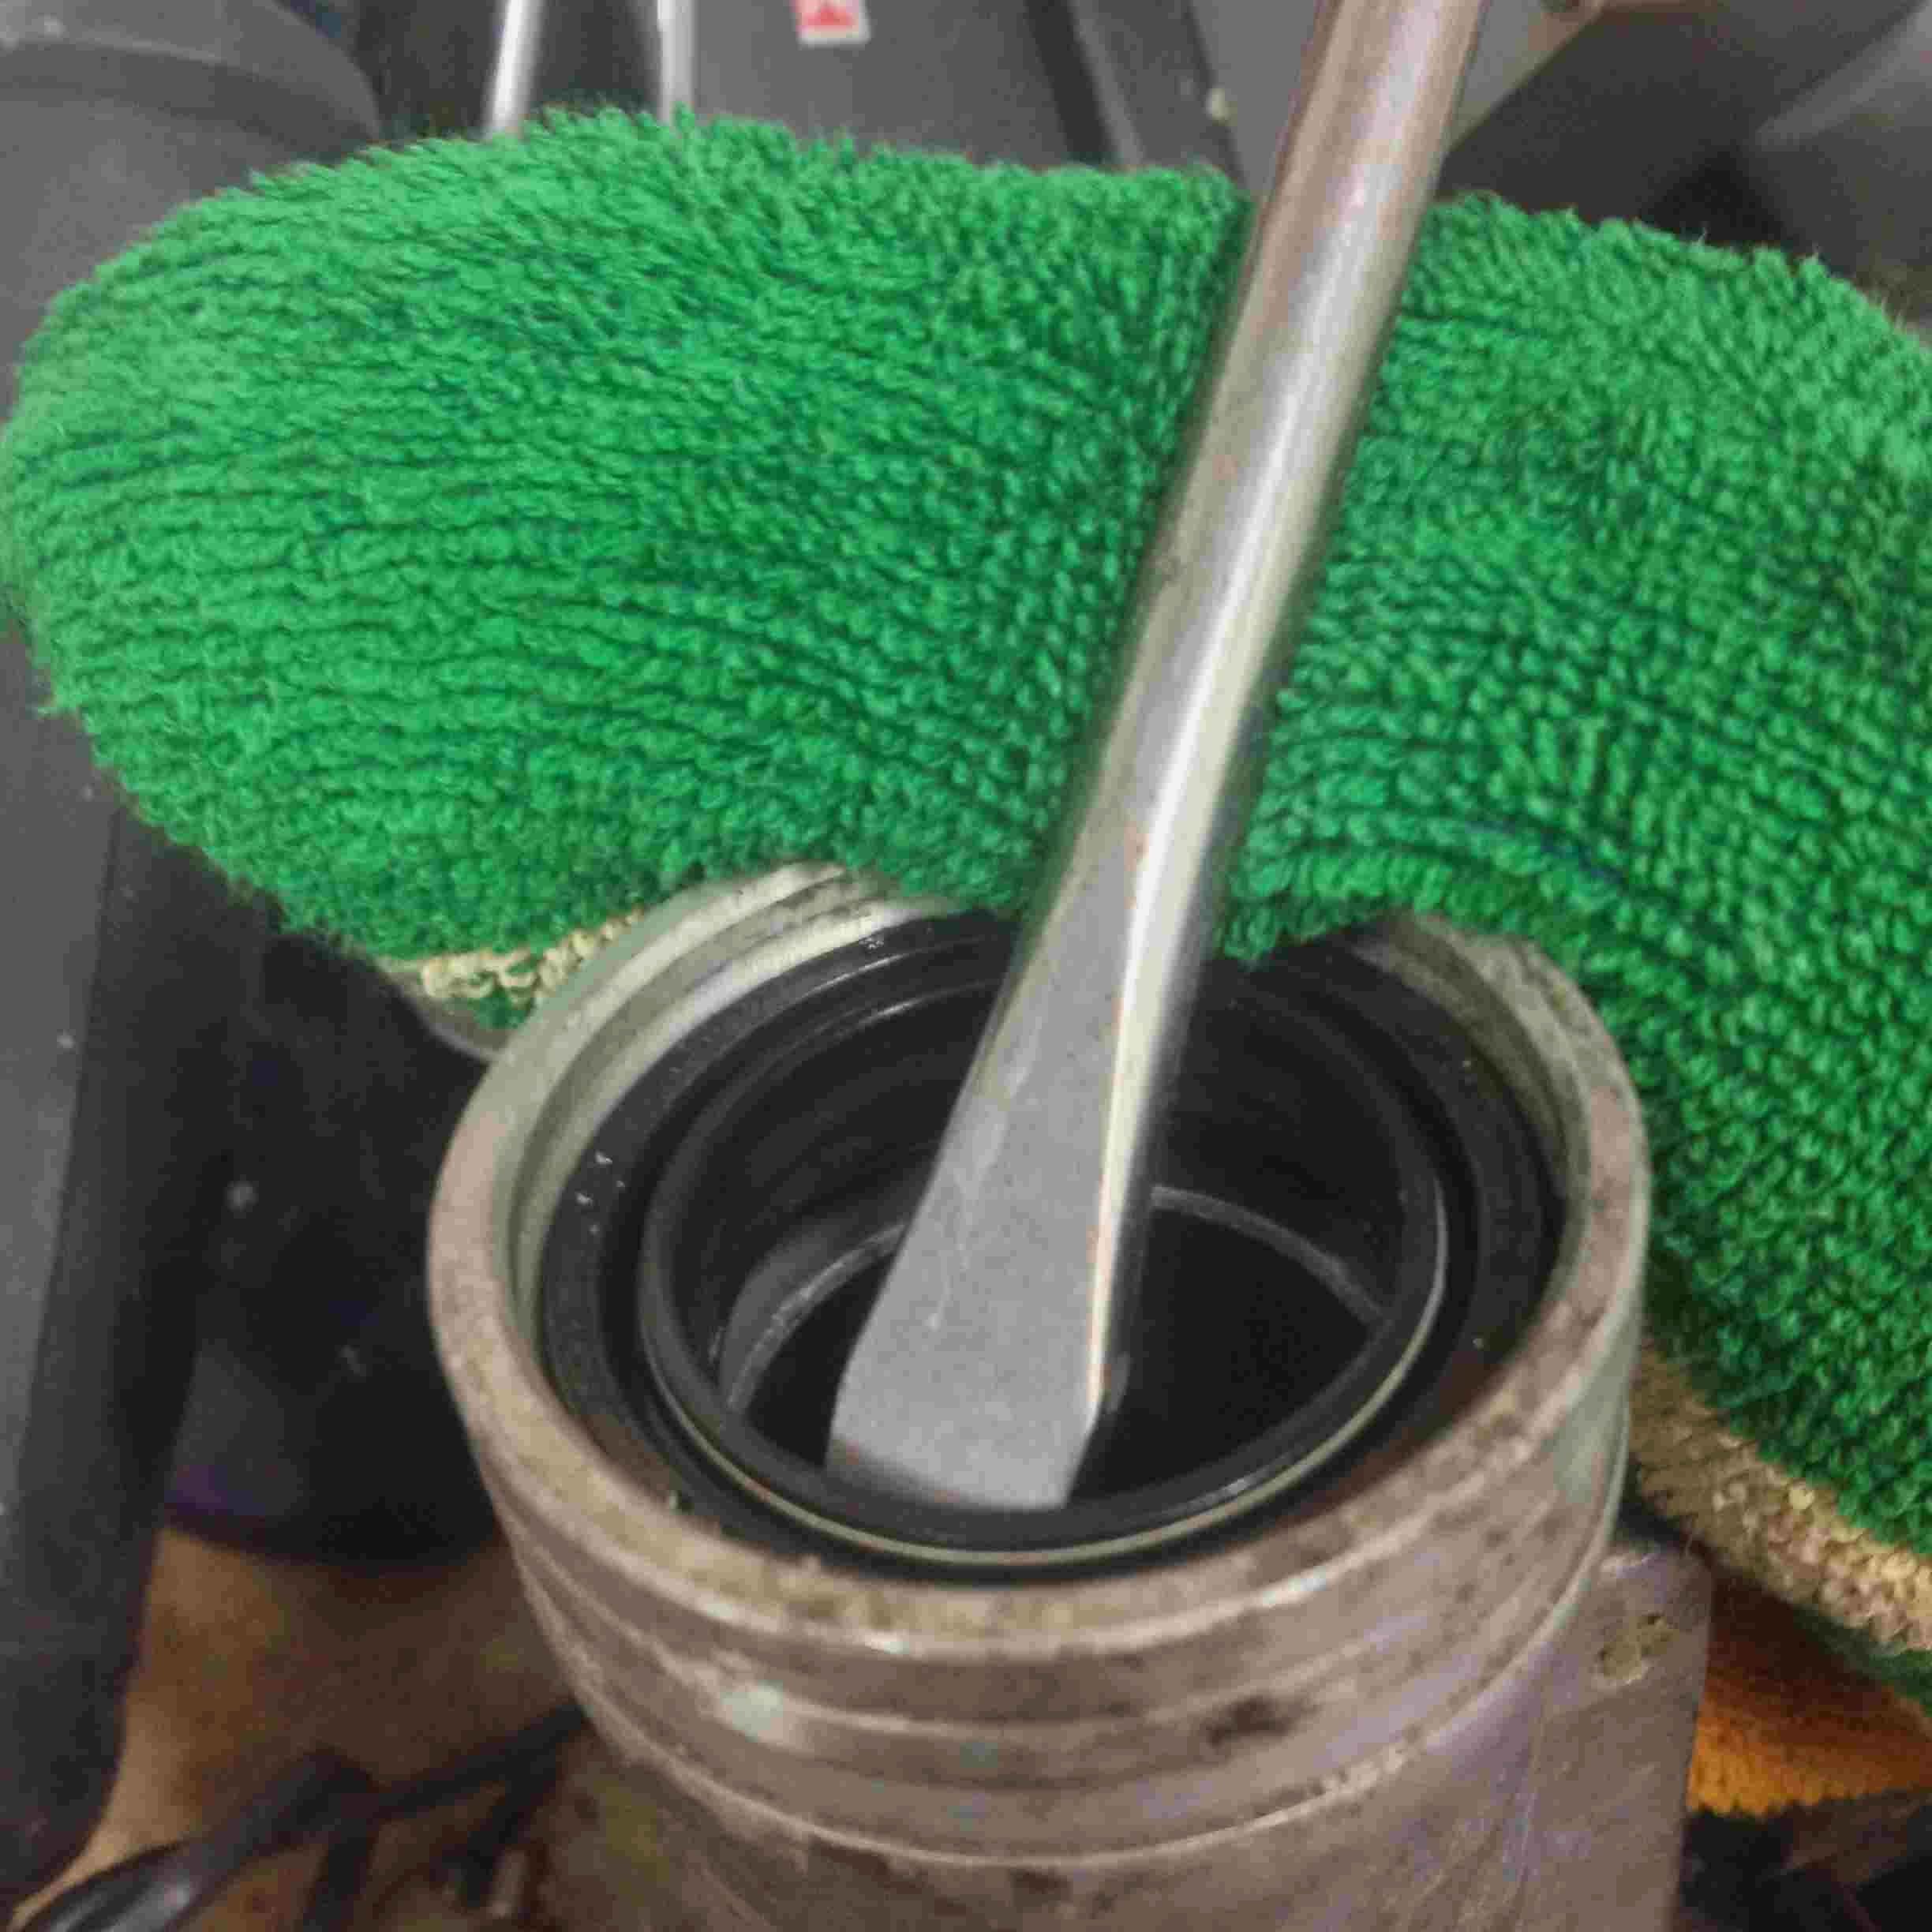
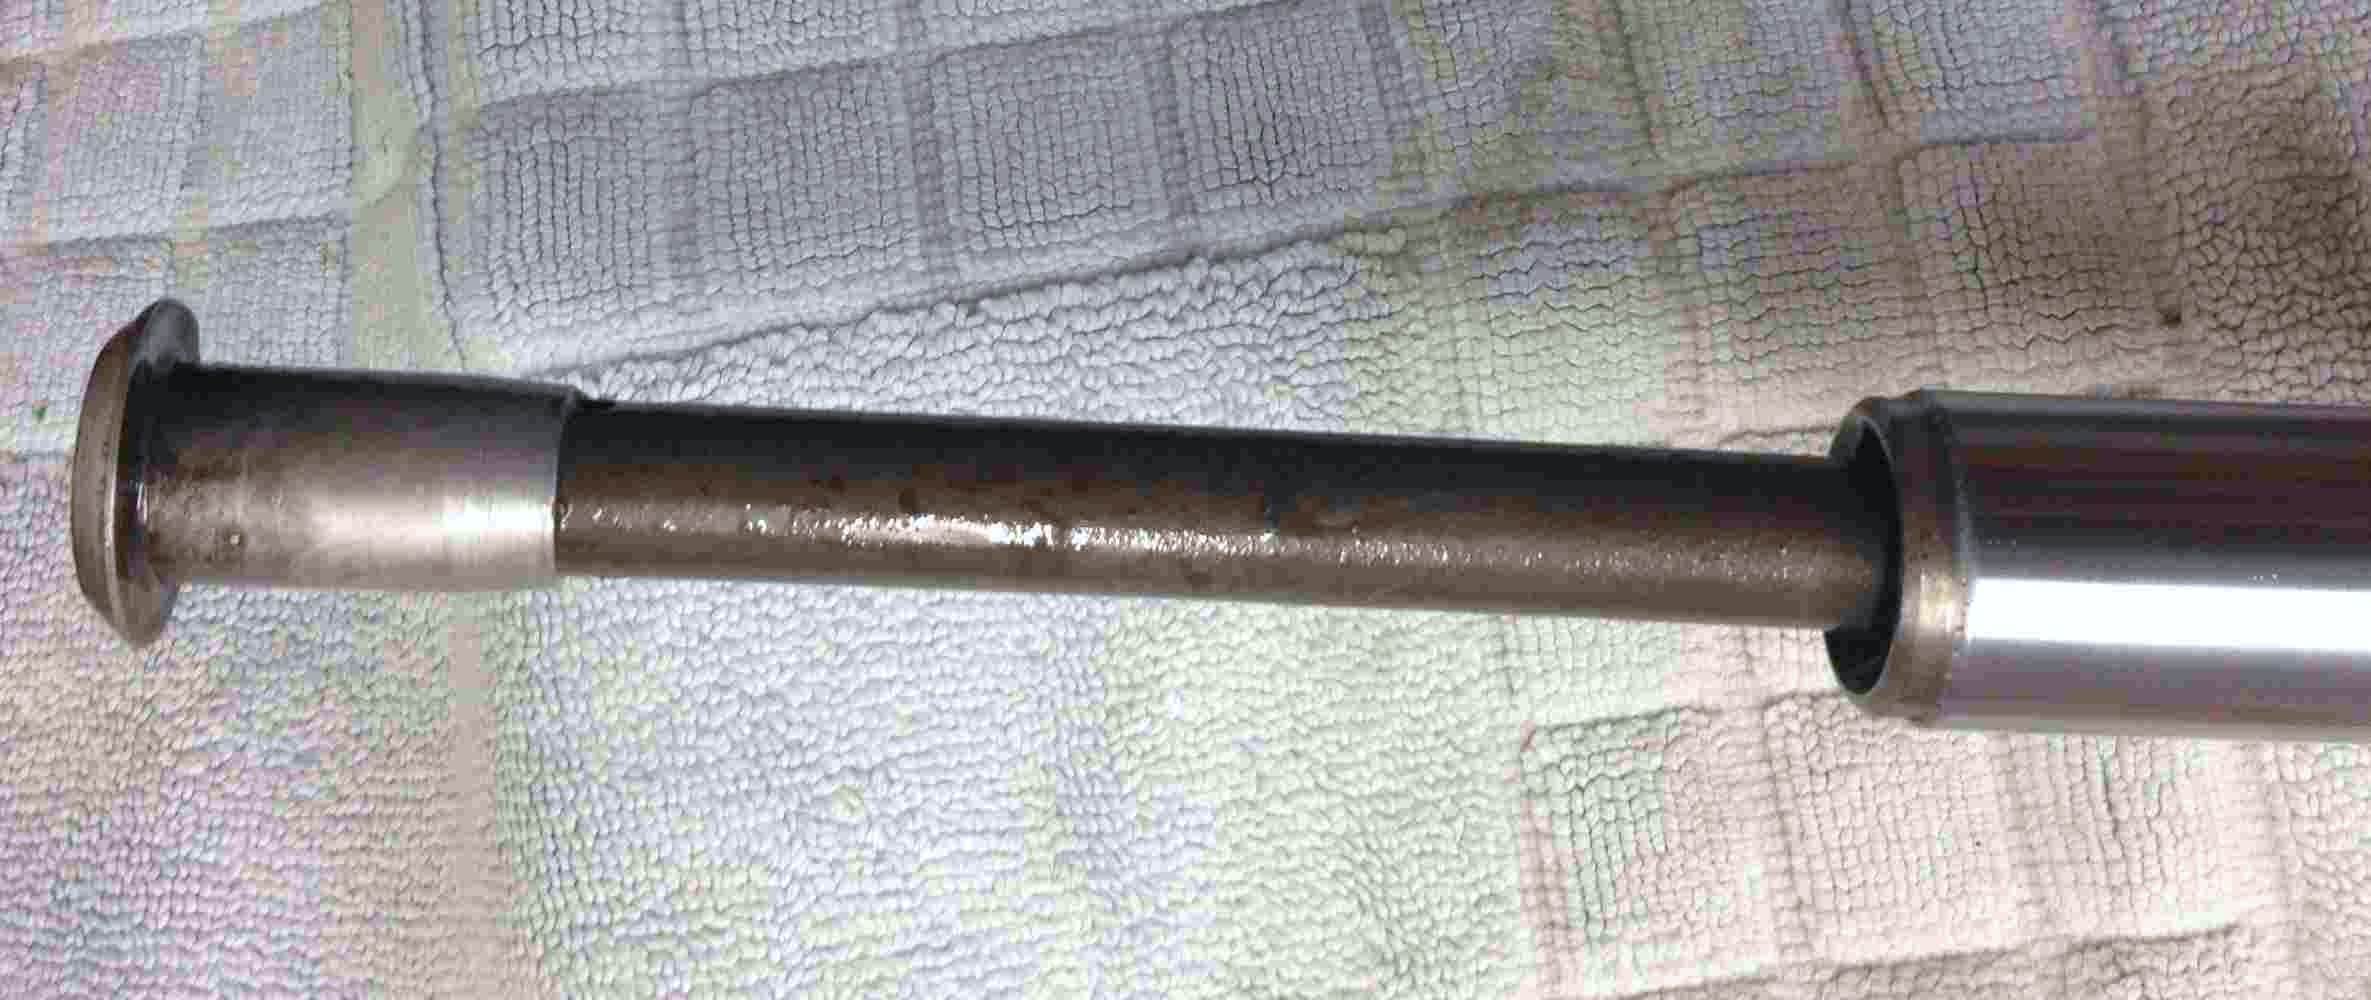
The top oil seal can be levered out with care; protect the top edge of the lower leg used as a fulcrum, with a cloth or other soft material.
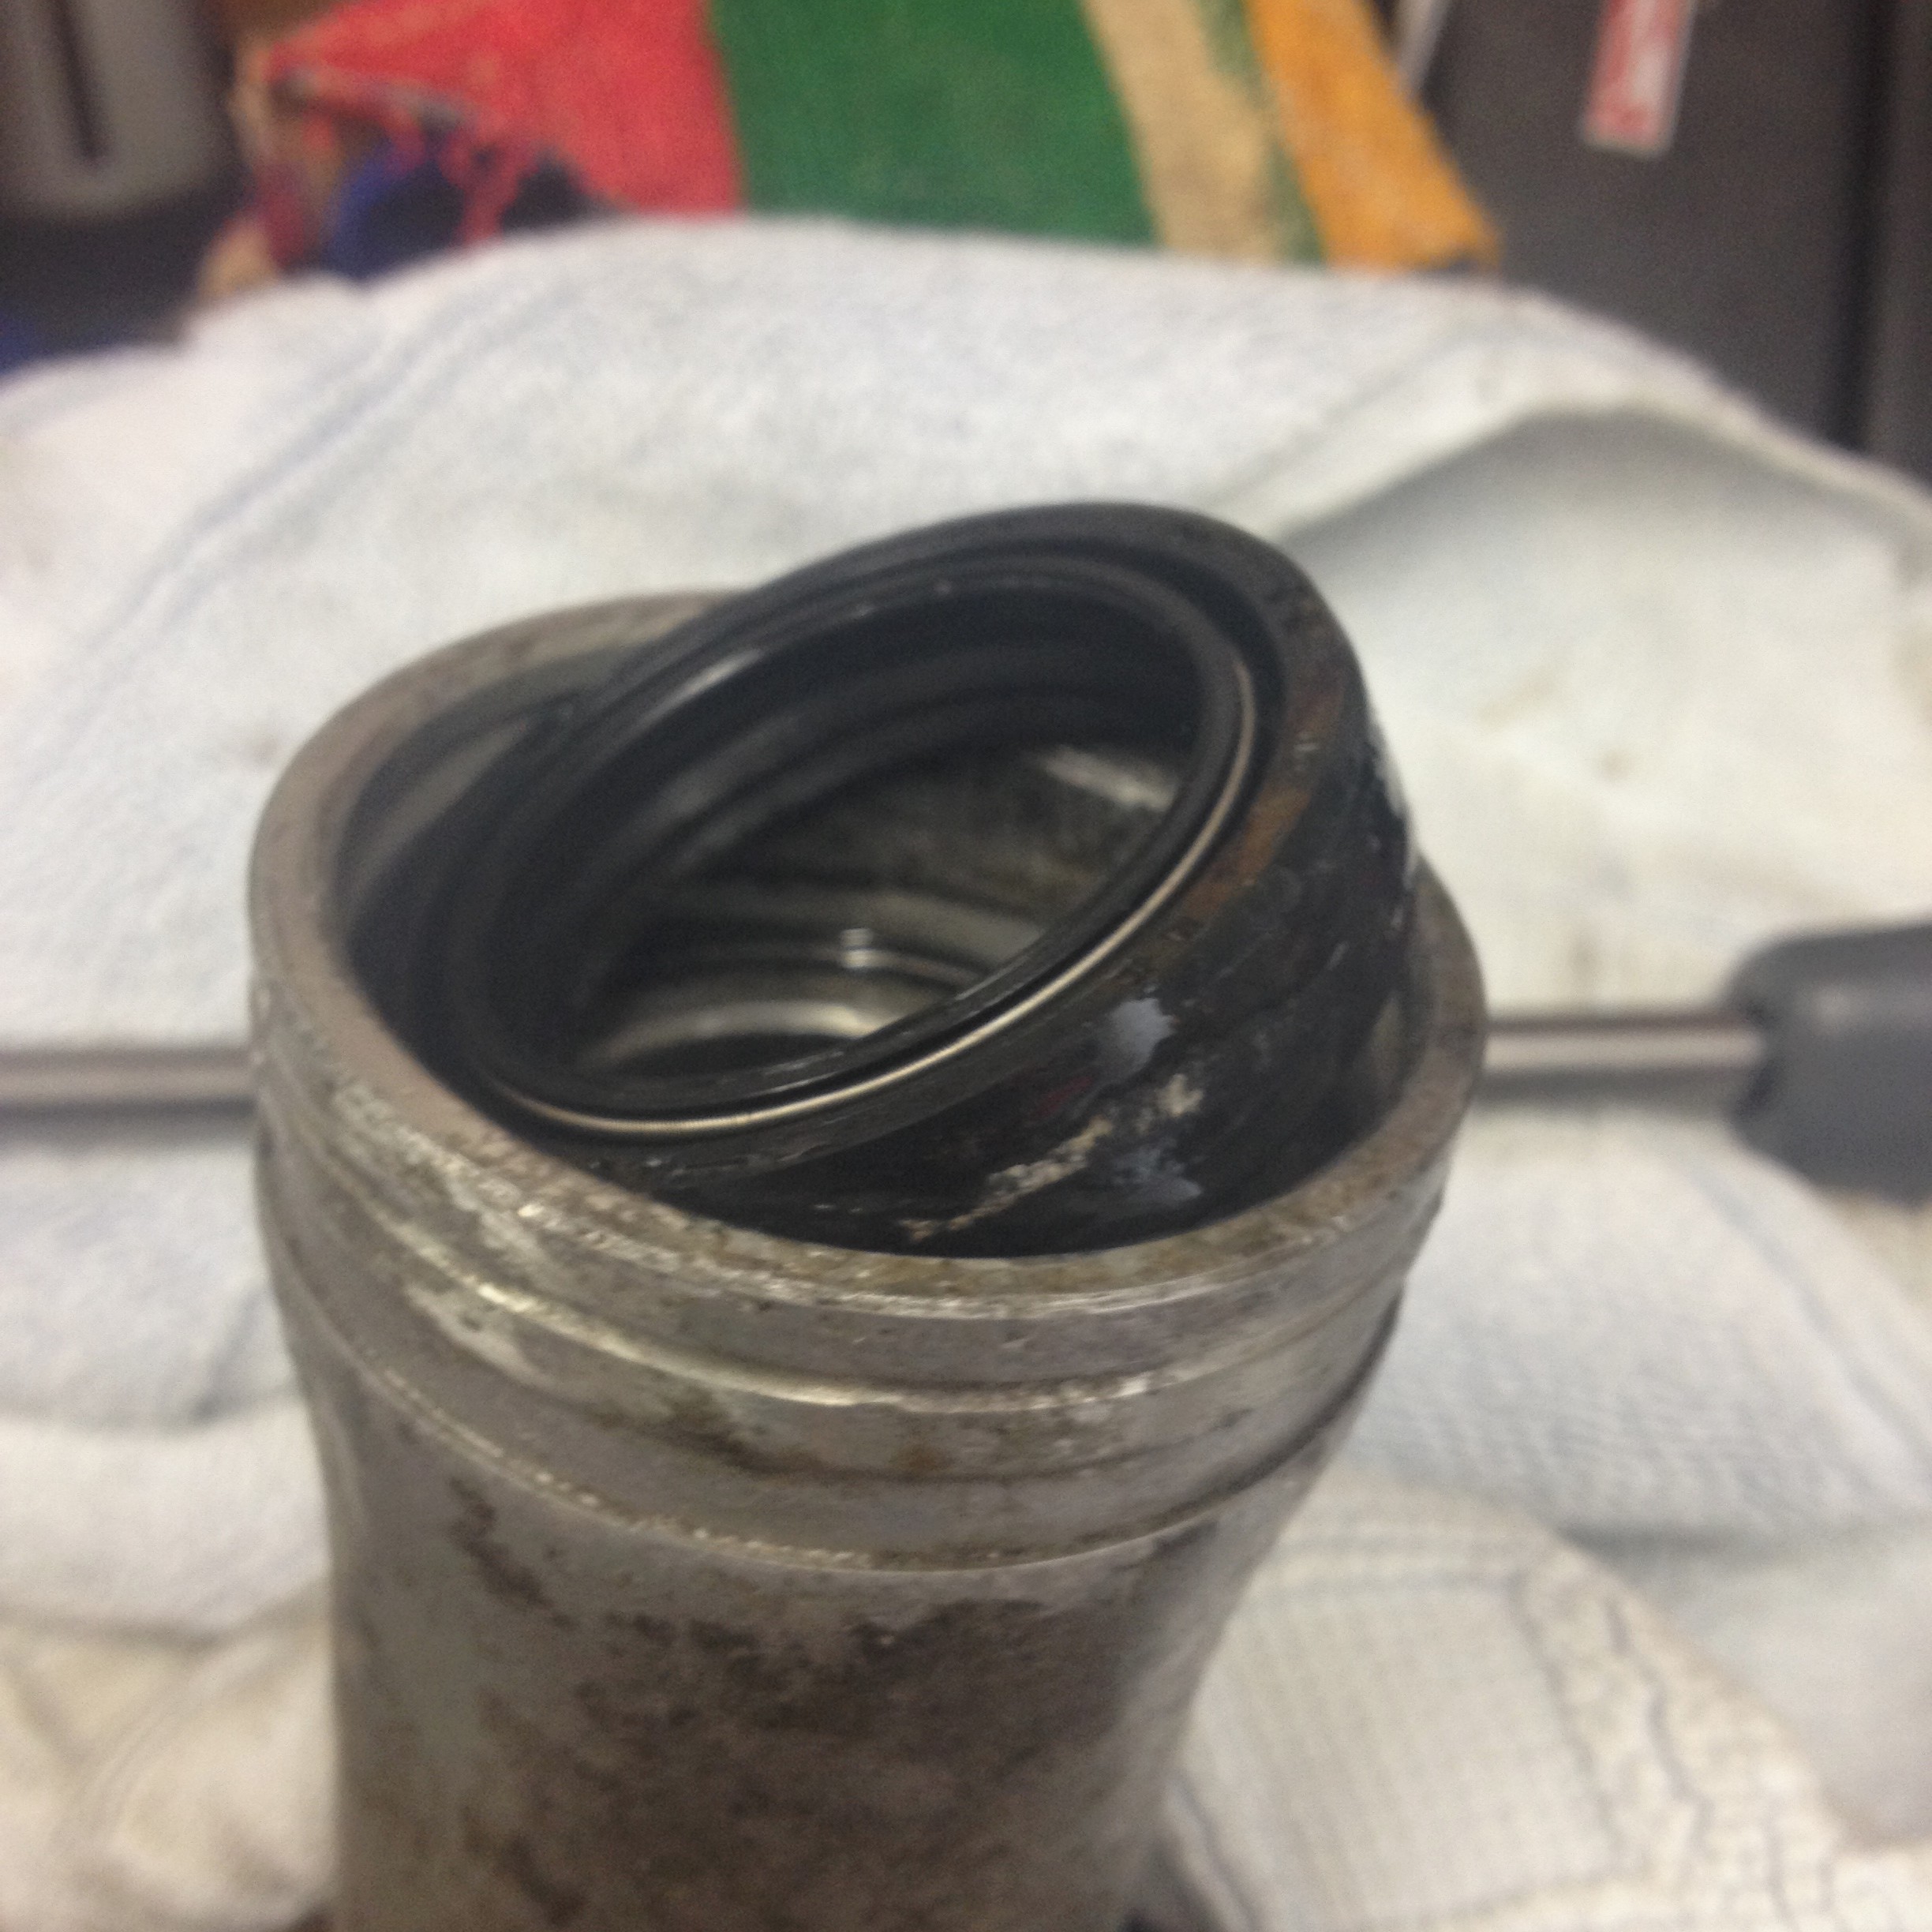
This fork oil seal is size 35x48x11 (part 91255- 300-033) but is a part bought in by Honda and a standard seal size that is fitted to many many bikes and plentiful. I have no problem not using a genuine part for these. You can buy a standard good quality seal for about £7GBP a pair just google the size for many sellers online/ebay. The Honda part is about £12 a pair.
Re-assembly is a reversal of the above. New seal, new oil, clean and tidy all bolts nipped up and safe and sound.
You have to fit the new oil seal over the stanchion, some people use a piece of plastic drain pipe.
I made a tool from some scrap ally bar on my lathe, or you can buy one online. The large hole up the centre is to allow you to slide it down the stanchion.The narrower lip is the one that contacts the seal itself.
When completed, fill the tube with ATF (automatic transmission fluid 'oil') this is done from the top, then screw on the big nut at the top, you will need to lean on it a bit to compress the springs.Make sure the drain hole screws are back in each leg first....or you will have oil all over the floor.
Honda say that if the forks are bone dry, they each take 170cc (5.7 oz) of oil but if they have only been drained to the level of the drain nut, they only need 150cc (5.1 oz).
Finally, when refitting the 8 nuts and washers on the lower fork leg remember the front axle clamps (part 51634-340-000) are marked with a direction arrow and the letter F this should be on the outside of each leg, with the arrow facing forward. Got it?
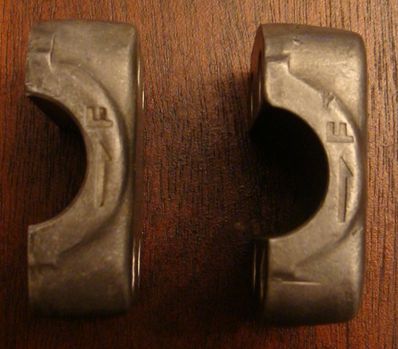
The correct procedure is to tighten only the front 4 nuts until the clamp is tight on the front axle, with no gap, before tightening the rear ones which will leave a small gap to the rear. Replace the front wheel and check free movement and correct front brake operation. We don't want to have an accident that could injure or maim us, or worse still, scratch the tank do we?
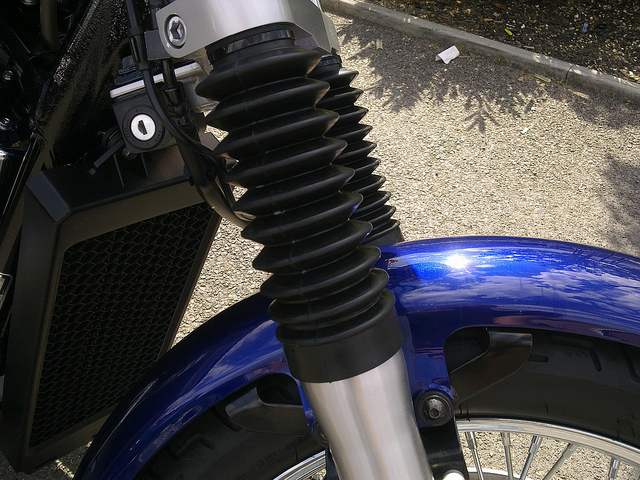
After riding in dirty weather or in the dirt, it is a good idea to clean the crap off the exposed stanchion above the seal before using the bike again. This will help prolong the seal life. If you use a bike in the dirt a lot, consider fitting telescopic bellows/gaiters over this part, it will look shitty but be kind to your fork legs. You choose.
Well that might help someone, especially if they can't remember where all the bits go. Lesson: take photographs as you take 'em apart!